10 Tested Ways to Stop or Decrease Buffering When Streaming
Switching network, resetting router, and changing the DNS are easy solutions
7 min. read
Published on
Read our disclosure page to find out how can you help Windows Report sustain the editorial team. Read more
If you regularly stream videos, you must have faced buffering issues. The problem affects all devices, including laptops, computers, TVs, mobile phones, and other smart devices!
As to what causes video buffering, the underlying factors include unstable Internet connectivity, slow Internet speed, misconfigured network settings, other devices hogging the network resources, and outdated software/drivers.
To decrease video buffering when streaming, move the router closer to the device in case of a wireless connection or switch to a wired network. Also, you could disconnect other devices from the network, terminate other apps/programs, reduce the video streaming quality, clear the app/browser cache, or pause the video for a few minutes!
How do I stop my stream buffering?
1. Quick tips
If our previous tricks didn’t work, here are a few more tips that will help stop, or at least reduce, buffering when streaming on a PC or TV:
- Use a VPN: If you are streaming videos from a server in another country, it’s best to use an effective VPN solution and choose a server based in that region. It will help improve the streaming quality and speed, effectively eliminating buffering.
- Update the affected software/OS: If buffering is limited to video streams on a specific program (say YouTube, Netflix, or Twitch) or device, update the program or the operating system running on the device.
- Use the 5 GHz band in case of dual-band routers: If you have a dual-band router, connect to the 5 GHz band. It offers higher Internet speed, albeit with a limited range!
- Place the router at an optimal location: If a single wireless router has to cover a large area, place it at a central location and an elevation of 2-5 feet. Also, ensure it’s not near an electronic device and faces no obstructions.
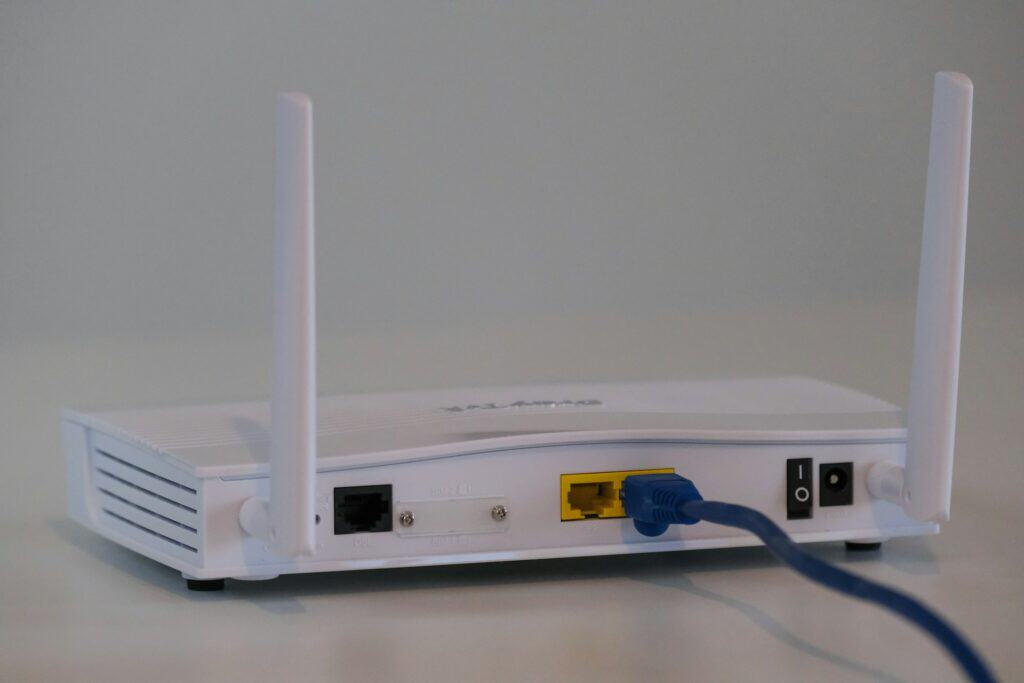
- Reboot/reset the router: If you don’t regularly turn off the router, power it off, then disconnect the power supply cord, wait for a minute, and finally reconnect the cable and turn on the router. Also, you could try resetting the router.
2. Identify and terminate applications hogging the network
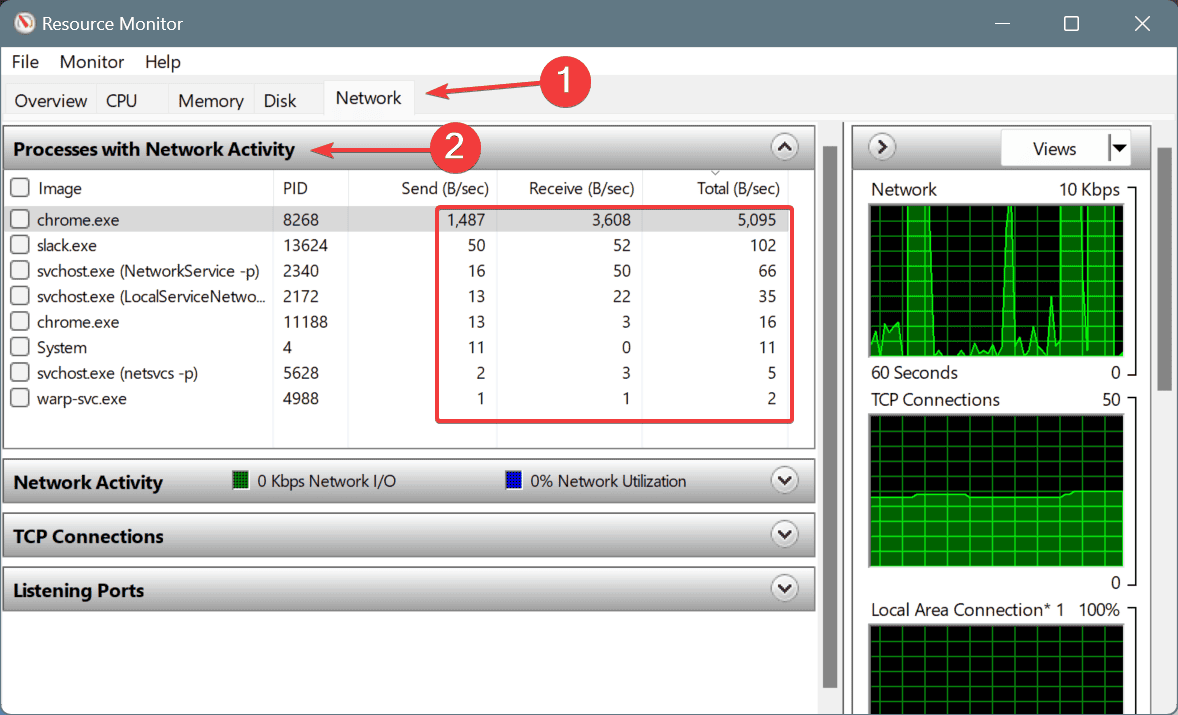
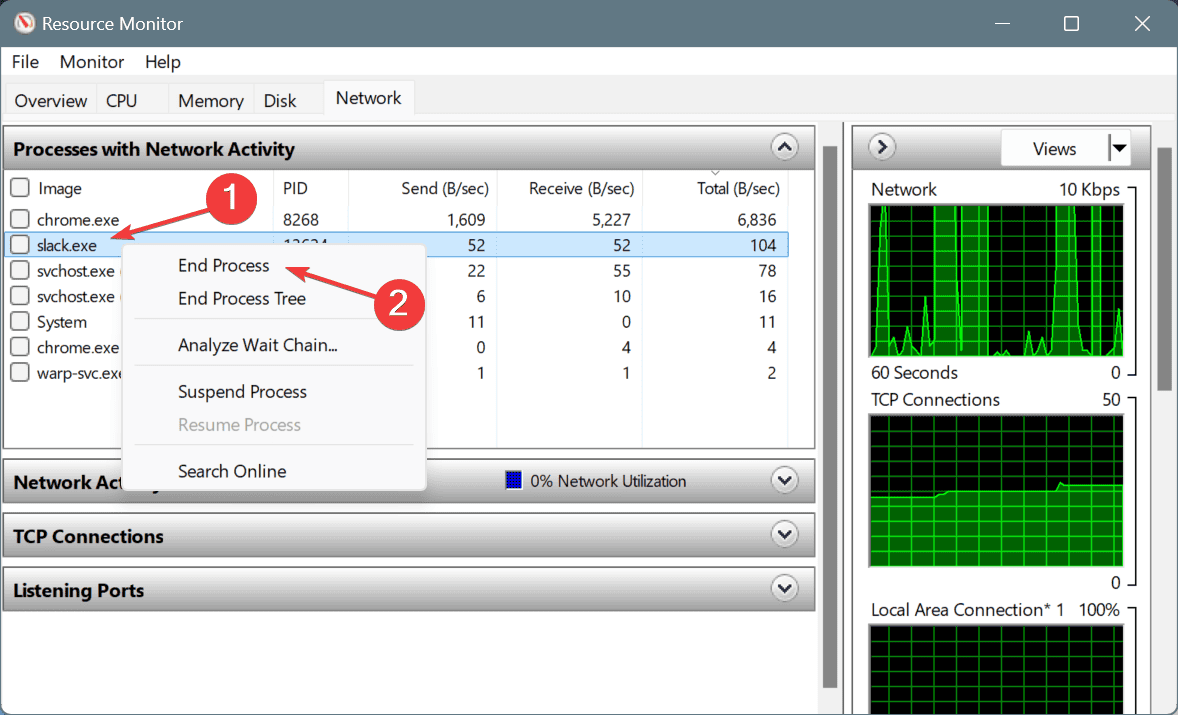
- Press Windows + S to open Search, type Resource Monitor in the text field, and click on the relevant result.
- Go to the Network tab, expand the Processes with Network Activity section, and identify the ones consuming the maximum network resources.
- Right-click on the non-critical entries here individually, and select End Process.
- After disabling all non-critical processes, check whether this decreases buffering when streaming video.
While ending processes in the Resource Monitor (or Task Manager), only terminate the ones related to third-party programs. Don’t go for critical Windows processes, say any that reads svchost.exe.
3. Update the graphics and network drivers
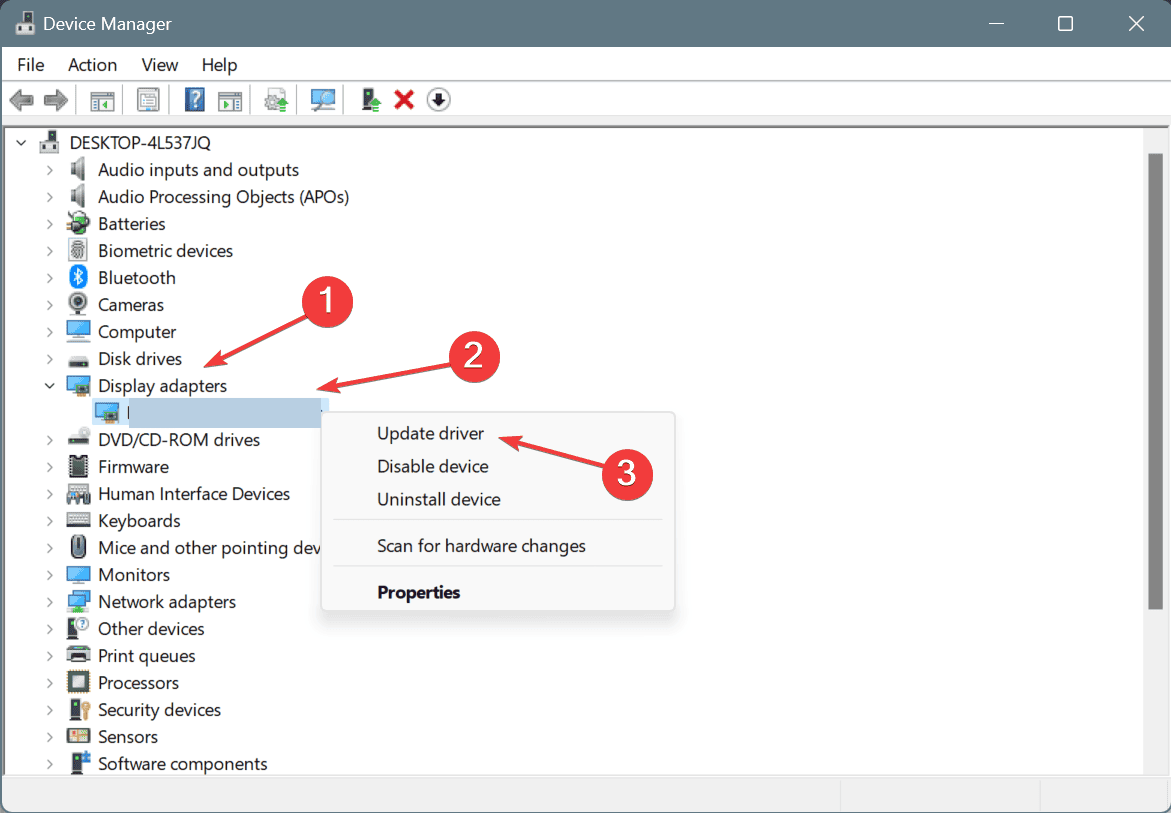
- Press Windows + X to open the Power User menu, and select Device Manager from the list.
- Expand the Display adapters entry, right-click on the active graphics adapter, and choose Update driver.
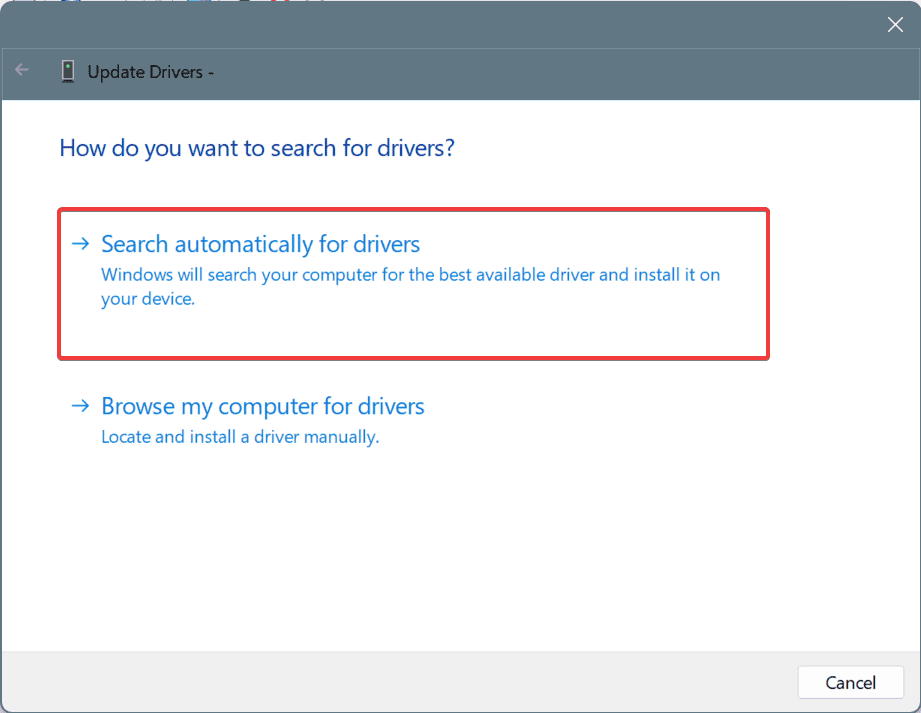
- Now, select Search automatically for drivers and wait for Windows to install the best locally available version.
- If a new driver is installed, restart the computer to apply the changes.
Similarly, you can update the network drivers on Windows. For that, you have to expand the Network adapters entry in the Device Manager, and update the driver for the adapter used to access the Internet, be it Wi-Fi or Ethernet.
If Windows can’t find a newer version, visit the manufacturer’s website, locate the latest one, and manually install the drivers. An easy and expert-recommended option is to use a reliable driver updater software, which will automatically install the latest driver version for all available devices!
4. Run the affected app as an administrator
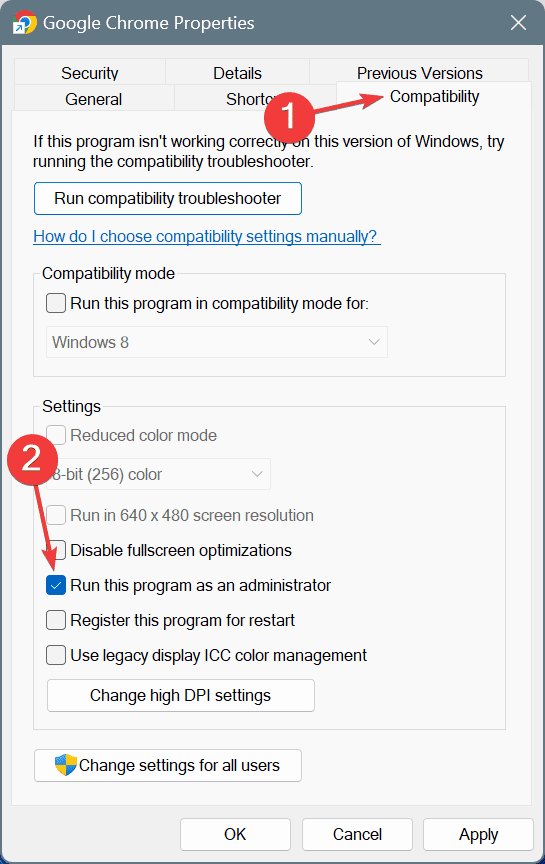
- Right-click the affected app’s launcher (.exe file), and select Properties.
- Go to the Compatibility tab, and tick the checkbox for Run this app as an administrator.
- Click Apply and OK to save the changes.
If the video is buffering when streaming on OBS, Netflix, Prime Video, Twitch, or even Chrome, you can decrease buffering by running the app as an administrator. This grants the app all the critical permissions, allowing it access to the required network resources.
5. Reconfigure the graphics preference
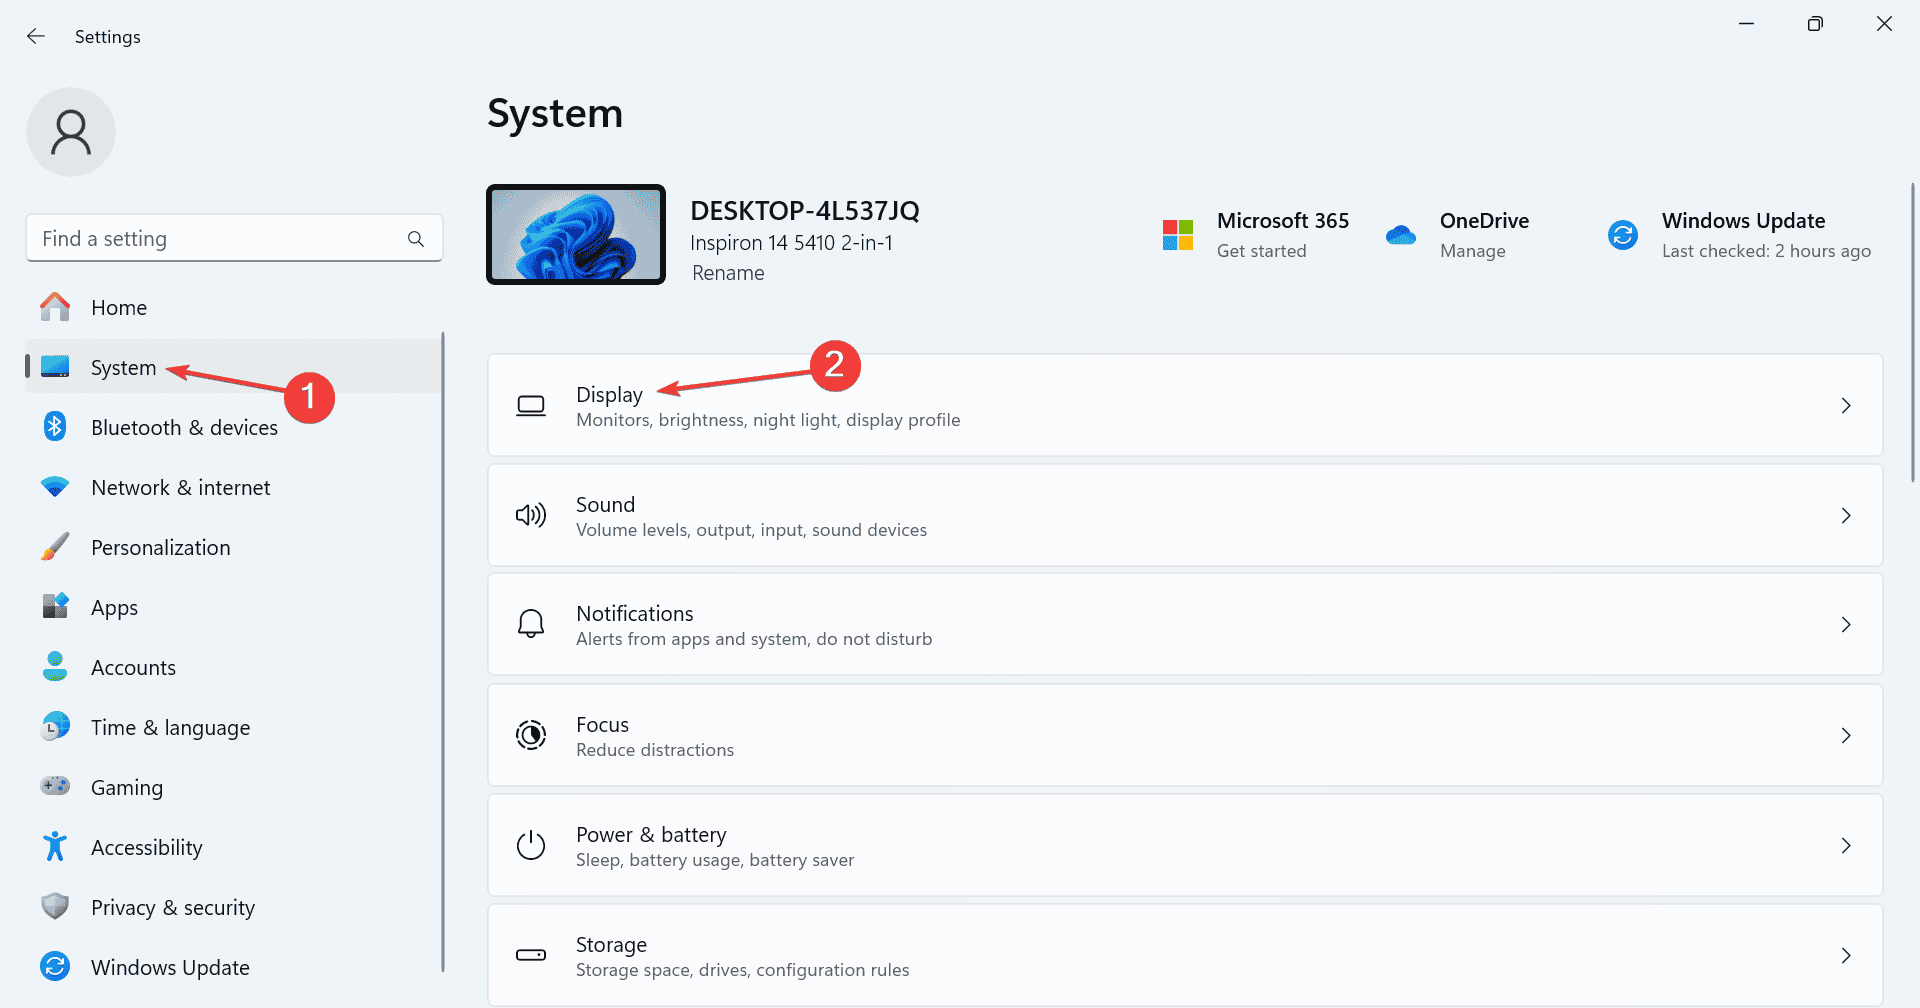
- Press Windows + I to open Settings, go to the System tab from the navigation pane, and click on Display.
- Click on Graphics under Related settings.
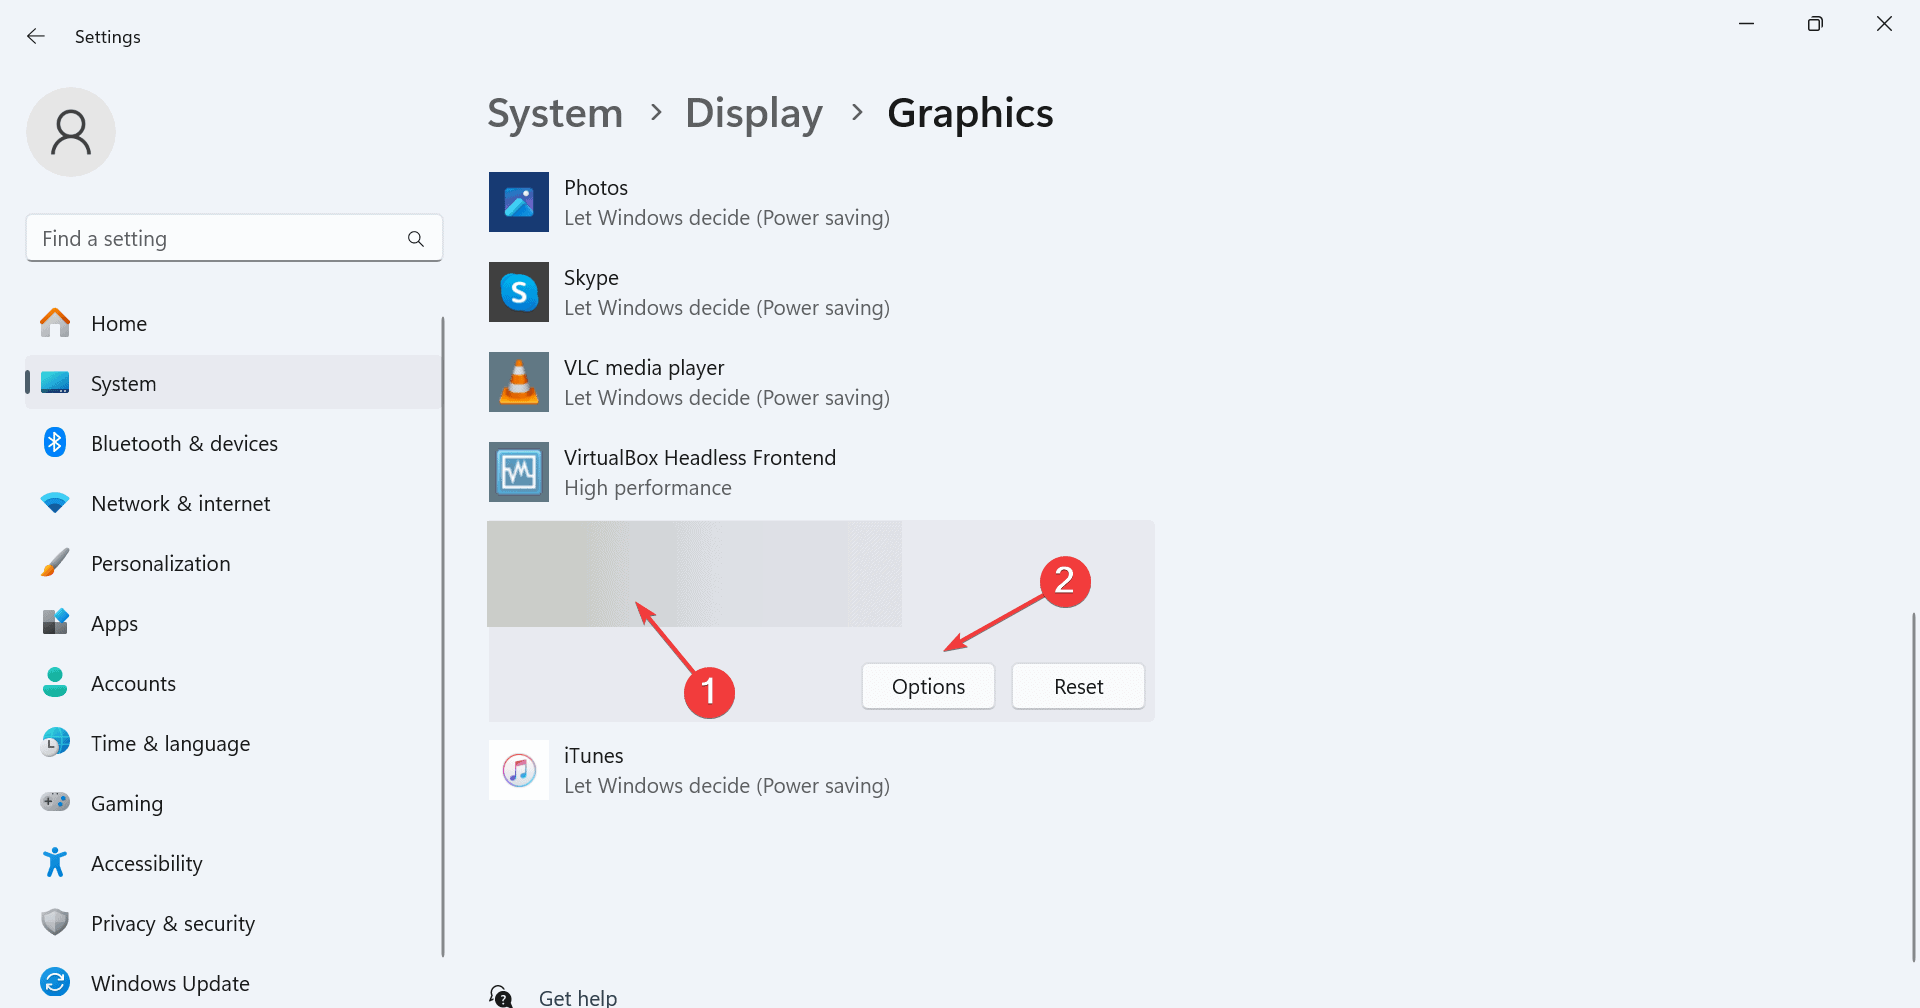
- Now, verify whether the affected app is listed here. If not, choose Desktop app or Microsoft Store app from under the Add an app dropdown menu, locate it, and then add the app.
- Next, click on the affected app that’s buffering while streaming videos, and select Options.
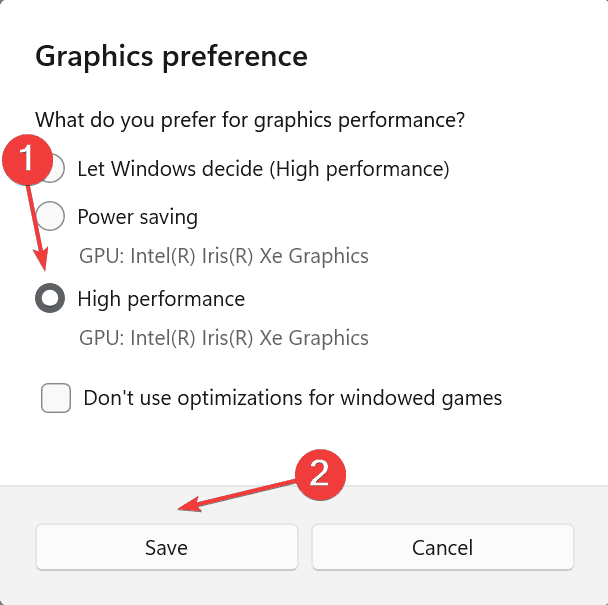
- Select High performance and click on Save.
- Finally, reboot the device for the changes to come into effect.
6. Perform a clean boot
- Press Windows + R to open Run, type msconfig in the text field, and hit Enter.
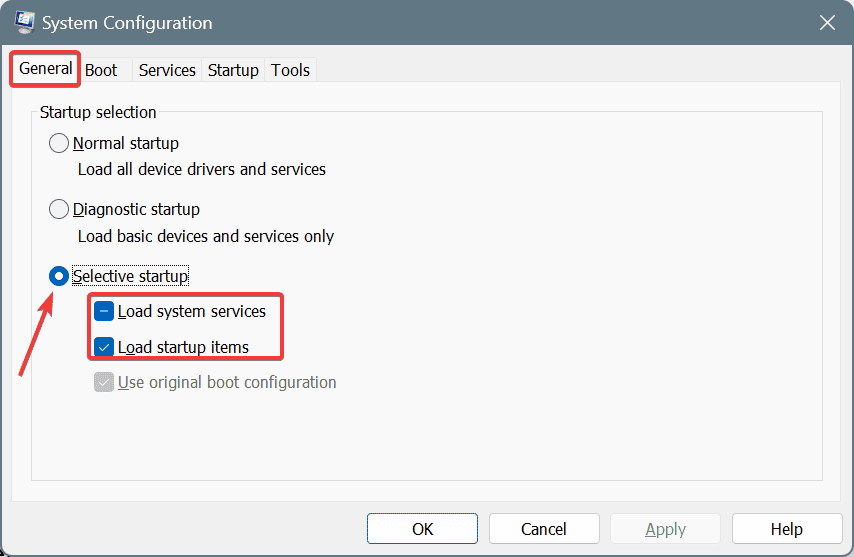
- In the General tab, choose Selective startup, and then tick the checkboxes for Load system services and Load startup items under it.
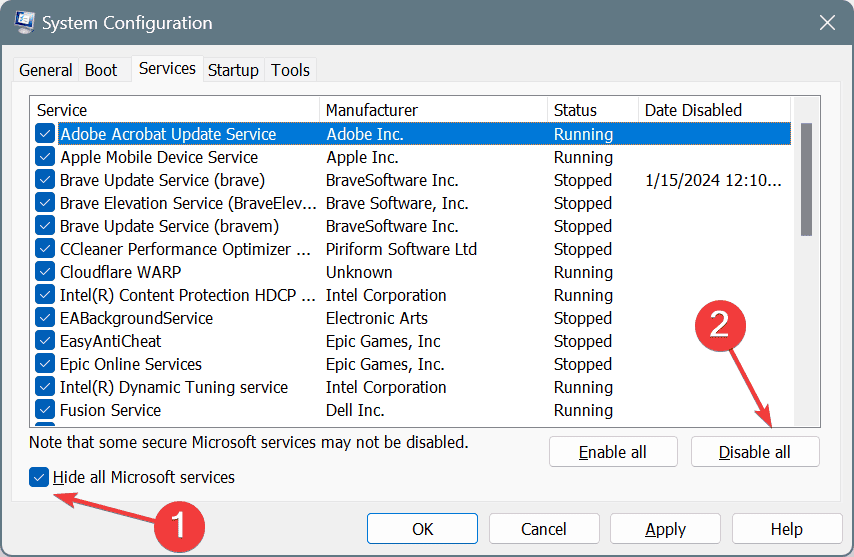
- Go to the Services tab, tick the checkbox for Hide all Microsoft services, and then click on Disable all.
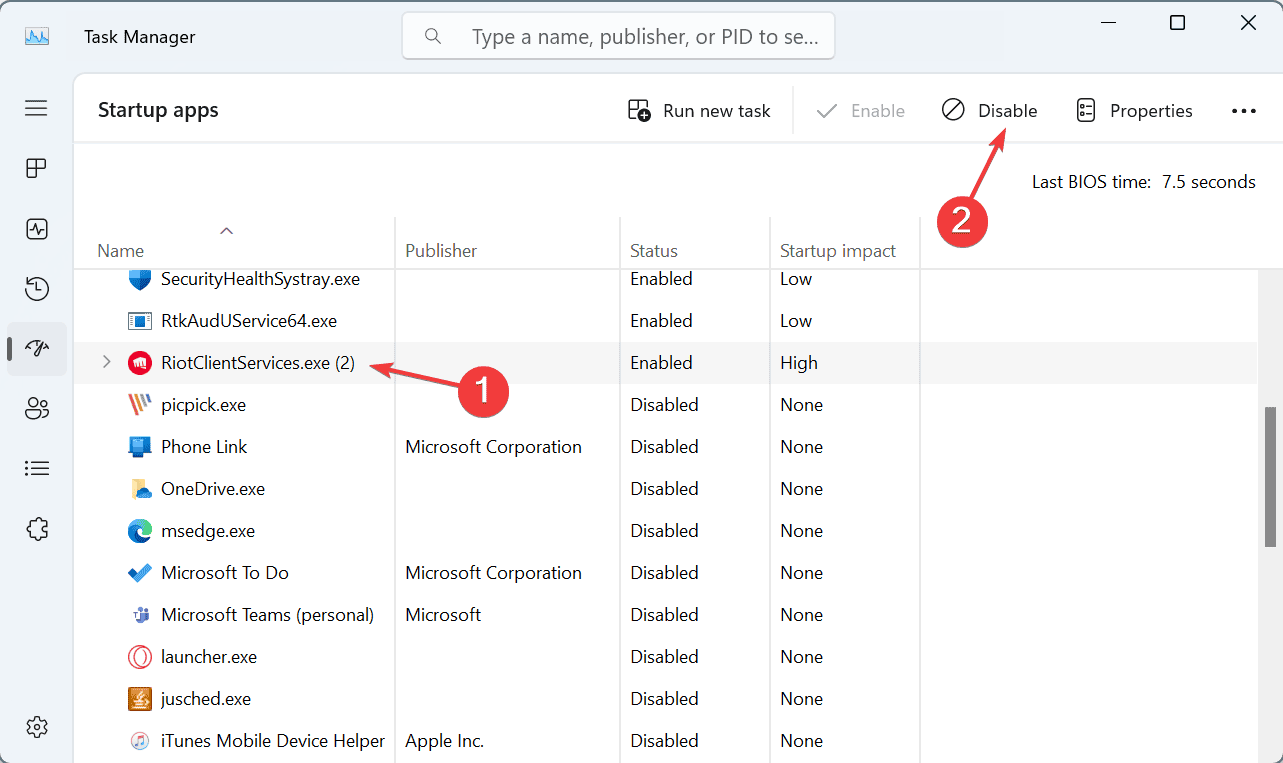
- Now, navigate to the Startup tab, and click on Open Task Manager.
- Select any non-critical app/process that reads Enabled under the Status column, and click on Disable near the top right.
- After disabling all the non-critical startup items, head back to System Configuration, and click on Apply and OK to save the changes.
- Click on Restart in the confirmation prompt.
- Once the PC reboots, you should find reduced video buffering when streaming through any app or browser.
When you perform a clean boot in Windows, it disables any third-party or non-critical processes/programs from running, thus improving the boot speed as well as decreasing buffering when streaming videos!
7. Switch to Google’s Public DNS
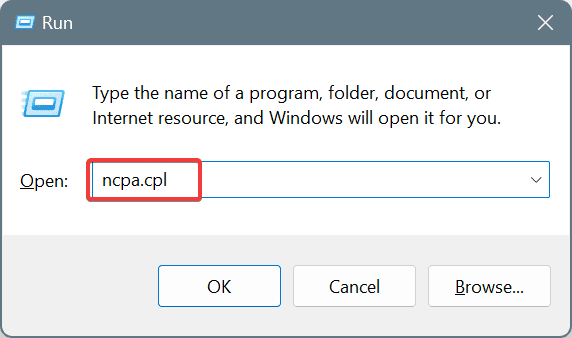
- Press Windows + R to open Run, type ncpa.cpl in the text field, and hit Enter.
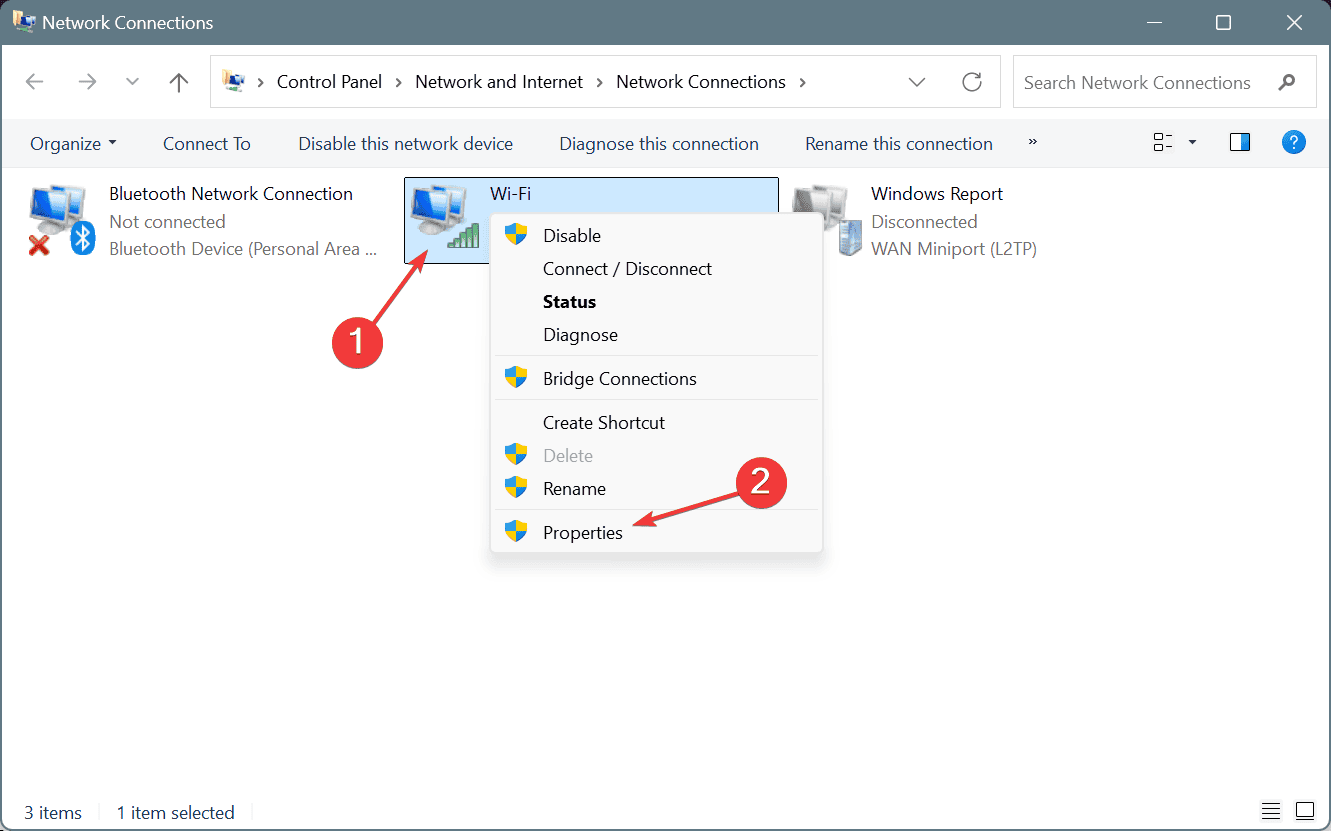
- Right-click on the active network adapter, whether Wi-Fi or Ethernet, and choose Properties.
- Select Internet Protocol Version 4 (TCP/IPv4) from the list, and click on Properties.
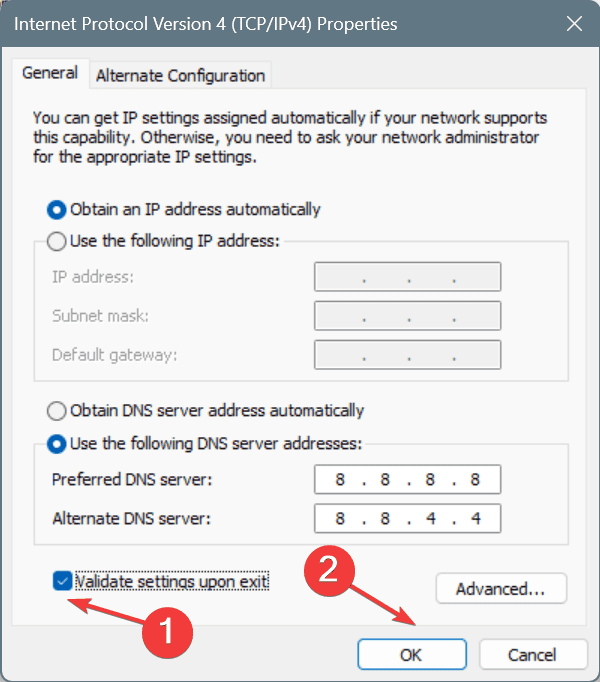
- Choose Use the following DNS server addresses option, and enter the following data:
- Preferred DNS server: 8.8.8.8
- Alternate DNS server: 8.8.4.4
- Finally, tick the checkbox for Validate settings upon exit, click on OK to save the changes, and then restart the device.
While I have used Google’s Public DNS, you could go with Cloudflare’s or pick the fastest DNS server near you for improved speed as long as it stops buffering when streaming movies or shows!
8. Reset the network settings
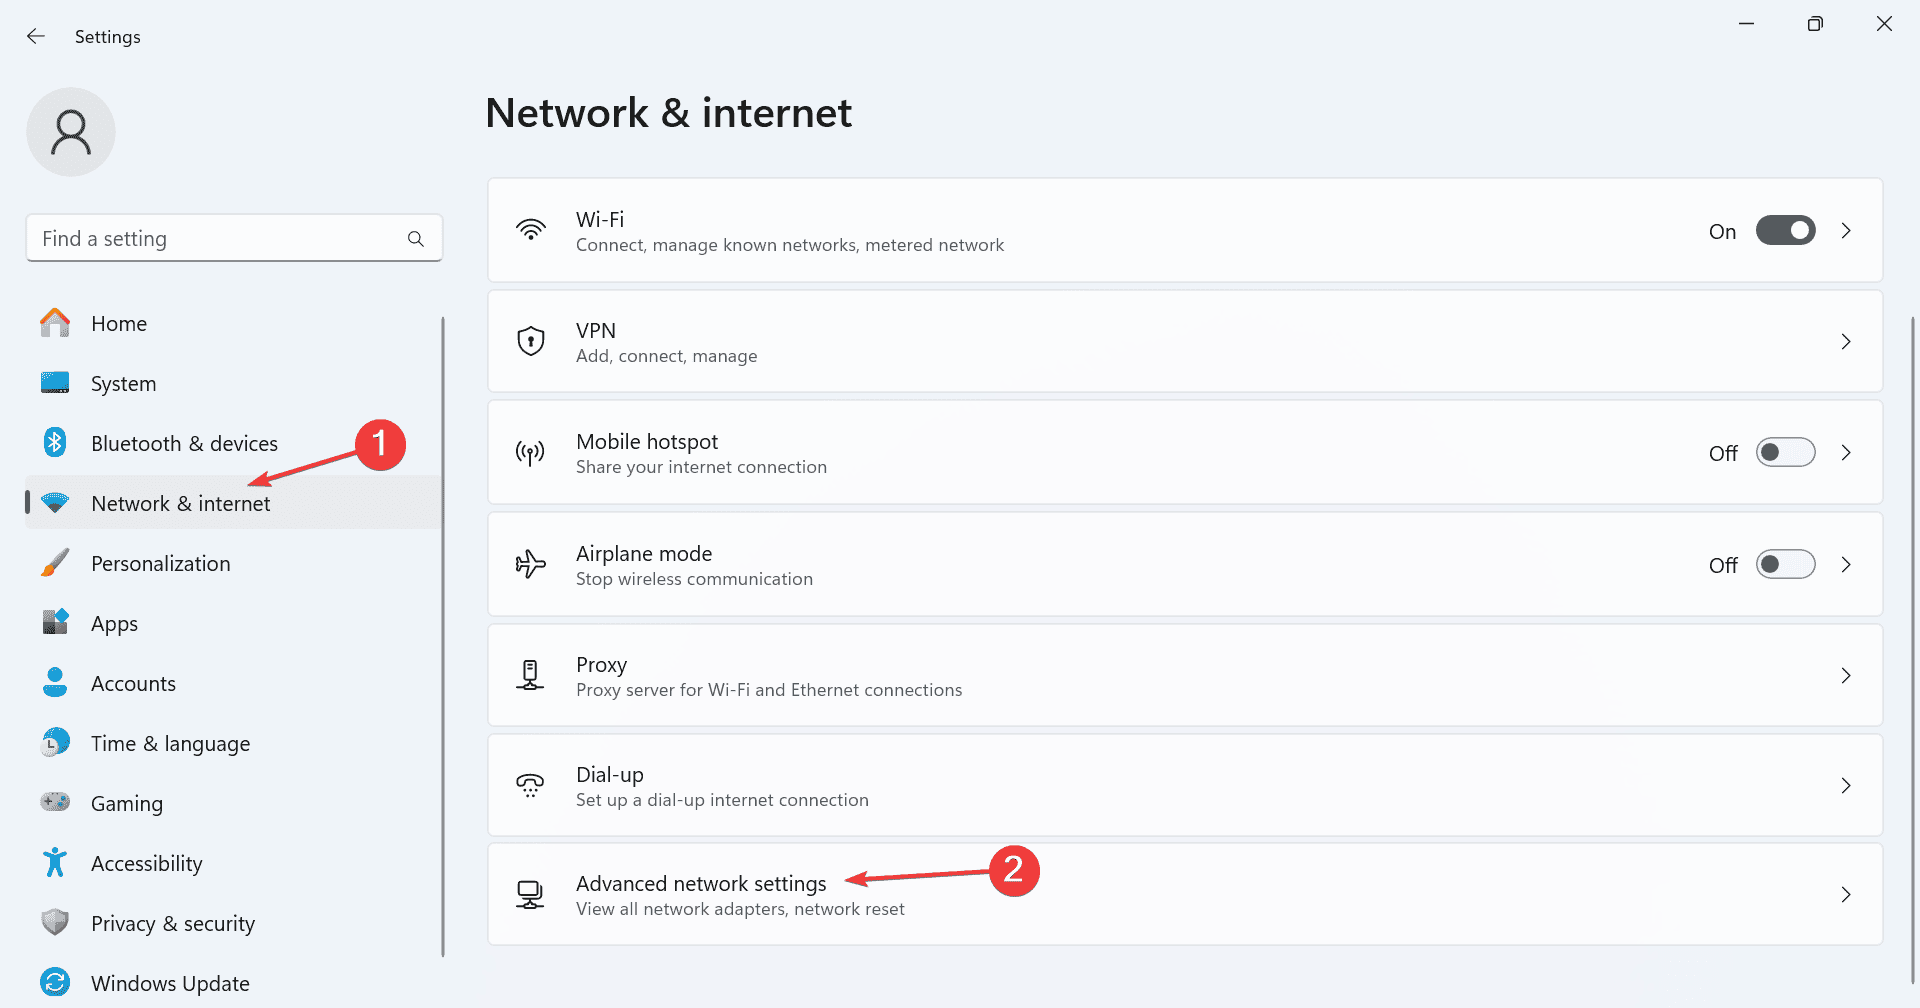
- Press Windows + I to open Settings, go to Network & Internet from the left pane, and then click on Advanced network settings.
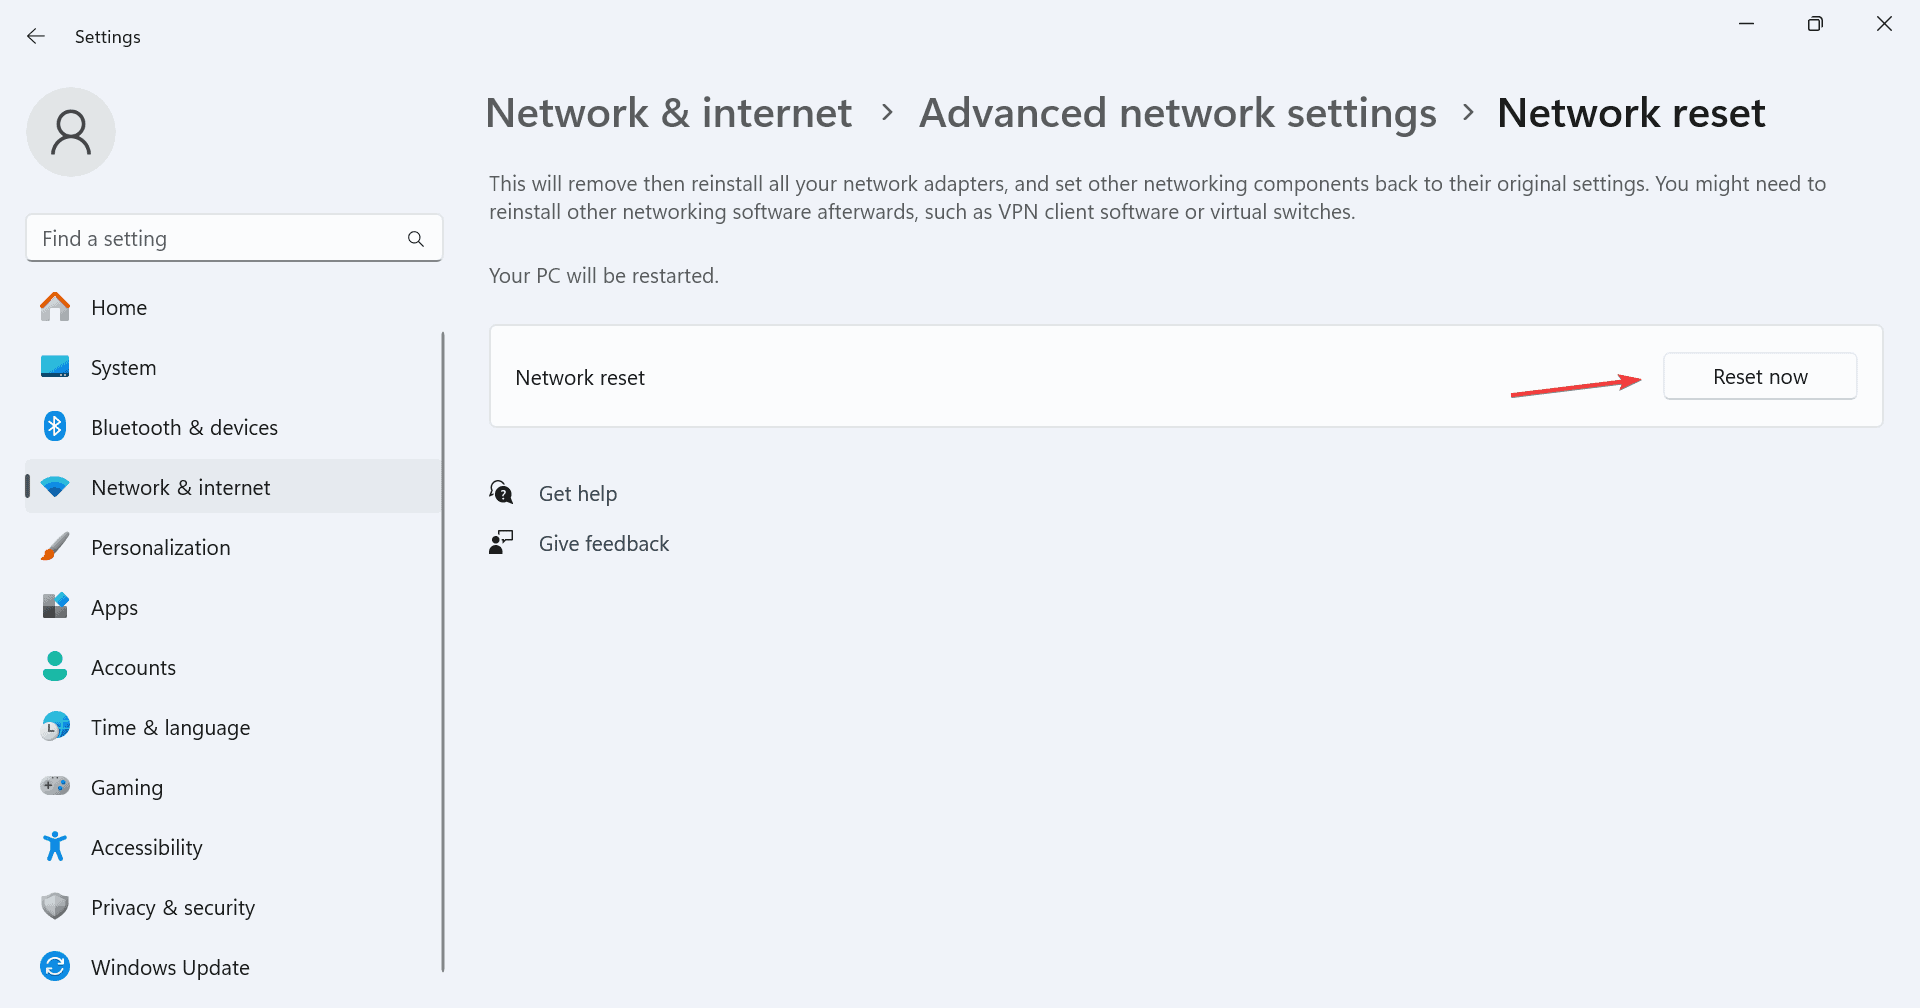
- Click on Network reset.
- Click the Reset now button.
- Finally, click on Reset in the confirmation prompt, wait for the process to complete, and then restart the device.
9. Set up a streaming-friendly network
If you want to stop buffering on live streaming but the wireless network strength is not high, you will have to either set up an extender or a mesh network to improve connectivity!
An effective extender comes in handy when only a small area away from the router lacks network connectivity. As the name suggests, an extender will extend the connectivity to this part. It’s best for apartments.
A mesh network, on the other hand, is more suited for bigger spaces, say a multi-storey house, and provides ample network connectivity to all parts. When picking the best Mesh Wi-Fi systems, make sure they provide the required coverage!
10. Upgrade the Internet plan
When nothing else works, the last option is to upgrade the Internet plan. A plan with 50 Mbps+ Internet speed should allow you to stream videos without buffering and not having to worry about terminating background programs and processors.
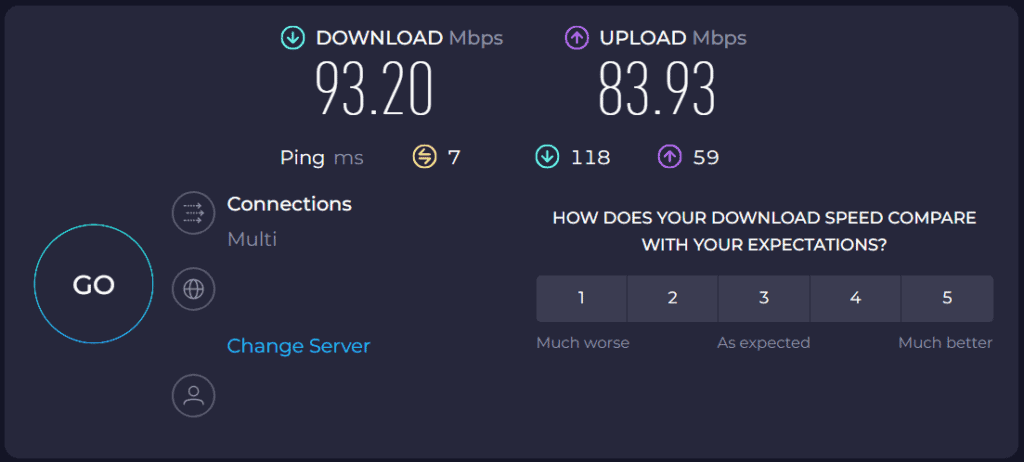
Upgrading the Internet plan may cost you a bit more, but it is a cheaper alternative to setting up a mesh network. Talk to your ISP (Internet Service Provider) and find out a plan that best meets your needs.
You now know how to effectively decrease buffering when streaming videos, movies, or shows across apps, browsers, and devices. Remember, for some, a single trick does the job, while for others, a combination achieves the desired purpose. So, I recommend you try them all!
In case you are looking for an automated option, check our top picks for anti-buffering software which are proven to reduce buffering significantly.
Which recommendation worked best for you? Share with our readers in the comments section below.



User forum
0 messages