7 Best Microphone Settings for Windows 11
Audio input levels, microphone sensitivity, and enhancements are the key aspects
5 min. read
Published on
Read our disclosure page to find out how can you help Windows Report sustain the editorial team. Read more
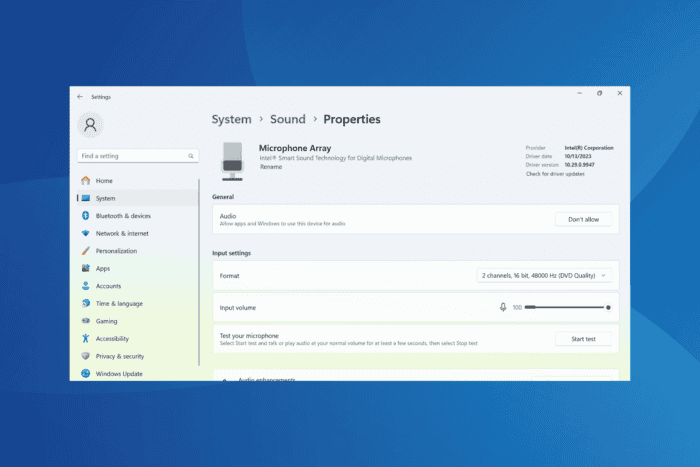
Poor voice quality in meetings or in-game chat is often a result of microphone issues. Surprisingly, most of these can quickly be fixed by configuring the best microphone settings in Windows 11!
These usually pertain to the microphone’s audio enhancements, audio levels, boost, sensitivity, and audio channel. Problems with even one of these can affect the overall microphone quality, no matter how costly the overall setup. And once you get things in order, the sound quality witnesses a substantial improvement on Windows 11!
How do I make my microphone sound better on Windows 11?
1. Enable audio enhancements
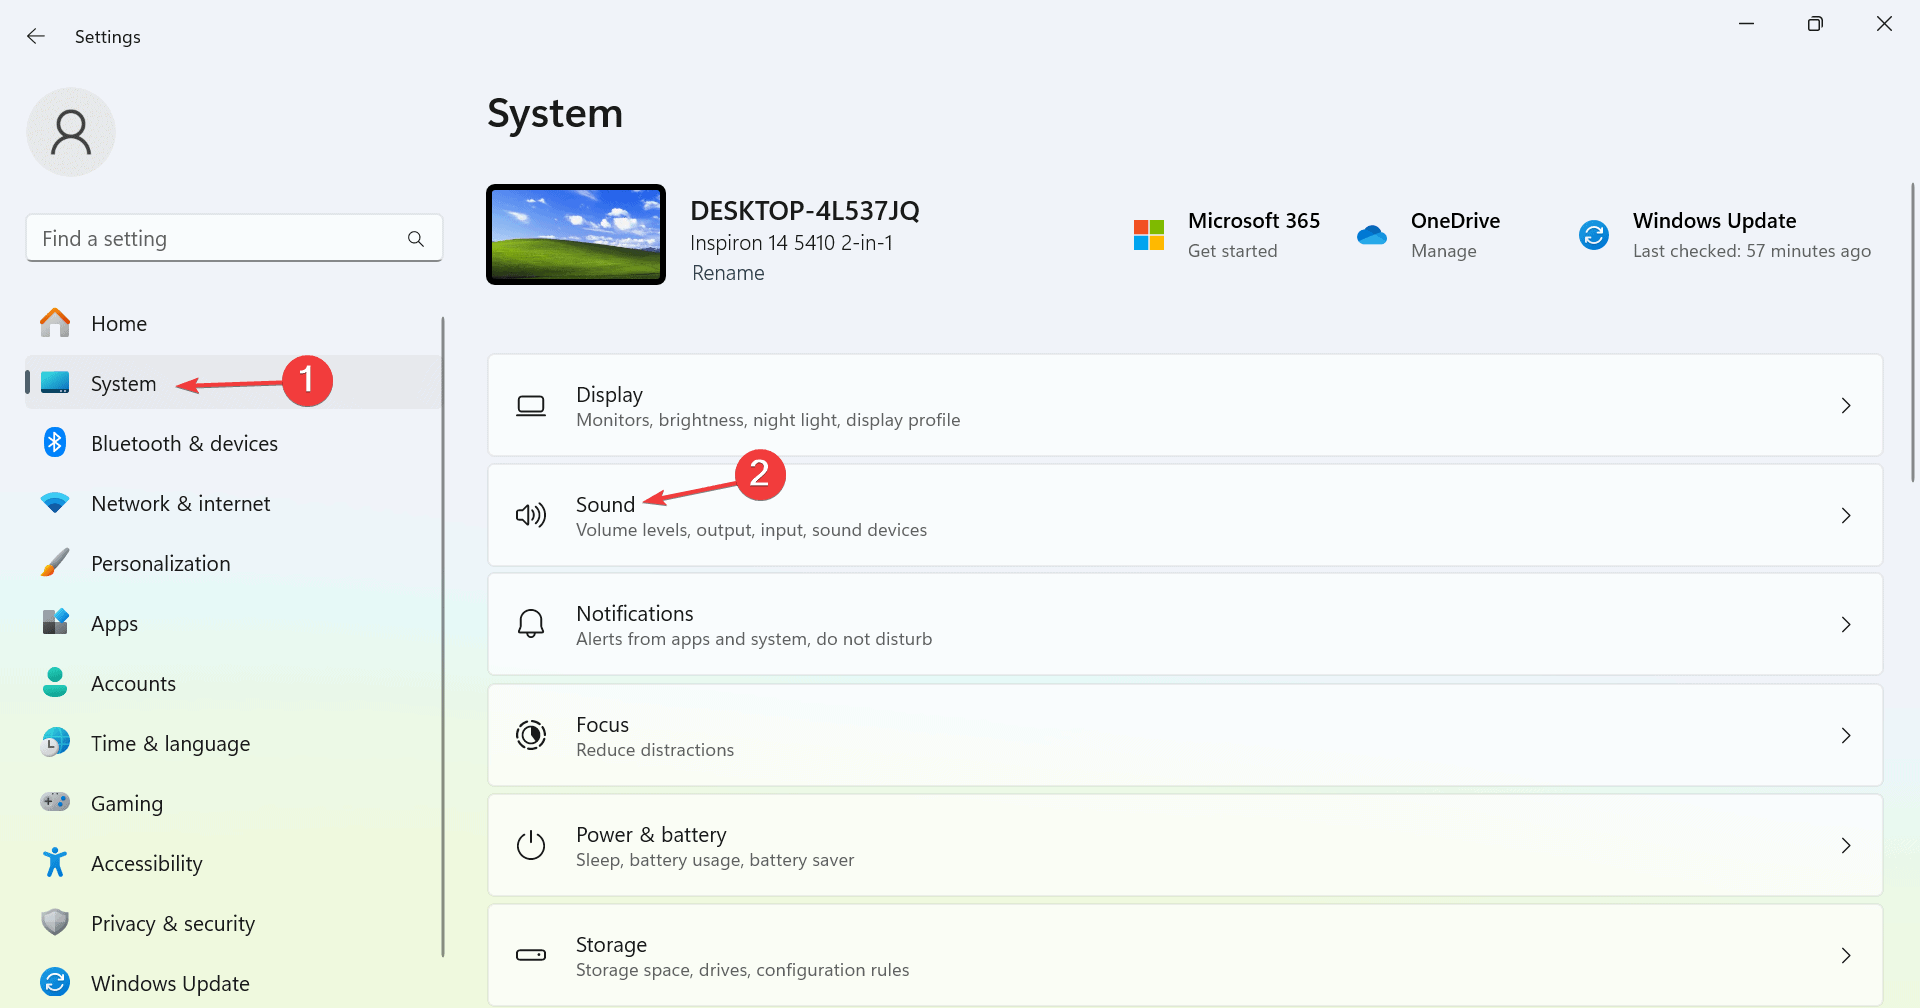
- Press Windows + I to open Settings, go to System from the navigation pane, and then click on Sound on the right.
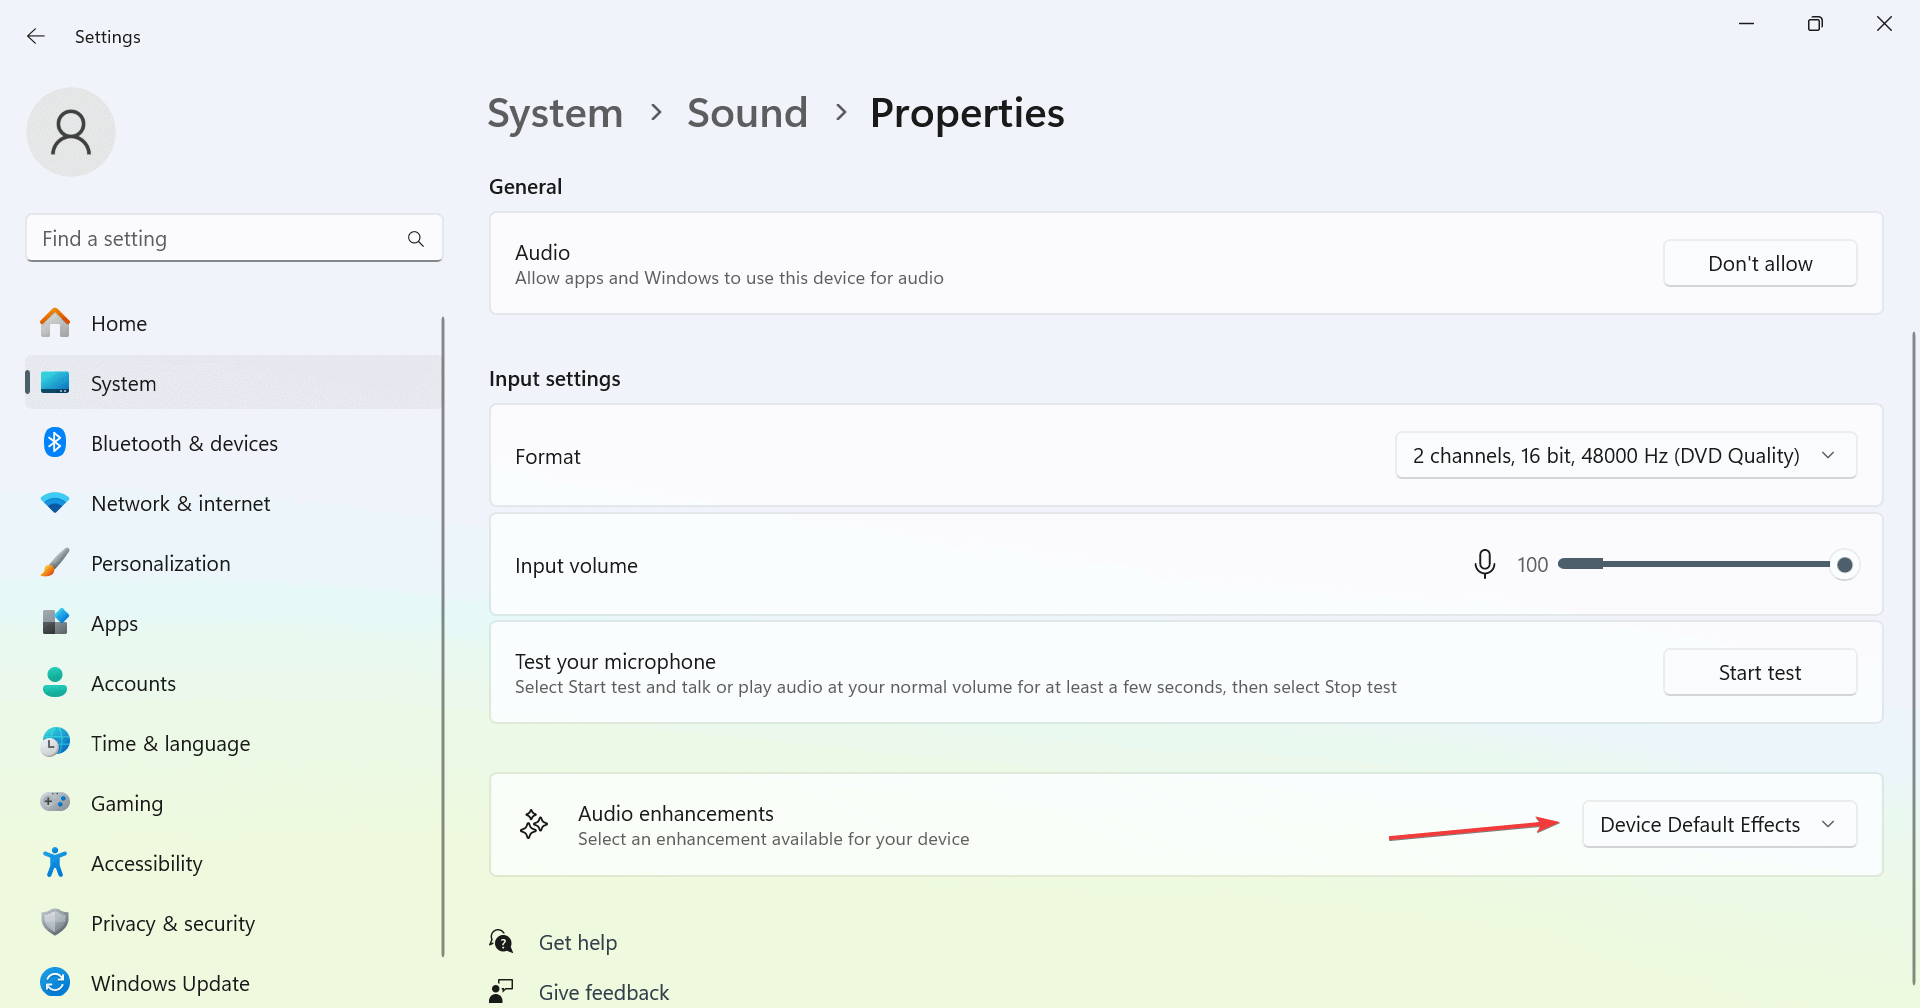
- Select your microphone under the Input entry.
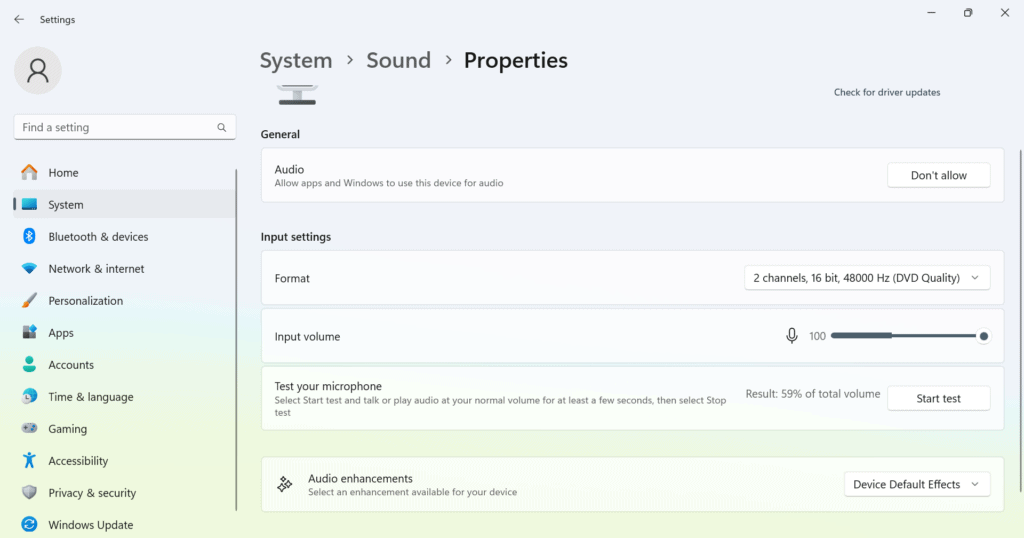
- Now, select Device Defaults Effect from under the Audio enhancements dropdown menu.
Audio enhancements, though an easy way to improve the microphone’s sound quality in Windows 11, can often result in other issues or cause the microphone to stop working altogether. If this is the case with you, disable audio enhancements right away!
2. Adjust the microphone levels
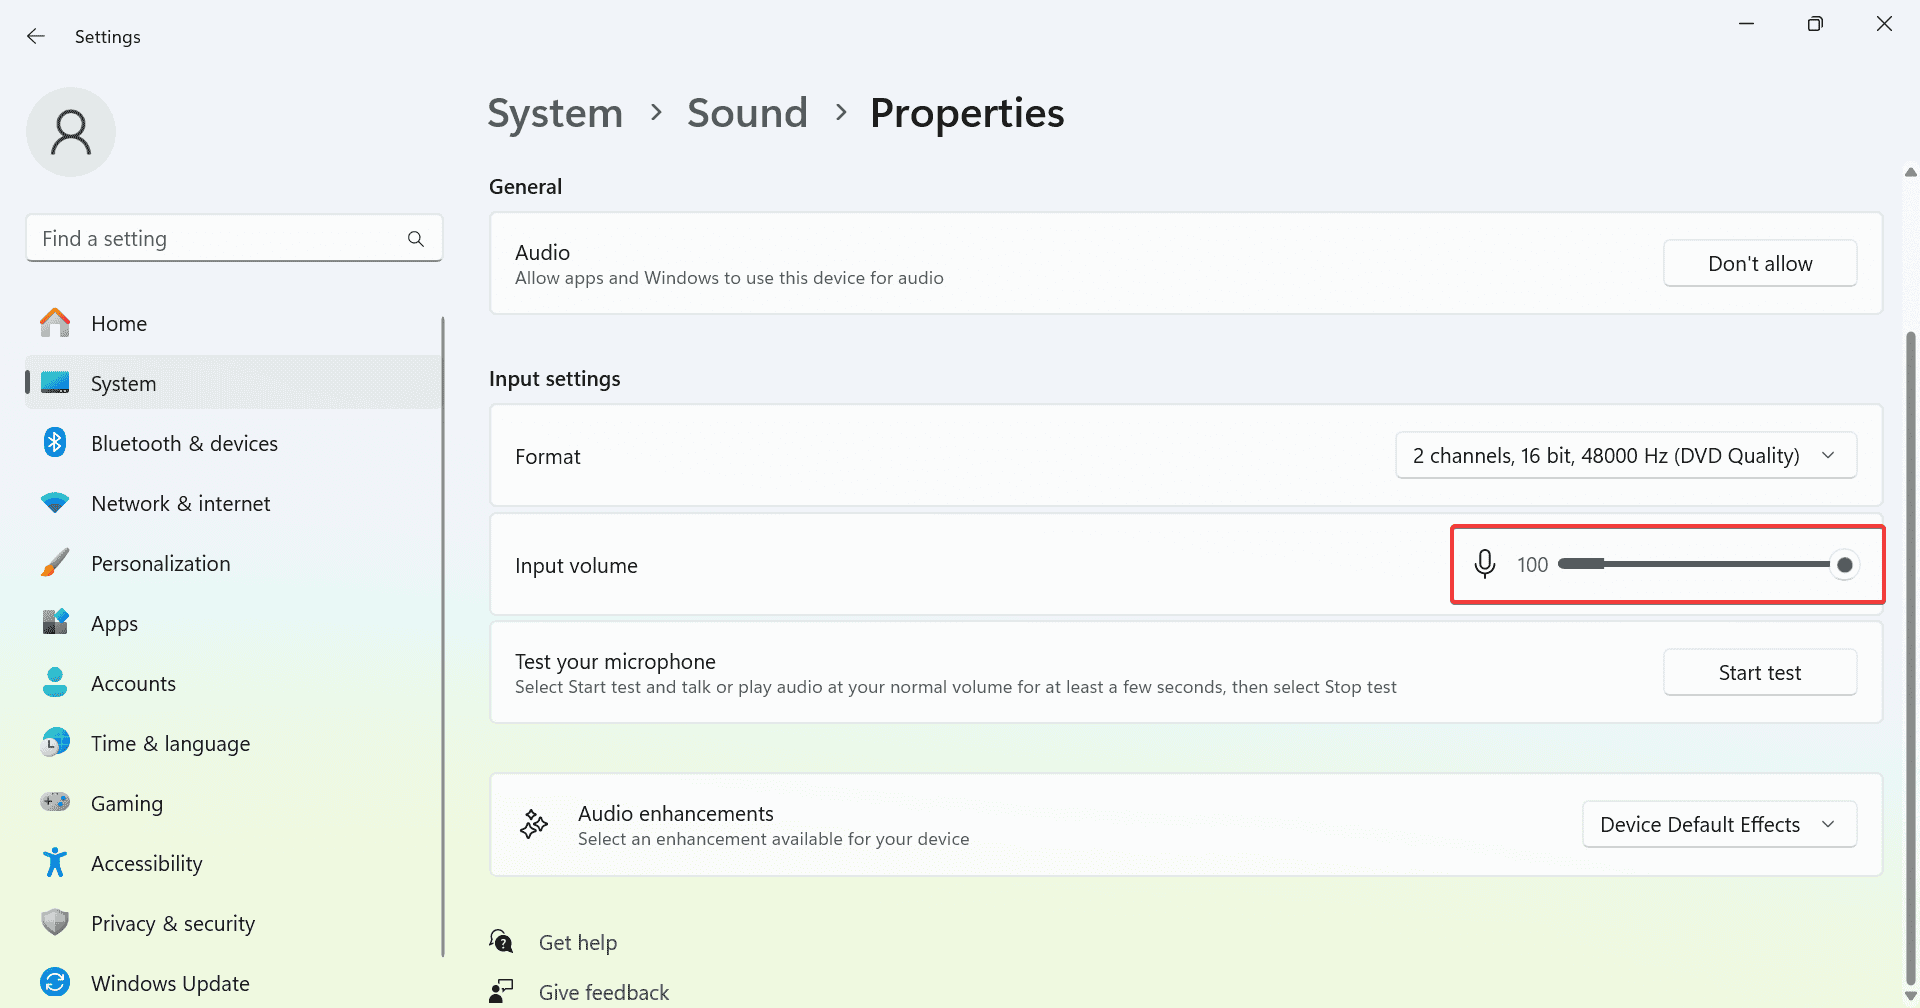
- Press Windows + I to open Settings, navigate to the System tab, choose Sound, and select your microphone from the list under Input.
- Now, adjust the Input volume slider and set it at the optimal levels. It’s different for each microphone.
For most of you with basic microphones, setting input volume to 100% is the best setting for Windows 11. Although, for anyone with a professional or high-end microphone, the input volume should be 60-80%!
3. Select the best audio channel
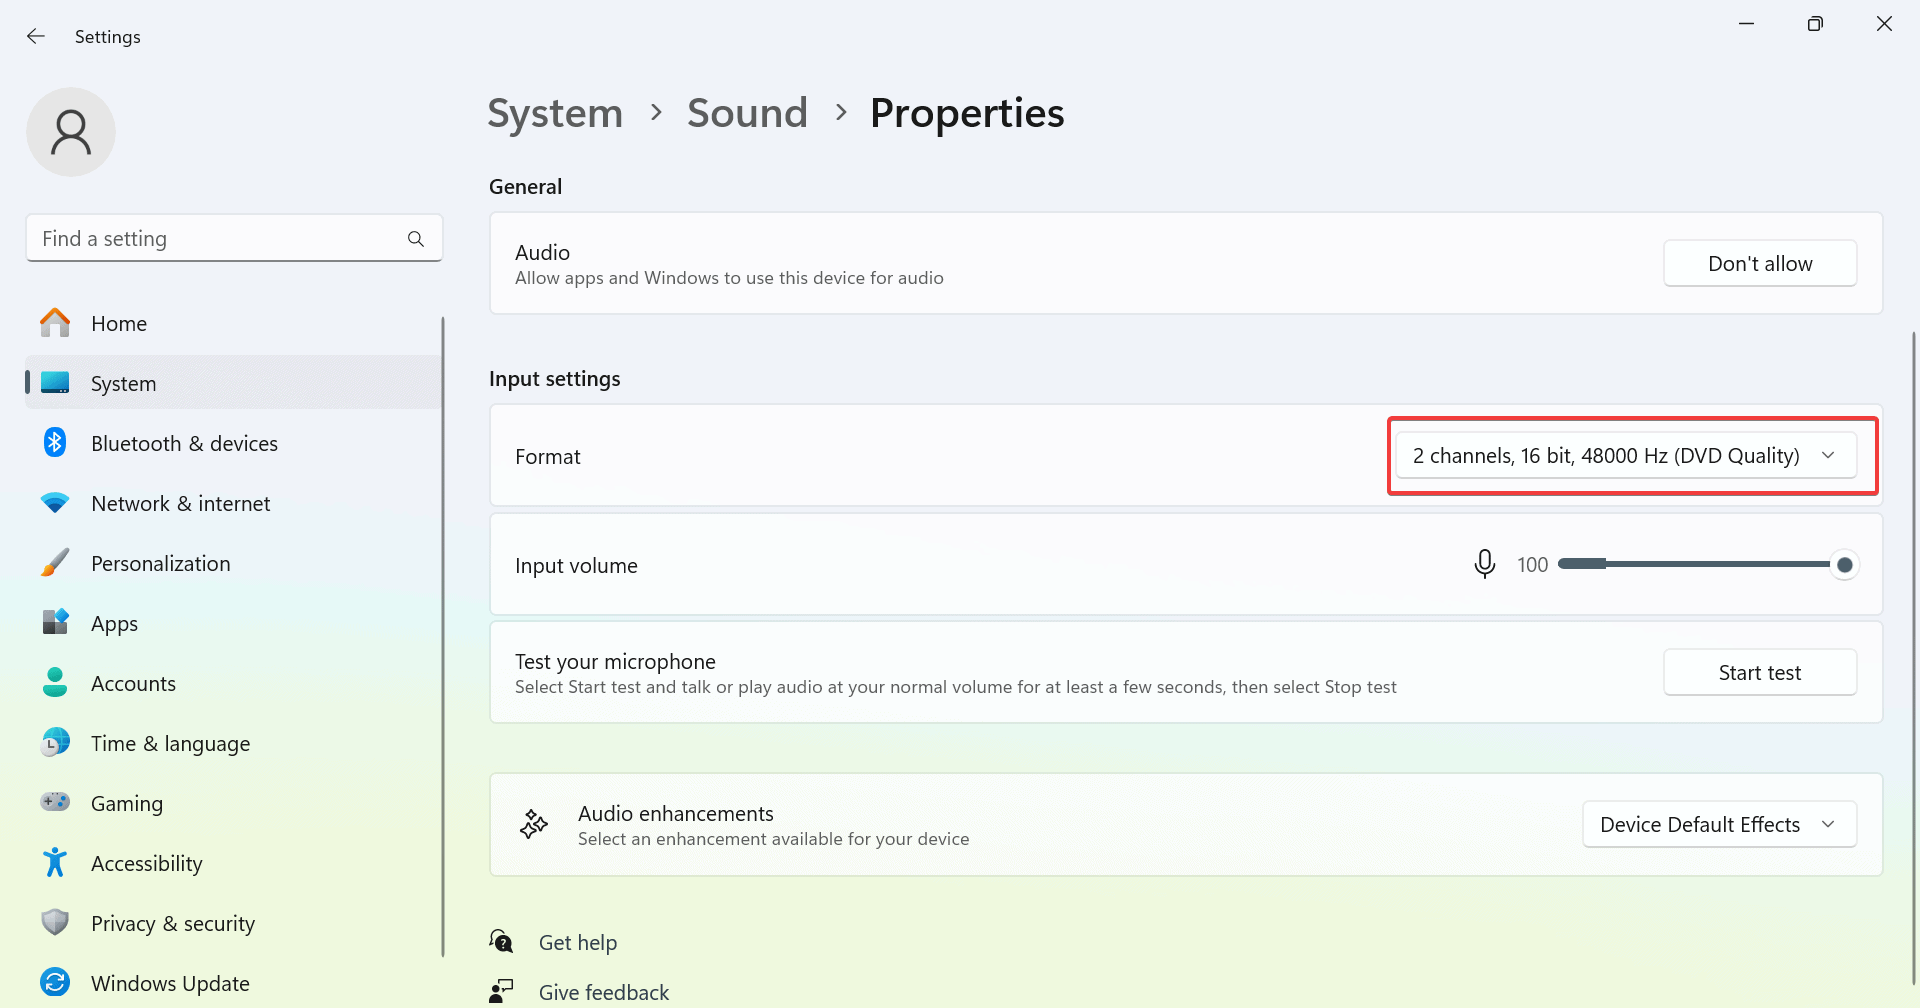
- Press Windows + I to open Settings, go to System, select Sound, and choose your microphone from the list.
- Now, select 2 channels, 16 bit, 48000 Hz (DVD Quality) or 2 channels, 16 bit, 44100 Hz (CD Quality), whichever is available. If both are available, pick the former microphone audio format.
4. Disable other connected microphones
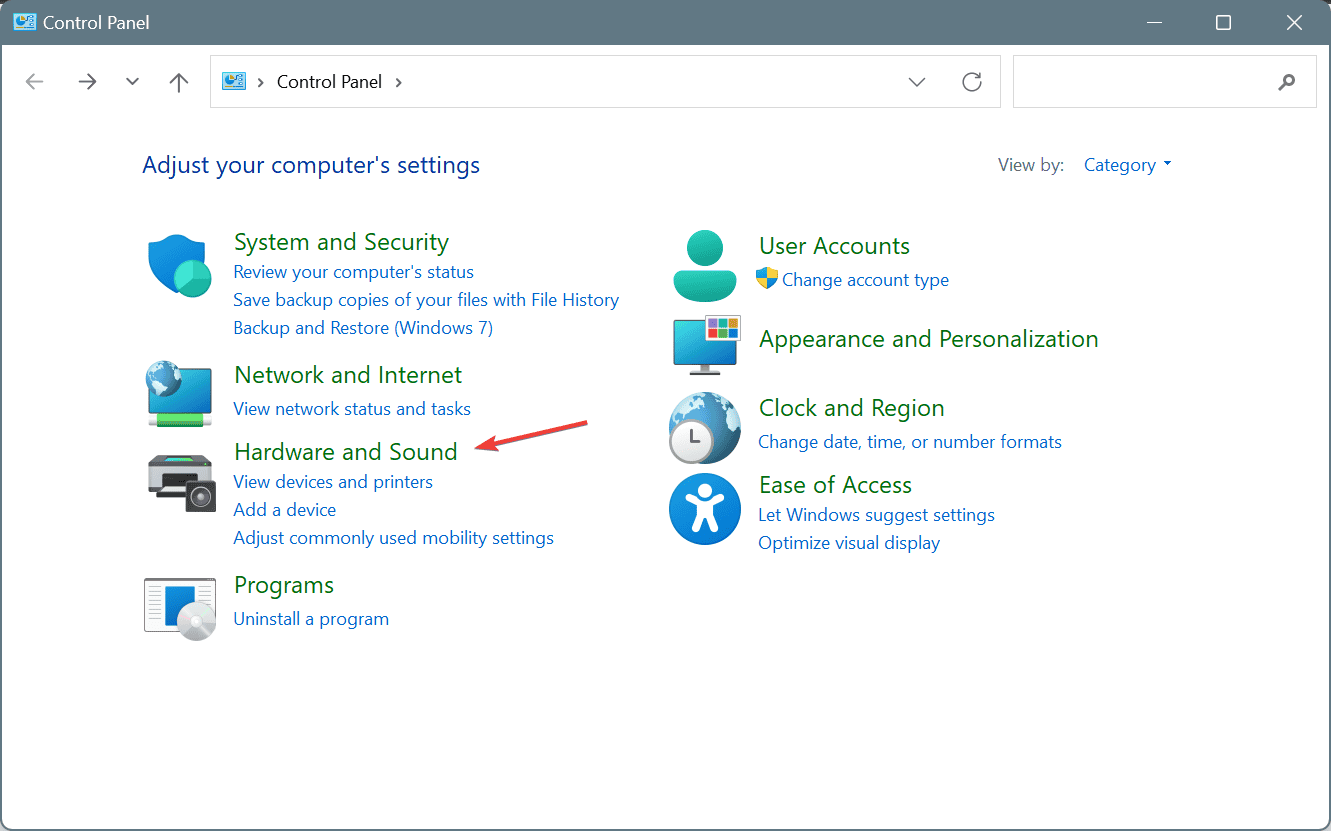
- Press Windows + S to open Search, type Control Panel, and click on the relevant result.
- Click on Hardware and Sound.
- Click on Sounds.
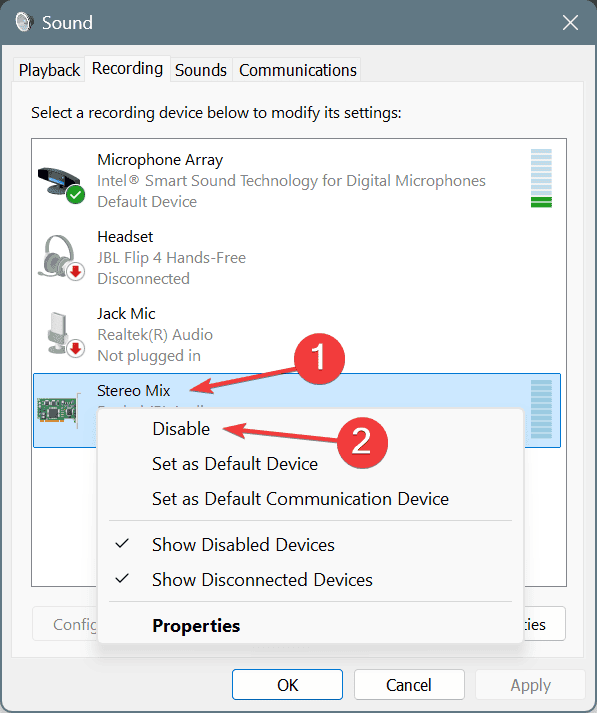
- Navigate to the Recording tab, individually right-click on the microphones not in use, and choose Disable.
Often, audio issues arise when the OS or third-party apps pick up another microphone instead of the one you intend to use. A simple trick here is to disable all the other microphones. Also, you could set the microphone in use as the default device!
5. Configure exclusive mode
- Press Windows + S to open Search, type Sound in the text field, and click on the relevant result.
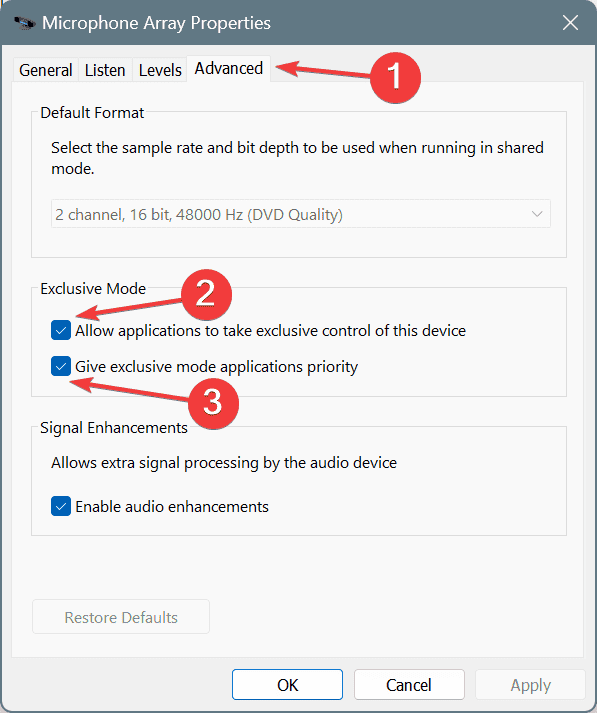
- Go to the Recording tab, right-click on the microphone in use, and select Properties.
- Head to the Advanced tab, and tick the checkboxes for Allow applications to take exclusive control of this device and Give exclusive mode applications priority.
- Finally, click on Apply and OK to save the changes.
6. Use the app’s built-in audio enhancements
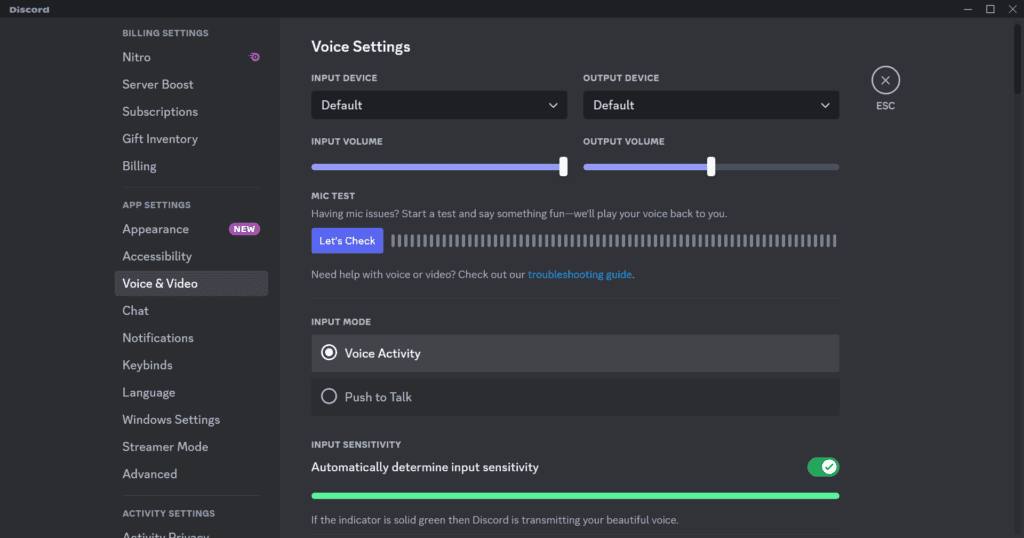
Many of the common audio and video conferencing apps have built-in audio enhancements and dedicated settings to improve the microphone’s sound output in Windows 11. For example, Skype and Discord.
From the built-in audio settings, you can quickly adjust the microphone’s input volume, input sensitivity, echo cancellation, noise suppression, gain control, and other critical parameters. Besides, you may even find a dedicated built-in audio troubleshooter.
So, make use of these to enhance the microphone’s audio quality and experience better sound!
7. Download a third-party microphone enhancement app
When it comes to the best microphone settings in Windows 11, the most useful ones are often offered by third-party software. You could choose a top-rated audio equalizer tool to begin with. Also, many couple it with an effective noise-cancellation software for improved results.
Choose whatever works best for you. But don’t forget, software with a paid subscription will always deliver better results than one that is free!
How can I troubleshoot microphone issues in Windows 11?
- Test the microphone in Windows 11: Press Windows + I to open Settings > go to System > select Sound > choose your microphone from the list > click on the Start test button > click Stop test > check the results.
- Run the microphone troubleshooter: Press Windows + I to open Settings > go to System > select Troubleshoot > choose Other troubleshooters > click on Run next to Audio.
- Update the microphone driver: Open Device Manager > right-click on the microphone under Audio input and output > choose Update driver > select Search automatically for drivers.
- Terminate third-party apps using the microphone: Open Task Manager > identify any apps using the microphone > select the app(s) > click on End task.
With these tips and recommended best settings, you should be able to improve the microphone’s audio in Windows 11 and previous iterations of the OS.
Before you leave, find out how to enable microphone boost in Windows 11 and experience louder audio!
Which microphone setting worked best for you? Share with our readers in the comments section.




User forum
0 messages