How to Fix the Run as Administrator Option Greyed Out
Adjusting folder permissions can reactivate greyed-out buttons
![]() 6 min. read
6 min. read
![]() Published on
Published on
Share this article
Improve this guide
Read our disclosure page to find out how can you help Windows Report sustain the editorial team. Read more
For the most part, you won’t require to run a majority of apps or files as an administrator but for some high-level operations, you’ll need it and it may be greyed out.
Your run as administrator option being greyed out could be as a result of misconfigured UAC settings, corrupt files or programs, or even a corrupt user profile. However, before you try out any troubleshooting, ensure you’re running an account with administrator privileges.
What can I do if the run as administrator option is greyed out?
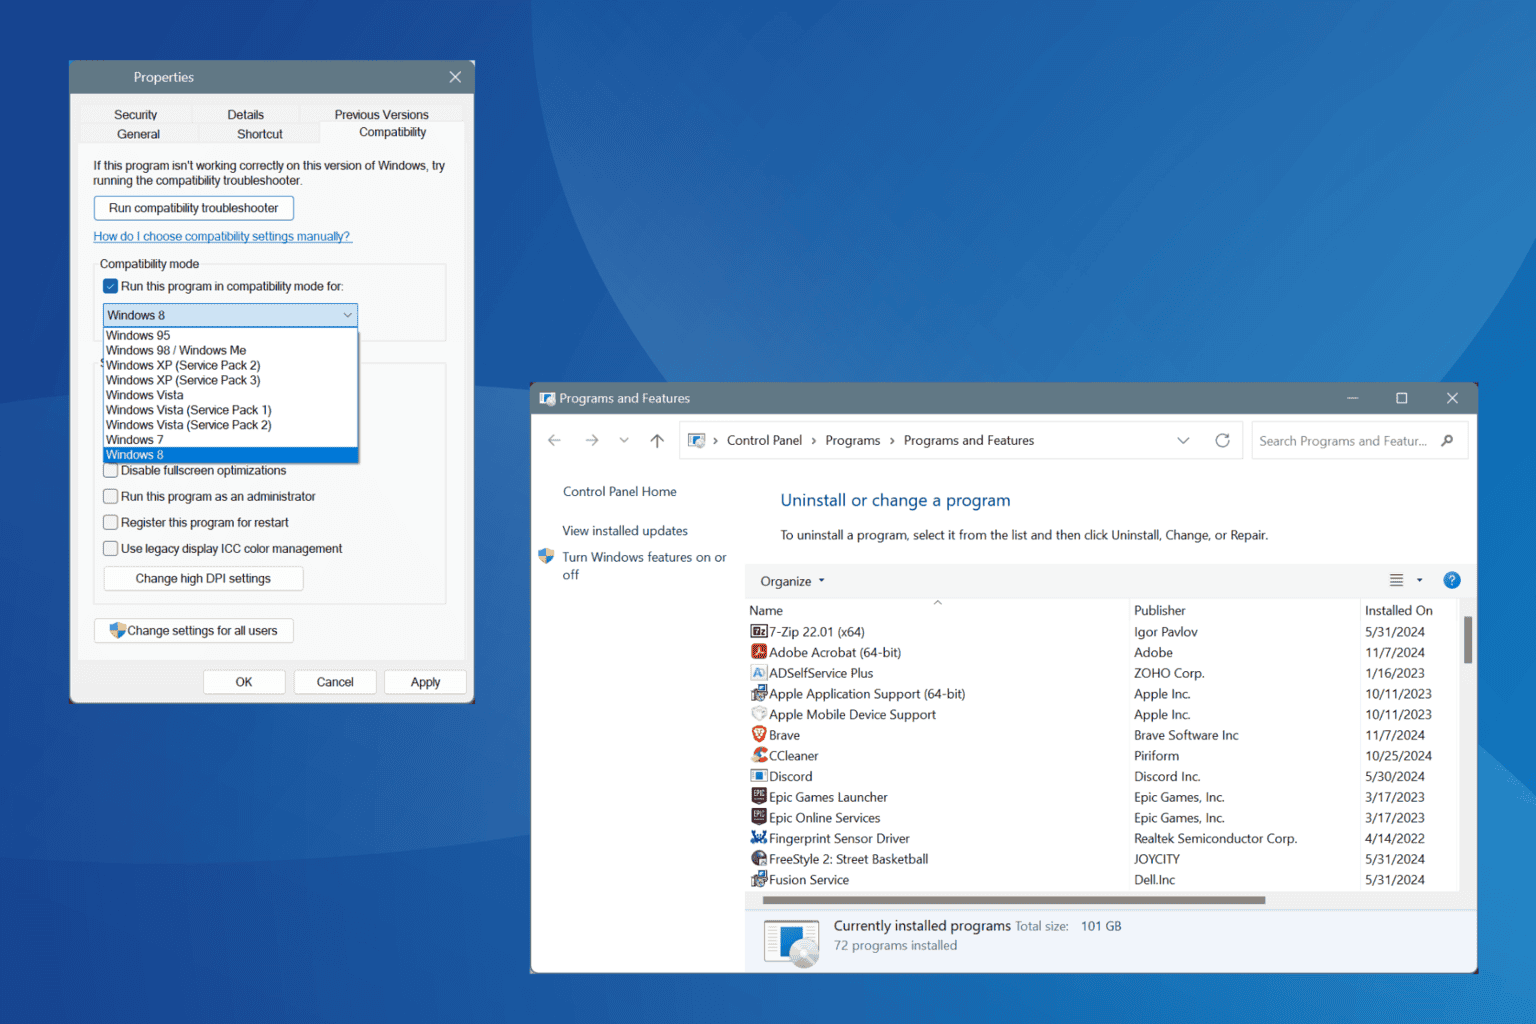
1. Check availability in compatibility mode
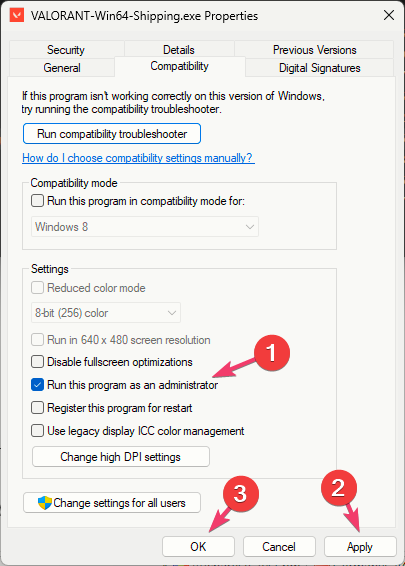
- Locate the problematic file or program, right-click on it, and select Properties.
- Navigate to the Compatibility tab, check whether the Run this program as an administrator option is greyed out. If not, place a checkmark next to it then click Apply and OK.

The issue of the run as administrator option being greyed out mostly occurs with shortcuts. Shortcuts essentially link to the EXE file but sometimes, if they are configured incorrectly, this option may be unavailable.
Other times, the shortcut may not support elevated permissions and cannot be prompted by the UAC security settings. To process this request properly, you’ll have to go to its properties.
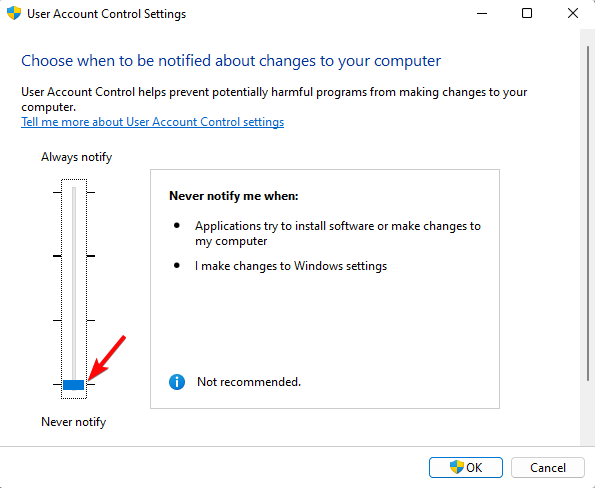
2. Disable UAC settings
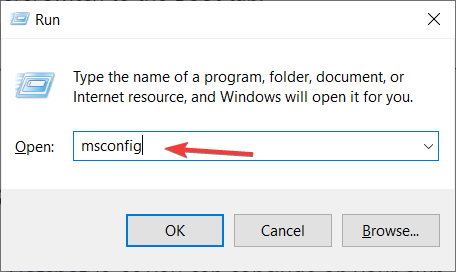
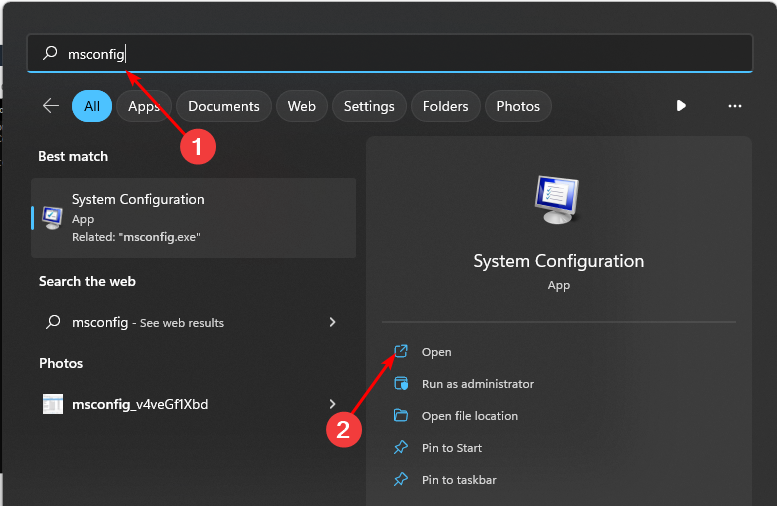
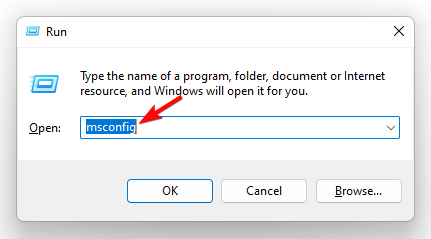
- Press the Win + R keys to launch the Run console. Then type msconfig in the search bar and hit Enter to open the System Configuration window.

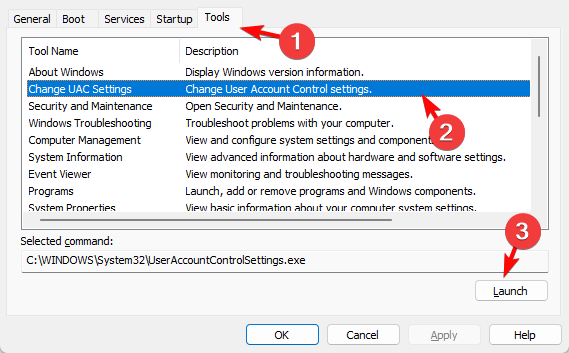
- Next, go to the Tools tab in the System Configuration window, select Change UAC Settings, and press Launch.

- This will open the User Account Control Settings window. Here, move the slider on the left to Never notify, and press OK to save the changes.

3. Adjust folder permissions
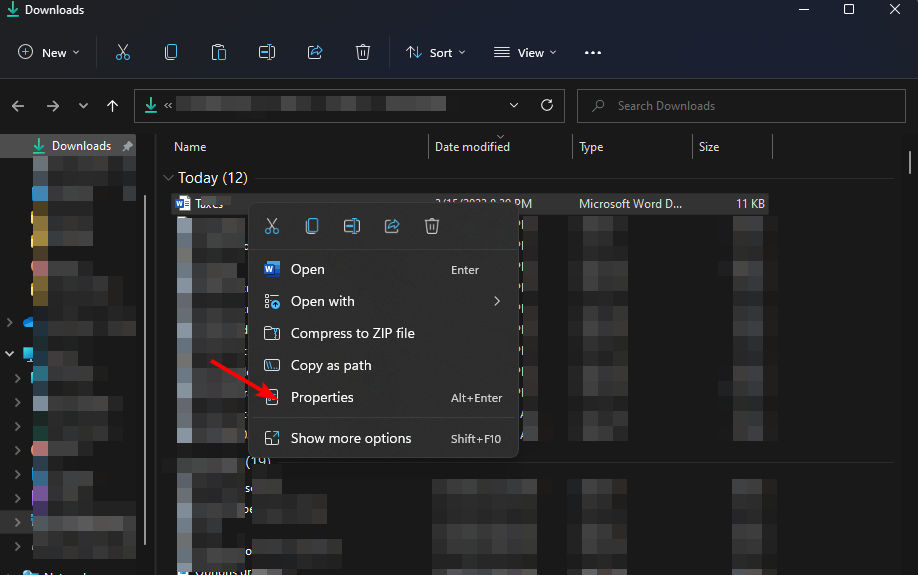
3.1 Allow user permissions
- Locate the problematic file in question, right-click on it, and select Properties.

- Navigate to the Security tab.

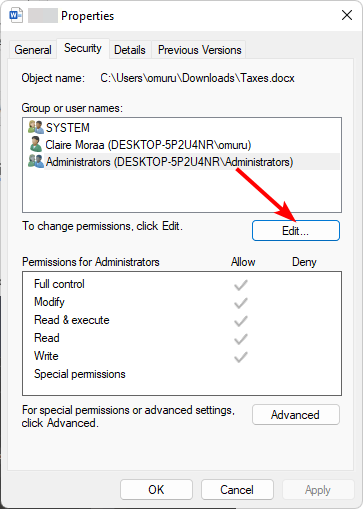
- Click on the Edit button.
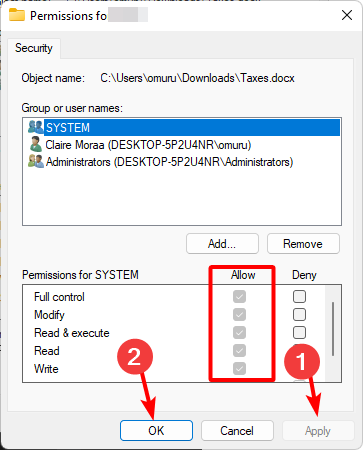
- Check all options under Allow to grant all authenticated users permissions, then click on Apply and OK to save the changes.

- Try opening the file again.

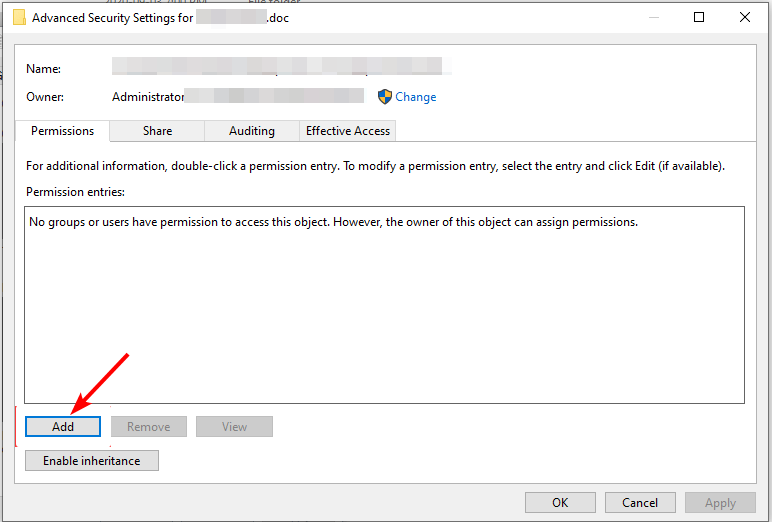
3.2 Take ownership of the file/folder
- Locate the word document in question, right-click on it, and select Properties.
- Navigate to the Security tab and look for You must have Read permissions to view the properties of this object. This will let you know you have insufficient permissions to open the file. Go to the bottom of the screen and click on Advanced.
- Hit Continue in the next window that pops up.
- Click on Add in the Permissions tab.

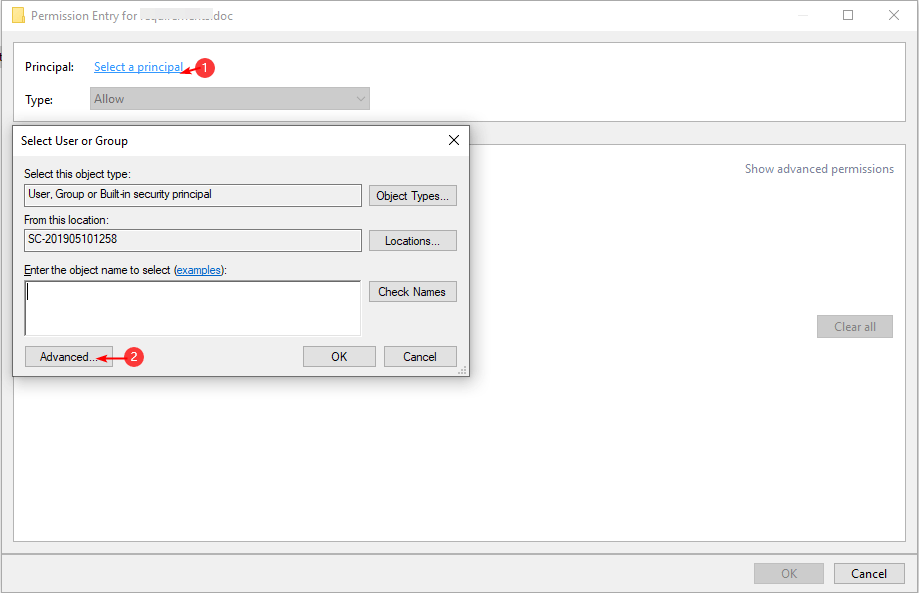
- In the Permissions Entry window, click on Select a principal, enter the information required in the listed entries, and click on Advanced at the bottom.

- Click on Find New, select Authenticated Users then press OK to generate a list of all users at the bottom.
- Check all the checkboxes to grant permissions then click on OK to save the changes.

- Try running the file as an admin and see if the error persists. Some PCs may require a reboot to effect the changes.

4. Run the DISM and SFC scans
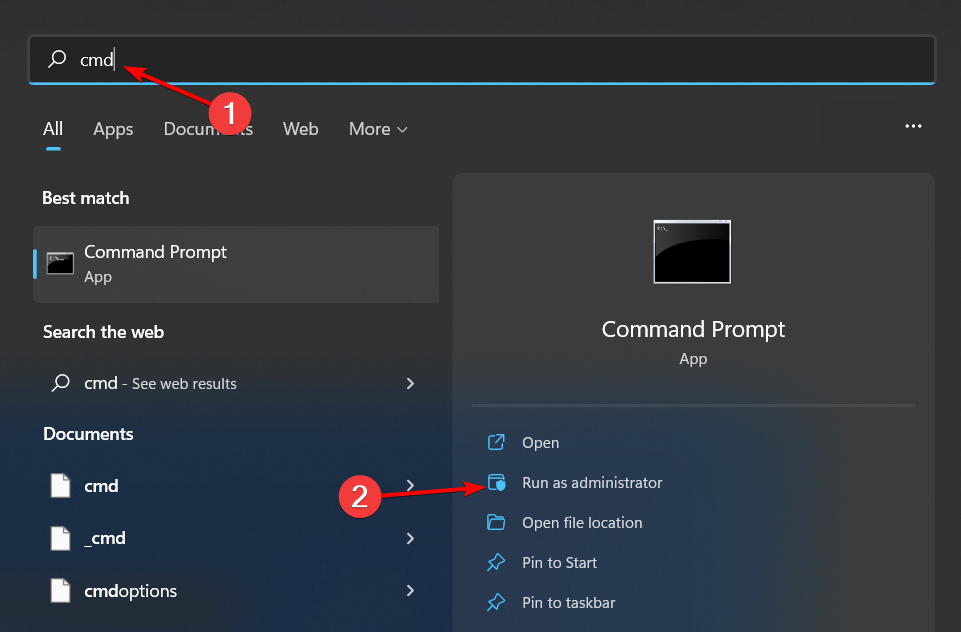
- Hit the Start Menu icon, type cmd in the search bar, and click Run as administrator.

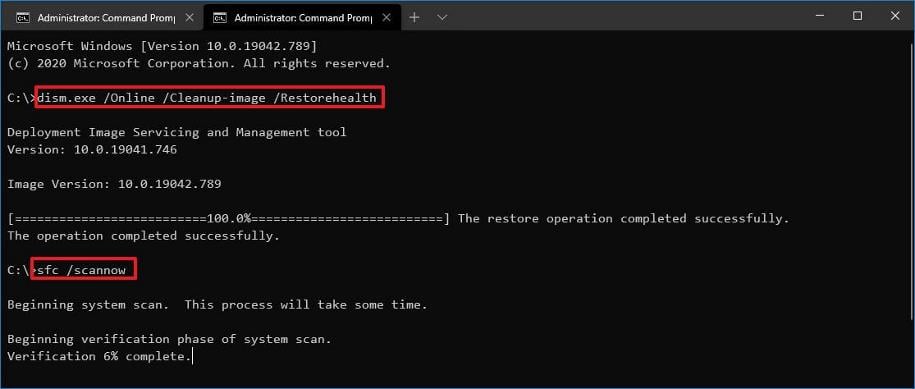
- Type the following commands and press Enter after each one:
DISM.exe /Online /Cleanup-Image /Restorehealthsfc /scannow
5. Reinstall the problematic app
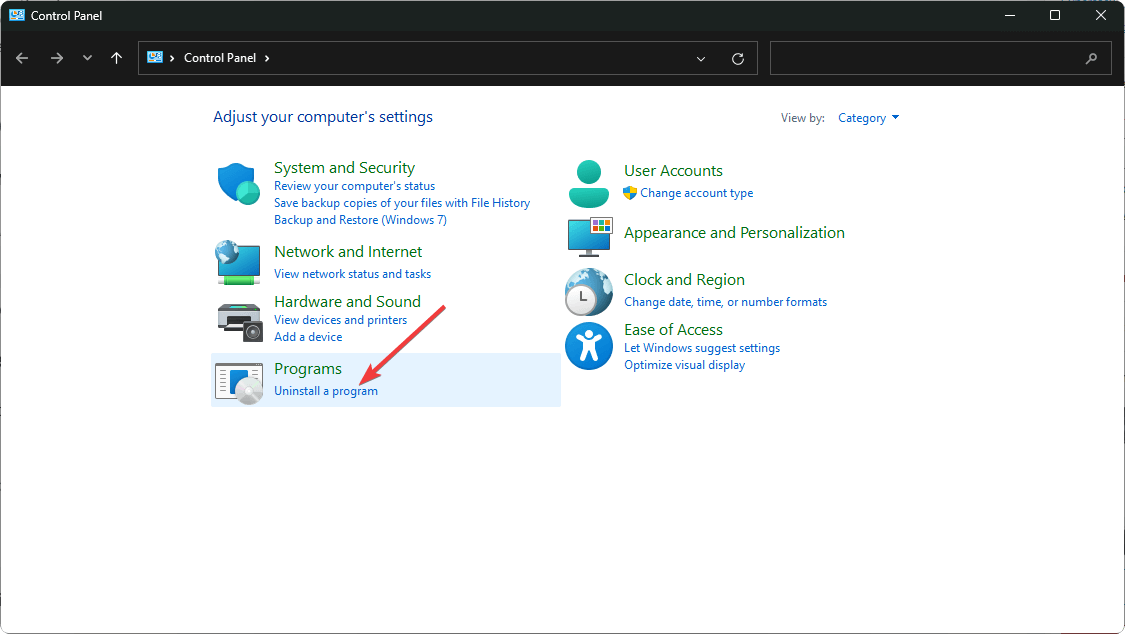
- Click on the Start Menu icon, type Control Panel on the search bar, and click Open.

- Select Uninstall a Program under Programs.

- Find the problematic app, click on it, and select Uninstall.
- Confirm uninstallation in the next pop-up.
- Next, remove any software leftovers.
- Go to the program’s official website or Microsoft Store and click Download.
- Once the executable file is downloaded, double-click it to install the app.
6. Create a new user profile
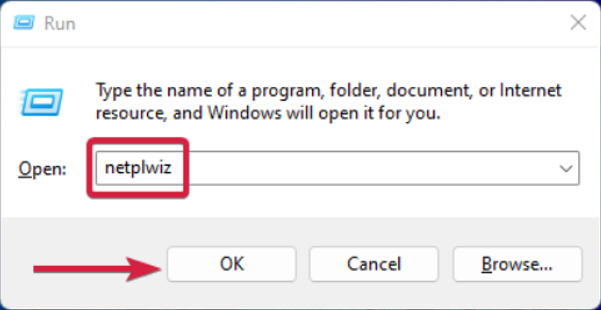
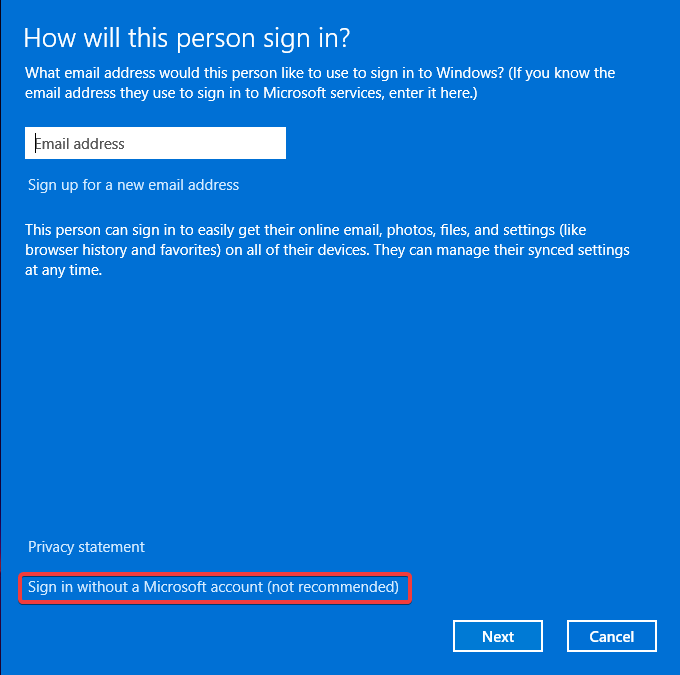
- Press Windows + R to launch the Run console, enter netplwiz in the text field, and click OK.

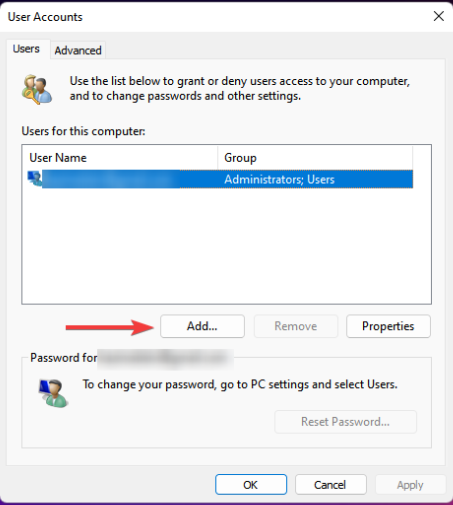
- Click Add in the User Accounts window.

- Select Sign in without a Microsoft account (not recommended).

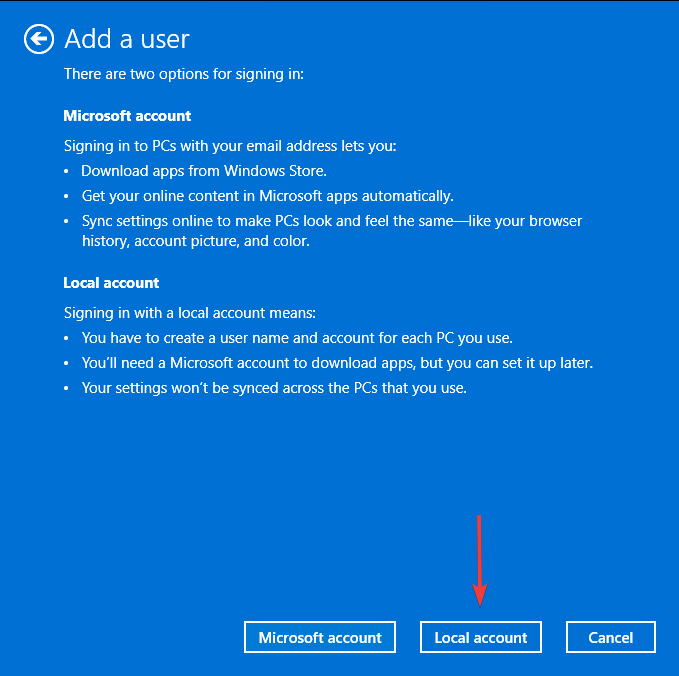
- Click on Local account button.

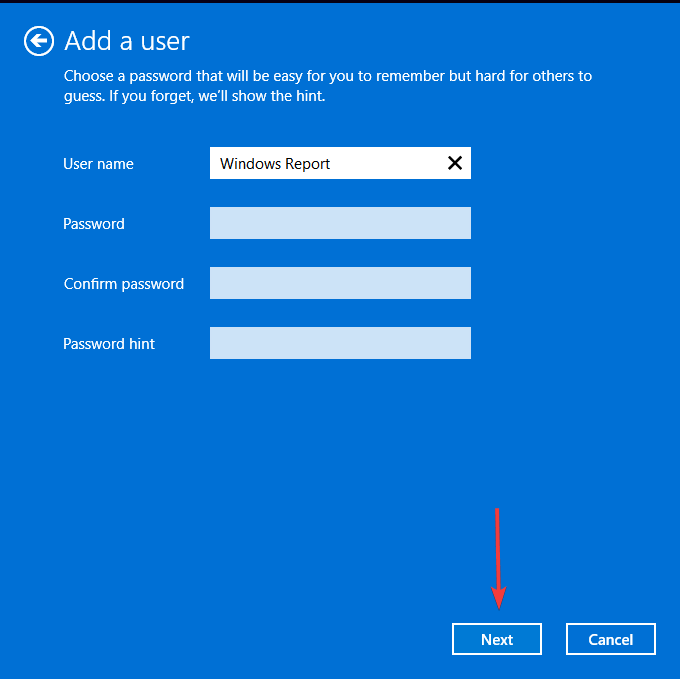
- Enter a username and password (optional) for the new user account, and a hint, in case you set a password. Once done, click on Next.

- Click on Finish to create the Local account.

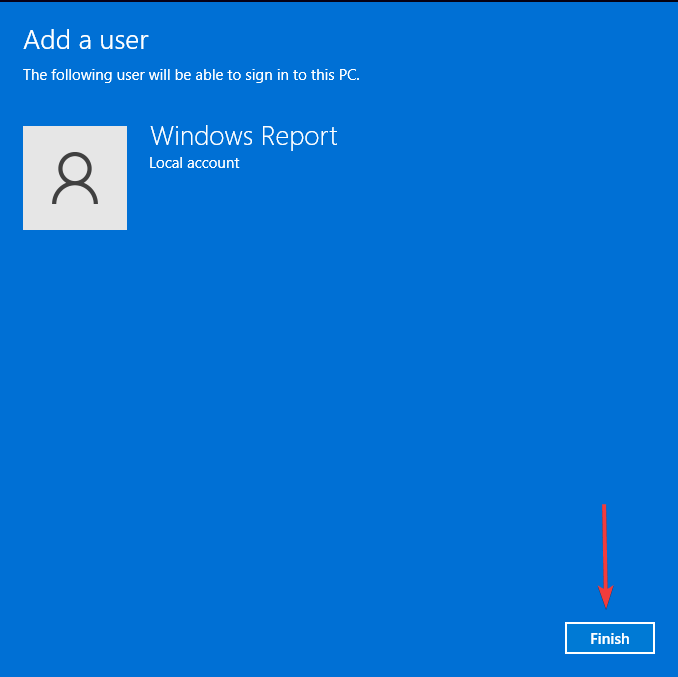
If the run as administrator option is not greyed out in this user profile, your previous account may have been corrupt. You can try to repair your user profile or copy your old profile to your new user account.
7. Perform clean boot
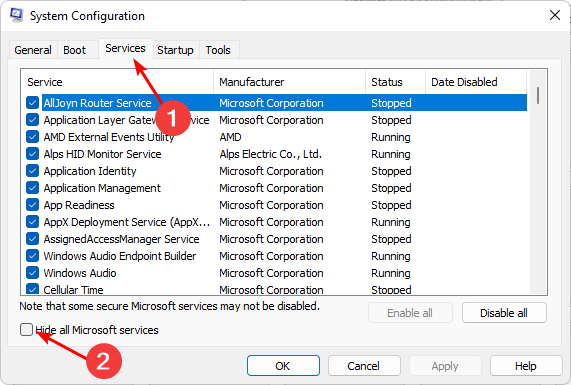
- Hit the Windows key, type msconfig, and open System Configuration.

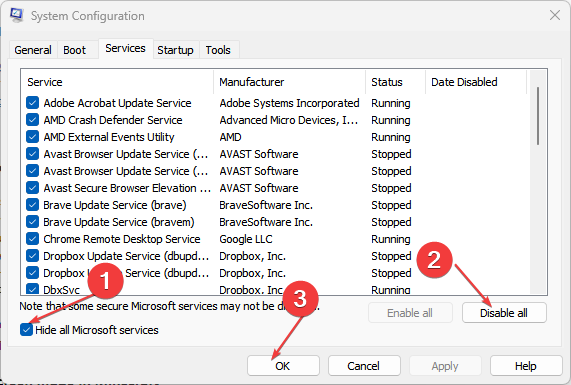
- Switch to the Services tab and select Hide all Microsoft services.

- Click on the Disable all button, then hit the Apply button to save the changes.
- Go back and click on the Startup tab, select Open Task Manager then click OK.
- In the Startup tab of the Task Manager, Disable all the Enabled startup items.

- Close Task Manager and restart your PC.


8. Perform an in-place upgrade
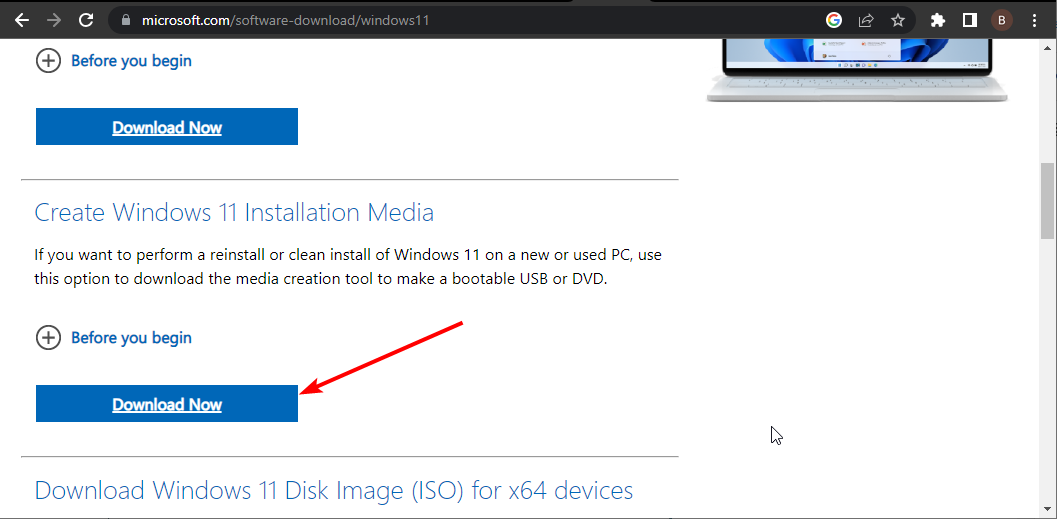
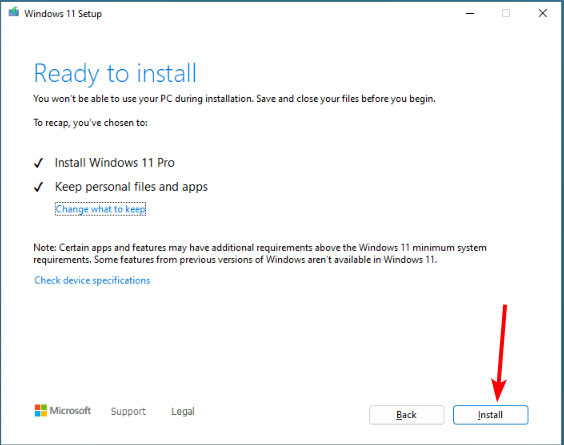
- Go to the official Windows 11 download website and click Download Now under the Create Windows 11 Installation Media section.

- Double-click the downloaded file to run it.

- Now, wait for Windows to prepare the setup and click Yes when prompted.
- Next, accept the Licence Agreement and wait while Windows downloads the required updates.
- Select between keeping your files and apps and removing them. Since you want to perform an in-place upgrade, leave the recommended settings, i.e., keep your files and apps.
- Now, click the Install button to start the in-place upgrade.

- Finally, wait for Windows to copy the necessary files to upgrade your device and restart your PC.
And if you’re able to get rid of the greyed button but nothing happens when you press run as administrator option, it is possible that your system administrator has limited access but we have several solutions to bypass this error.
Remember that an overzealous antivirus may sometimes limit your access level so if necessary, disable it temporarily and take note of any changes.
Apart from this option missing, you may find that the option to run as a different user option may also be missing. If so, feel free to check out our comprehensive article for tried and tested methods.
It’s a wrap from here but we’d love to get your feedback on which solution did it for you. Also, if you have any other solution not mentioned here but worked out for you, drop us a line below.

User forum
0 messages