Temporarily Disable Windows Defender: 4 Easy Ways to do it
There's a dedicated option in Windows Security
Key notes
- While it's recommended that you have Windows Defender turned on, users often need to temporarily disable the built-in antivirus.
- This becomes imperative when Windows Security is preventing a third-party app from running.
- To disable Windows Defender, run a quick command, modify the Registry, or reconfigure the policies.

Windows Defender is the built-in antivirus shipped alongside the OS and is a part of the default installation. While the antivirus delivers optimal performance and triggers minimal conflicts, you may often need to disable Windows Defender temporarily.
This is usually the case if you want a reliable third-party antivirus solution to take over or when Windows Security stops an application from running. So, let’s find out how you can temporarily disable Windows Security and the subsequent effects!
What happens if I disable Windows Defender?
When you disable Windows Defender temporarily or permanently, the PC is left unprotected unless another antivirus is installed and running. So, it’s not recommended that you turn off Windows Defender.
If you have to disable Windows Defender, here are a few tips and tricks that will keep the PC safe:
- Keep Internet activity to a minimum: We often become victims of phishing through emails, and the same medium is used to infect the PC with malware. So, it’s recommended that you don’t click on links in emails or even those on unreliable websites.
- Don’t download files or apps: Another preventive measure you can undertake to ensure security after disabling Windows Defender is not to download any files or apps. The ones on the Microsoft Store are safe, but be wary of others.
- Get another antivirus: When Windows Security conflicts with a program or process, installing another antivirus is best instead of disabling the former altogether.
How do I temporarily disable Windows Defender?
 Tip
Tip
1. Via Windows Security
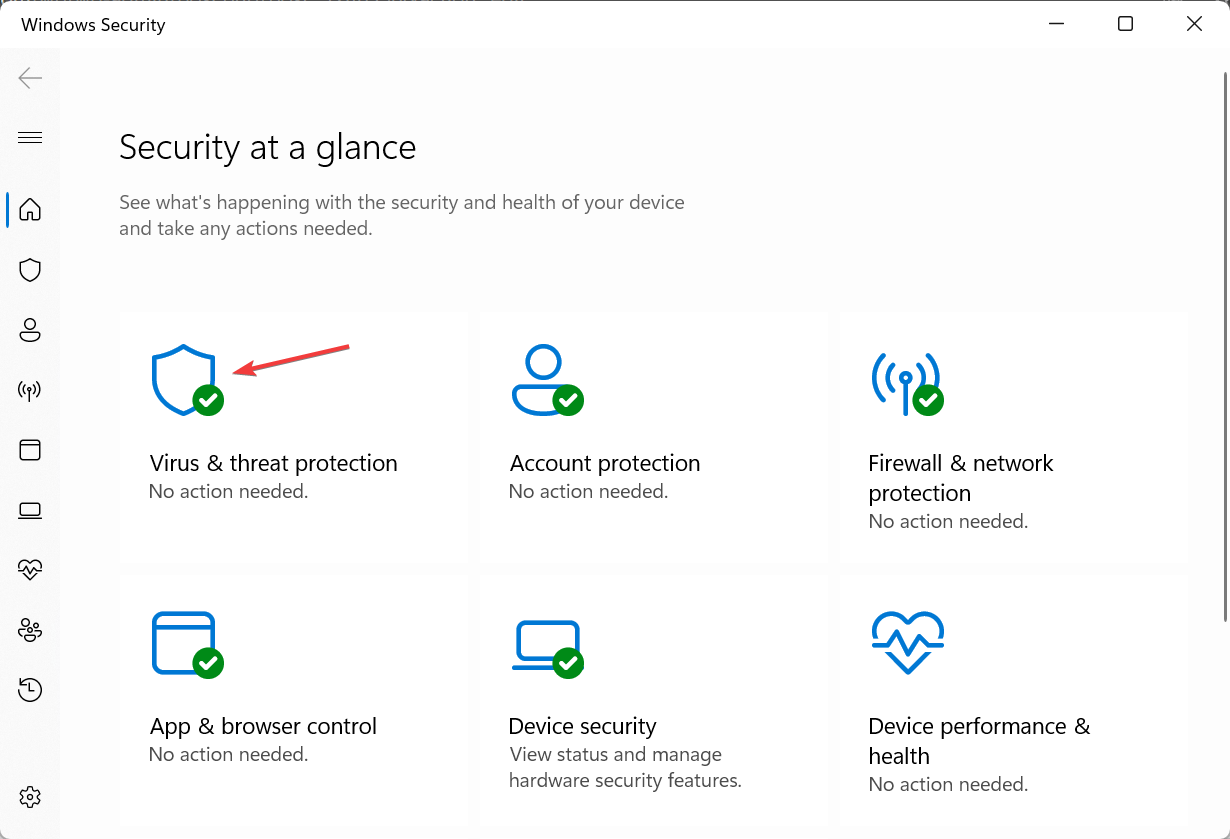
- Press Windows + S to open Search, type Windows Security in the text field, and click on the relevant result.
- Click on Virus & threat protection.
- Now, click on Manage settings under Virus & threat protection settings.
- Disable the toggle under Real-time protection.
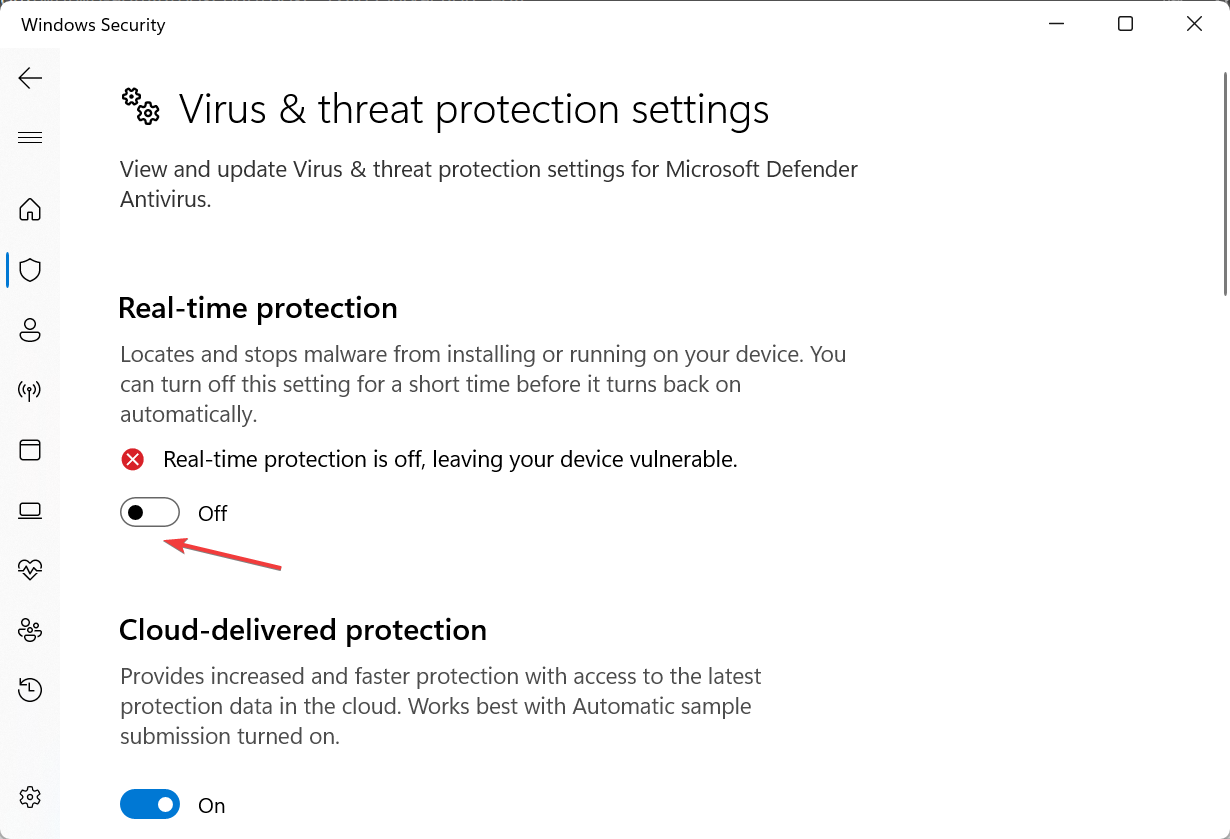
- Click Yes in the prompt to confirm the change.
That’s it! You can temporarily disable Windows Defender in all iterations of the OS via the built-in settings. And when you want to enable it, simply turn on the toggle for Real-time protection.
2. Through Command Prompt
- Press Windows + R to open Run, type powershell, and hit Ctrl + Shift + Enter.
- Click Yes in the UAC prompt.
- Now, paste the following command and hit Enter to disable Windows Defender:
Set-MpPreference -DisableRealtimeMonitoring $true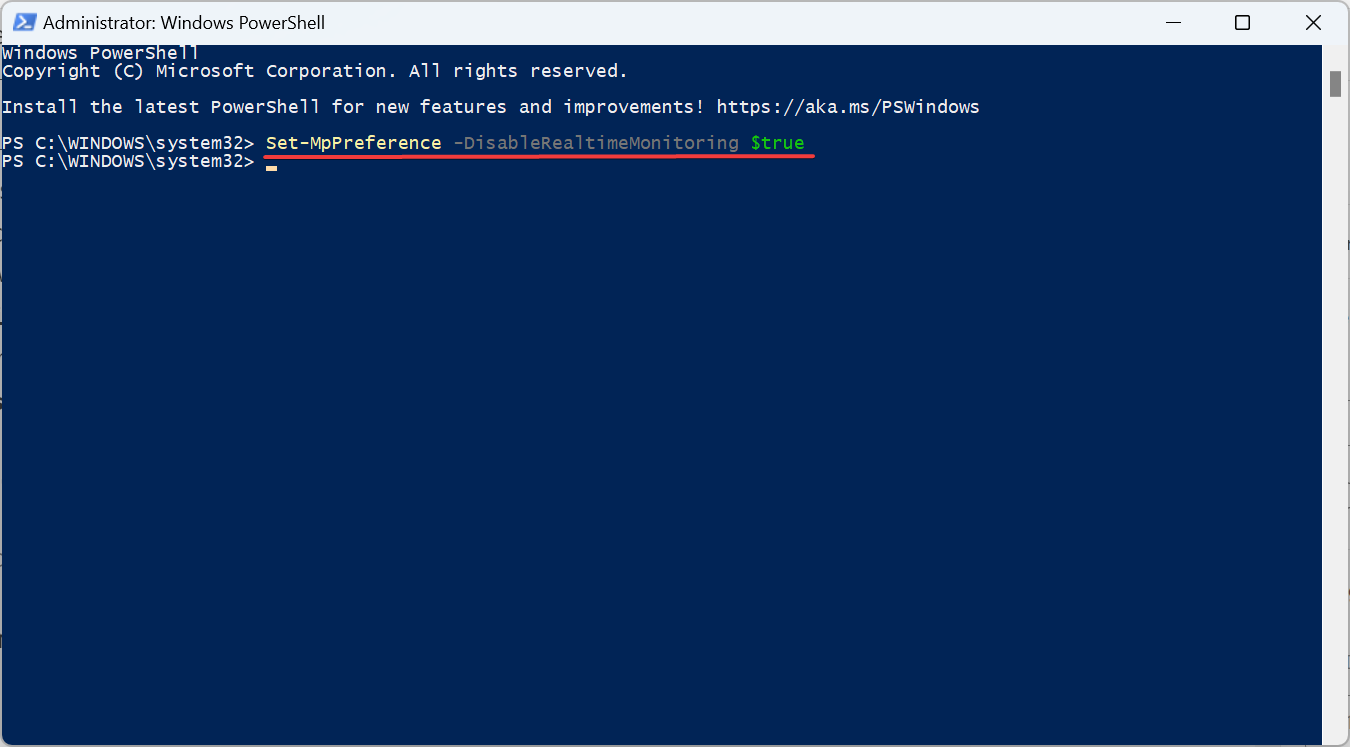
- To re-enable Windows Defender, run the following command:
Set-MpPreference -DisableRealtimeMonitoring $false
Another easy way to temporarily disable Windows Defender is using a PowerShell command. Remember, it doesn’t disable the antivirus altogether, but just Real-time monitoring.
3. Using the Registry Editor
- Press Windows + R to open Run, type regedit in the text field, and hit Enter.
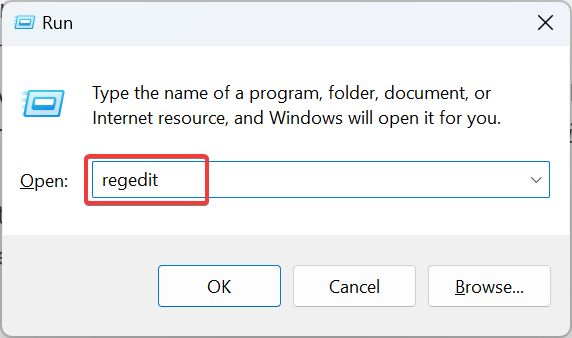
- Click Yes in the prompt that appears.
- Now, paste the following path in the address bar and hit Enter:
Computer\HKEY_LOCAL_MACHINE\SOFTWARE\Policies\Microsoft\Microsoft Defender - Right-click on the empty portion, hover the cursor over New, select DWORD (32-bit) value, and name it DisableAntiSpyware.
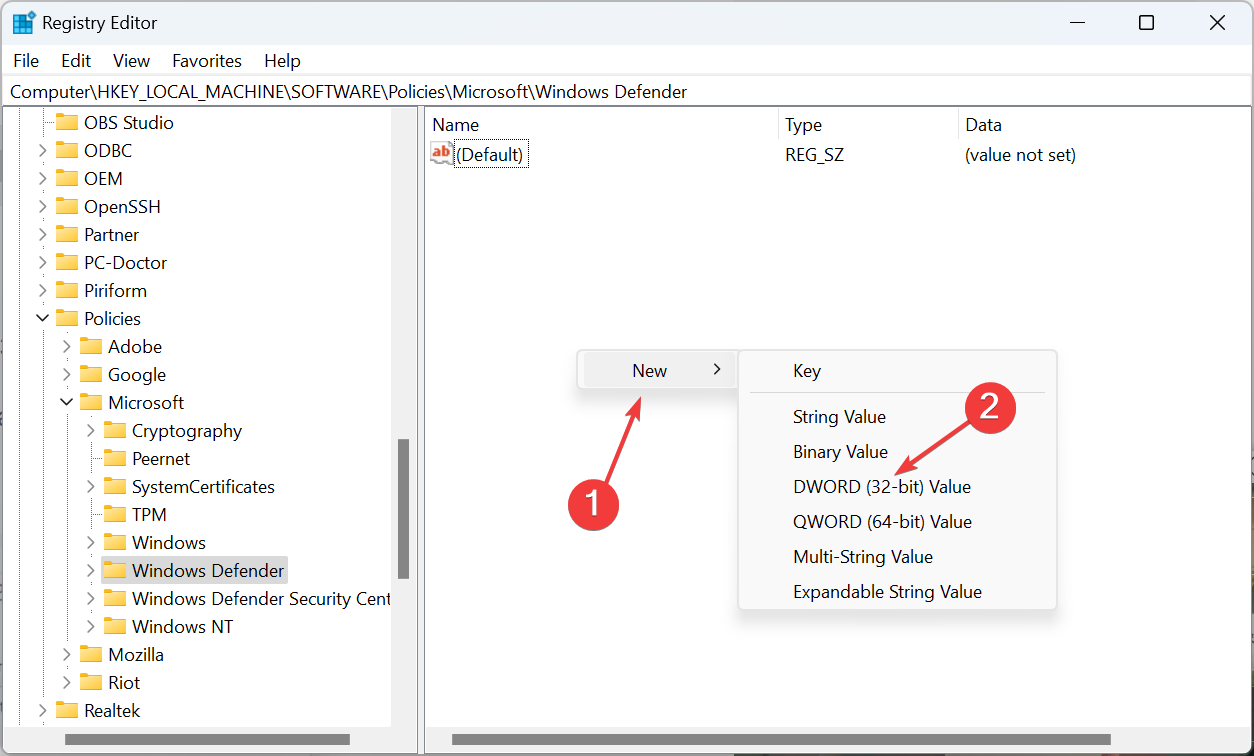
- Next, double-click the DWORD, set its Value data to 1, and click OK to save the changes.

- Finally, restart the computer for the changes to apply.
- To re-enable Windows Defender, change the Value data to 0 or delete the DisableAntiSpyware DWORD.
For those who want to disable Windows Defender using the Registry temporarily, there’s an easy method out there. Add and enable the DisableAntiSpyware DWORD, and you are good to go!
4. From Local Group Policy Editor
Tip
- Press Windows + R to open Run, type gpedit.msc in the text field, and click OK.
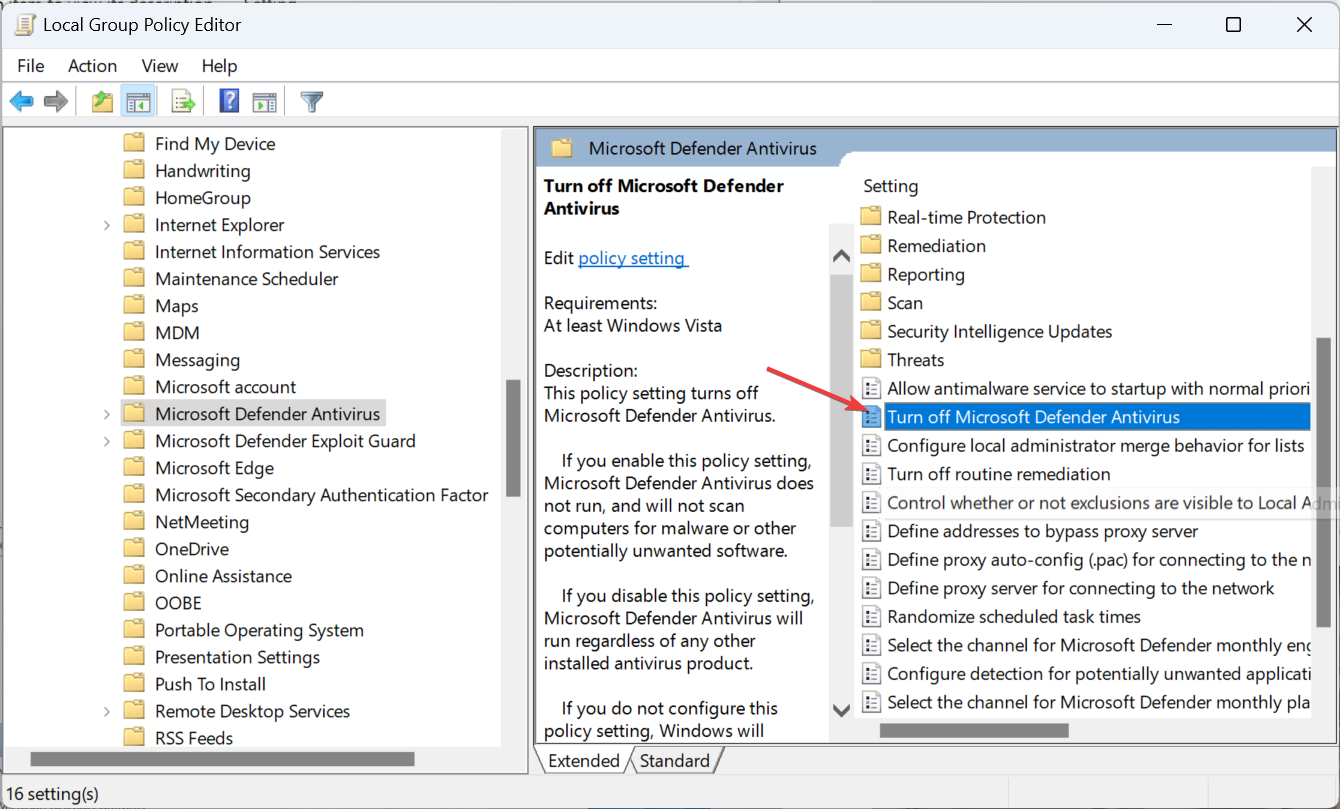
- Under Computer Configuration, expand Administrative Templates, select Windows Components, and then choose Windows Defender Antivirus.
- Now, double-click the Turn off Microsoft Defender Antivirus policy on the right.
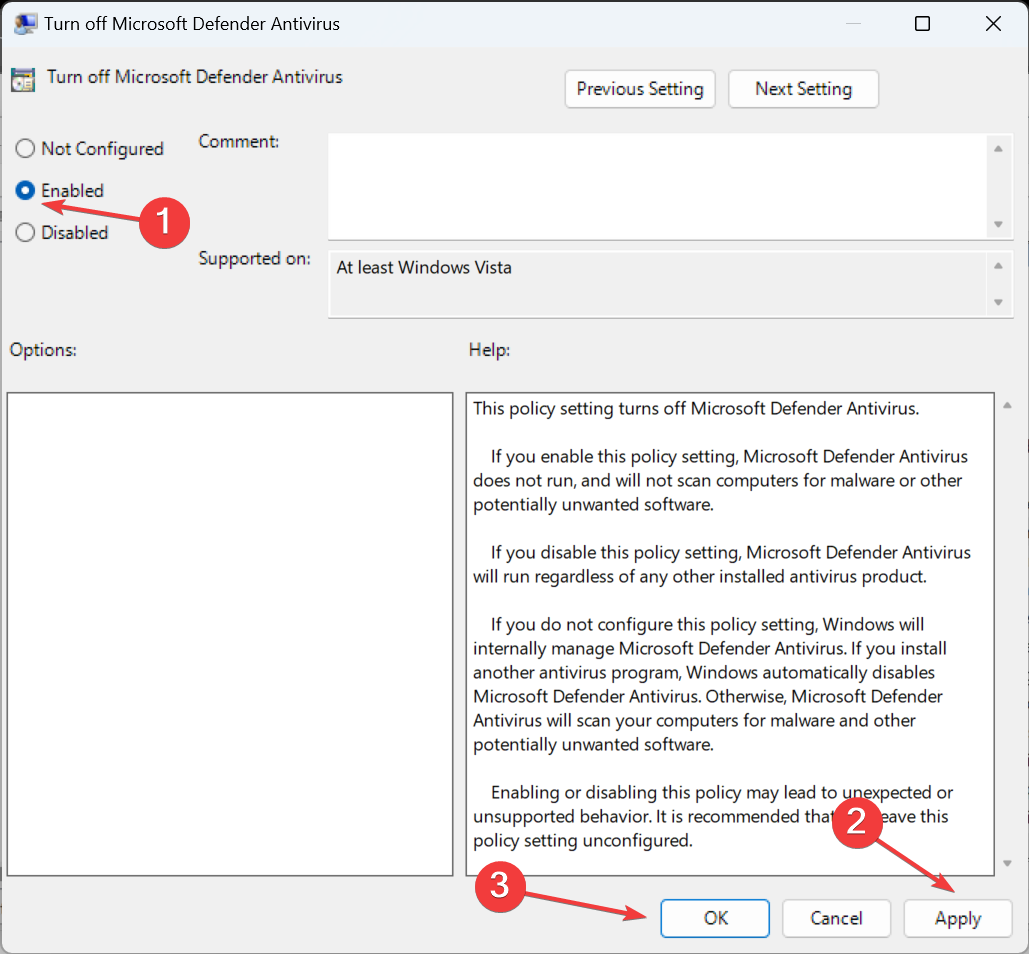
- Select Enabled and then click on Apply and OK to save the changes.
- Restart the computer for the changes to come into effect.
- To turn on Windows Defender, set the Turn off Microsoft Defender Antivirus policy as Not configured or Disabled.
That’s it! If you prefer changing the Local Group Policy Editor, temporarily disable Windows Defender.
In case you are not able to disable real-time protection on Windows Defender and want to know the reasons, read this guide. And find out what to do if Tamper Protection is not turning on.
Also, while you can disable Windows Defender in Windows 11 via AutoRuns, we recommend against it since several simpler methods are available.
Before you leave, find out the best security settings in Windows for a secure OS experience.
For any queries or to share what prompted you to disable Windows Defender, comment below.
Read our disclosure page to find out how can you help Windows Report sustain the editorial team. Read more


Improve this guide


User forum
0 messages