Here's How to Fix Keyboard Driver Error in Windows 10
Repair your keyboard driver error using this simple guide
7 min. read
Updated on
Read our disclosure page to find out how can you help Windows Report sustain the editorial team. Read more
Key notes
- Corrupted keyboard driver issues aren’t uncommon, so let us list the quickest solutions to apply.
- You may try to reinstall the keyboard drivers or take your time to check the keyboard connection.
- If you want to keep your keyboard neatly tucked away, pick one of these great keyboard sleeves.
- When encountering similar issues, try some of the workarounds in our Computer Peripherals Hub.

A keyboard driver error can make your keyboard inoperable, which leaves you having to struggle using mouse-only operations.
Windows 10, however, offers a few quick solutions you can use through the Device Manager, but you need to verify a few things first about your keyboard.
To resolve the keyboard driver errors in Windows 10, below are a few preliminary checks and quick fixes, as well as solutions that you can use going forward.
How can I fix a keyboard driver error in Windows 10?
1. Reinstall the keyboard drivers
If your keyboard isn’t working we suggest you reinstall your keyboard driver manually from Device Manager. To reinstall a certain driver you just need to follow these steps:
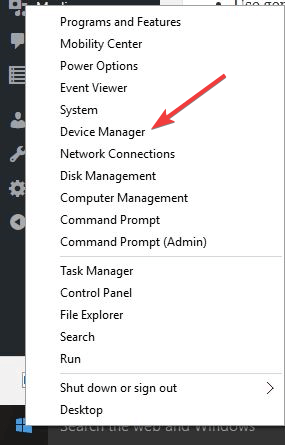
- Right-click the Start button and choose Device Manager from Control Panel.
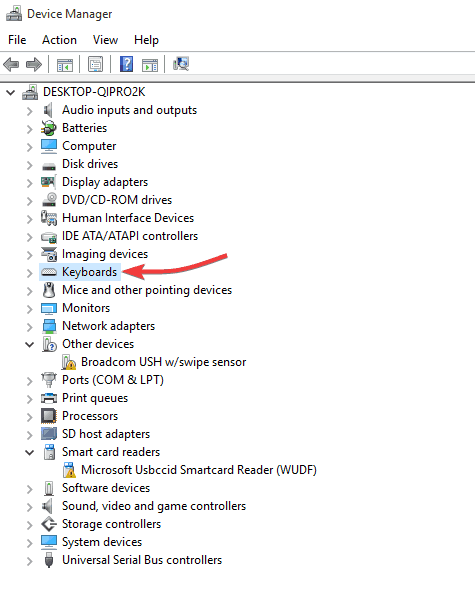
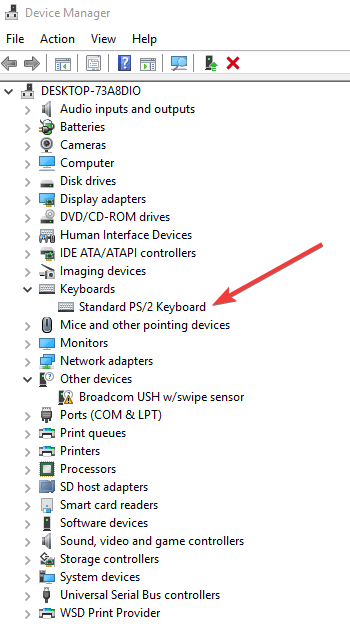
- Go to the Keyboards section and expand it.
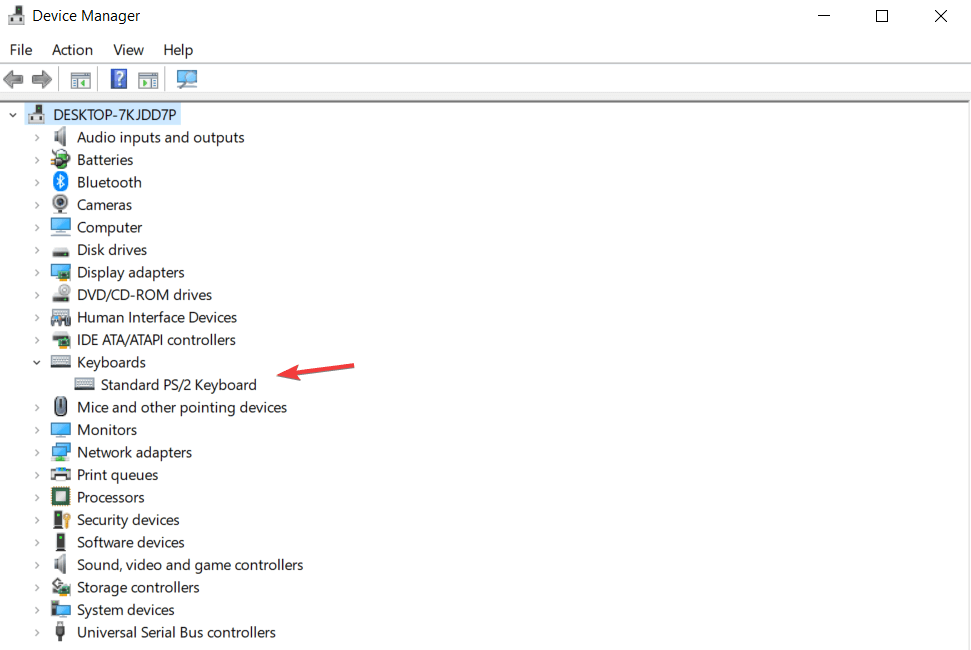
3. Locate your keyboard, right click it and choose Uninstall from the menu.

4. An window confirmation will appear and you just have to click OK.
After the keyboard driver is removed you need to restart your computer. After your PC restarts the default keyboard driver will be installed and your keyboard should start working.
Automatically update keyboard drivers using third-party application
If you want to keep your PC and all its components safe and working flawlessly, you need to use third-party programs to update your keyboard drivers.
Needless to say, downloading and installing the wrong system drivers will cause permanent damage to your system, so we suggest you try a third-party tool.
Instead of trying the workarounds, a professional driver updater will reinstall your keyboard driver or, even better, all your corrupted drivers. They all deserve this special treatment since no driver problem can remain unnoticed for too long.
2. Examine your keyboard to ensure it isn’t damaged physically

Keyboard drivers (and other drivers generally) can cause issues, and sometimes the simplest of things can cause such malfunctions.
If for example, liquid spilled into the keyboard, you may have to replace it altogether. Another thing to examine is the cord of your keyboard to ensure no wires have been exposed.
If yours is a wireless keyboard, change the batteries to see if the corrupted keyboard driver issue disappears.
3. Check the keyboard connection
Before you resolve to find solutions for the corrupted keyboard driver, check that your keyboard is connected properly. If not, the driver probably didn’t load.
Follow the keyboard cable and ensure it is connected to the correct port.
USB keyboards have to be connected to USB ports on your PC, while the round PS/2 port keyboard should be connected to their corresponding port labeled with a keyboard icon or picture.
For wireless keyboards, check manufacturer instructions on how to connect them.
4. Check installation of Windows driver
There is a standard Windows keyboard driver that comes packaged with Windows operating system, so there’s no need for installation CDs or more downloads.
For the best driver installation for your keyboard, uninstall the previous or original driver and let Windows reinstall it once you restart your computer.
You can do this through Device Manager using mouse-only navigation.
5. Use proprietary software
There are keyboards that require proprietary drivers that are Windows-based so as to access any advanced keyboard features like hotkeys and media controls.
These drivers come with the CD that accompanied your keyboard, but you can also get them from the brand manufacturer’s official website.
Once the driver installation program is in place, run the program based on the given instructions from the manufacturer’s website.
6. Use Device Manager to update existing drivers
- Right-click Start.
- Select Device Manager.
- Expand the Keyboards category.
- Right-click the keyboard you want to repair.
- Select Update driver software and follow the prompts.
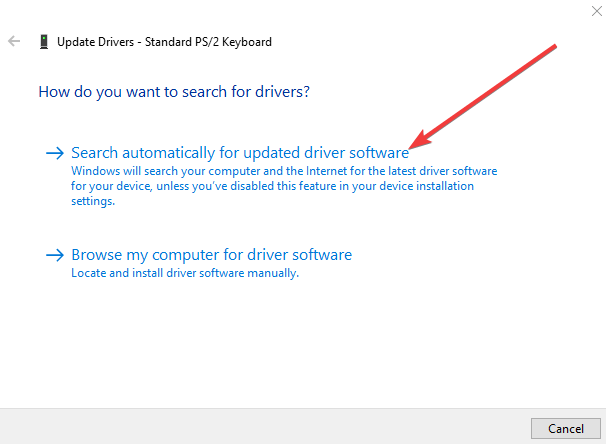
- A new window will appear asking How do you want to search for driver software?
- Select Search automatically for updated driver software – Windows will search online for an update to your keyboard. If one is available it will apply the update to your keyboard.
- Reboot to complete the change.
Oftentimes, the keyboard driver, if incorrect or outdated, can be corrupted. You can update it to the next version and see if it resolves the issue.
7. Use a Command Prompt
- Open the on-screen keyboard so as to type some commands below.
- Click Start.
- Using the on-screen keyboard, type This PC and wait for it to appear on the list.
- Right-click This PC.
- Select Properties.
- In the System window, click the Device Manager link.
- Find Keyboards and click to expand the list.
- Find Standard PS/2 keyboard – it may have an exclamation point next to it which indicates an error.
- Double left-click Standard PS/2 keyboard.
- A window with the title Standard PS/2 keyboard properties will display.
- Under General tab, it will show There’s a problem with the keyboard. Normal functioning shows The device is working properly.
- Delete the keyboard device.
- Re-detect it in the Device Manager.
- Click the Keyboards category to expand the list.
- Left-click Standard PS/2 Keyboard to highlight it.
- Press DEL on your keyboard to delete it. Windows will warn you that You are about to remove the device from the system.
- Click OK. If it asks whether you want to remove the driver, click Yes.
- Go to the Device Manager window, at the top.
- Click Action.
- Select Scan for hardware changes.
- Your keyboard will re-detect itself. Try and update it using Device Manager.
- Right-click Start.
- Select Device Manager.
- Expand the Keyboards category.
- Right-click the keyboard you want to repair.
- Select Update driver software and follow the prompts
- A new window will appear asking How do you want to search for driver software?
- Select Search automatically for updated driver software – Windows will search online for an update to your keyboard. If one is available it will apply the update to your keyboard.
- Reboot to complete the change.
- If Windows reports that The best driver software for your device is already installed, go to the next step.
- Open an administrative command prompt by typing CMD in the search bar.
- Right-click Command Prompt and select Run as Administrator.
- Use your mouse to highlight this text:
reg add HKEY_LOCAL_MACHINESYSTEMCurrentControlSetServicesi8042prt" /v Start /t REG_DWORD /d 1 /f - Right-click over top of the above-highlighted text.
- Select Copy from the dialogue menu.
- Right-click in the middle of the command prompt window.
- Select Paste.
- The text you copied should output to the command line.
- Restart your computer to force the keyboard to detect itself again.
- Check if the keyboard now works.
If you’re having trouble accessing Command Prompt as an admin, then you better take a closer look at this handy guide.
If the keyboard isn’t working, a simple registry edit can resolve the issue. To do this:
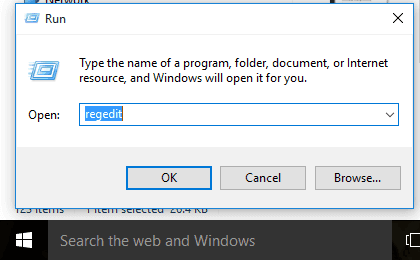
- Right-click Start.
- Select Run.
- Type regedit and press Enter.
- Click Edit.
- Click Find.
- Type kbdclass and press Enter.
- Find any key that has the name UpperFilters and Data of.
- If you find the key, double click on it.
- Edit the text to include only kbdclass and press OK.
- Continue searching until you find and edit all UpperFilters keys. All of these should have a data file that includes only kbdclass
- Close Registry Editor.
- Right-click Start.
- Select Device Manager.
- Click Keyboards to expand the list.
- Find your keyboard and uninstall it.
- Restart your computer and see if after this your keyboard works.
If none of these solutions work, your keyboard is probably damaged so you can replace it.
8. Hardware and devices troubleshooter
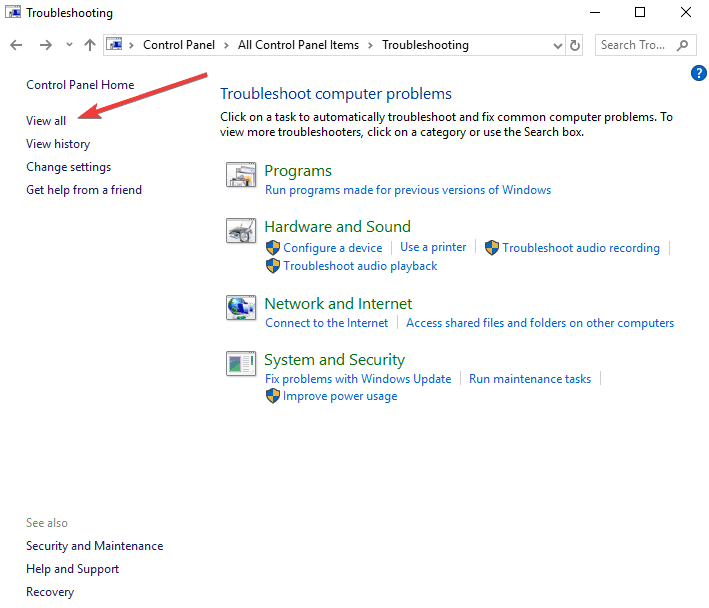
- Open Control Panel.
- Click Troubleshooting.
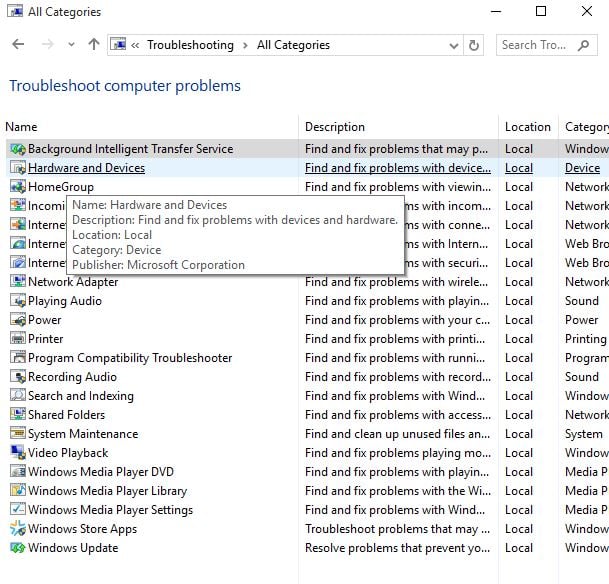
- Select View all.
- Click Hardware and devices troubleshooter and follow the prompts.
This is a built-in tool to detect and fix the most incorrect settings and errors that cause issues with hardware. To do this, complete the above procedure.
9. Install keyboard drivers in compatibility mode
- Right-click on the setup file of the driver.
- Select the Compatibility Tab.
- Check the box next to Run this program in Compatibility mode.
- Select the operating system accordingly from the drop-down list.
- Let the driver install and check the functionality.
Were any of these solutions helpful? They are useful when you intend to update the HID keyboard device driver, uninstall the keyboard driver, or solve pretty much any keyboard driver error.
Let us know in the comments section below which tip worked for you.




User forum
0 messages