FULL FIX: Exe files deleting themselves on Windows 10/11
6 min. read
Updated on
Read our disclosure page to find out how can you help Windows Report sustain the editorial team. Read more
Key notes
- Many users reported that exe files keep disappearing from their PC for no apparent reason.
- The missing executable files case is pretty strange but most evidence point to the antivirus solution.
- If you want to learn more about fixing executable files, visit our EXE Troubleshooting page.
- Helping you fix your PC is our main objective so check our Troubleshooting Hub for solutions.
Many users reported that exe files keep deleting themselves on their PC. This is a strange problem, and in today’s article we’ll show you how to fix this issue.
There are many issues with exe files that can appear on your PC, and speaking of exe issues, here are some common problems that users reported:
- Exe files automatically deleted, being deleted, deleted after download, disappearing, missing, getting deleted – These are some common problems with exe files, and in most cases, you can fix them simply by checking your antivirus settings.
- Exe file disappears after double clicking, delete itself – Can appear if you don’t have administrative privileges. Run the exe file as an administrator and check if that helps.
- Windows 10 deletes exe files – Can appear due to certain glitches. Switch to Safe Mode and check if the problem is still there.
What can I do if the Exe files keep deleting themselves?
- Check your antivirus
- Try using Safe Mode
- Try running the application as an administrator
- Create a new user account
- Use a different archiver
- Install the missing updates
- Perform a Clean Boot
- Perform an in-place upgrade
1. Check your antivirus
If you’re having this problem, be sure to scan your PC for malware. Sometimes malware can infect your PC and start removing exe files on its own.
To be sure that your PC is not infected, perform a full system scan.
If your PC isn’t infected, the problem might be your antivirus settings. If your antivirus keeps removing certain exe files, add that file to the list of exceptions and check if that helps.
Alternatively, you can try disabling certain antivirus features or even disable your antivirus altogether.
If that doesn’t work, perhaps you should uninstall your third-party antivirus. Even if you choose to do so, you’ll still be protected by Windows Defender, so there’s no need to worry about your safety.
Users reported problems with Norton and Malwarebytes, but bear in mind that other antivirus tools can cause this problem to appear as well.
If removing the antivirus solves the problem, perhaps you should consider switching to a different antivirus solution.
There are many great antivirus tools on the market, but if you’re looking for a reliable security tool that won’t interfere with your system, we recommend that you try an antivirus software with low CPU usage.
Modern antivirus are configured to keep you protected in real-time while allowing your PC to work optimally so you can carry out your daily tasks with no issue.
2. Try using Safe Mode
- Open the Settings app by using the Windows Key + I shortcut.
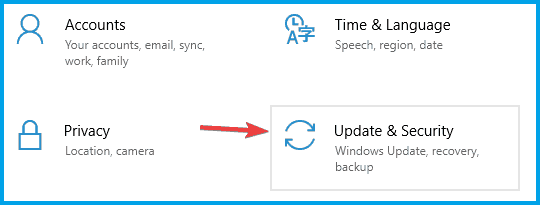
- Head over to the Update & Security section.
- Select Recovery from the left pane and click the Restart now button from the right pane.
- Select Troubleshoot, then Advanced options and Startup Settings. Now click the Restart button.
- You should now see a list of options. Select the version of Safe Mode you want to use by pressing the corresponding keyboard key.
Note: If the issue doesn’t appear, you can start troubleshooting it. Some users are suggesting to copy or extract the file while you’re in Safe Mode, so you can do that as well.
3. Try running the application as an administrator
- Locate the problematic application.
- Right-click the exe file and choose Run as administrator from the menu.
Note: If this solves your problem, you’ll need to repeat this process every time you want to run that exe file.
Force the application to run with administrative privileges
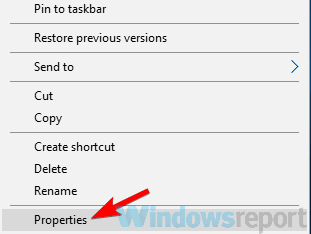
- Right-click the problematic exe file and choose Properties from the menu.
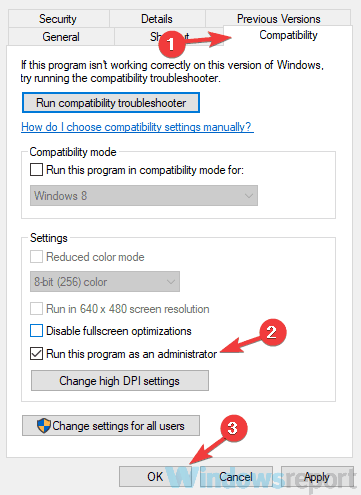
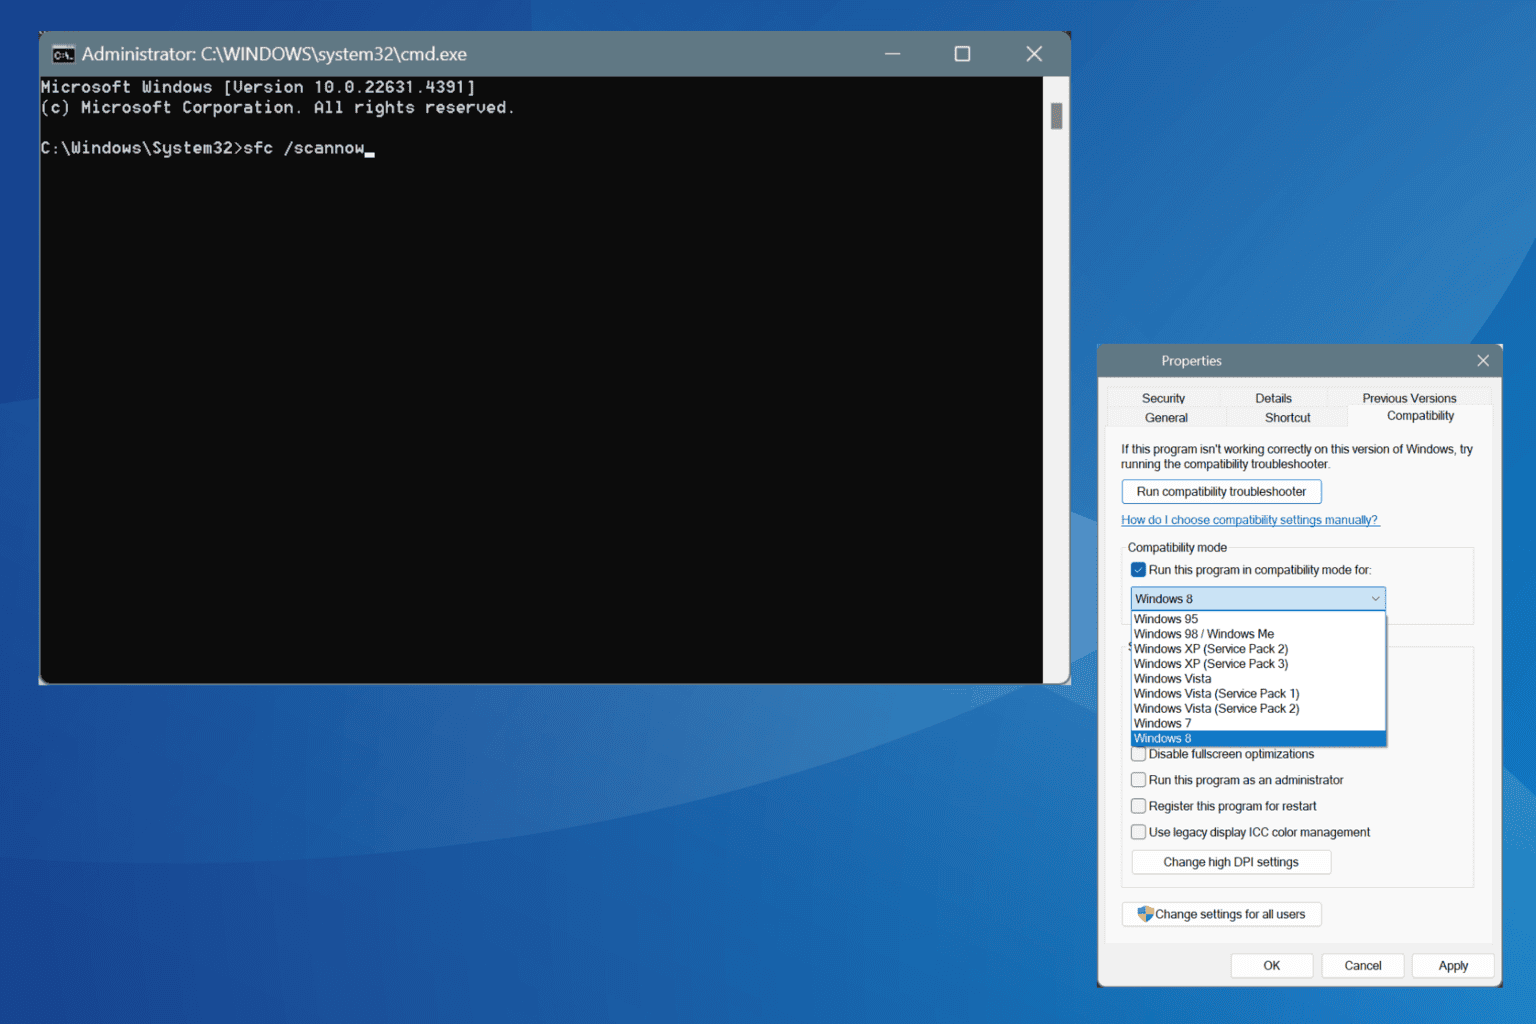
- Head over to the Compatibility tab and check Run this program as an administrator option. Click Apply and OK to save the changes.
4. Create a new user account
- Open the Settings app and navigate to the Accounts section.
- Select Family & other people from the left pane and choose Add someone else to this PC from the right pane.
- Select I don’t have this person’s sign-in information, then Add a user without a Microsoft account.
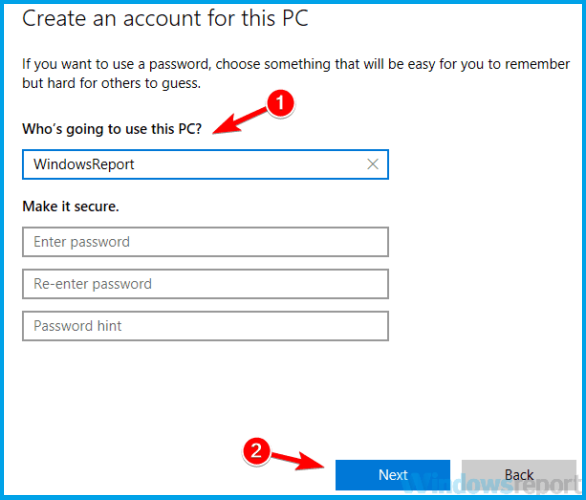
- Enter the username for the new account and click Next.
- Switch to the new account and check if the problem is resolved.
Note: If the issue isn’t present on the new account, move your personal files to it and start using it instead of your old account.
5. Use a different file archiver
Some users reported that exe files are deleting themselves when you extract them from a zip archive.
This problem usually appears when using a built-in archiver tool in Windows, and in order to avoid it, users are recommending to switch to a third-party archiver such as WinZip.
This is probably one of the most popular tools on the planet so you probably know a lot of things about it. It features a long list of different archive types and it’s the quickest archiver you can find.
But few probably know that WinZip also protects your data with high-level encryption and it has a lot of other advanced options.
This awesome software has direct integration with your cloud storage accounts on Dropbox, Google Drive, MediaFire, OneDrive, and others so you can send large files quickly.
6. Install the missing updates
- Open the Settings app and navigate to the Update & Security section.
- Click the Check for updates button.
7. Perform a Clean Boot
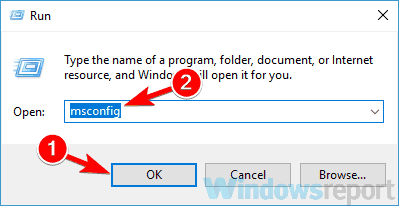
- Press the Windows Key + R combination, type msconfig, and press Enter.
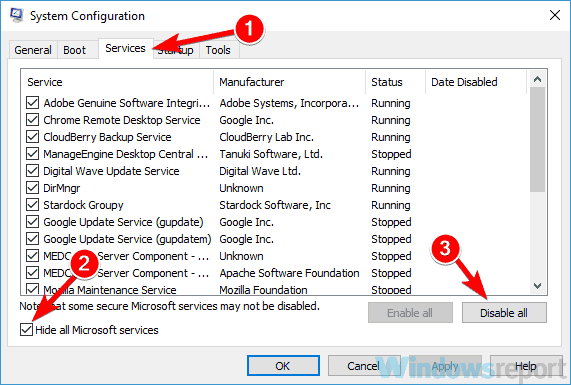
- Navigate to the Services tab and check the Hide all Microsoft services box. Click the Disable all button to disable all available services.
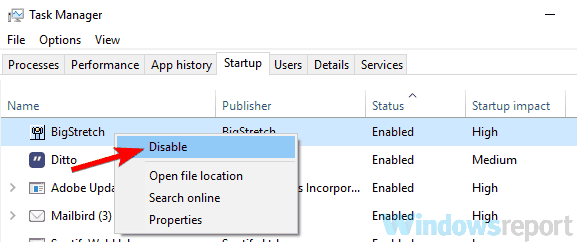
- Navigate to the Startup tab and click Open Task Manager.
- Right-click the first application on the list and pick Disable from the menu. Do this for all applications on the list.
- Once you disable all startup applications, go back to the System Configuration window.
- Click Apply, OK, and restart your PC.
Note: If the problem is fixed, it’s certain that one of the disabled applications or services was causing the issue. To find the root cause, enable disabled services and applications one by one or in groups.
Keep in mind that you’ll need to restart your PC after enabling an application or service in order to apply changes.
8. Perform an in-place upgrade
- Download and run the Media Creation Tool.
- Select Upgrade this PC now and click Next.
- Choose Download and install updates and click Next.
- Follow the instructions on the screen. Once you reach Ready to install screen select Change what to keep.
- Select Keep personal files and apps option and click Next.
- Follow the instructions on the screen to complete the upgrade.
Note: After you complete the upgrade, you’ll have a fresh installation of Windows installed, and all your files and applications should remain intact. If the problem is still there, your next step would be to perform a Windows 10 reset.
Exe files that keep deleting themselves can be a problem, but we hope that you managed to fix this problem with one of our solutions.
[wl_navigator]






User forum
0 messages