Fix: SYSTEM PTE MISUSE BSOD error in Windows 10
Key notes
- SYSTEM_PTE_MISUSE is a Blue Screen of Death error, and it’s often caused by file corruption.
- Keeping Windows and your drivers up to date can prevent this and similar issues.
- In some instances, there might be a problem with your RAM causing this inconvenience.

SYSTEM_PTE_MISUSE and other Blue Screen of Death errors can cause a lot of issues on your PC, therefore it’s important to fix them as soon as possible.
The main problem is that a BSOD will force your computer to crash resulting in losing any unsaved work and data and making your PC unstable to use.
If the issue keeps appearing, it might cause permanent damage along the way, therefore you need to find a way to fix it.
We’ve put together a list consisting of solutions for all these problems below. Make sure you follow every step and you will solve the error in no time.
Why does the SYSTEM PTE MISUSE error appear?
In most cases, these types of errors appear if you have an issue with certain files, such as file corruption or incompatible drivers. Incorrect BIOS settings can also lead to this problem.
Hover, the issue can occur if your hardware is faulty, so you might have to replace it to fix it.
Is SYSTEM PTE MISUSE error dangerous?
This depends on the cause of the issue. If it is software-related, you’ll lose unsaved work whenever this error appears since you’ll be forced to restart your PC.
On the other hand, if the cause is related to your hardware, your computer will eventually stop working if you don’t find and replace the problematic component.
How can I fix the SYSTEM PTE MISUSE BSOD error?
- Run the Hardware Troubleshooter
- Use a third-party BSOD fixer
- Run the SFC scan
- Update Windows 10 and all your drivers
- Run DISM
- Remove your antivirus software
- Use Safe Mode
- Overclock or underclock your RAM
- Check your hardware and clean your PC from dust
- Fix SYSTEM PTE MISUSE on Windows 11
1. Run the Hardware troubleshooter
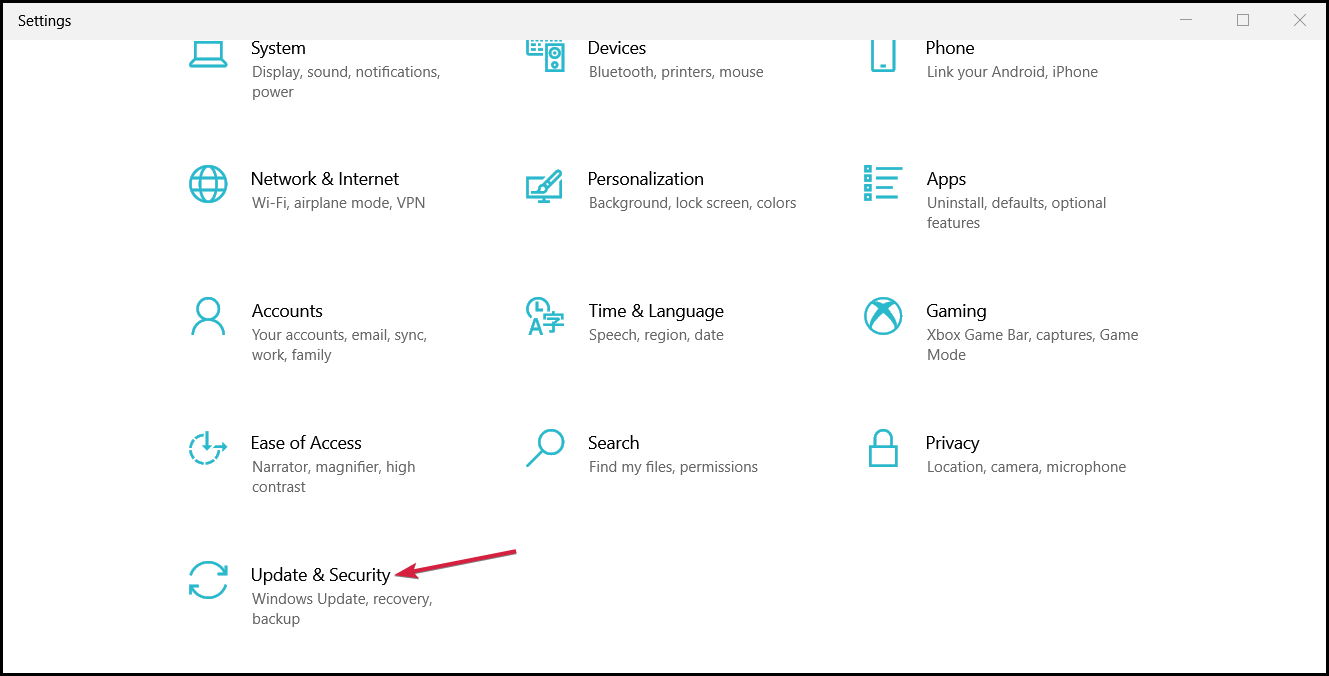
- Open the Settings app and go to Update & Security section.
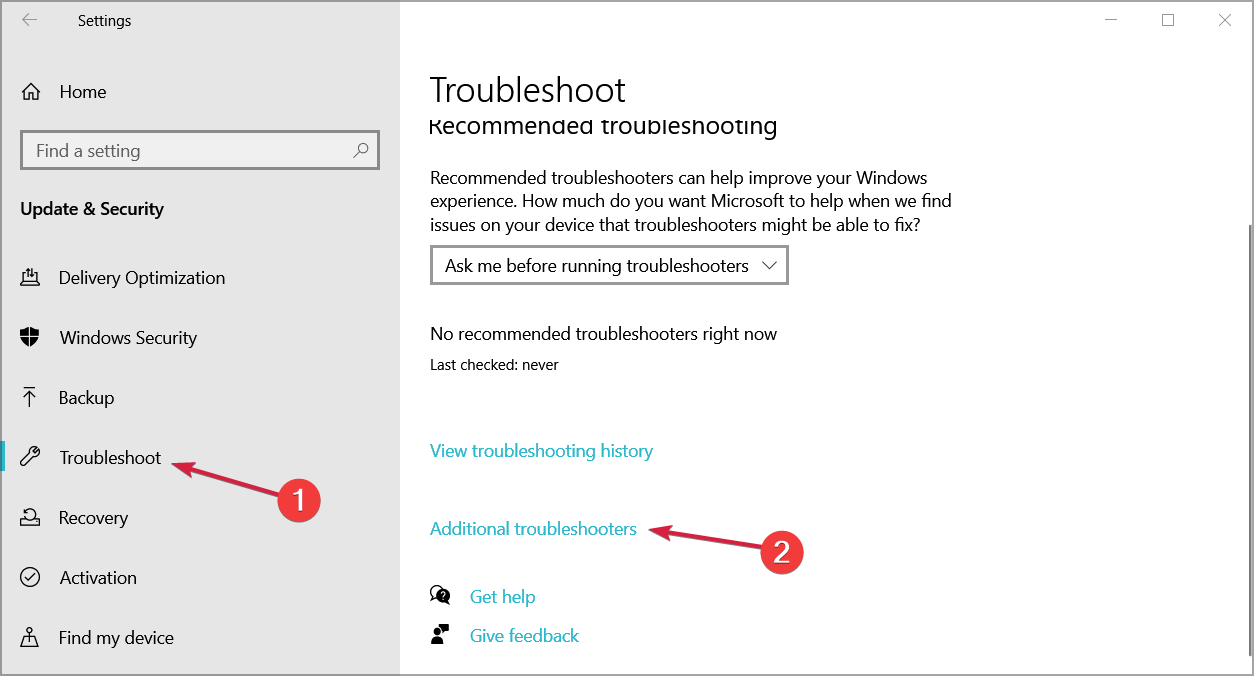
- Select Troubleshoot from the menu on the left. Now select Additional troubleshooters.
- Select the desired troubleshooter and click the Run thetroubleshooter.
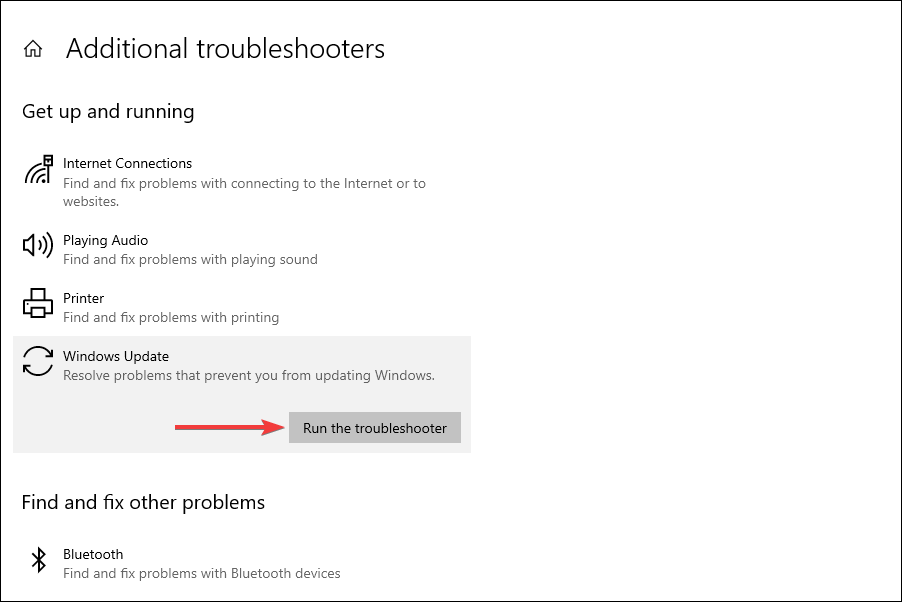
- Follow the instructions on the screen to complete the troubleshooter.
2. Use a third-party BSOD fixer
The simplest way to solve these error messages is by installing software specialized in restoring crucial OS files. The program will ensure that your PC is running properly with no bugs.
3. Run the SFC scan
- Right-click on the Start Menu button, and select Windows PowerShell (Admin).
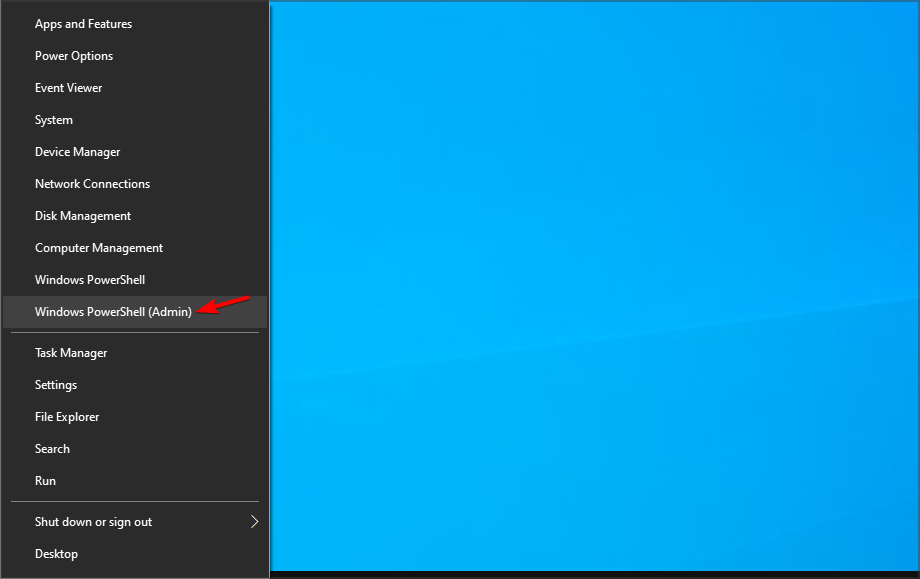
- Enter the following line and run it:
sfc/scannow
- Wait until the process is done (it may take a while).
- If the solution is found, it will automatically be applied.
- Now, close the PowerShell and restart your computer.
Few users reported that SFC /scannow stops for some reason, but there are ways to fix that issue.
4. Update Windows 10 and all your drivers
➡ Update Windows
- Press Windows key + I to open the Settings app.
- Navigate to Update & Security section.
- Now check for available updates and download them.

➡ Update drivers
- Visit your hardware manufactuer’s website.
- Go to the Drivers section.

- Locate your model and download the latest driver for it.

- Repeat this for all devices whose drivers you want to update.
To make this process faster, you might want to consider using dedicated driver updater software.
5. Run DISM
➡ Standard way
- Right-click Start and open Windows PowerShell (Admin).
- Paste the following command and press Enter:
DISM /Online /Cleanup-Image /RestoreHealth
- Wait until the scan is finished.
- Restart your computer and try updating again.
➡ With the Windows installation media
- Insert your Windows installation media.
- Right-click the Start button and choose the Windows PowerShell (Admin).
- Now, type the following command and press Enter:
DISM/Online/Cleanup-Image/RestoreHealth/source:WIM:X:SourcesInstall.wim:1/LimitAccess
- Make sure to change an X value with the letter of the mounted drive with Windows 10 installation.
- After the procedure is finished, restart your computer.
6. Remove your antivirus software
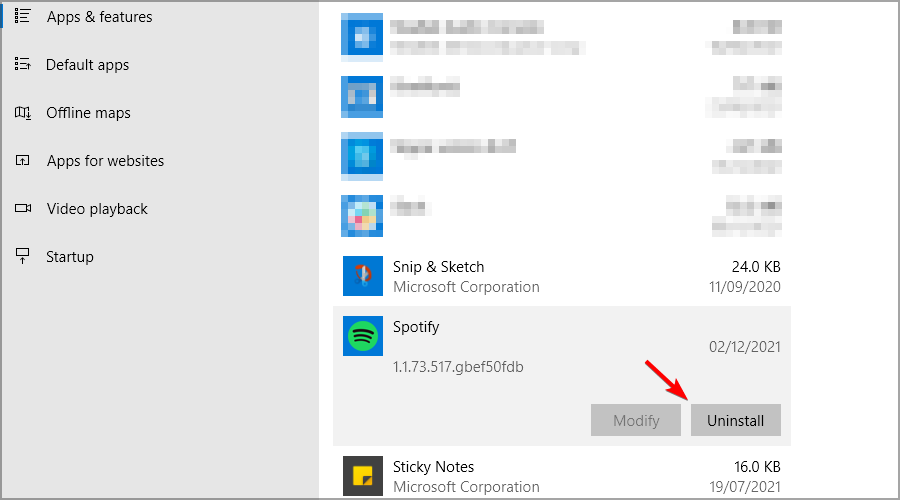
- Press Windows key + I to open the Settings app.
- Navigate to the Apps section.

- Select your antivirus software and click on Uninstall.
If this solution fixes the problem, you might want to consider switching to different antivirus software to avoid future issues.
7. Use Safe Mode
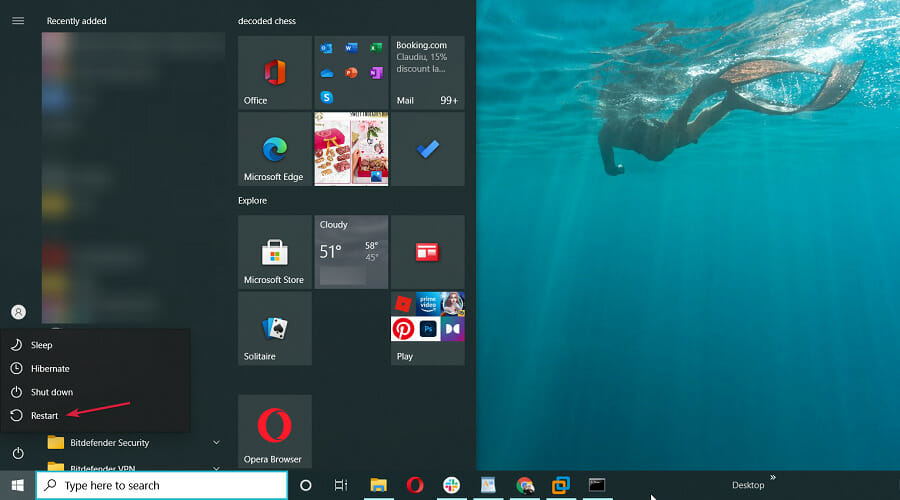
- Hold the Shift key on your keyboard and click the Restart button.
- Choose Troubleshoot.

- Navigate to Advanced options.

- Pick the Startup Settings.
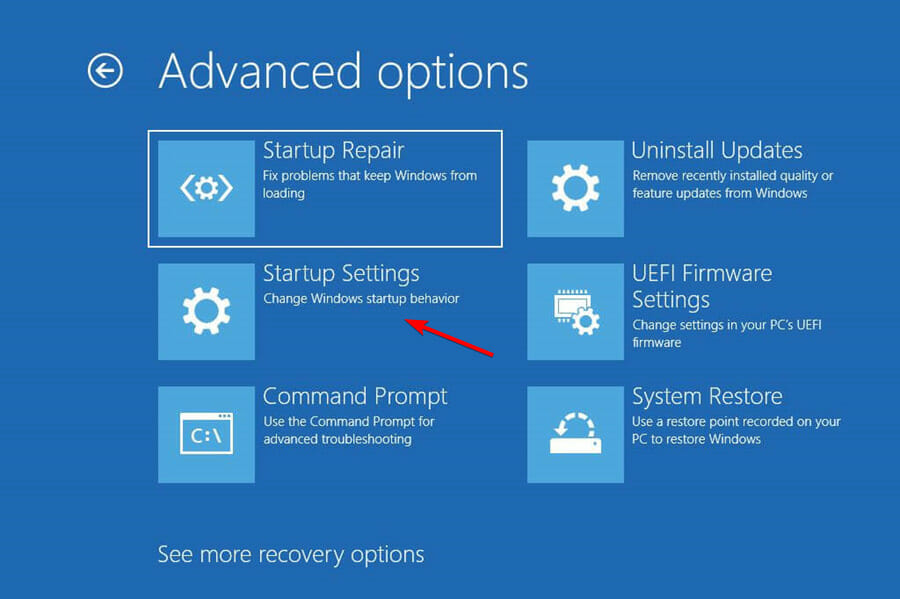
- Click the Restart button.

- When your computer restarts you’ll see a list of options. Select Safe Mode with Networking by pressing 5 or F5.

- Your computer will now enter Safe Mode.
If the BSOD error doesn’t appear, it means that it was caused by a third-party application or a driver that you have installed, and you can use the Safe Mode to remove the problematic software.
8. Overclock or underclock your RAM
 NOTE
NOTE
- While your PC boots, keep pressing F2 or Del to access BIOS.
- Navigate to Overclock section.

- If you’re using 1600MHz RAM, change the frequency of your to 1333MHz.
- Alternatively, change the voltage of your RAM from 1.5 to 1.6V.
9. Check your hardware and clean your PC from dust
- Use Memtest86 to check your RAM.
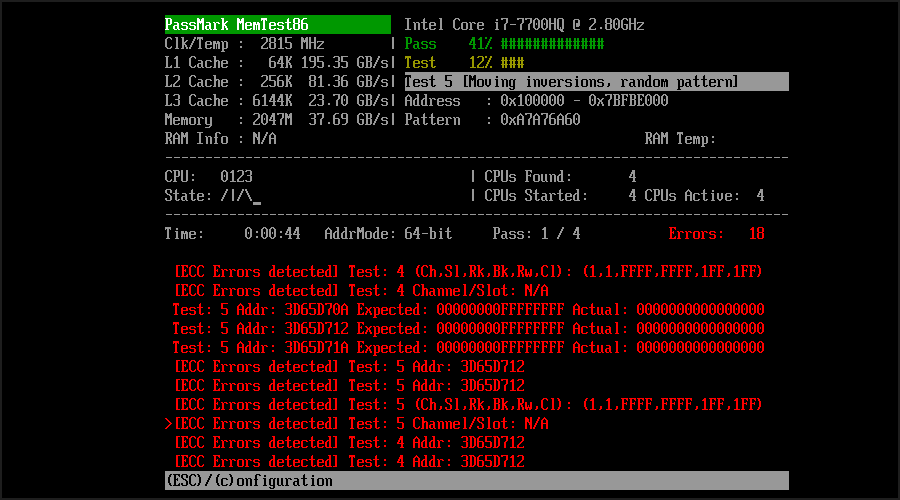
- Reseat your RAM modules.
- Clean your PC from dust.
10. How can I fix the SYSTEM PTE MISUSE error in Windows 11?
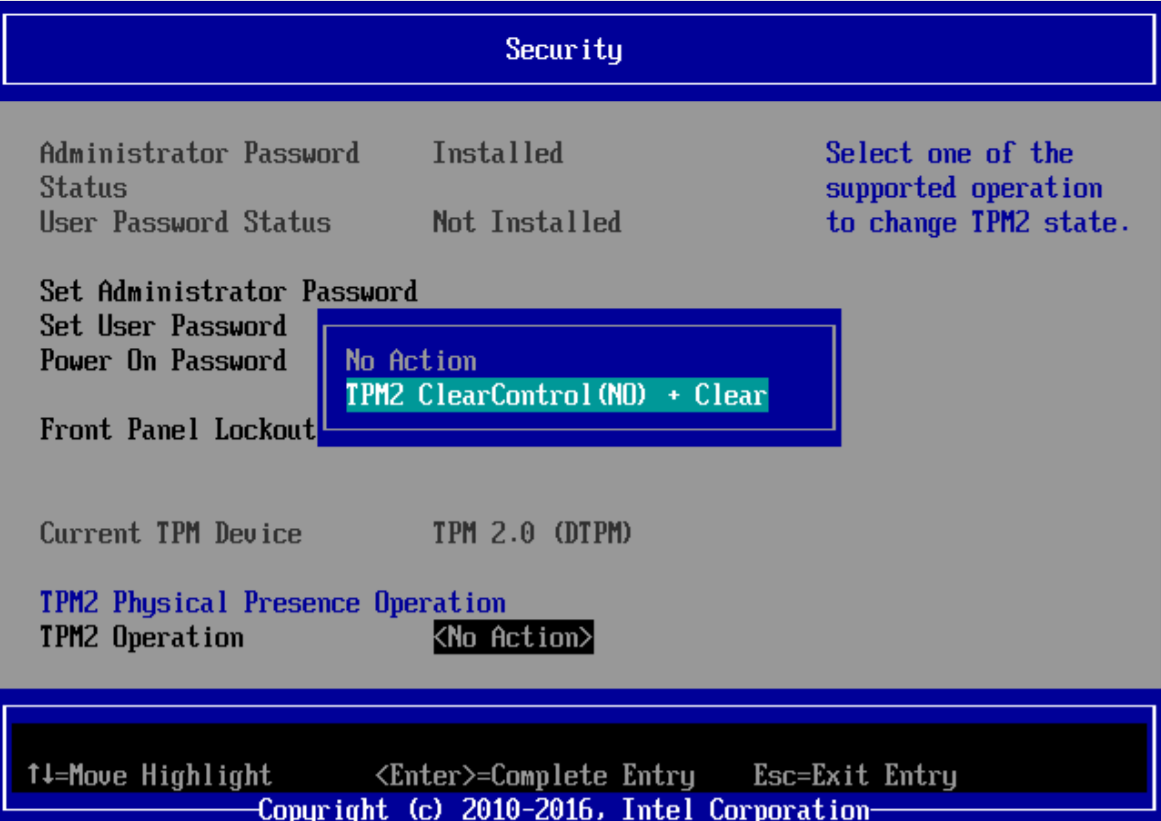
10.1. Disable PTT/TPM in BIOS
- While your system boots, keep pressing F2 or Del to enter BIOS.
- Navigate to Security section.
- Select PTT and set it to Hidden.
- Look for TPM and set it to Disabled.

- Save changes.
10.2. Update BIOS
- Visit your motherboard manufactuer’s website.
- Locate your model and navigate to the Download section.
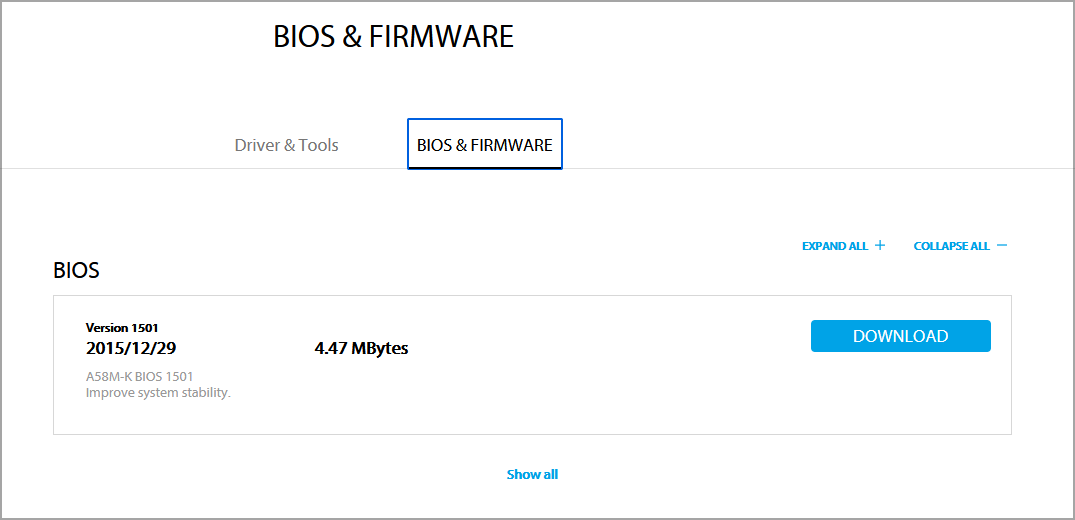
- Locate the latest BIOS for it and download it.
- Move the downloaded file to a flash drive.
- Restart your PC and keep pressing F2 or Del to enter BIOS.
- Select the BIOS update option and choose the file that you downloaded from the flash drive.
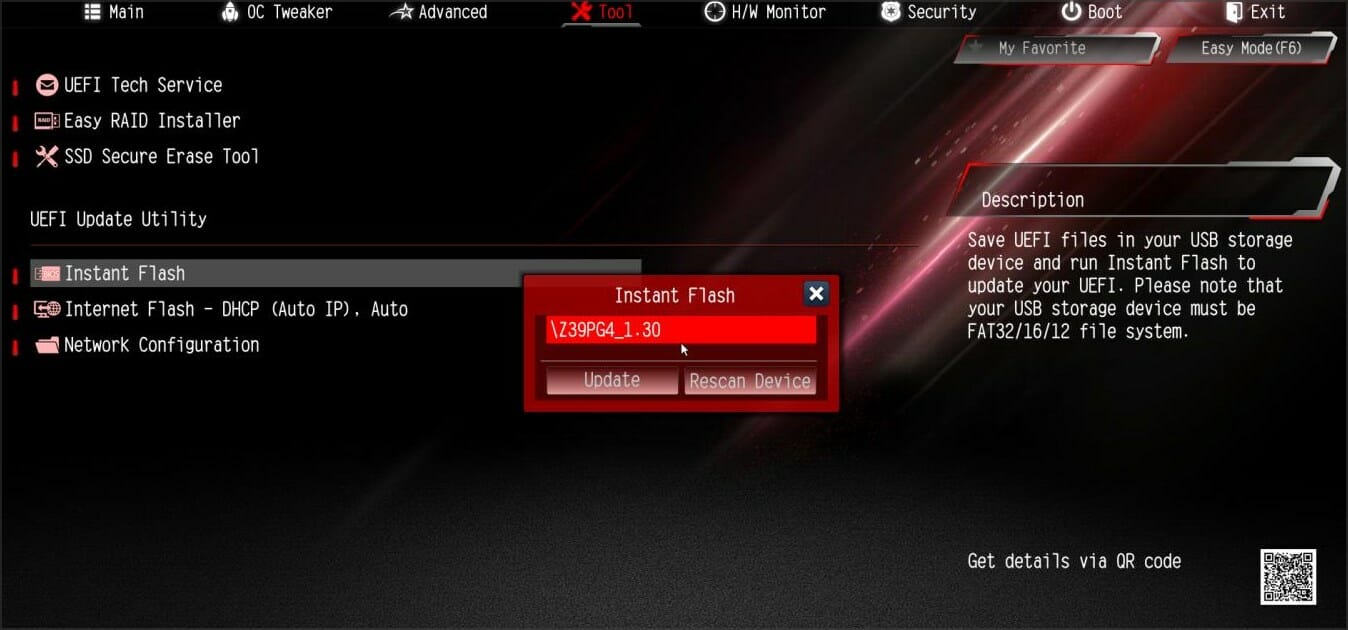
- Wait for the process to finish.
For more solutions, check out this guide on how to fix the SYSTEM PTE MISUSE error in Windows 11. Rest assured that you will be able to resolve the problem in no time.
Where can I find BOSD crash files?
Whenever a BSOD error occurs, Windows save the crash information to a file that you can use to analyze the issue.
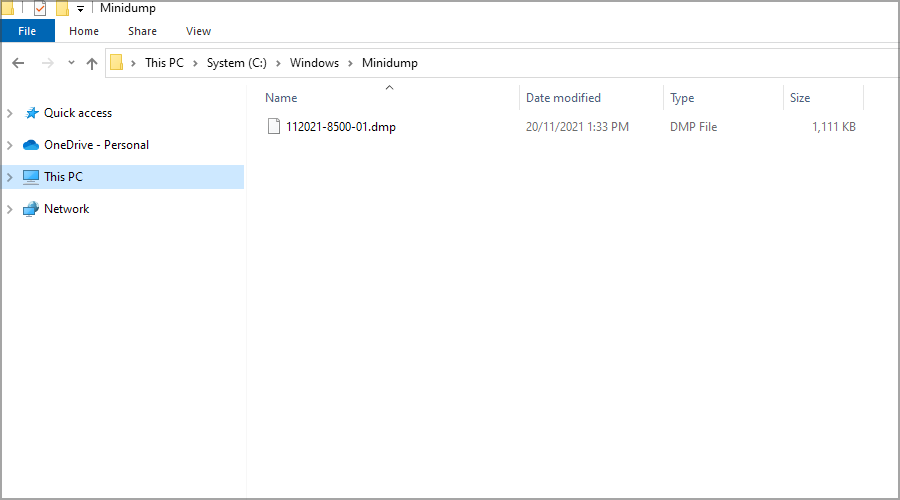
You can find these files in the following directory: C:\Windows\Minidump
How to open crash files?
By default, Windows doesn’t have the necessary components to open the crash files, so it needs to rely on third-party solutions.
Many applications can do that, but we recommend using WinDbg Preview.
SYSTEM_PTE_MISUSE Blue Screen of Death error can cause many problems, but it can be easily fixed by replacing the faulty RAM or by underclocking it.
To make the process simpler, you can always use Blue Screen of Death repair software to solve any non-hardware issues on your PC.
If that doesn’t work, feel free to try other solutions from this article and let us know what worked for you in the comments section below.
Read our disclosure page to find out how can you help Windows Report sustain the editorial team. Read more


Improve this guide


User forum
0 messages