Fix the File Autorun.DLL Could not be Loaded & Install Windows
Find out all you need to know to fix error code 0x7e autorun.dll
10 min. read
Updated on
Read our disclosure page to find out how can you help Windows Report sustain the editorial team. Read more
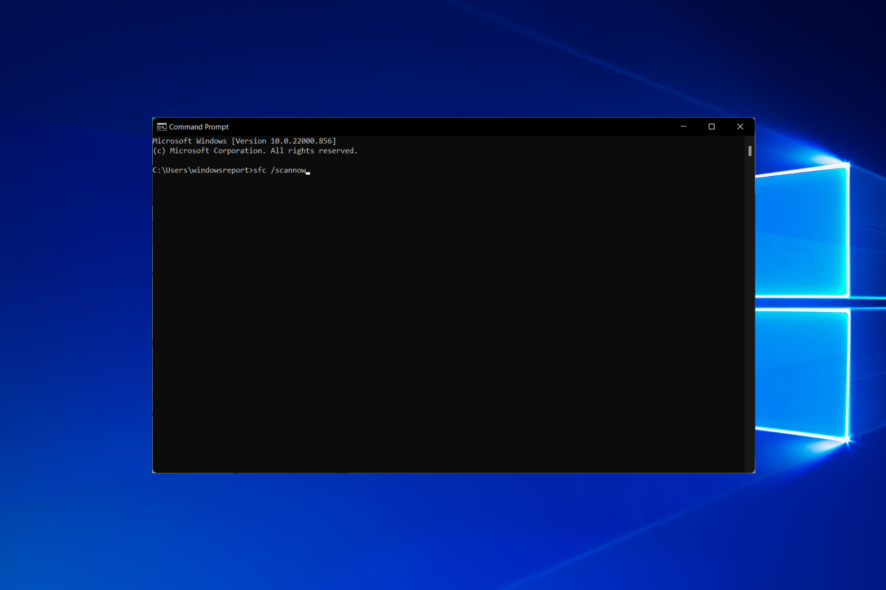
Autorun.dll errors are widespread among Windows 10 users, and the most frequently encountered errors are the following: Autorun.dll not found, and The file Autorun.dll is missing.
These errors can occur when users try to install an update or launch a particular program. The AutoRun.dll file contains essential information on how a particular software should execute, do here’s how to fix it.
How do I fix Autorun.dll error code 0X7E?
1. Repair Autorun.dll registry entries
Sometimes, the autorun.dll file is corrupted or invalid because the file location may have changed. The best solution to fix this issue is to use a Registry repair tool.
You can check out our article about the best registry cleaning tools and install one of the tools listed there.
2. Check the Recycle Bin
- Open the Recycle Bin.
- Press Ctrl + F to open the search bar, type Autorun.dll, and hit Enter.
- If the file is found, right-click on it, and select Restore.
You may have unintentionally deleted the Autorun.dll file, which may explain why you’re getting the Autorun.dll not found and The file Autorun.dll is missing errors.
3. Run a full system scan
The Autorun.dll errors may be linked to a malware infection. The best solution is to run a full system scan to detect and remove the malicious programs that may have triggered the Autorun.dll errors.
You can use your favorite antivirus for this task, and we recommend using an anti-hacking software compatible with your antivirus.
If you didn’t find any malware, or if you don’t have an antivirus, you might want to consider using a third-party antivirus solution.
Many great third-party antivirus tools offer excellent protection and features, and if you’re looking for a new antivirus, we would have to recommend Bitdefender.
This tool offers excellent security and will keep your PC protected and safe from all malware. Once you scan your PC for malware with one of these tools, check if the problem persists.
4. Use the System File Checker tool
4.1 SFC scan
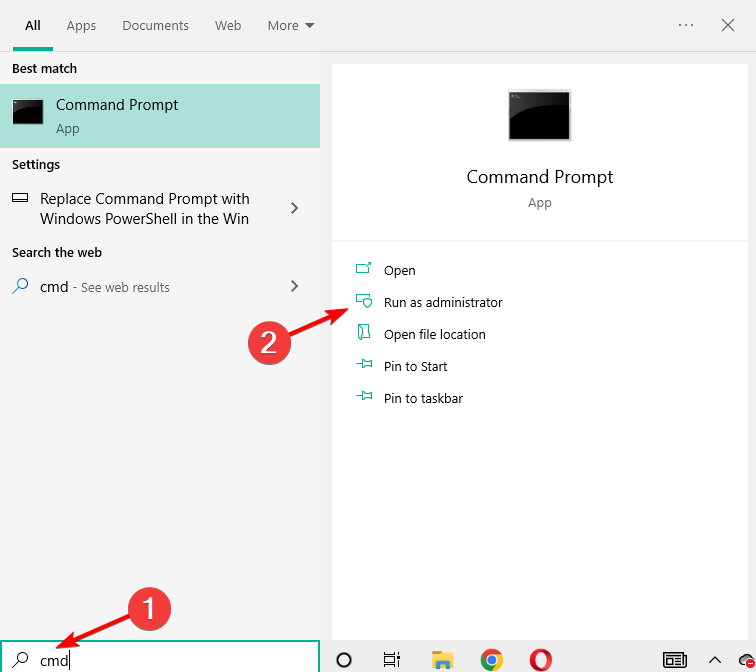
- Press Windows then type cmd. Choose the Run as administrator option from the right side.
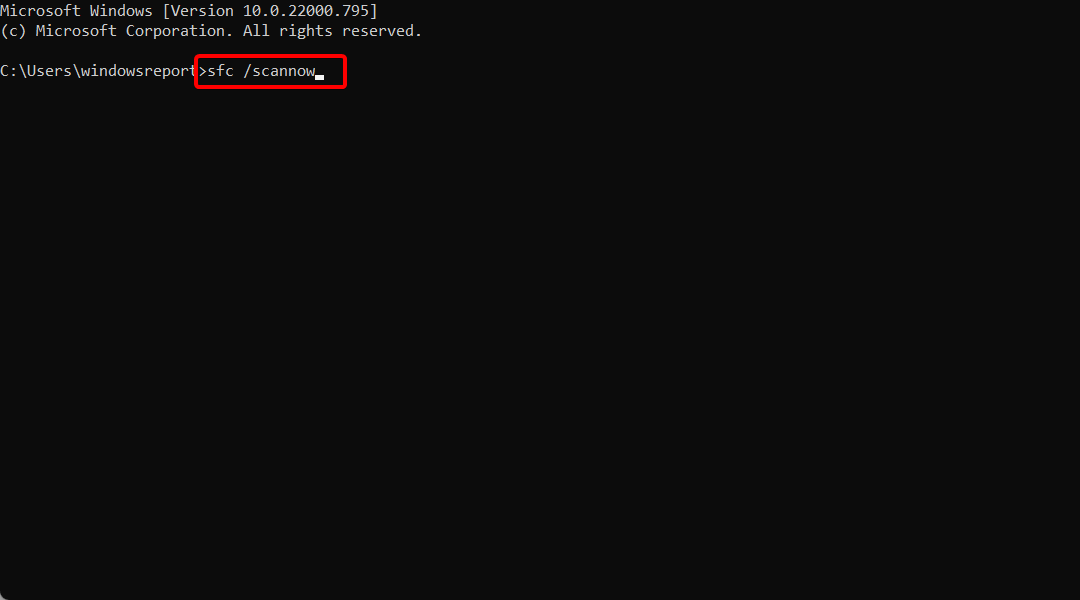
- Type the following command and press Enter:
sfc /scannow - When the scan is complete, restart your PC.
Once the SFC scan is finished, check if the problem is resolved. Several users reported that they couldn’t run the SFC scan on their PC.
The issue might be file corruption if you have any Autorun.dll errors on your Windows 10 PC.
According to users, sometimes your system files can get corrupted, and that can cause autrorun.dll to become missing or corrupted.
However, as explained above, you can permanently repair your files simply by performing an SFC scan.
If that’s the case, or if the SFC scan didn’t fix your problem, you might also have to use a DISM scan.
4.2 DISM command
- Start Command Prompt as administrator.
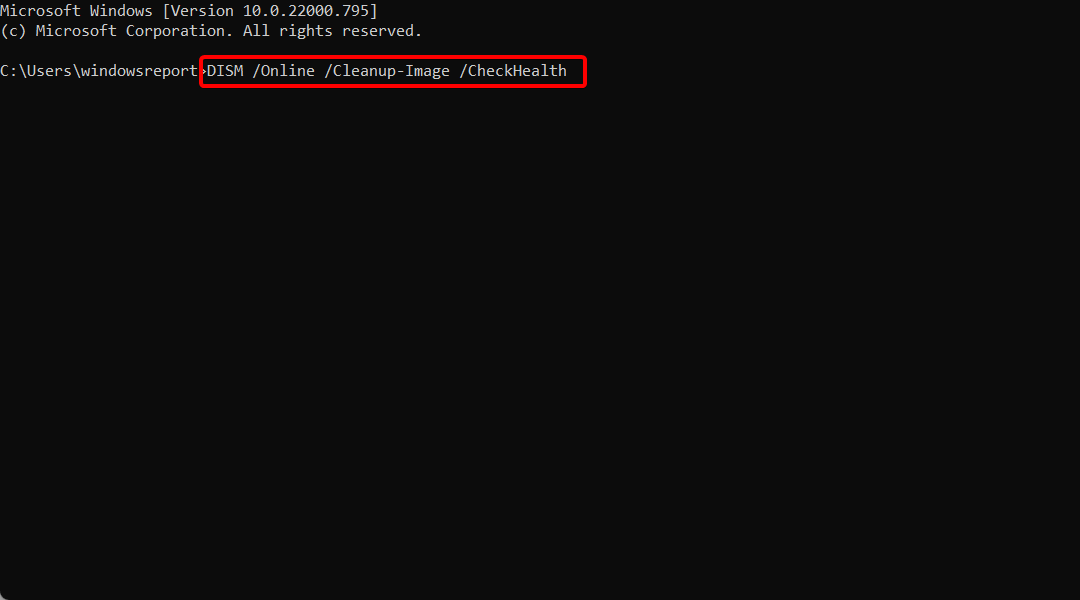
- Run the following command:
DISM /Online /Cleanup-Image /RestoreHealth - DISM scan will now start. It’s worth mentioning that DISM scan can take about 20 minutes or more, so don’t interrupt it.
Once the DISM scan is finished, check if the problem persists. If you could not run an SFC scan before, you might want to rerun it and check if that solves your problem.
5. Install all the available updates
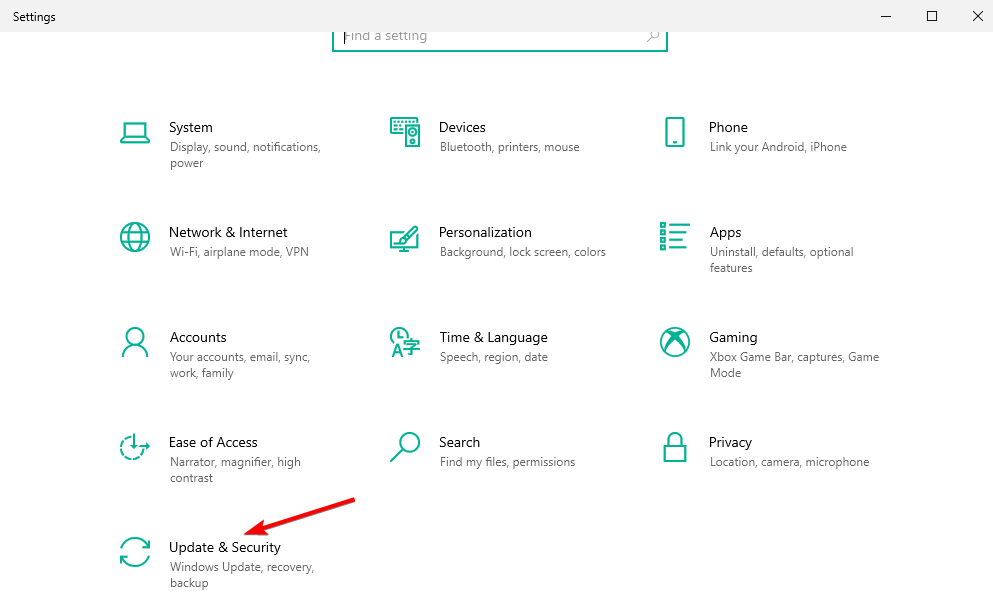
- Press Windows + I to open the Settings app.
- When the Settings app opens, navigate to the Update & Security section.
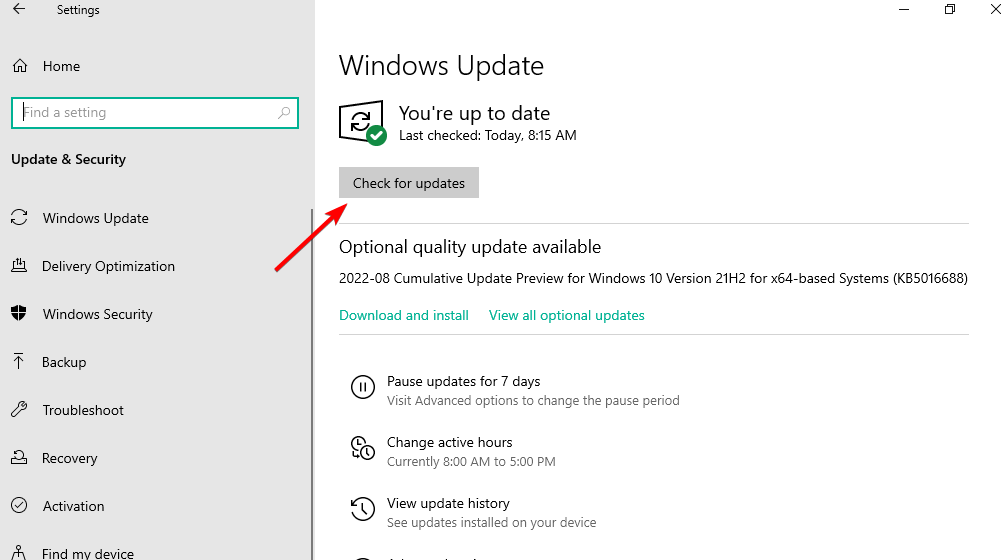
- Now click the Check for updates button.
Windows will now check for available updates and download them automatically in the background.
Once the updates are downloaded, restart your PC, and the updates will be installed. Once your PC is up to date, check if the problem persists.
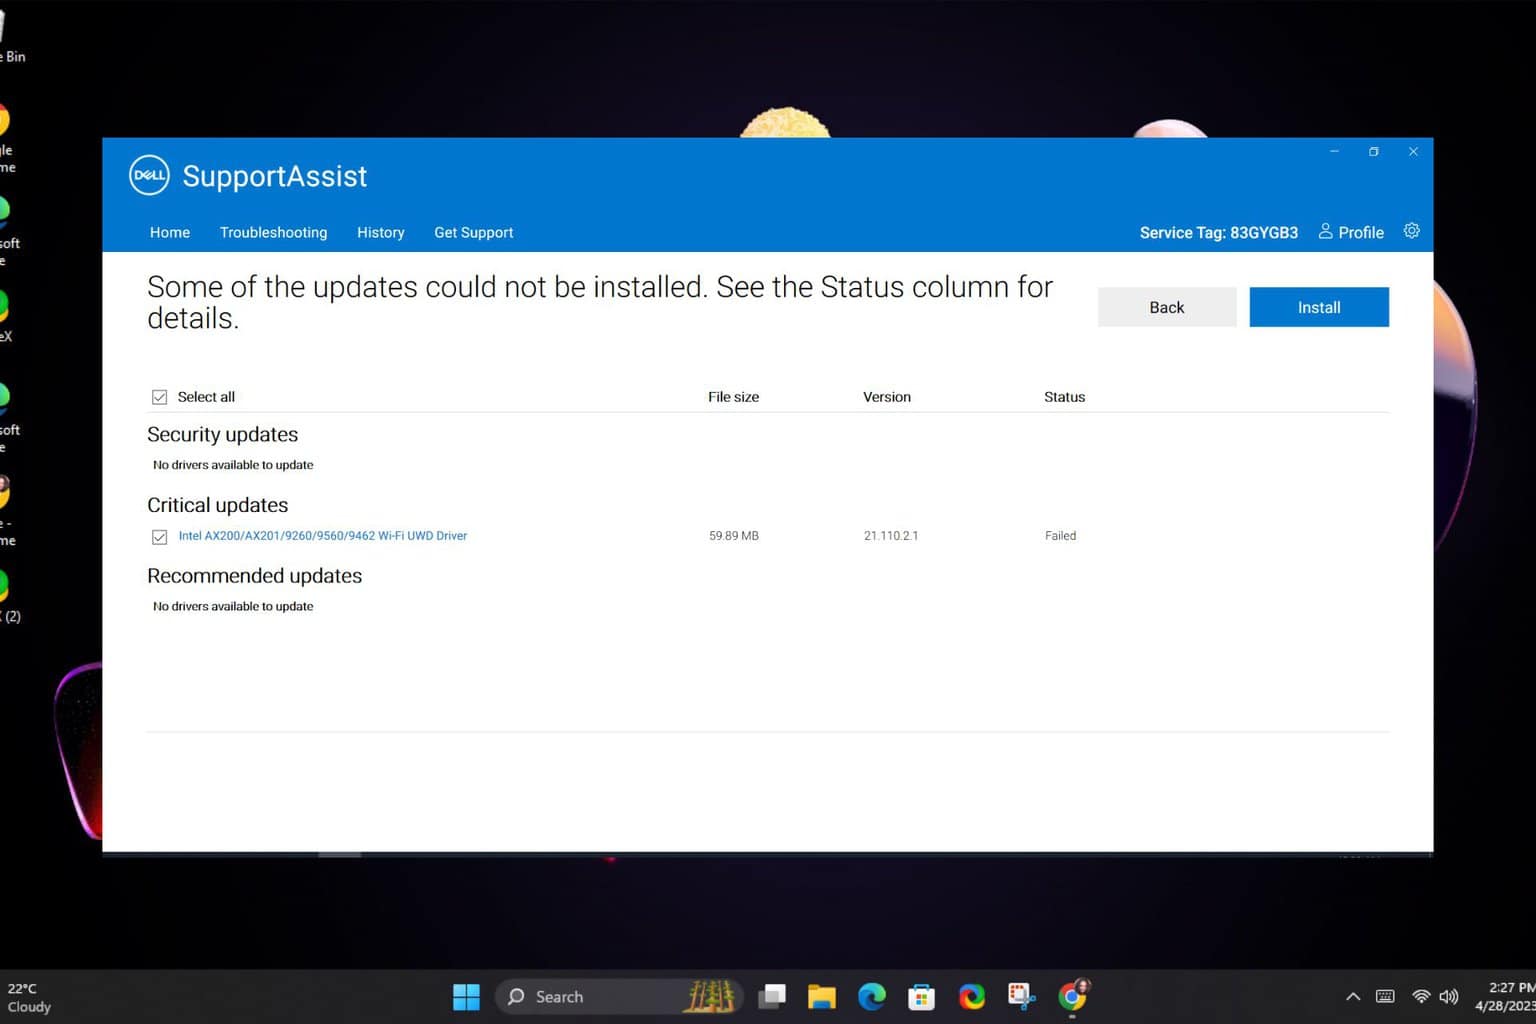
Outdated system drivers may also cause Autorun.dll errors. Go to Windows Update and install all the available updates.
If you’re getting the error when you try to run a particular program, such as a video game, your video drivers are likely outdated.
Windows 10 usually downloads the necessary updates automatically, but sometimes you might miss an update or two due to specific bugs.
You can download the necessary drivers from your manufacturer’s website if an outdated driver is a problem.
However, downloading drivers manually can be tedious, so it might be better to use a driver updating tool that can update all your drivers automatically.
6. Perform a system restore
- Type Recovery in the search box that you open by pressing the Windows key, then open the first result.
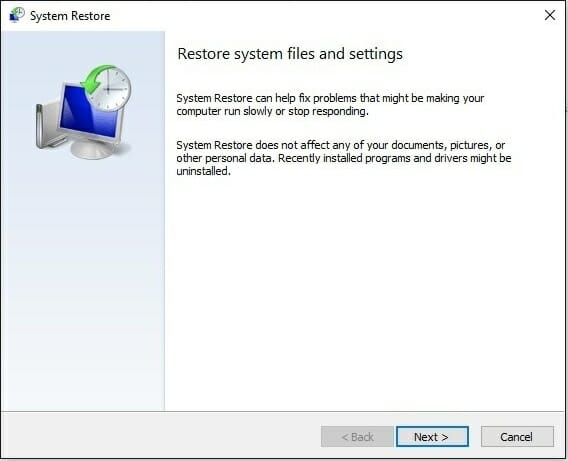
- Next, select Open System Restore.
- Follow the on-screen instructions to choose a restore point. The Autorun dll could not be a loaded issue and will be gone.
The System Restore feature allows you to return to a previous Windows state when everything is working correctly.
Unfortunately, if you don’t have any created points, you won’t be able to do this. So instead, check out how to make a System Restore Point in Windows 10 and Windows 11 so you can have one created for future errors.
7. Check your DVD drive
Many users reported this problem while installing Windows from a DVD. According to users, a faulty DVD drive caused the problem.
To fix the problem, checking if your DVD drive is working correctly is recommended. You can do that by trying to read other DVDs.
If your DVD isn’t working correctly, you must replace it to solve the problem. If you don’t feel like replacing your DVD, you can always try to install Windows from a USB flash drive.
You must create installation media using the Media Creation Tool and boot your PC from the installation media.
8. Check your DVD drive options
According to users, if you’re having problems with Autorun.dll, the issue might be your DVD drive options.
Several users reported that they fixed the problem simply by turning on Enable CD recording option in their DVD drive options.
After enabling this option, the issue with Autorun.dll was resolved entirely.
9. Reinstall your DVD drive
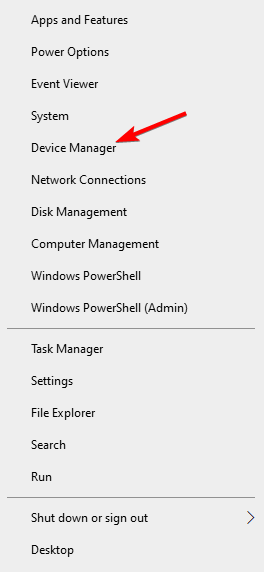
- Right-click the Start icon then select Device Manager.
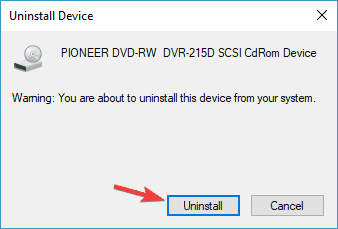
- Locate your DVD drive on the list, right-click it, and choose Uninstall device from the menu.
- A confirmation dialog will now appear. Click Uninstall to confirm. The Autorun dll could not be loaded issue will be solved.
Once the driver is removed, restart your PC and check if that solves the problem.
As we previously mentioned, issues with Autorun.dll can appear due to problems with your drivers. However, several users fixed this problem simply by reinstalling their DVD drives.
How can I fix autorun.dll could not be loaded on Windows 11?
Several distinct potential causes for errors are associated with the autorun.dll file. For example, a malfunctioning program, the autorun.dll file may have been deleted or lost, or it may have been corrupted by malicious software installed on your computer.
The problem may almost always be fixed by thoroughly reinstalling the autorun.dll file on your personal computer under the Windows system folder.

Alternately, specific applications, most notably PC games, call for the DLL file to be stored within the folder designated for the game or application’s installation.
Use the DLL-files website to download the Autorun.dll file you need. But remember that you can’t download DLL files from any website as this action risks affecting your system.
What is Autorun dll?
An example of an Autorun Wizard Pages file is the file called Autorun.dll. The Windows operating system is where you will most frequently find it. It is a Win64 DLL file, a crucial component of the OS and one of its core files.
Autorun.dll typically consists of a collection of driver functions and operations that Windows can use.
When you get an error about DLL files, it is possible that the autorun.dll file on your computer was removed by a user unintentionally, that it was removed because it was a shared file with another software, or that it was removed as a consequence of a malware infestation.
Various Autorun.dll issues can appear on your PC and prevent you from installing specific applications.
This can be an annoying problem, and speaking of Autorun.dll issues, here are some of the most common problems that users reported:
Install Windows the file Autorun.dll could not be loaded 0x7e, 0xc1 or is corrupted. So setup cannot continue error code is 0x7e Autorun.dll download – You can quickly fix this error by running a full system scan as shown below.
Autorun.dll file error code 0x7e Windows 7, 8, 0xc1 Windows 10, Windows 11 – There are various errors related to Autorun.dll, which can appear on all versions of Windows. Even if you’re not using Windows 10, you should know that our solutions will also work for older versions of Windows.
The file Autorun.dll 0x7e Windows 10 – This error can appear on Windows 10, and if you encounter it, be sure to clean your registry and check if that solves the issue.
Autorun.dll could not be loaded or corrupted 0xc1 – This error can appear while trying to install specific applications. However, you might be able to fix it by performing a full system scan.
Autorun.dll missing Windows 10 – Sometimes, you might get a message saying that Autorun.dll is missing from your system. If that happens, you might have to perform both SFC and DISM scans to fix it.
Autorun.dll is missing or corrupt – If you’re getting an error message saying that Autorun.dll is missing or corrupt, you might be able to solve the problem simply by performing System Restore.
Why do DLL errors occur?
DLL errors occur due to a bunch of reasons, including renaming or deleting a DLL file. Also, certain applications modify the DLL file, and if it’s used by multiple apps, this may lead to the Autorun.dll error in Windows 10, amongst other similar issues.
Besides, corrupt system files or the presence of malware on the system can also lead to DLL errors. Another reason for it is improper installation of OS updates or issues while upgrading the OS.
How do I know if a DLL is corrupted?
Take advantage of the System File Checker to check Windows and recover your data if some Windows features aren’t working, or Windows crashes.
The System File Checker (SFC) is a handy program that can check and restore protected system files. It is run from the command line.
Assessing the reliability of your computer using this method is the simplest and quickest way to do it. It identifies issues with software installs and updates and searches for suitable replacements for corrupted or missing files, if feasible.
Follow our fourth solution to see how to run this scan on your computer. Now let’s see what we can do about the Autorun.dll error in Windows 10.
How do I install a DLL file in Windows 10?
There is an extensive range of third-party software available, and the vast majority of it lives up to its claims of being able to repair or replace DLLs that have been damaged or misplaced. These claims may be found in the program’s product descriptions.
Check out our post on the seven best DLL repair software that you can use that will not only repair but also download and replace Autorun.dll and other DLL files. This is the easiest method out there.
Alternatively, look at how to fix DLL files missing from your Windows 10/11 PC to find more potential solutions.
We hope these solutions help you to fix the Autorun.dll errors you have encountered.
If you tried another fix not listed in this article, share your experience in the comment section below.


User forum
0 messages