Fix: Projecting to this PC options are greyed out
Wireless Display feature needs to be installed to fix this issue
4 min. read
Updated on
Read our disclosure page to find out how can you help Windows Report sustain the editorial team. Read more
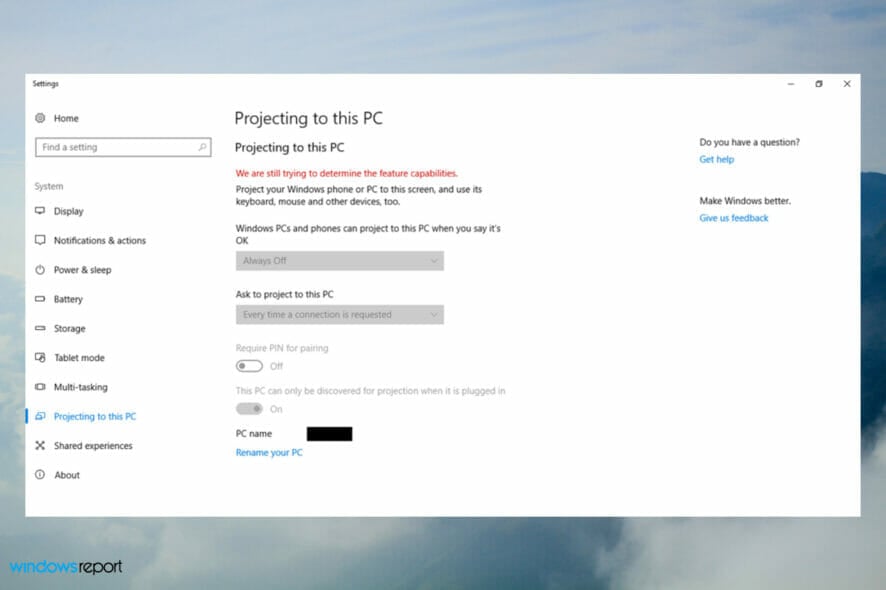
If the projecting to this PC feature is greyed out, you won’t be able to use wireless displays with your computer. However, this can be easily fixed by following these steps.
How come Windows 10’s Projecting to this PC options are greyed out on my PC?
If you get this message, it means that the Wireless Display feature isn’t installed. An outdated wireless adapter driver can also cause this problem. Devices that don’t support Miracast can also experience this issue.
How can I fix the greyed-out Projecting to this PC options?
Before trying anything else, ensure that your system is up to date.
1. Install the Wireless Display features
- Click the Start taskbar button.
- Then select Settings on your Start menu.
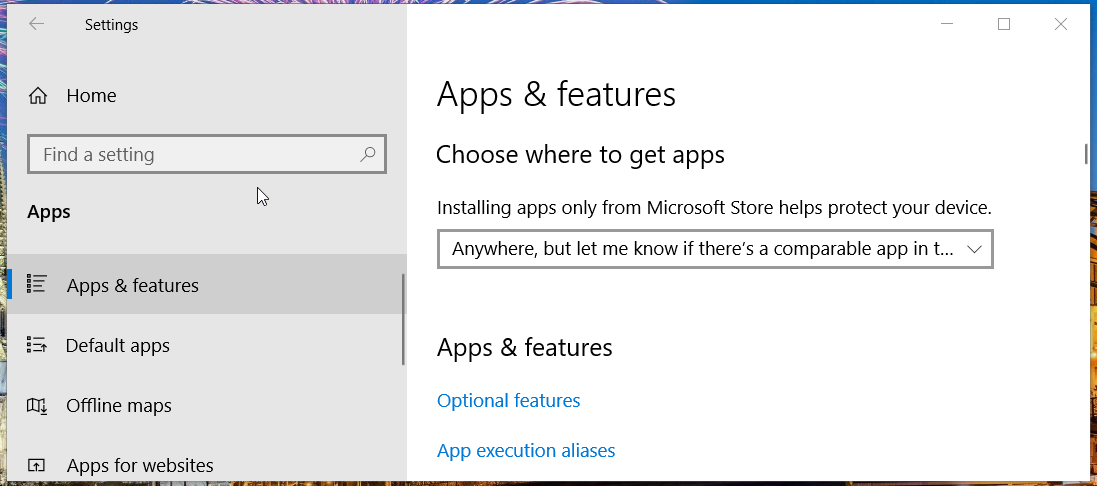
- Click Apps to bring up the Settings tab shown directly below.
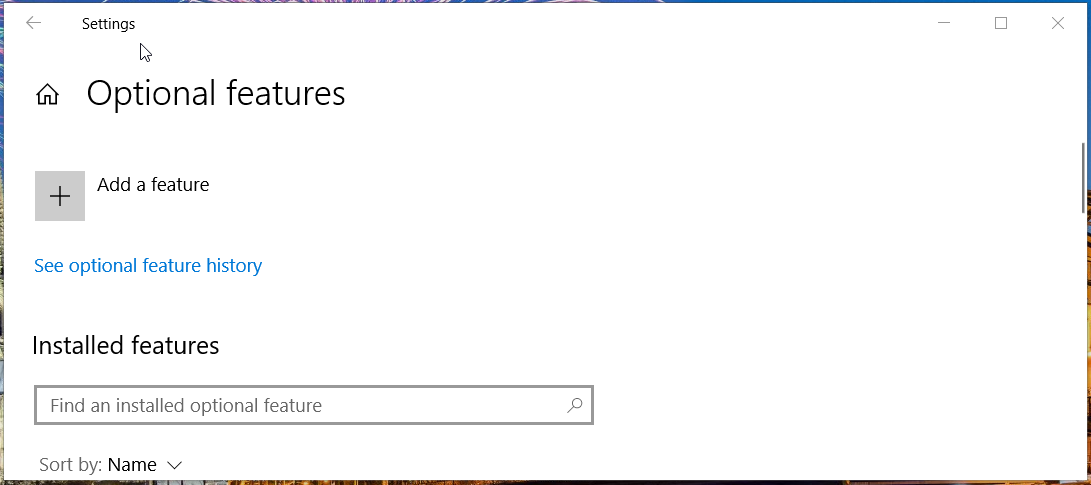
- Then click Optional features to open the window in the screenshot directly below.
- Press the + Add a feature button on that window.
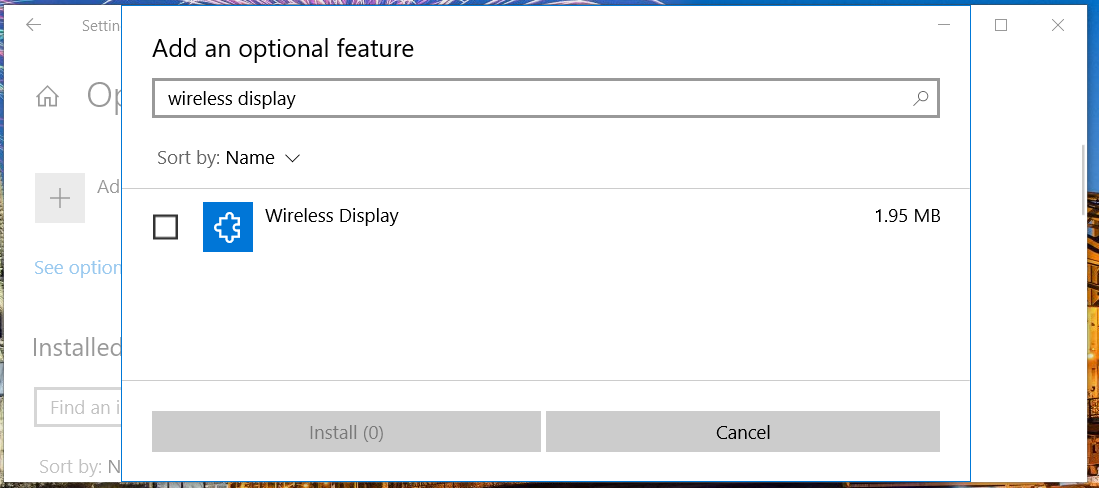
- Type the keyword Wireless Display within the search box that opens as in the snapshot directly below.
- Select the Wireless Display checkbox there.
- Click Install to add Wireless Display to Windows 10.
- Thereafter, wait for the new feature to install. When installed, check that the Installed features list includes Wireless Display.
2. Update your PC’s wireless network adapter driver
- Right-click Start to select Device Manager on the Win + X menu.
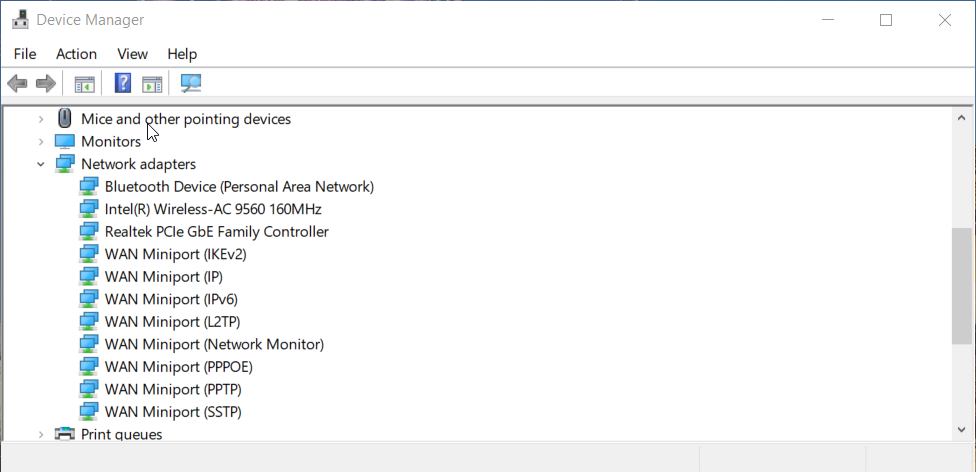
- Double-click the Network adapters category within the Device Manager window.
- Right-click your Wi-Fi network adapter there and select an Update driver option for it.
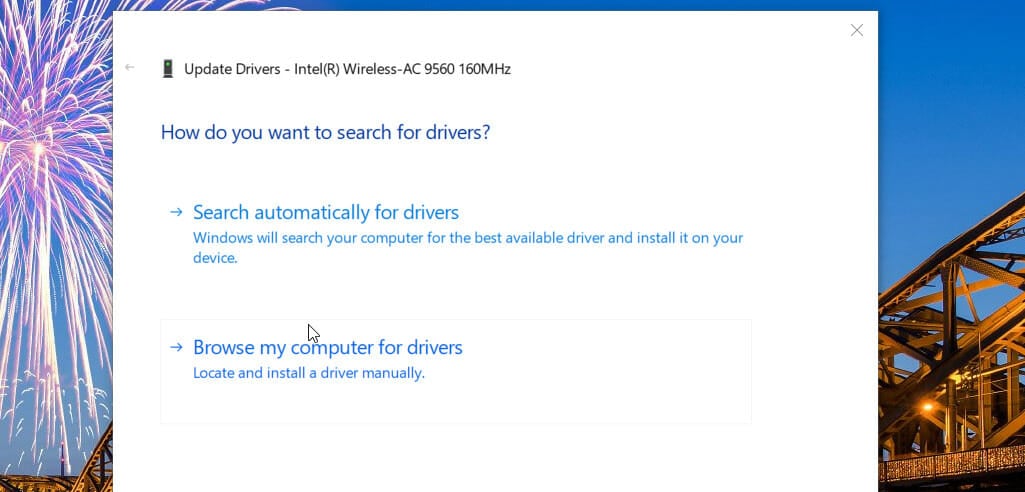
- Now select the Search automatically for drivers option within the Update Drivers window that opens.
A quick scan with a driver updater utility will tell you if your Wi-Fi network adapter’s driver is faulty or outdated.
PC HelpSoft Driver Updater can scan your system and check if your drivers need to be updated. Then you can select to download and install a new network adapter driver with the driver updater utility.
Note: Also, make sure your PC’s wireless network adapter is enabled before trying to update its driver. To do so, right-click the Wi-Fi adapter and select an Enable option on the context menu if it’s disabled.
3. Reinstall the wireless network adapter’s driver
- Open the Device Manager as covered within the first two steps of the previous resolution.
- Then expand the Network adapters category.
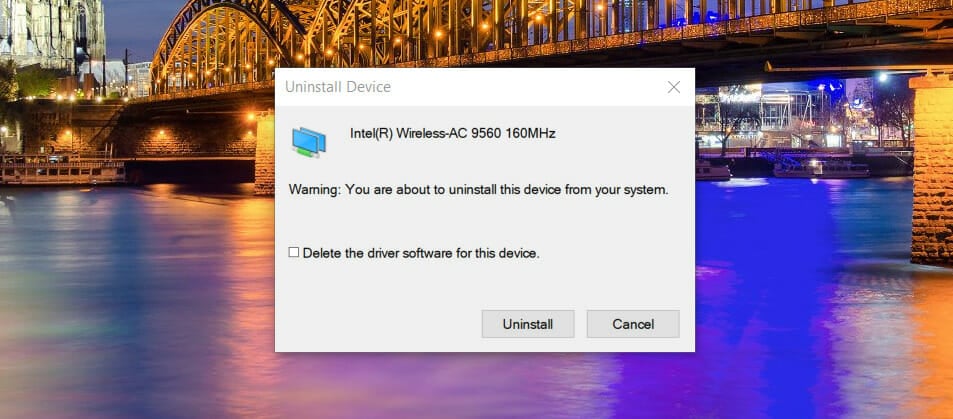
- Right-click your wireless network adapter listed there to select Uninstall device.
- Then select the Delete the driver for this device checkbox on the confirmation window that pops up.
- Press the Uninstall button.
- Thereafter, click Power and choose Restart on the Start menu.
 NOTE
NOTE
How to check if your PC’s Wi-Fi supports Miracast
- Click the search box on the taskbar (or press the Windows key and S at the same time).
- Next, type cmd in the search utility’s text box to find Command Prompt.
- Then select the Command Prompt utility within the search results to open it.
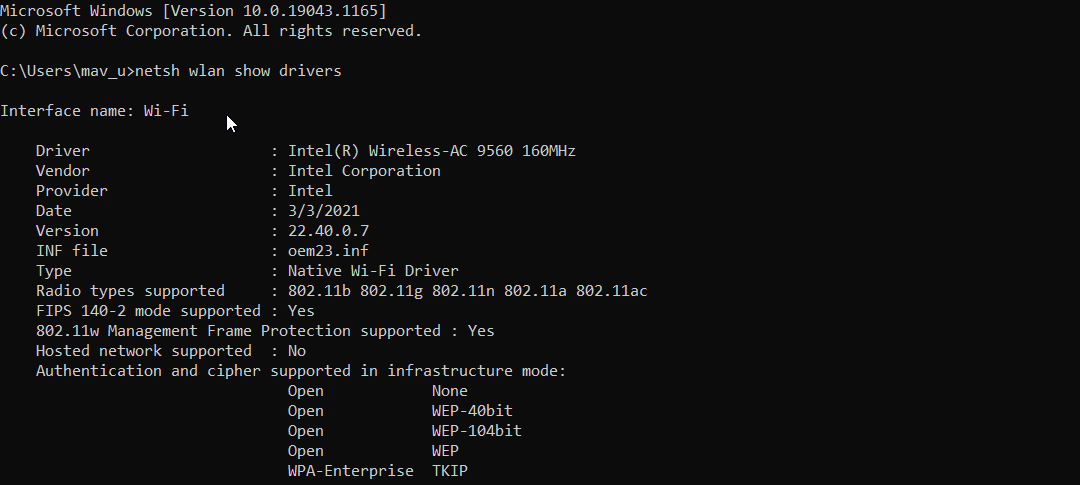
- Type the following command into the Prompt’s window:
netsh wlan show drivers - Press the Enter key to execute the command.
- Then look for the Wireless Display Supported detail near the bottom the Command Prompt’s window. The Wireless Display Supported detail will say There’s no wireless interface on the system if this device doesn’t support Miracast.
However, that doesn’t mean there’s no way you can utilize Windows 10’s Wireless Display feature on your PC.
You’ll need to purchase a new USB Wi-Fi adapter that supports Miracast, and then insert it in a USB slot on your PC. Check out our best Wi-Fi adapters guide to choose one.
This isn’t the only problem you can encounter, many reported that projecting to this PC is always off as well as a Your PC can’t project to another screen message.
We also have a guide on what to do if projecting to this PC keeps disconnecting, so don’t miss it for more information.




User forum
0 messages