How to Fix the Windows 11 Proxy Error
Give a try to these quick methods that have been confirmed
7 min. read
Updated on
Read our disclosure page to find out how can you help Windows Report sustain the editorial team. Read more
Key notes
- Proxy errors are fairly common for people who use proxy services to connect to the internet.
- A proxy error occurs when servers don’t receive clients’ requests or identify them as unauthorized access.
- Depending on the error type, various solutions can help you fix the errors.
- This problem can be resolved by using the Command Prompt’s flush DNS command, disabling the proxy server, resetting network settings, and so on.
The annoying experience of receiving proxy errors is the same, no matter whether you’re running Windows 11 or another operating system.
Typically, proxy error messages indicate that you are not allowed to enter a specific website or web page. Also, it shows that there are multiple sources of requests in a short time.
For example, if you have attempted several log-ins to your account, the server will block the request and hinder the connection.
These issues are often server-side problems. However, there are cases the error source traces back to the client-side in Windows 11, such as some system misconfiguration.
So, to fix the Windows 11 proxy error, you need to apply some changes or reset your settings. For this reason, we present you with helpful instructions to fix this problem.
What causes proxy errors?
There are several reasons why these errors occur. When you receive proxy errors, the most common cause is a misconfiguration on your computer’s part, namely in the proxy settings.
However, there are cases in which proxy errors result from websites denying unauthorized access to their pages to keep them safe from attacks.
Simply put, the server blocks requests from the client for security issues.
It’s possible that you’re browsing the web through a rogue proxy server and that websites are flagging you as a potential threat to their systems due to your activity.
How can I fix Windows 11 proxy error?
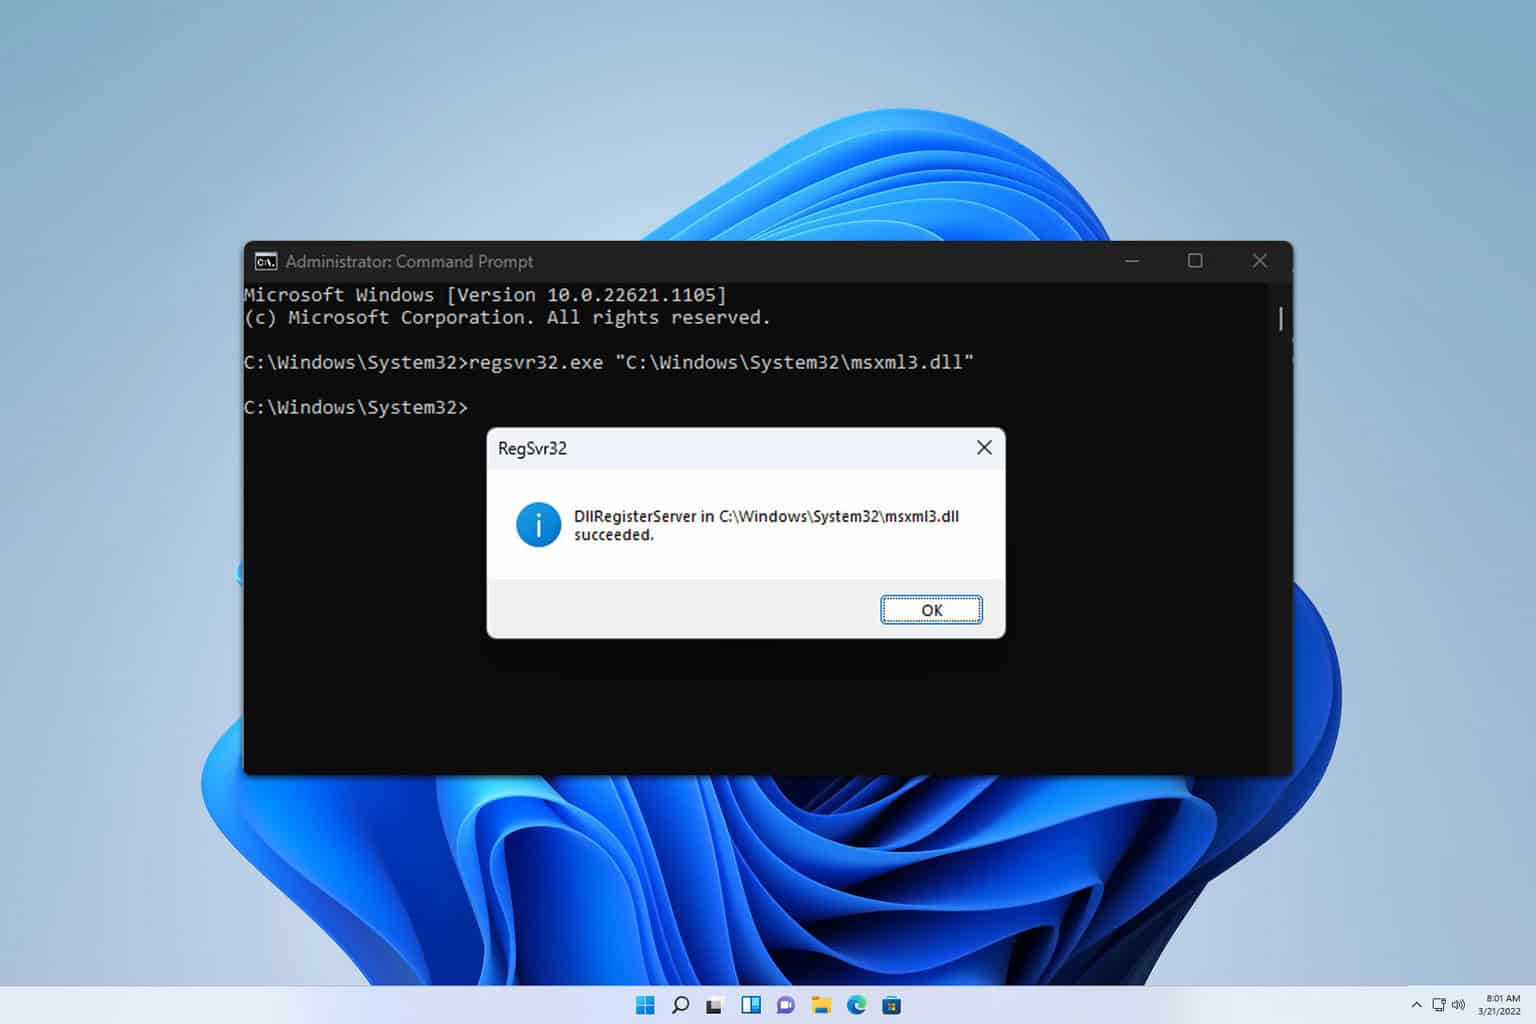
1. Use Command Prompt
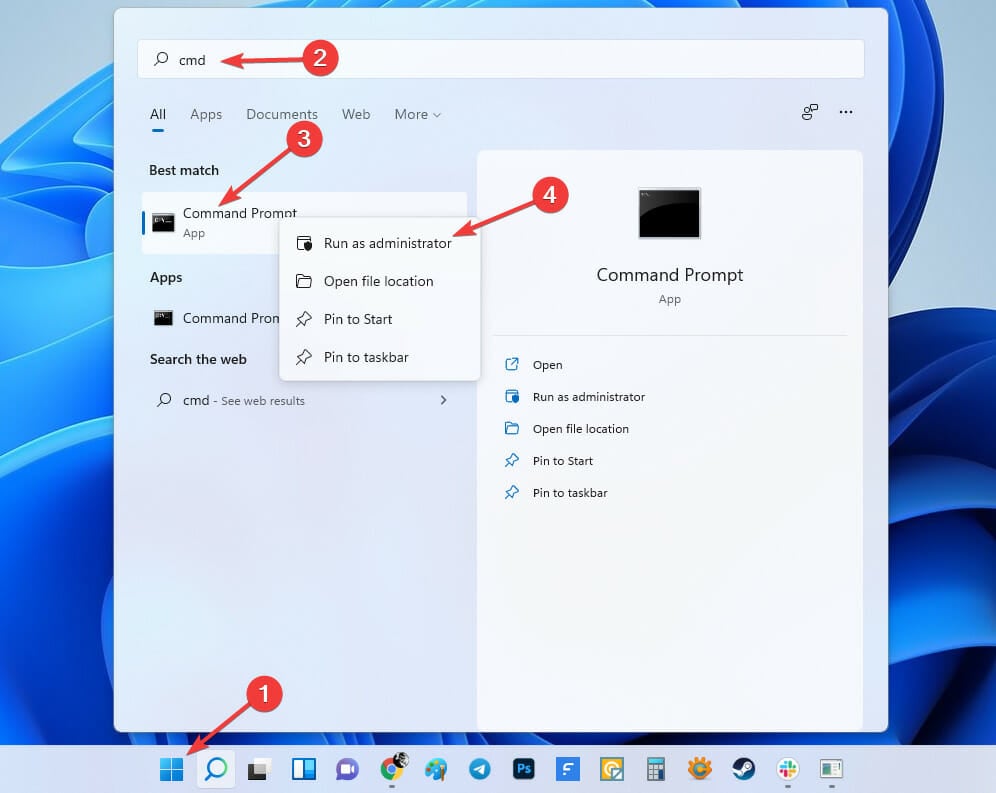
- To begin, go to the Start menu and type CMD, then right-click on Command Prompt and select Run as administrator from the menu that appears.
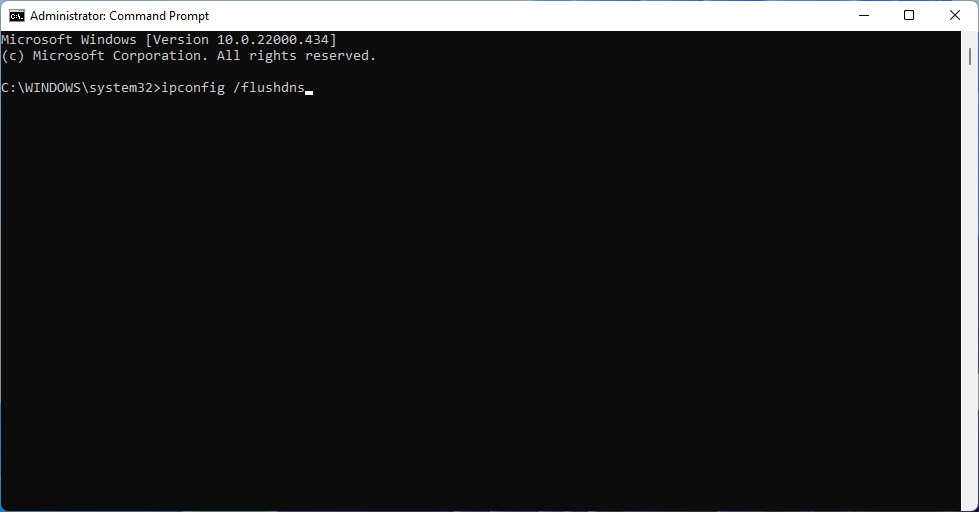
- Now, type the following command and then press Enter:
ipconfig /flushdns - Next, type this command and hit Enter key again:
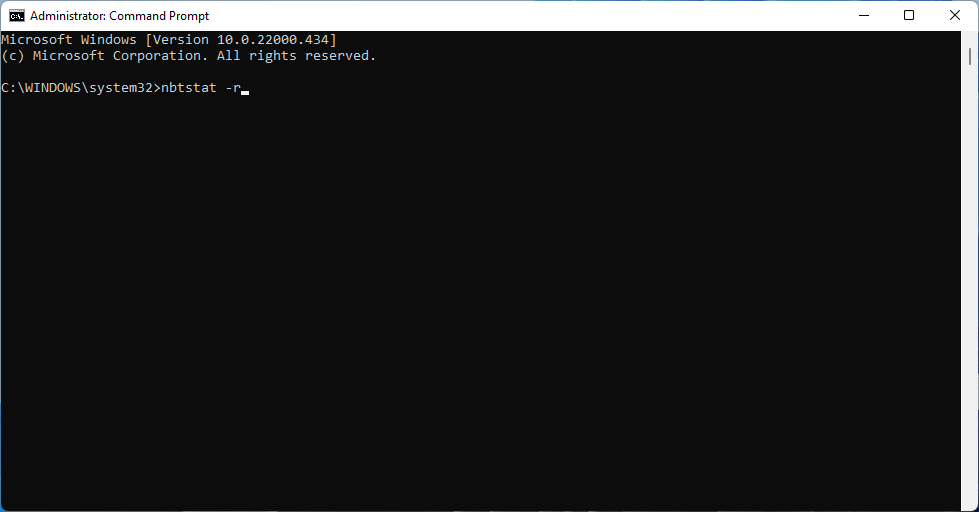
nbtstat –r - In this step, type the following command and press Enter:
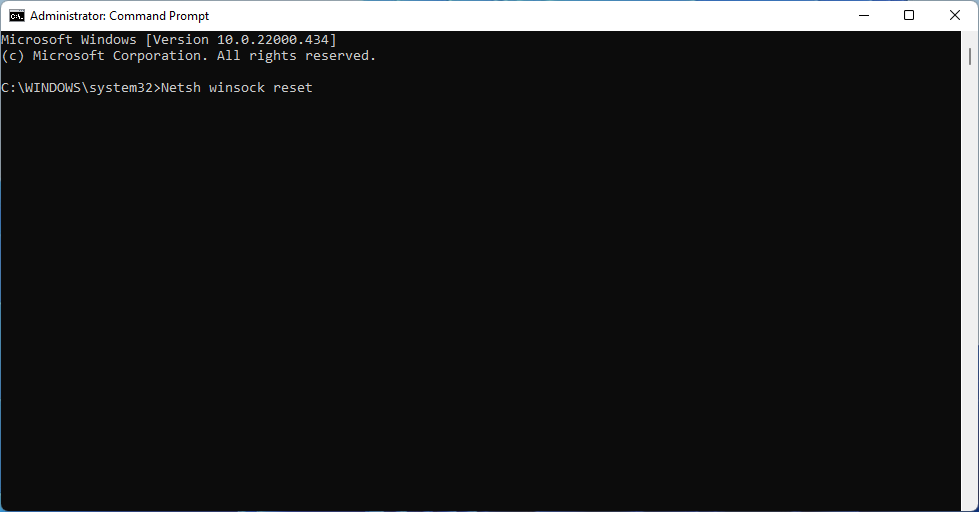
netsh int ip reset - Next, type this command and hit Enter key again:
netsh winsock reset - Type Exit and press Enter.
Finally, restart your Windows PC. If your problem still exists, we head into the next workaround. So, let’s jump into it.
2. Disable proxy server
- Press the Windows + I key combination to open the Settings menu.
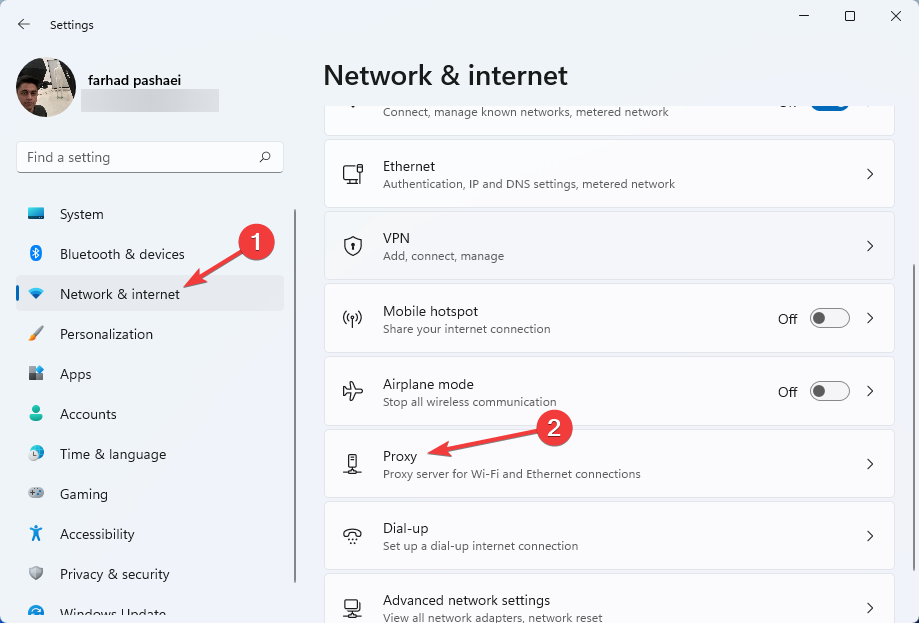
- In the left pane, choose Network & Internet, then scroll down and click Proxy.
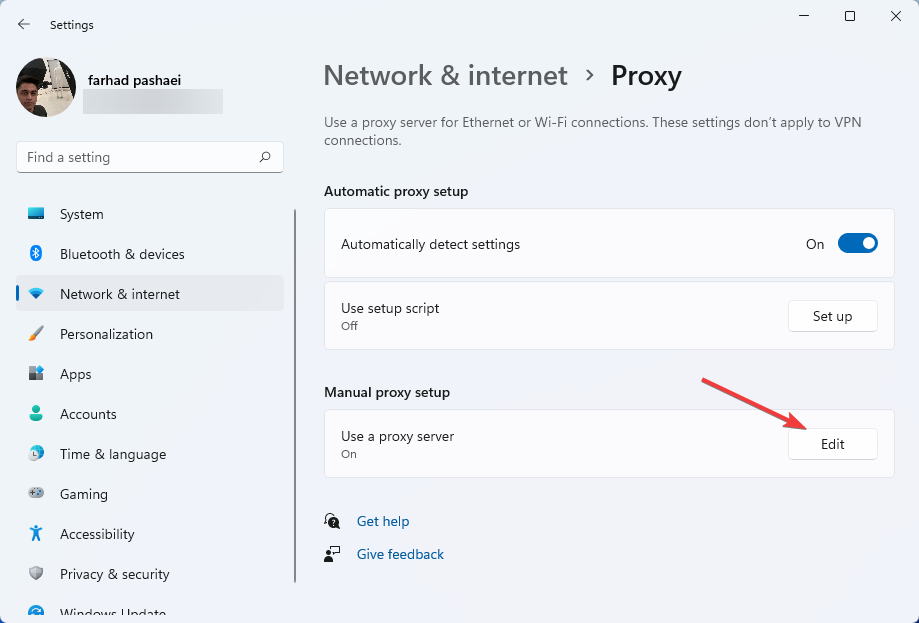
- Select Edit next to Use a proxy server option in the Manual proxy setup section.
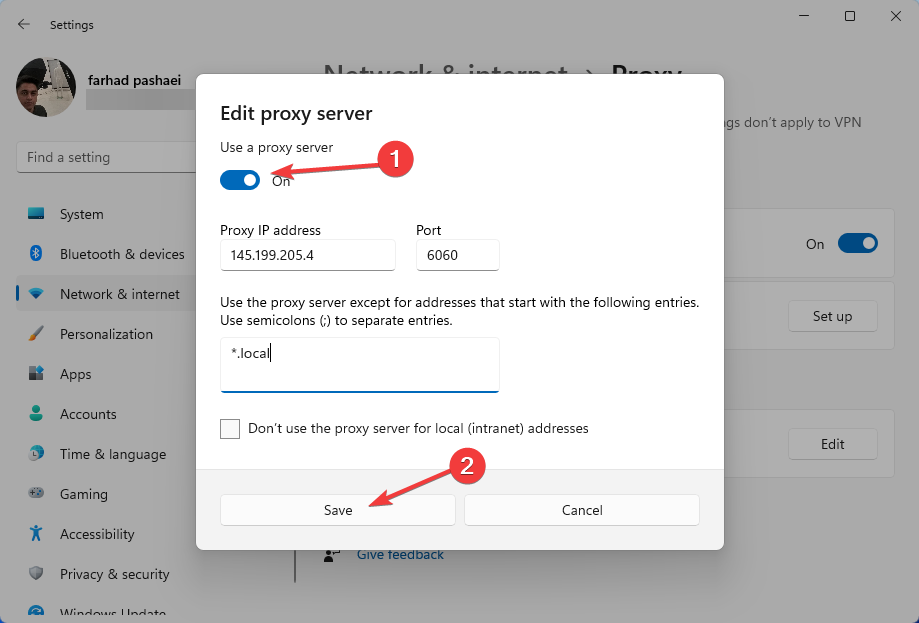
- Toggle off Use a proxy server and click on Save. Then, close Settings.
A proxy error may occur because of changing user IP addresses. So, to solve this, you must toggle it off in Network & internet settings.
3. Use a dedicated software
Reliable troubleshooting software may be your best option if you’re new to computers or have trouble following instructions.
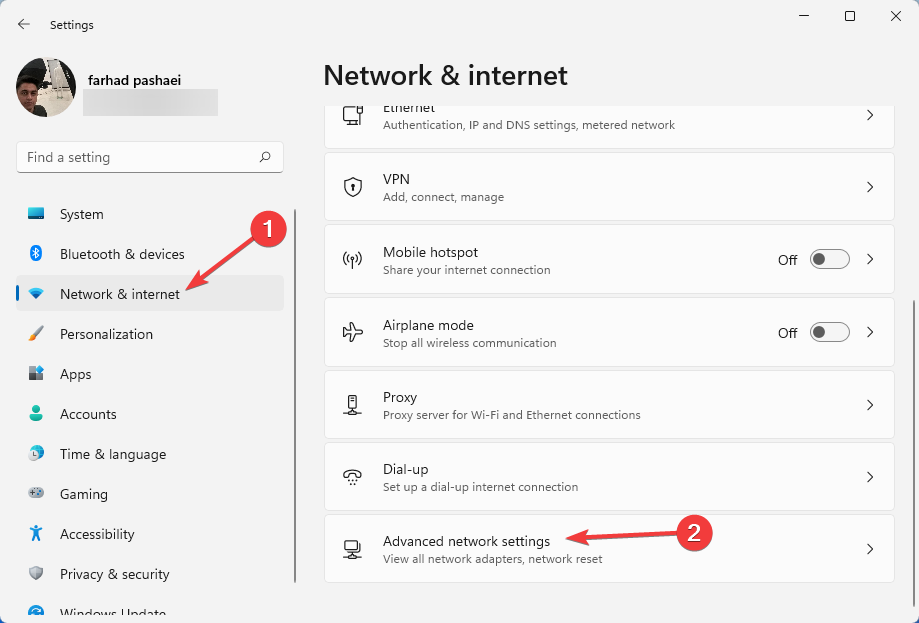
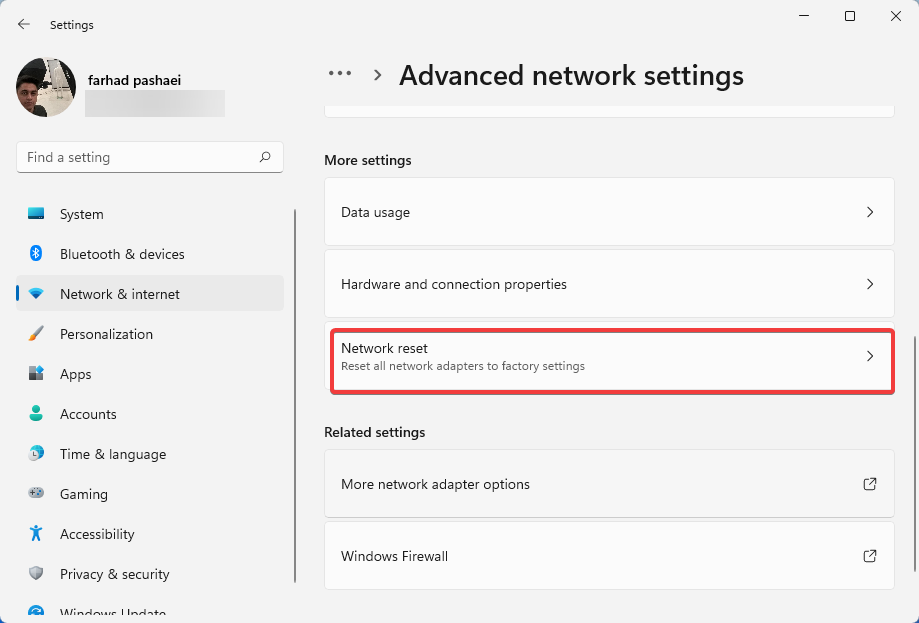
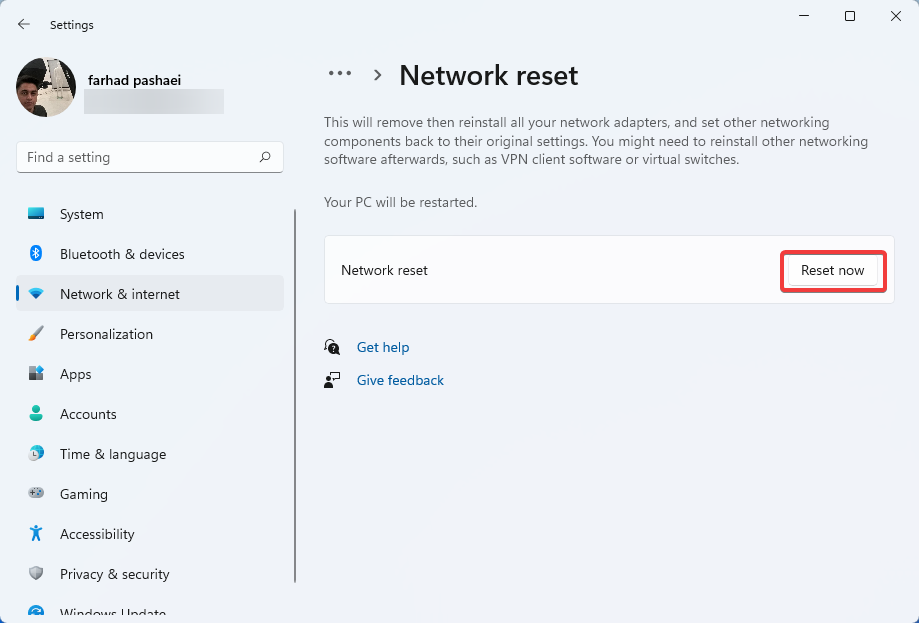
4. Do a network reset
While it is the simplest way, network reset has shown to be one of the most effective solutions because it restores the default network settings and resolves proxy issues.
5. Reset browser settings
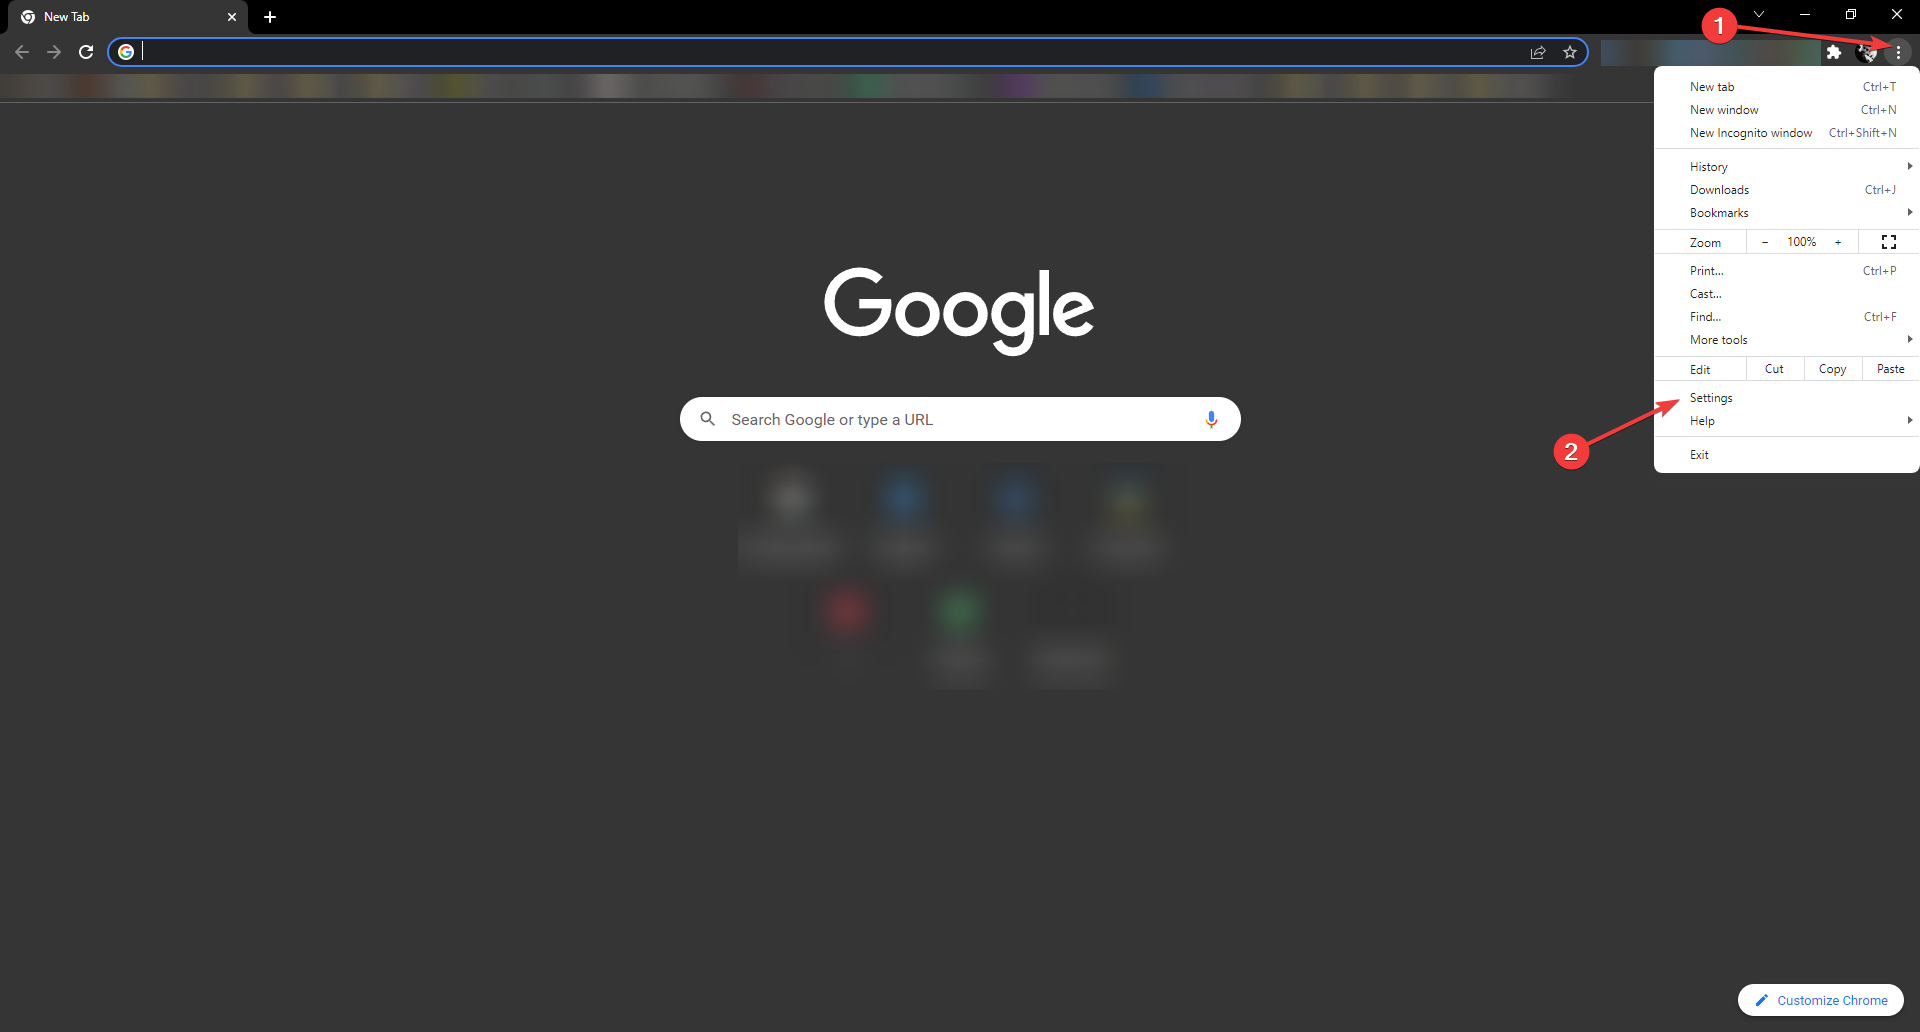
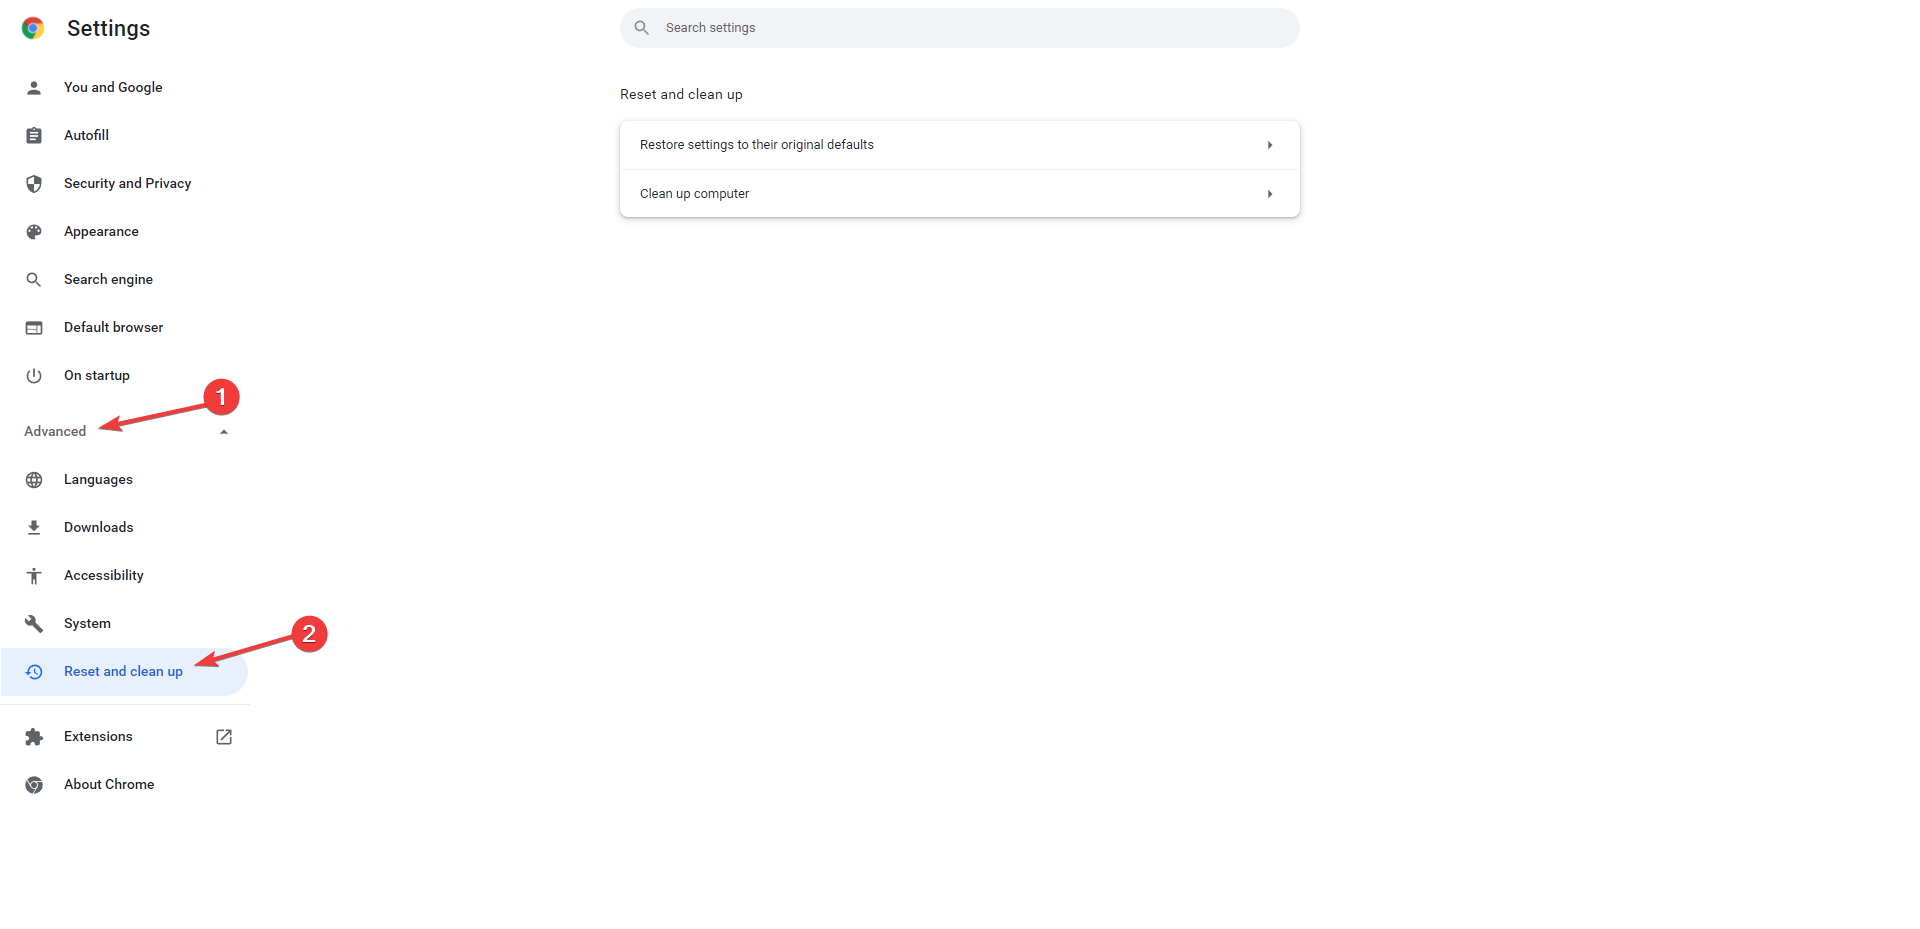
- Open up your web browser, for example, Chrome. Then, click on the three-dot menu just on the top right side and select Settings.
- Now, select Advanced and scroll down to Reset and clean up option then click it.
- Following that, choose Restore settings to their original defaults.
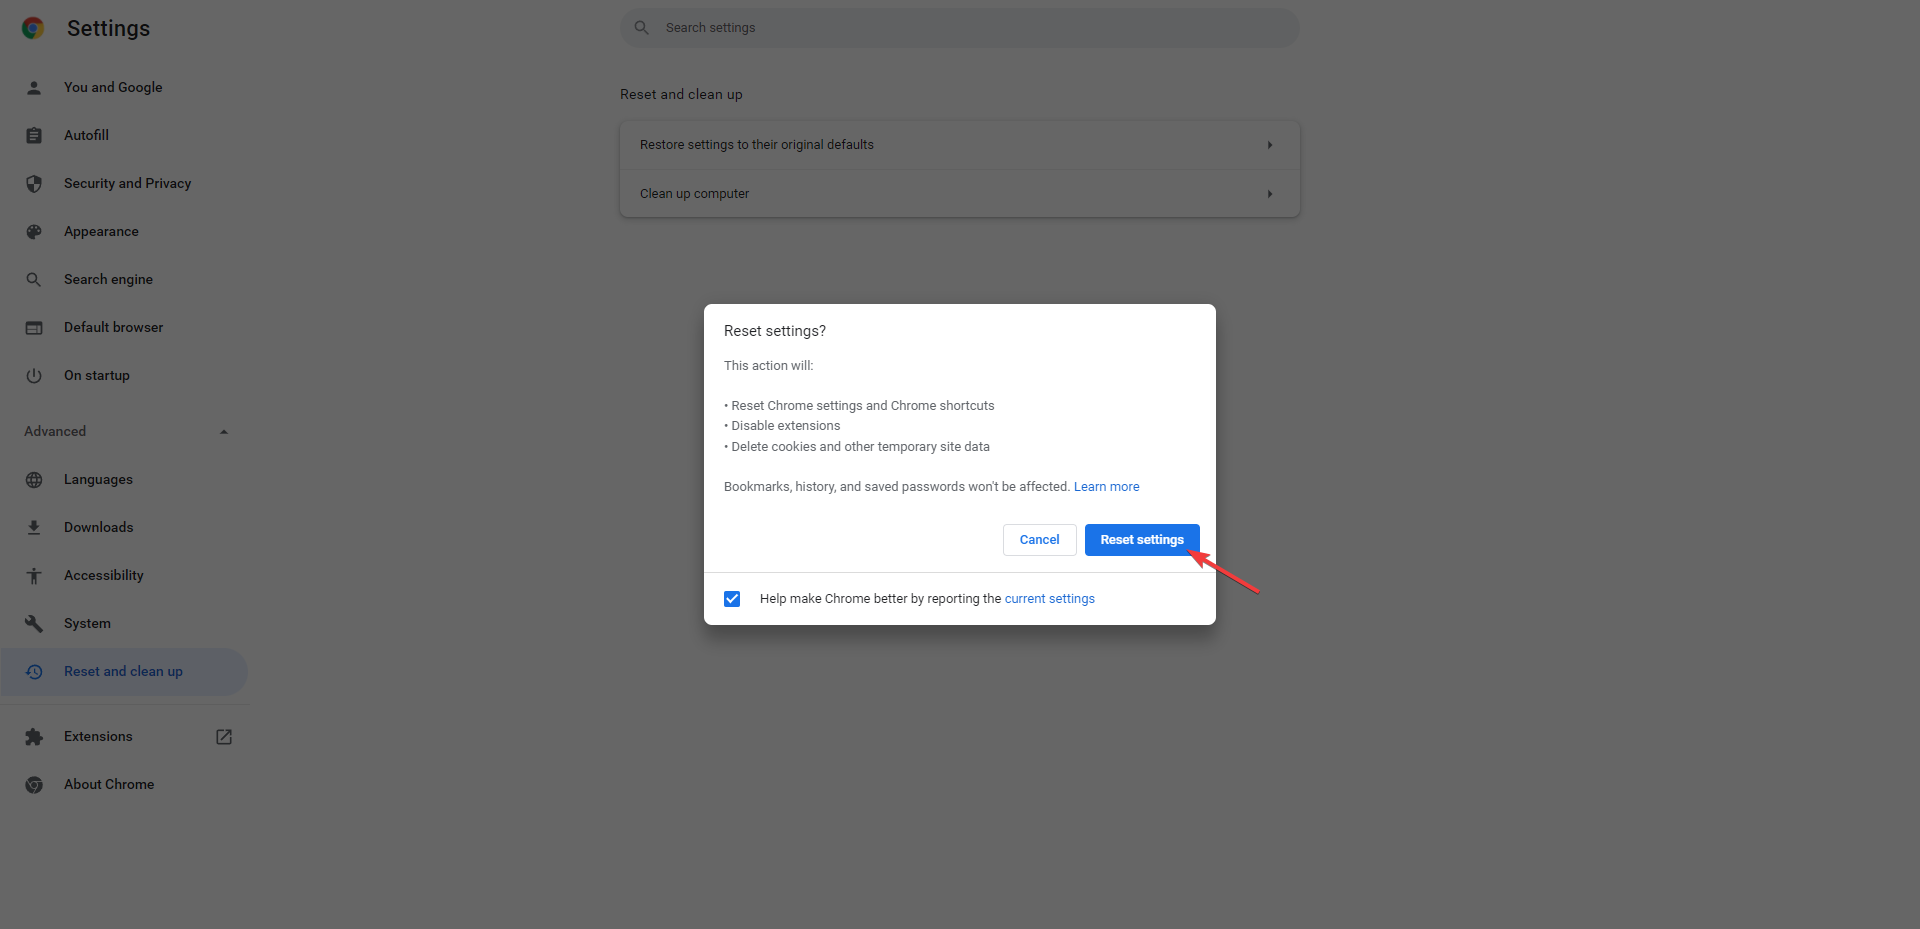
- Select Reset settings. Then, you’ll have to wait a little time for the process to complete.
- Close Chrome and open it again.
You can troubleshoot proxy errors just by restoring Chrome settings to default. Note that this process cleans up all your cookies.
6. Perform malware scan
Proxy errors can be caused by malicious programs or viruses. So, if you’ve lately visited a suspicious website or downloaded any strange software, there’s a chance your computer has been infected.
Install powerful security software like ESET HOME Security Essential and run a scan. Then, leave the software to handle the rest of the work.
ESET HOME Security Essential is capable of real-time protection. Also, ransomware and phishing attacks are all prevented by using this software on the PC.
7. Modify the Registry
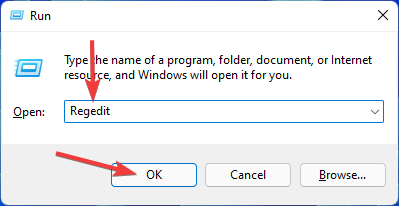
- Hold down Windows + R keys simultaneously to open Run dialog.
- Now, type Regedit in Run and press OK.
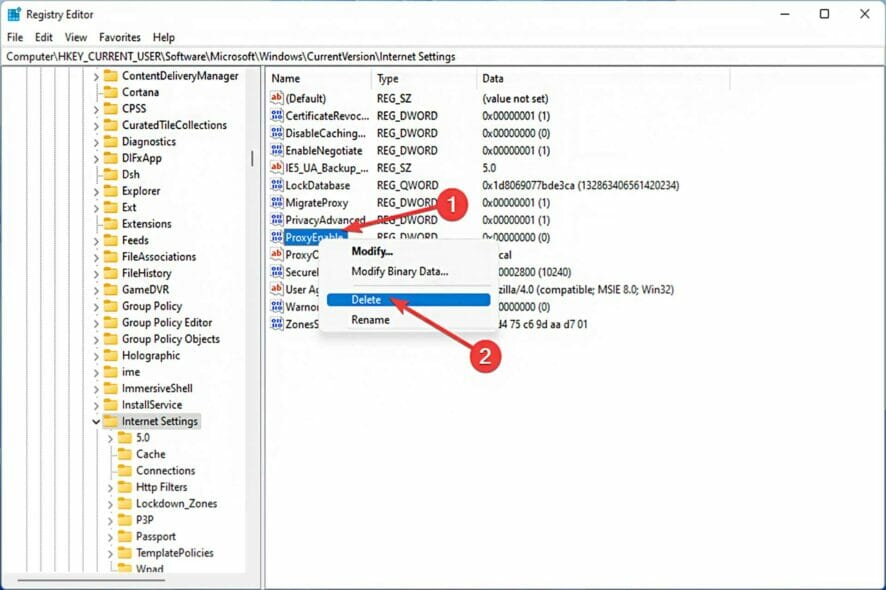
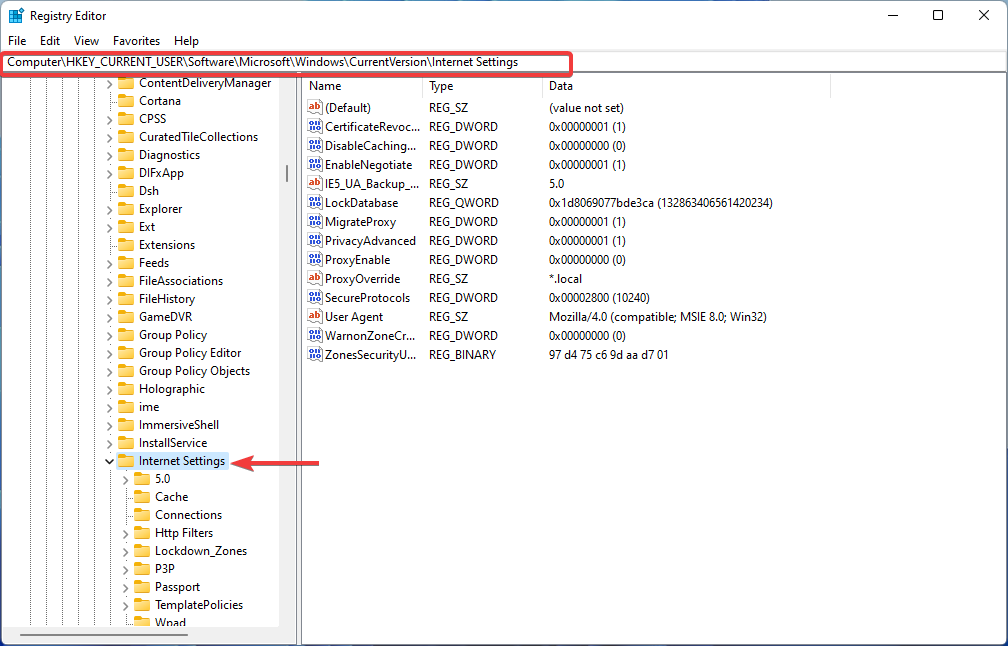
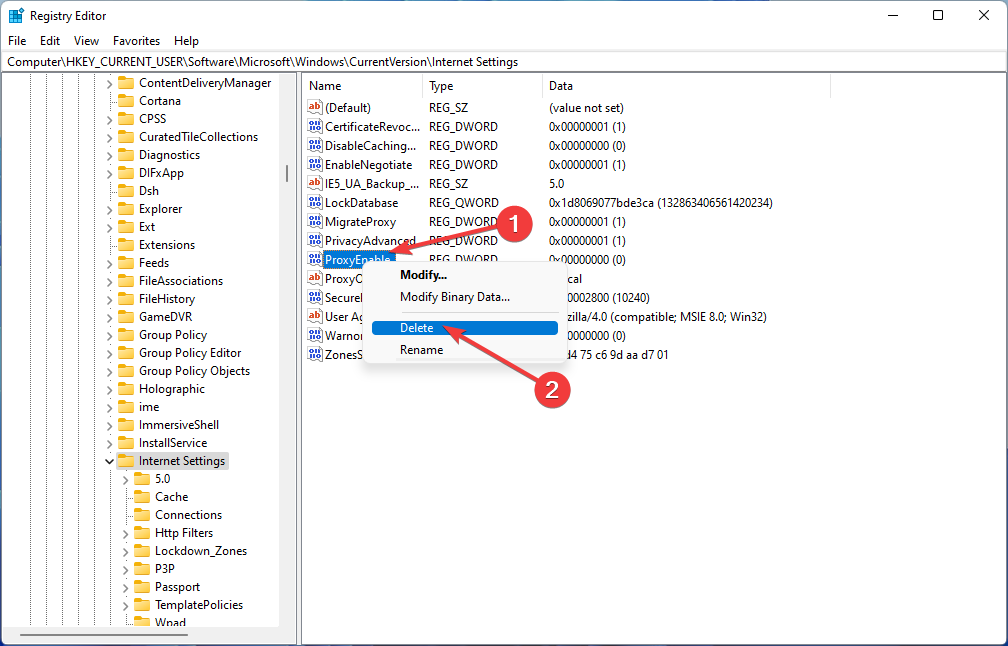
- Then, navigate to: Computer\HKEY_CURRENT_USER\Software\Microsoft\Windows\CurrentVersion\Internet Settings.
- After that, in the right pane, look for Proxy Enable and Proxy Server values.
- Right-click on the value and select Delete.
 NOTE
NOTE
8. Disable proxy LAN settings
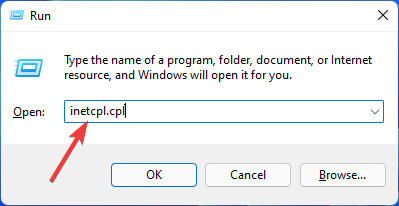
- Open Run dialogue by pressing Windows + R key combination.
- Type inetcpl.cpl then hit Enter.
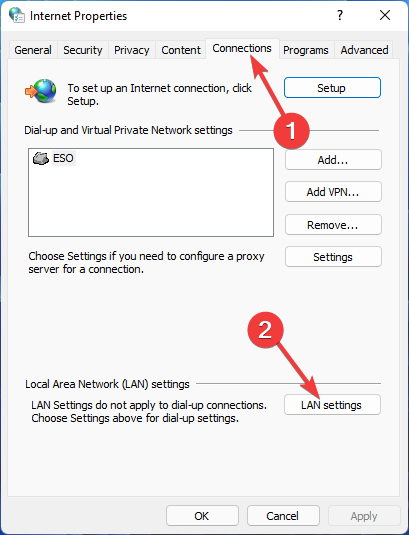
- Once the Internet Options window opens up, go to the Connection tab and select LAN settings.
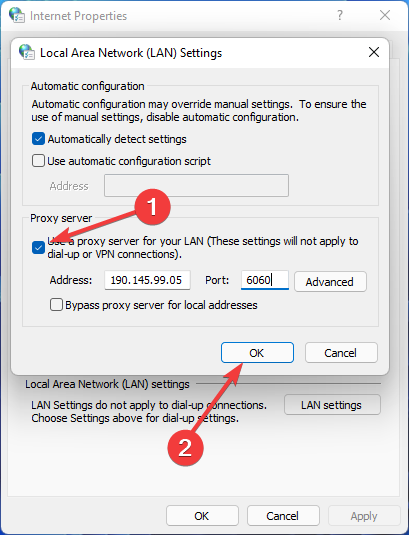
- Now, under Proxy server section, uncheck the Use a proxy server for your LAN box and click on OK to save changes.
- Then click OK in the Internet Properties window before exiting.
If you get inetcpl.cpl errors, it’s easy to fix!
9. Uninstall your network adaptor
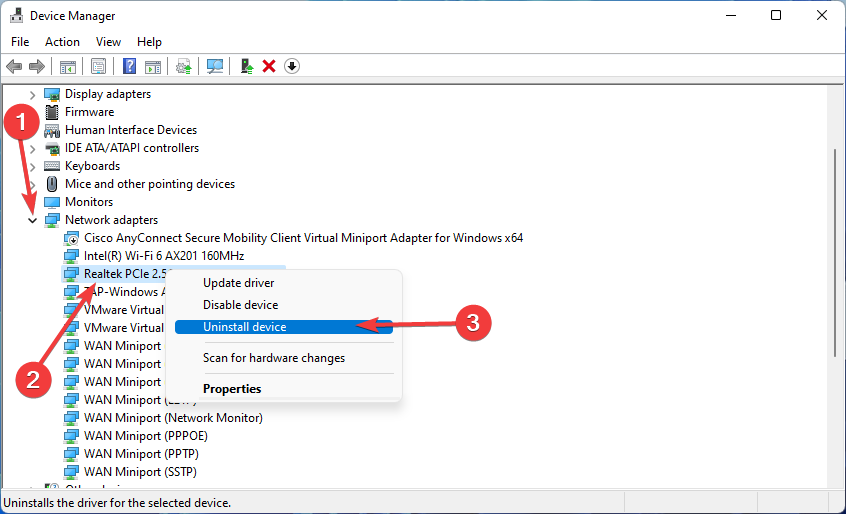
- Right-click on Start menu and select Device Manager.
- Expand Network adapters, then right-click on your network adapter and choose Uninstall device from the menu that appears.
- Restart your computer.
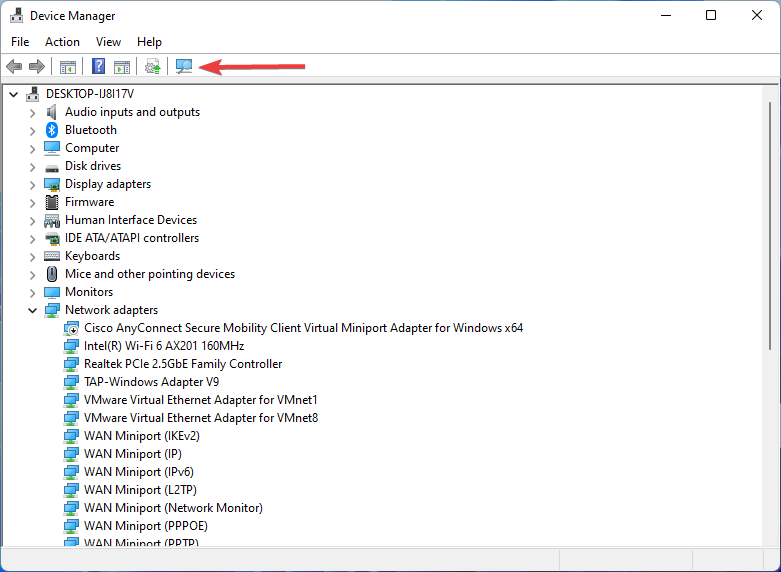
- Now it’s time to reinstall network driver. To do this, open up Device Manager again then click on Scan for hardware changes.
It is recommended that you download and run Outbyte Driver Updater if the driver was not able to be installed successfully.
Following the installation of this application, it will scan your computer for and install any missing drivers that are found.
One of the advantages of using this tool is that it will scan your computer for outdated drivers and update them, resulting in a significant boost in the overall performance of your computer.
What are the main types of Windows 11 proxy errors?
For the client side, proxy errors are categorized into 4xx classes. So, to fix Windows 11 proxy errors, you may need to know them from scratch.
- 400- a Bad Request: It arises from an invalid client request. It is either due to malformed requests or incorrect syntaxes
- 401- an unauthorized error: This error occurs when a client sends unverified authentication credentials to the server. It is attributed to DNS. You can solve it by clearing browser cookies
- 402- a payment requirement: This infrequent error mainly functions as a means for digital payment systems. According to Mozilla. developer, it is ” a nonstandard response status code that is reserved for future use”
- 404. Object not found: This error is a common proxy error that drives from incorrect or dead URLs. This error occurs when a URL changes without redirection
- 407. Proxy Authentication Required: This error occurs when the server identifies a client as unauthorized access. So, you have to make changes in proxy settings to fix this issue
- 429. Too many requests: When a client sends many requests to a server quickly, you see this error. You can also see this error while logging into your account successfully
If you’re having trouble connecting to a proxy server in Windows 10, we recommend reading this article.
There are a bunch of ways to fix Windows proxy errors. Some of them are attributed to changing proxy settings, and you can alter the settings, for example, LAN settings, or reset them to the default.
You can also make registry changes, but you must exercise caution when doing so because incorrectly modifying it may result in even more problems.
Please let us know which solution worked best for you in the comments section below.
User forum
0 messages