Acer Nitro 5 Touchpad not Working: 4 Ways to Fix it
Simple and effective solutions to fix this issue for good
3 min. read
Updated on
Read our disclosure page to find out how can you help Windows Report sustain the editorial team Read more
Key notes
- A wide range of users has reported that their Acer Nitro 5 touchpad is not working.
- Ensuring that your operating system is updated is the first step in fixing this issue.
- You can also solve this problem by updating your touchpad driver.
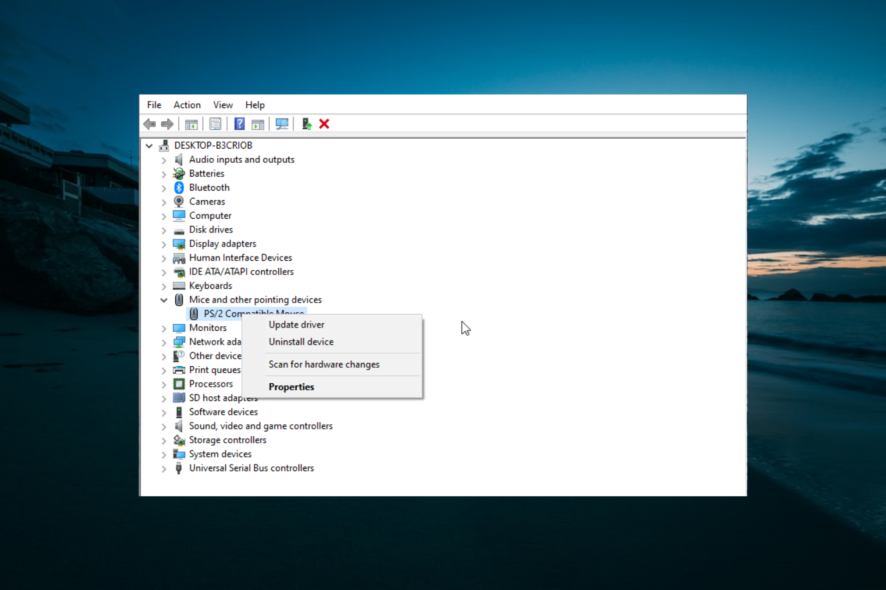
Using the touchpad is one of the primary actions during our day-to-day work. Unfortunately, some Acer Nitro 5 users complain that their touchpad is not working.
This takes away an essential ease-of-use feature on their PCs. Fortunately, the issue can be easily fixed, as shown in this guide’s ensuing sections.
Why won’t my Acer laptop touchpad work?
A series of potential causes for the Acer Nitro 5 touchpad not working, from software to hardware problems. Below are some of them:
- Faulty touchpad drivers: Sometimes, this issue is to an outdated or corrupt touchpad driver. You need to reinstall or update your driver to solve this problem.
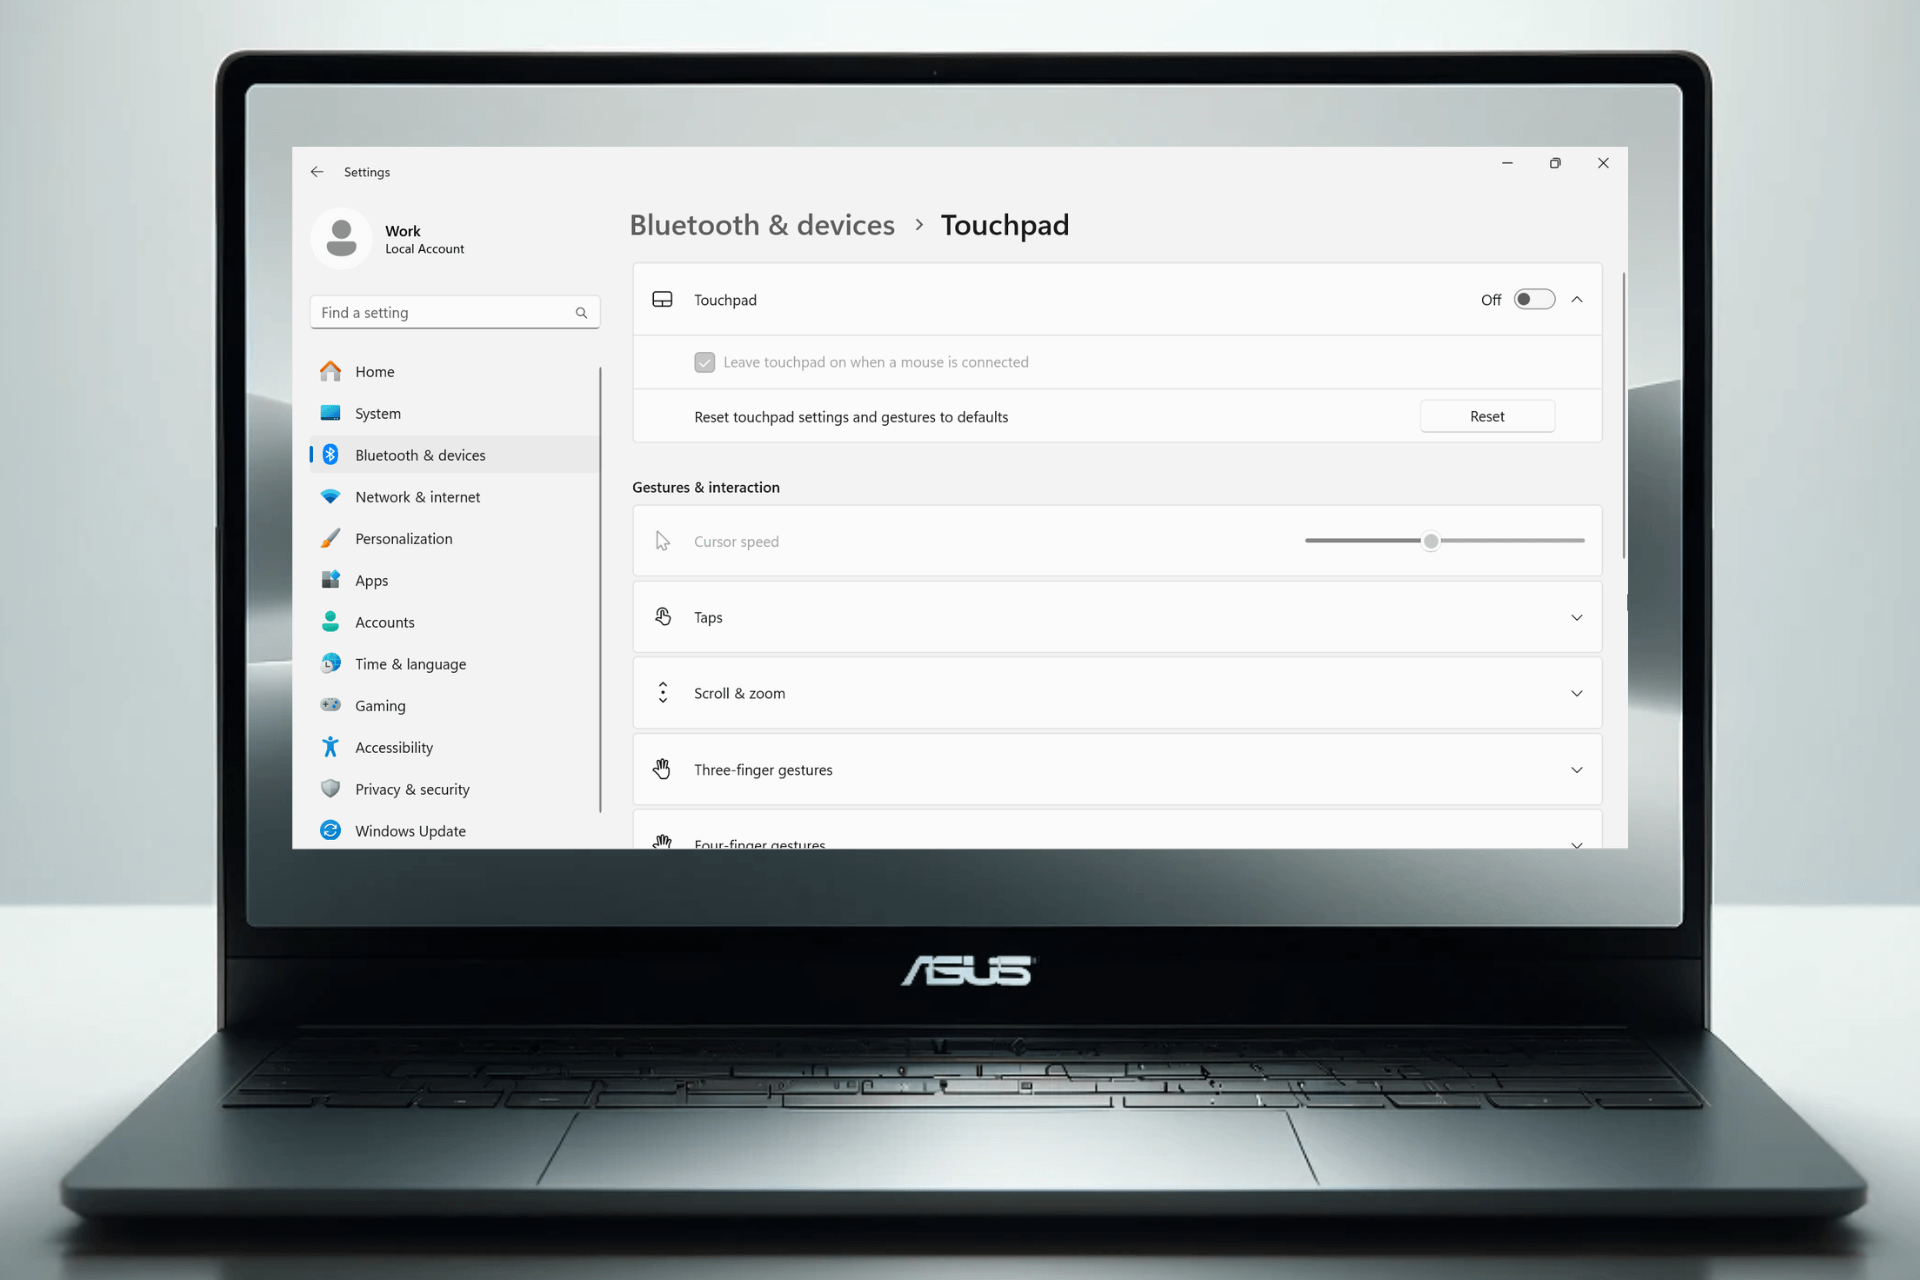
- Disabled touchpad: At times, this Acer Nitro 5 touchpad problem can occur simply because the touchpad is disabled. The solution to this is to enable it with the required shortcuts.
- Outdated PC: Windows updates are important for keeping your PC running smoothly. Hence, you need to update your PC if it is outdated to prevent issues such as this.
What can I do if Acer Nitro 5 touchpad is not working?
1. Re-enable the touchpad
Sometimes, the Acer Nitro 5 touchpad might not be working because it has been somehow disabled knowingly or accidentally. To fix this, press the Fn key + F6 or F7 (or any function key that works for the touchpad) to enable it.
With this, the issue should be fixed for good.
2. Check for Windows updates
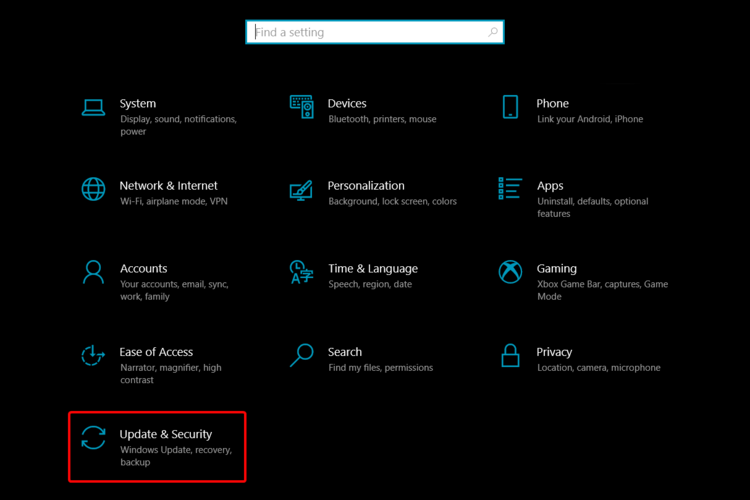
- Press the Windows key + I to open the Settings app and select Update & Security.
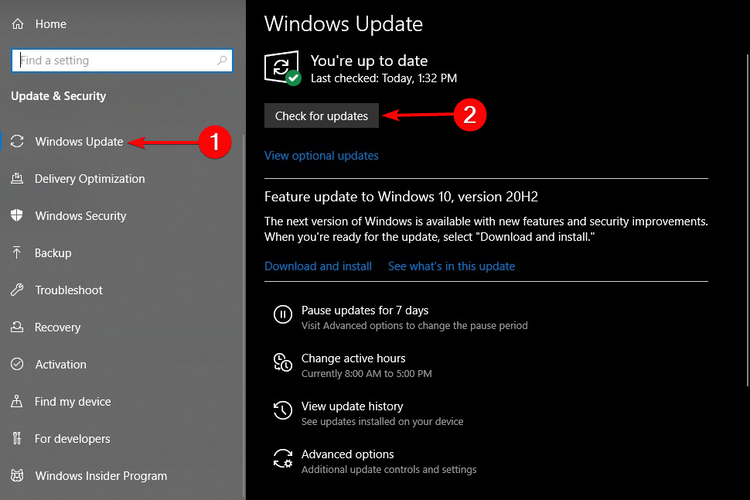
- From the left side, select Windows Update, then click on the Check for updates button from the right side.
An outdated PC is prone to different issues, including this Acer Nitro 5 touchpad not working problem. So, you need to keep your operating system updated at all times.
3. Update the touchpad driver
- Open Device Manager.
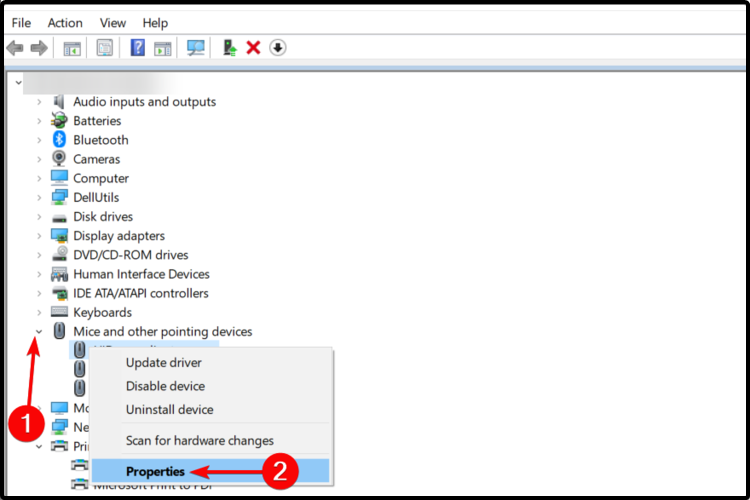
- Expand Mice and other pointing devices, right-click on the touchpad driver you need, and select Properties.
- Click on the Driver tab, then on Update Driver.
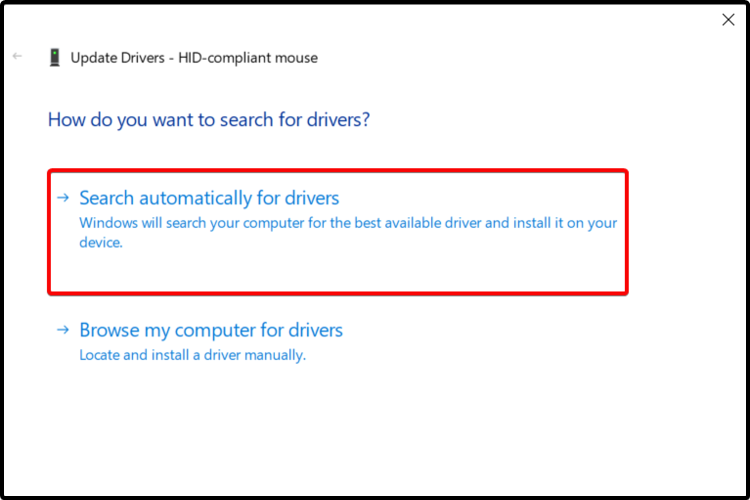
- Select Search automatically for drivers.
Unlike the manual option presented above, you can use a dedicated driver updating tool to automatically scan and fix any driver you need. Thus, you’ll always keep your components safe with much less effort.
Not only will it keep your driver’s troubles away, but the operating system will be constantly updated to the latest software version.
Moreover, a dedicated driver updater allows you to work with an extremely easy-to-use interface.
4. Uninstall the touchpad driver
- Press the Windows key + X and select Device Manager.
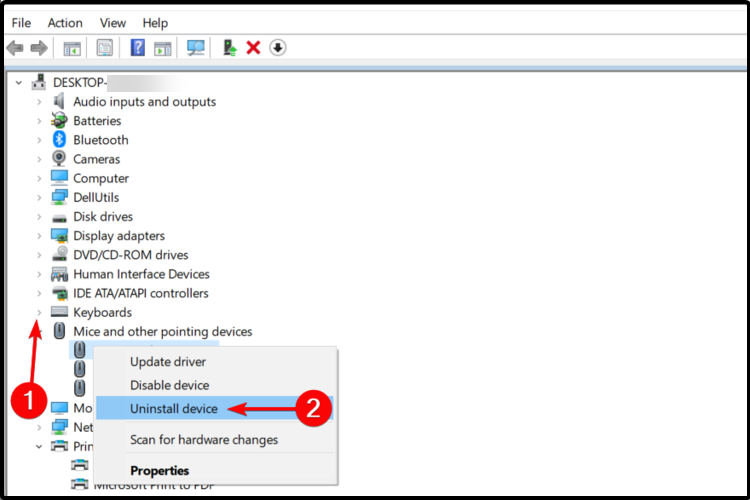
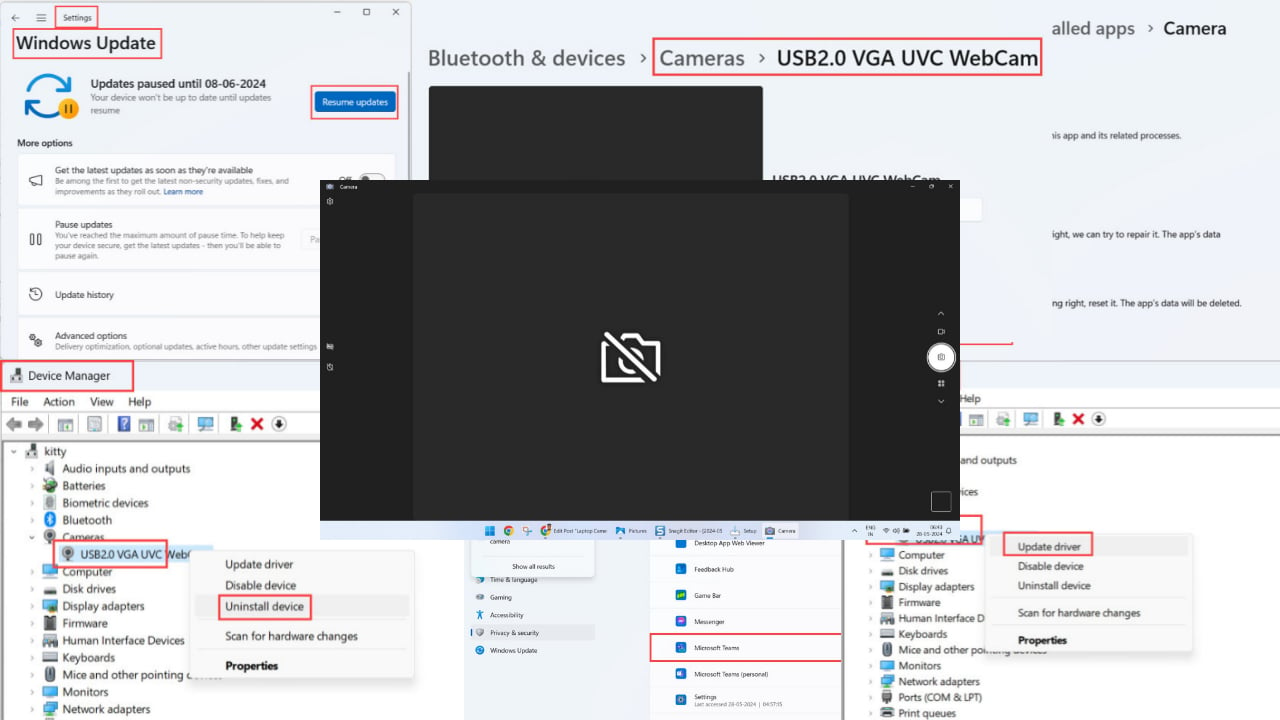
- Expand Mice and other pointing devices, right-click on the driver you need, and select Uninstall device.
- Click Uninstall for final confirmation.
- After the driver uninstallation is complete, restart your PC.
 NOTE
NOTE
The solutions above are the best options you can find to fix the Acer Nitro 5 touchpad not working issue.
If you’re ever unable to install drivers on Windows 10, check a complete guide and find out some helpful information.
Let us know which one of the suggested solutions worked best for you. Thus, make sure you leave a comment in the section below.

