ADB Command or Not Found: 5 Ways to Enable it
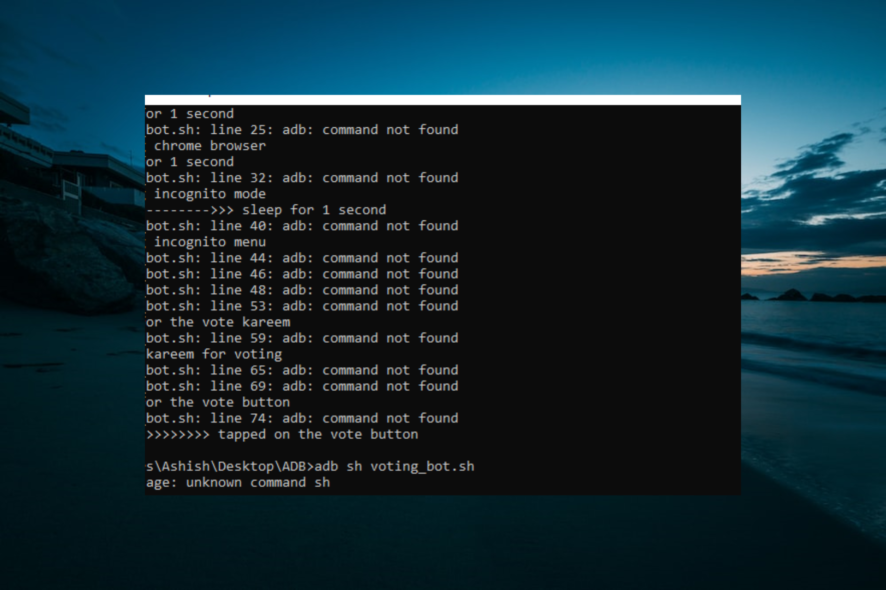
Have you ever received an ADB command not found error message when you were trying to connect your smartphone to your personal computer? This error prevents you from running developer commands on your phone, but it can be easily fixed.
How can I fix the ADB command not found error?
Table of contents
1. Select Media Transfer Protocol on your phone
- The first thing that you will have to do will be to check if your smartphone is plugged in correctly.
- After this, you will have to select the USB connection notification on your phone.
- Then, you will have to select MTP to be your connection mode.
2. Update ADB Interface
- Open Device Manager.
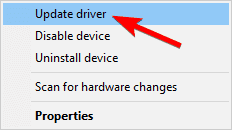
- Right-click on the Android ADB Interface or Android Phone option, under Other Devices, and select Update driver.
- Select Browse my computer for driver software.
- Now, select Let me pick from a list of device drivers on my computer.

- Now, a window dialog will show up on your screen with the text Show all devices, click Next.
- Click Have Disk.
- After this, go to the location where you have installed the SDK. Usually is
C:\Program Files\Android\android-sdk\extras\google\usb_driver - Then you will have to double-click on android_winusb.inf and select Android ADB Interface.
- Now, click on Yes, followed by Install.
- After the process is complete, you will have to close the window.
For more information, we have an in-depth guide on how to download ADB drivers for Windows 11.
3. Enable USB Debugging and Developer Options
- The first thing that you will have to do will be to go to your phone Settings and Select About.
- Here, tap the Build number seven times to enable Developer Options.
- Then, you will have to go back and select Developer Options.
- Now, scroll down and tap on USB Debugging.
This can help you if zsh: command not found: adb error appears, so be sure to try it.
4. Run ADB command from the installation directory
- Open Command Prompt.
- Navigate to the directory where Android SDK is installed in Command Prompt. By default, it should be one of the paths below:
C:\Program Files (x86)\Android\android-sdk\toolsC:\Program Files (x86)\Android\android-sdk\platform-tools - Try running the ADB command from these directories.
Alternatively, you can open Command Prompt in the Android SDK directory by doing the following:
- Open the Android SDK installation directory.
- Press and hold the Shift key, and right-click the space inside the directory. Choose the Open PowerShell window here option.

- Once the PowerShell window opens, try running the ADB command.
5. Create a user or system variable path for ADB or fastboot
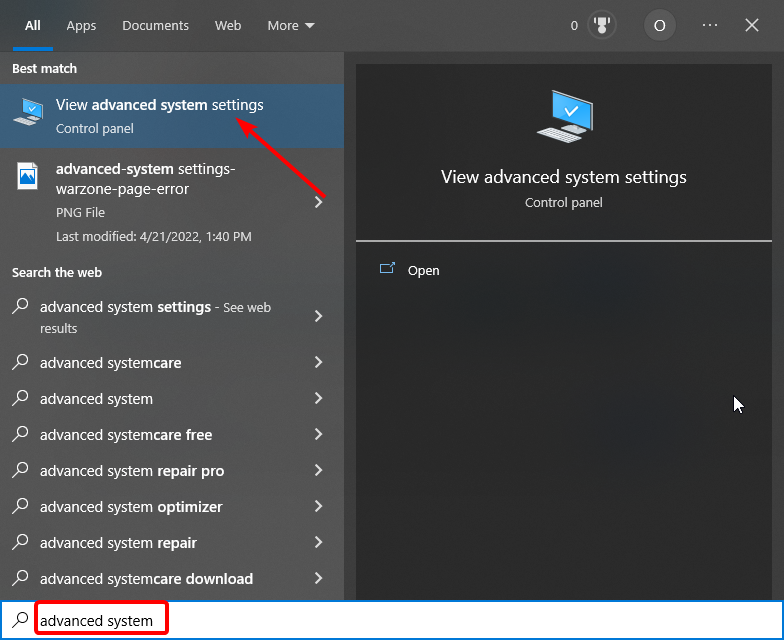
- Press the Windows key, type advanced system, and choose View advanced system settings.
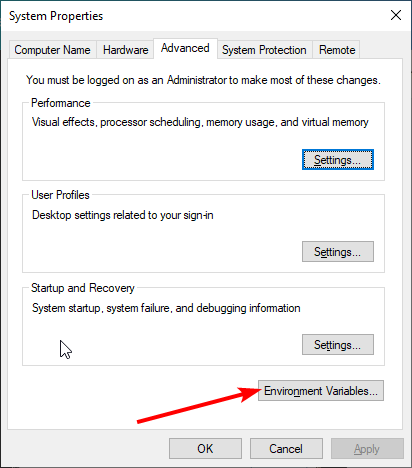
- Click on the Environment variables button.
- Now, select any item under the System or User variables sections, and click the New button.
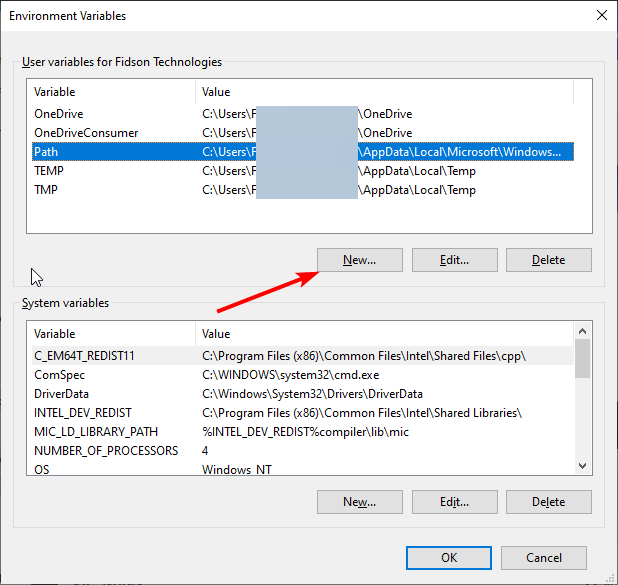
- Type Path as the Variable name.
- Next, click the Browse Directory button, select platform-tools, and click OK.
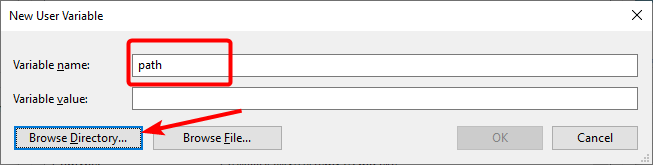
- Finally, click the OK button to confirm the changes, and remember to click the OK button on the Environment variables button.
We hope this article and our solutions helped you fix the ADB inaccessible or not found message.
If you encounter the ADB reboot bootloader is not working on your PC, check our detailed guide to fix it quickly. Many also reported that ADB is not recognized in Windows 11, but we have a guide that addresses that.
For some users, the ADB driver is not installing, but our dedicated article should help you fix that.
Feel free to let us know the solution that helped you fix this issue in the comments below.
Read our disclosure page to find out how can you help Windows Report sustain the editorial team. Read more


Improve this guide

User forum
1 messages