Fix: Ark Survival Ascended Server Not Showing Up
First, check the ARK game server status
5 min. read
Updated on
Read our disclosure page to find out how can you help Windows Report sustain the editorial team. Read more
Key notes
- To fix the Ark Survival Ascended server not showing up, restart the game client & game, refresh the server list, or verify the game files.
- Continue reading to learn about the solutions in detail.
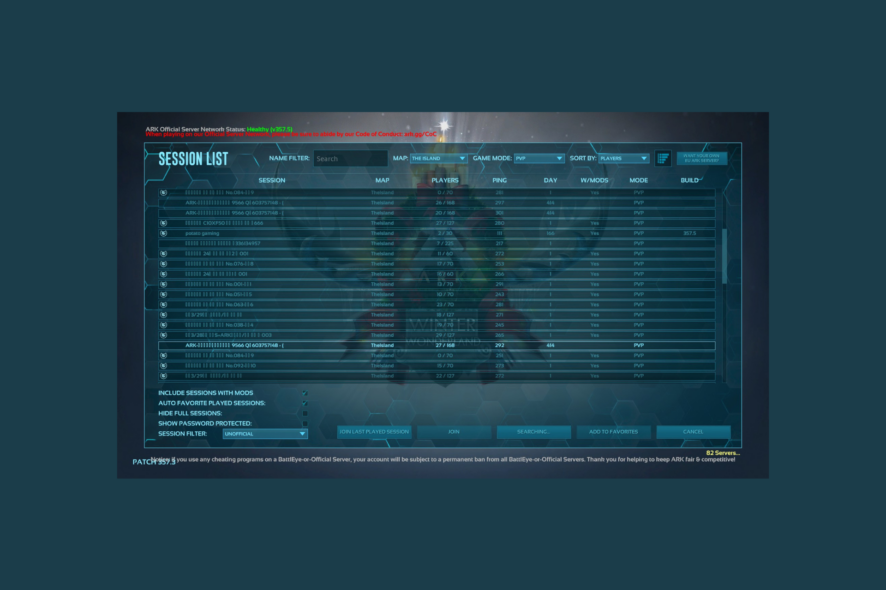
If you are trying to play Ark Survival Ascended, but the servers are not showing up, then this guide can help!
We will discuss the probable causes and offer WR experts-tested solutions to resolve the issue so that you can continue playing your favorite game without any interruption.
What causes the server not showing up issue on Ark Survival Ascended?
- Servers are down for maintenance or facing technical issues.
- Outdated game or corrupted game files.
- Security software interference.
How can I fix the Ark Survival Ascended server not showing up issue?
Before moving to the troubleshooting steps to fix the server missing from the server list issue, here are a few preliminary checks you should do:
- Check the server status or official community forums to ensure there are no announcements about technical issues or outages.
- Restart your game & the game launcher, then ensure your internet connection is stable or switch to a wired connection.
- Ensure your game and mods are updated to the latest version.
1. Refresh the server list
- Launch the game and go to the game’s server browser.
- Locate an option similar to Refresh or Update to refresh the list.
- Once done, you will get the latest server list; check if you see the server you want to join.
2. Verify the game files
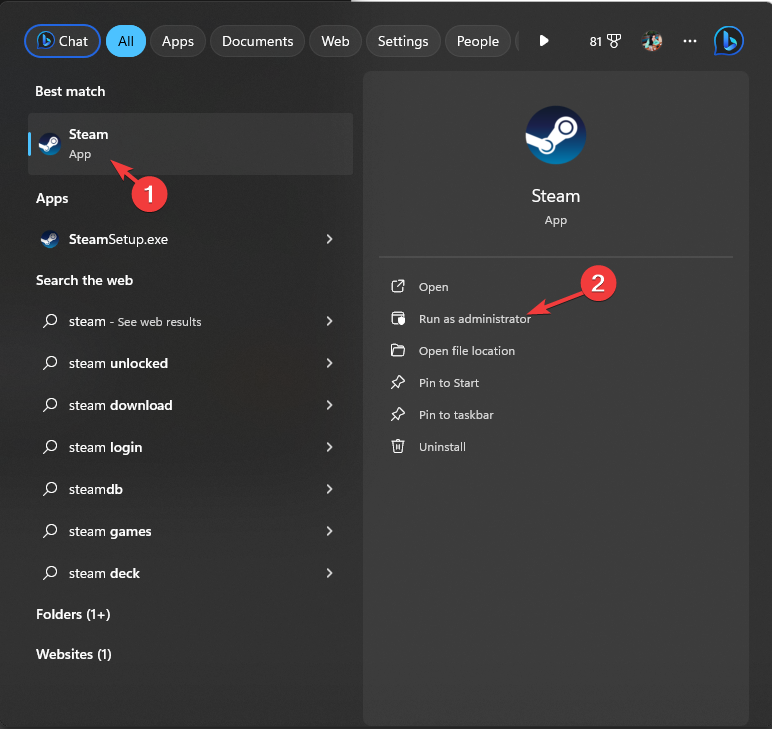
- Press the Windows key, type steam, and click Open.
- Click the Library option, right-click the ARK: Survival Ascended option, and then choose Properties.
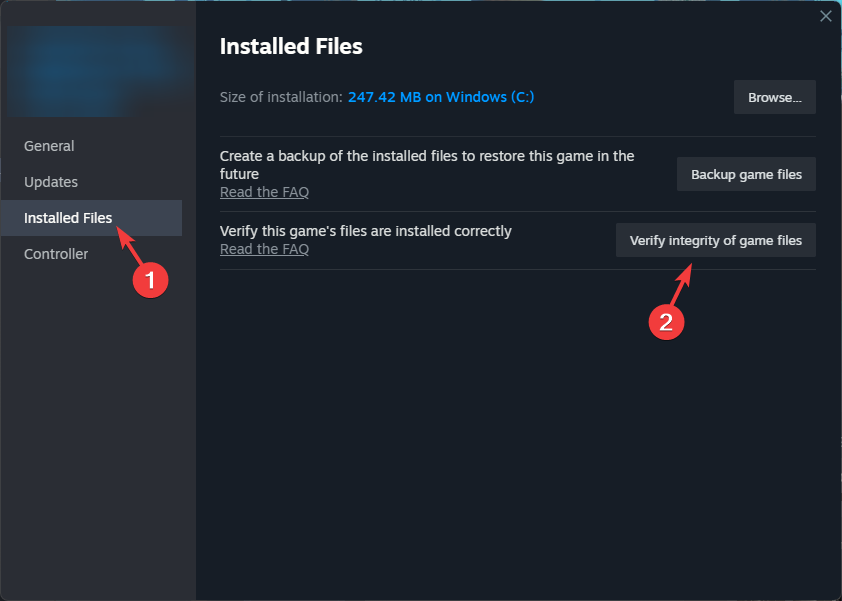
- Now, click the Installed Files option from the left pane.
- Click the Verify Integrity of Game Files button and let it check the game for missing files and if found, it will repair them.
3. Add the game to the allowed app list
 NOTE
NOTE
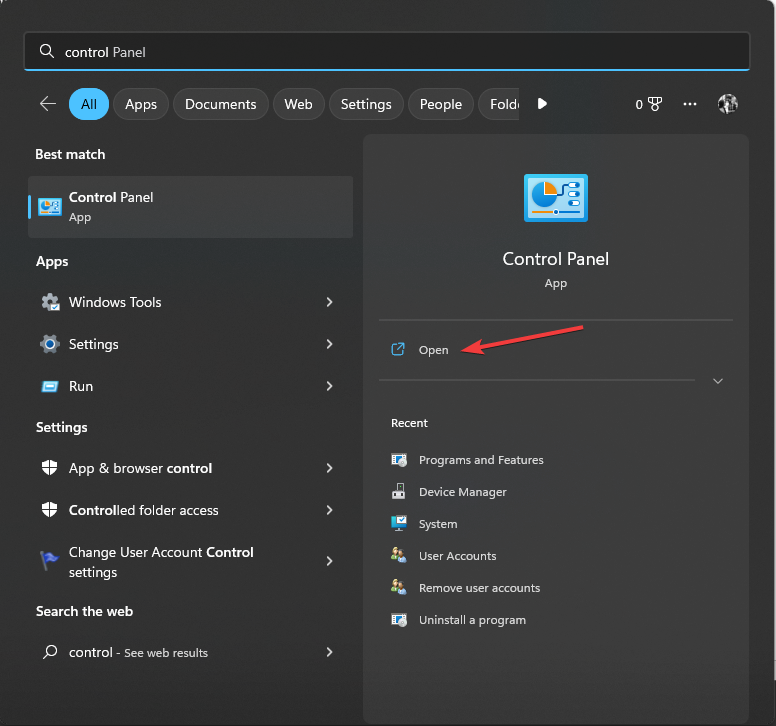
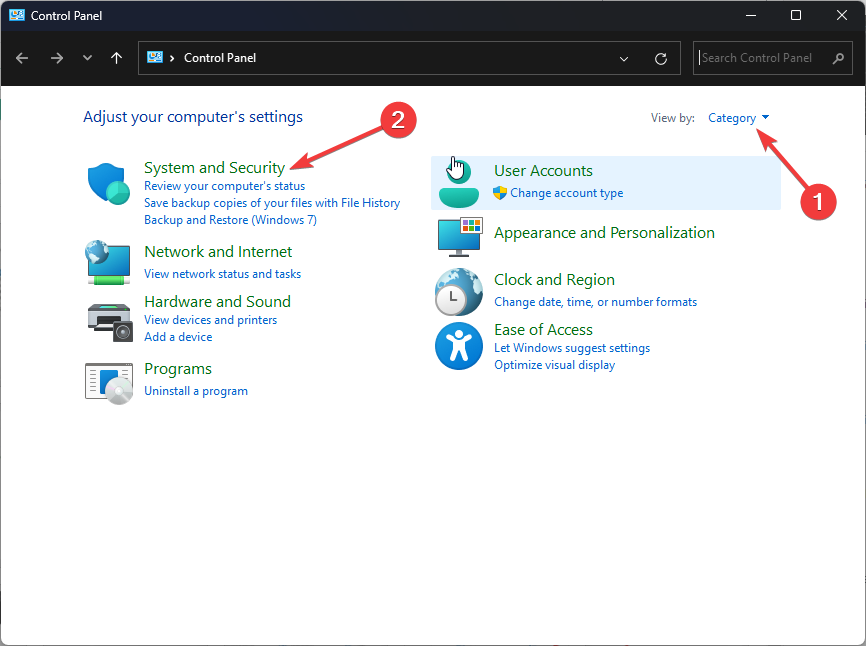
- Press the Windows key, type control panel in the search box, and click Open.
- Select Category for View by and click System and Security.
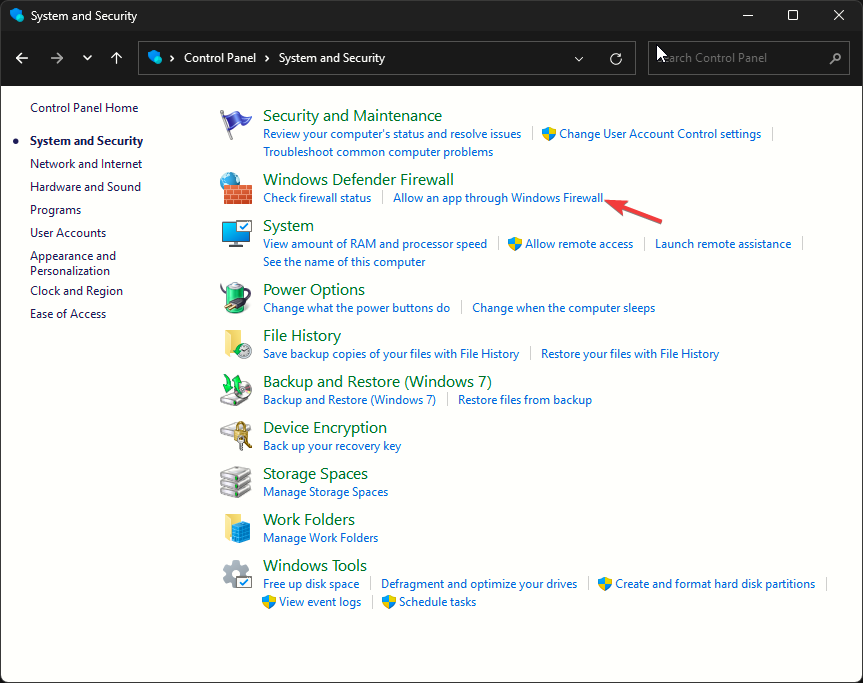
- Locate Windows Defender Firewall, and click Allow an app through Windows Firewall.
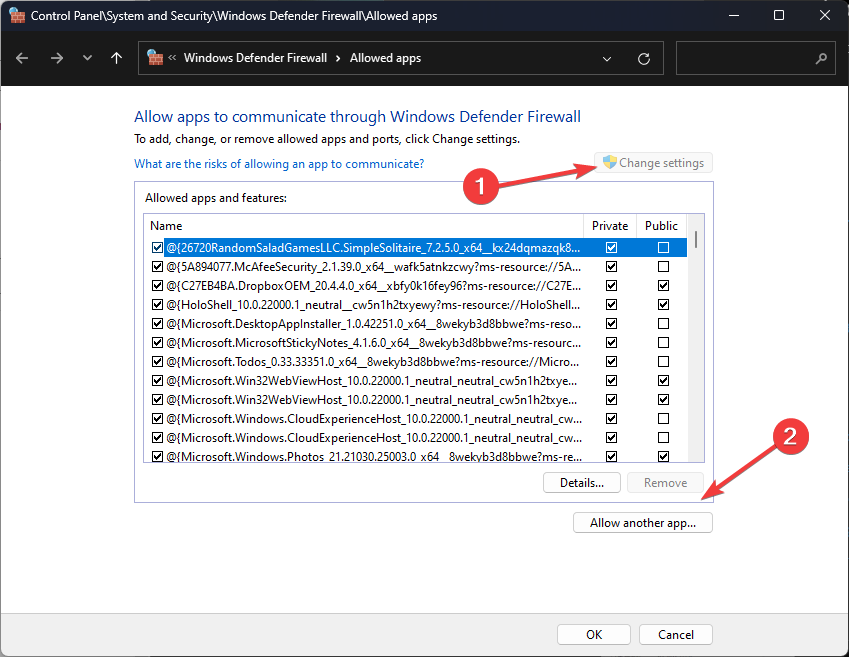
- On the Allowed apps screen, look for ARK: Survival Ascended; if not found, click Change settings, then Allow another app.
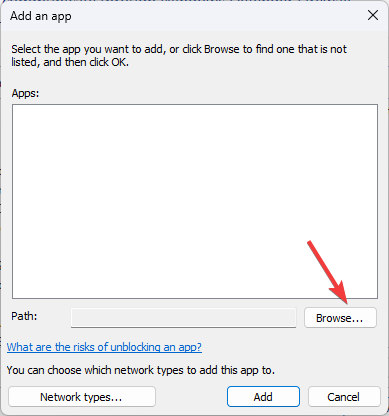
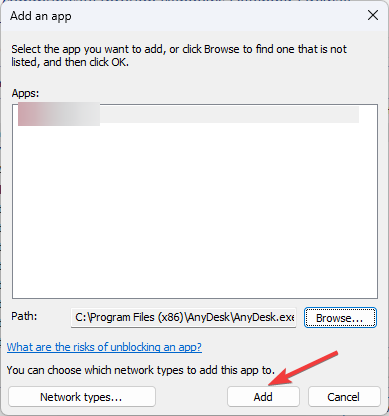
- Click Browse, look for the executable file of the game in the system drive, select it, and click Open.
- Click Add.
- Once added to the Allowed apps page, place a checkmark next to the Private and Public options and click OK to complete.
It is essential to allow ARK: Survival Ascended through the Firewall on Windows, as it solves other problems that could arise due to firewall interference.
4. Add the game to the antivirus exclusion list
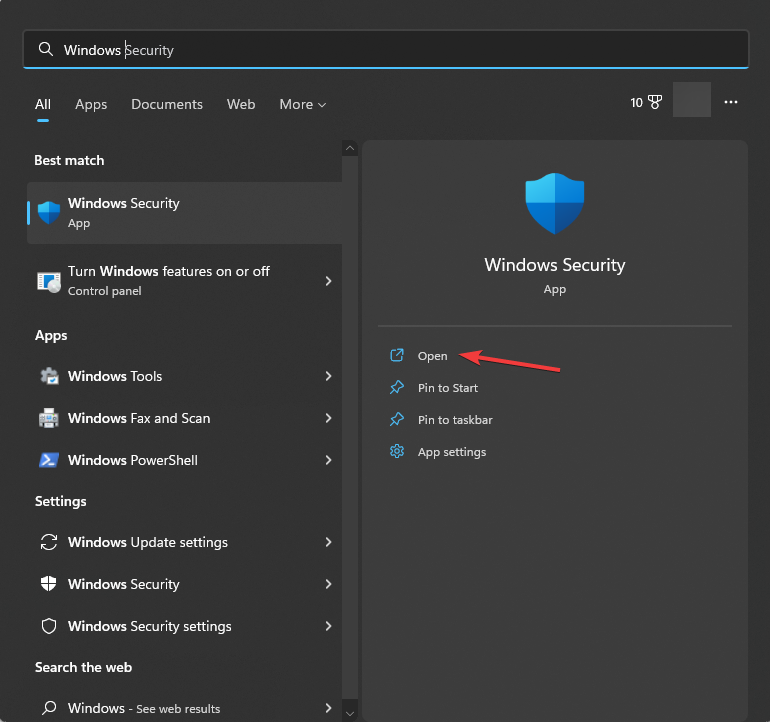
- Press the Windows key, type windows security in the search box, and click Open.
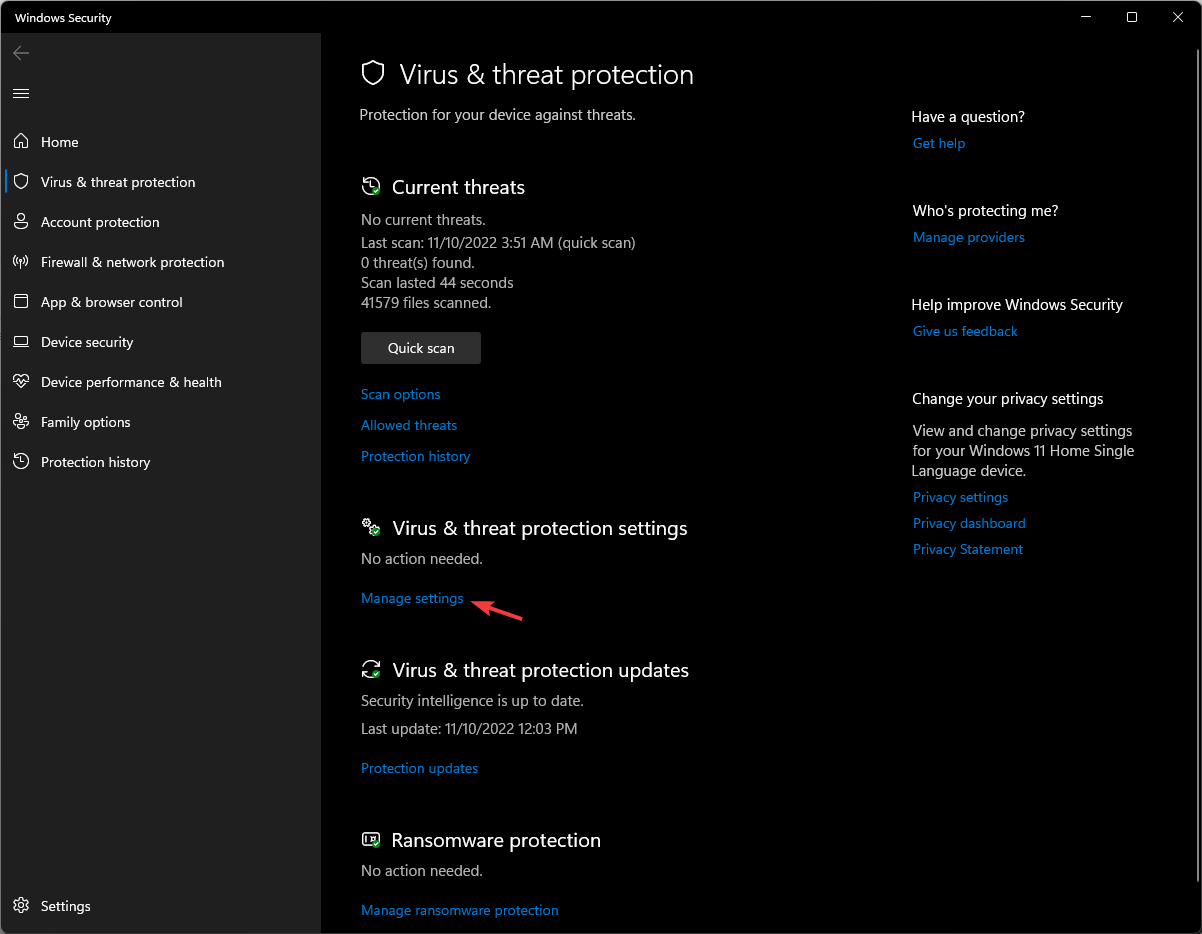
- Go to the Virus & threat protection from the left pane, and select Manage Settings.
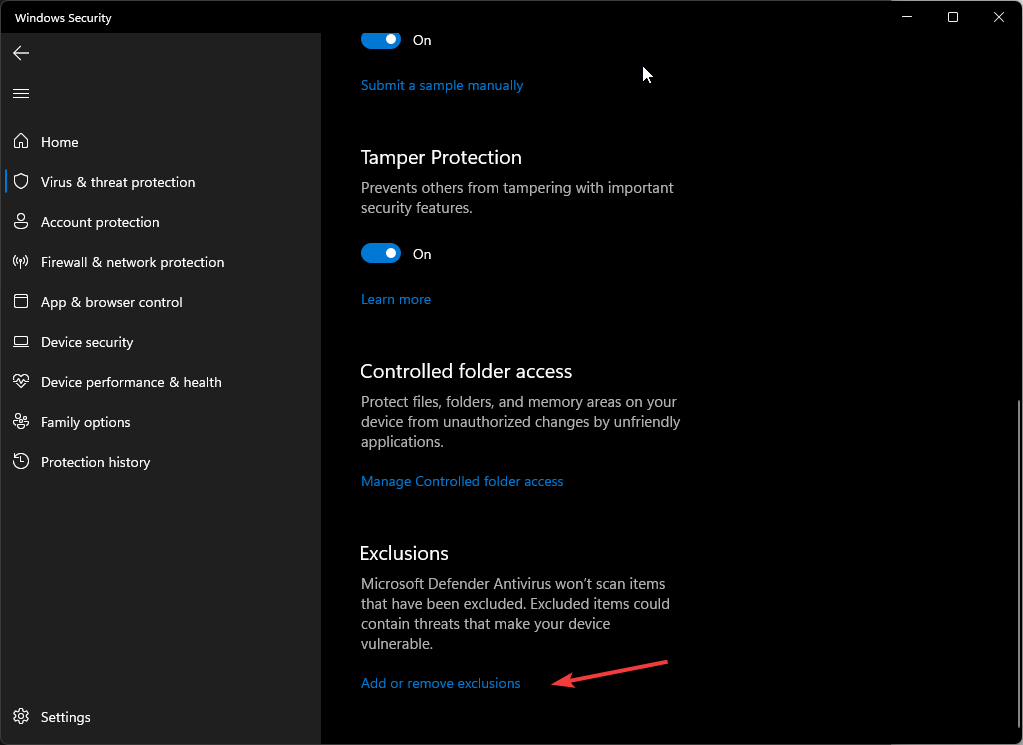
- Scroll down the page to find Exclusions, and click the Add or remove exclusions option.
- Click Yes on the UAC prompt.
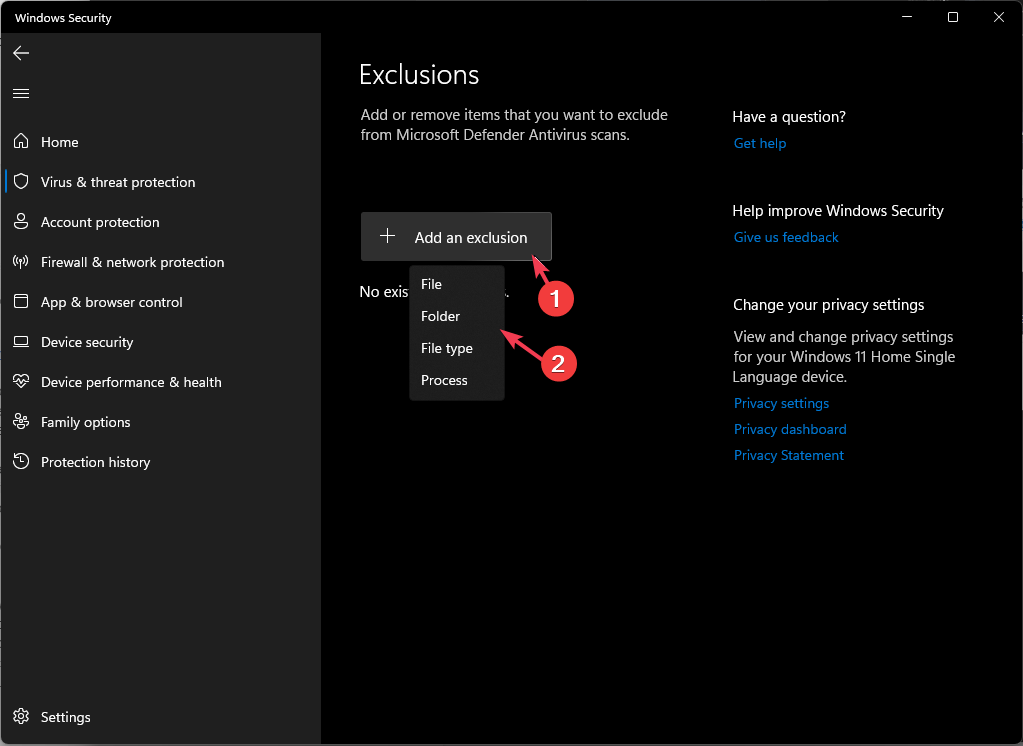
- Now, click the Add an exclusion button.
- Select Folder from the drop-down menu.
- From the following window, select the game and click Select Folder to add it to the exclusion list.
Restart your computer, then try to access the server for the game and check if the issue persists.
5. Add the ports to your router & firewall
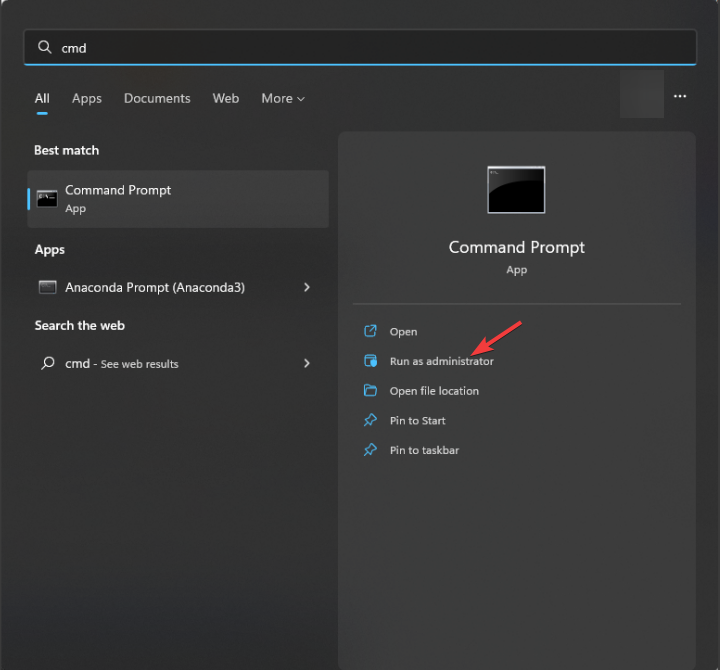
- Press the Windows key, type cmd, and click Run as administrator.
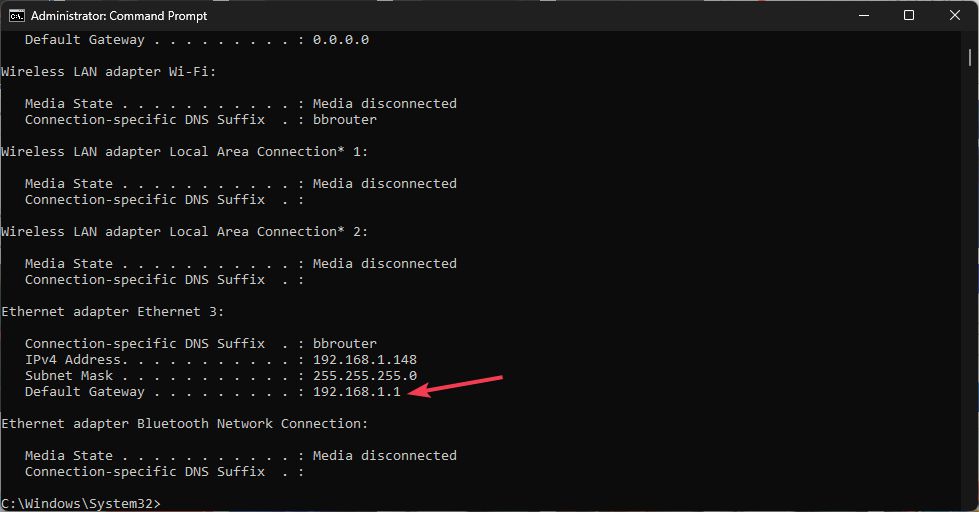
- Type the following command to get the IP address and hit Enter:
ipconfig - From the list of connections, locate your active connection and note down the address next to Default Gateway.
- Launch your preferred browser and type in the IP address you noted.
- Enter the username and password; for most routers, the username is admin, and the password is password unless you or your ISP has changed it. You can also check the credentials from the back of your router to be sure.
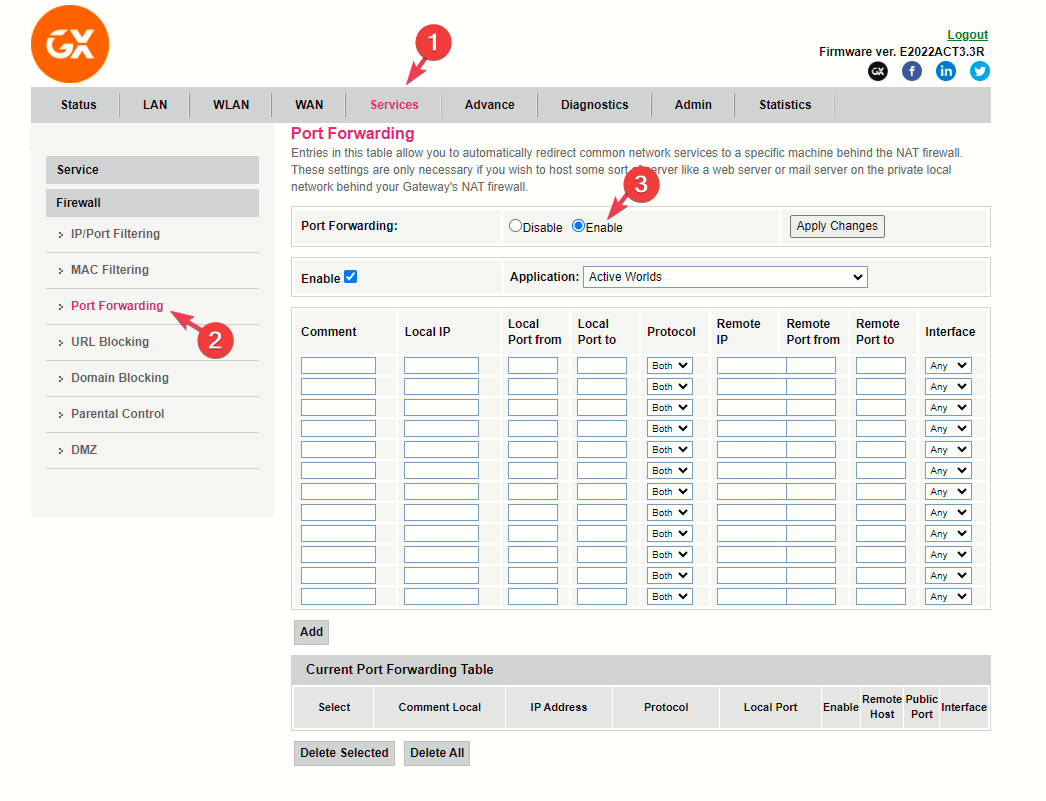
- Next, go to Services, then click Firewall.
- Click Port Forwarding, and click Enable or a similar option to turn it on.
- Now, mention these values:
- Steam TCP – 27015, 27036
- Xbox TCP – 3074
- Steam UDP – 27015, 27031-2703
- Xbox UDP – 88, 500, 3074, 3544, 4500
- Click Apply changes to confirm.
The steps for adding the ports can differ depending on the make and model of your router, so look for the similar options mentioned in the steps above.
Now, to add the ports to your firewall, follow these steps:
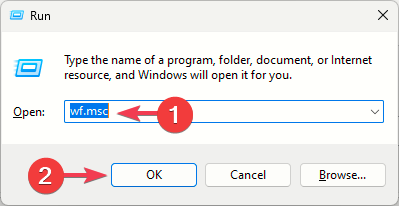
- Press Windows + R to open the Run window.
- Type wf.msc and press Ctrl + Shift + Enter to open Windows Defender Firewall with Advanced Security.
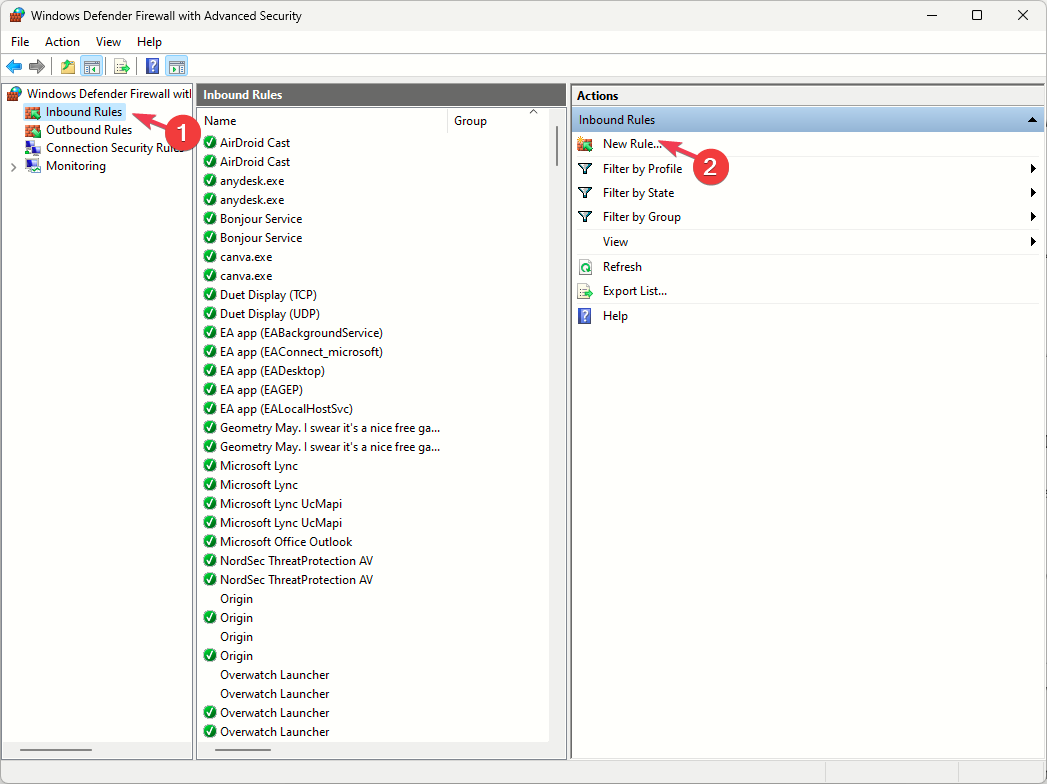
- Click the Inbound Rules, then select New Rule.
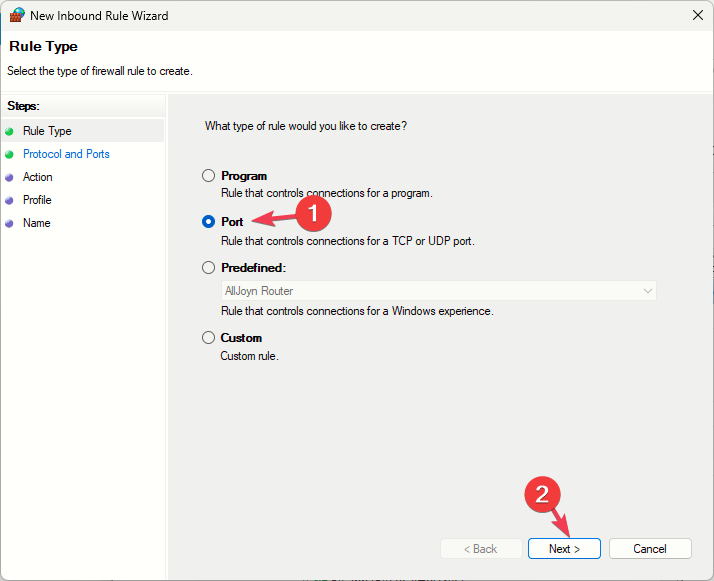
- On the next page, select Port, then click Next.
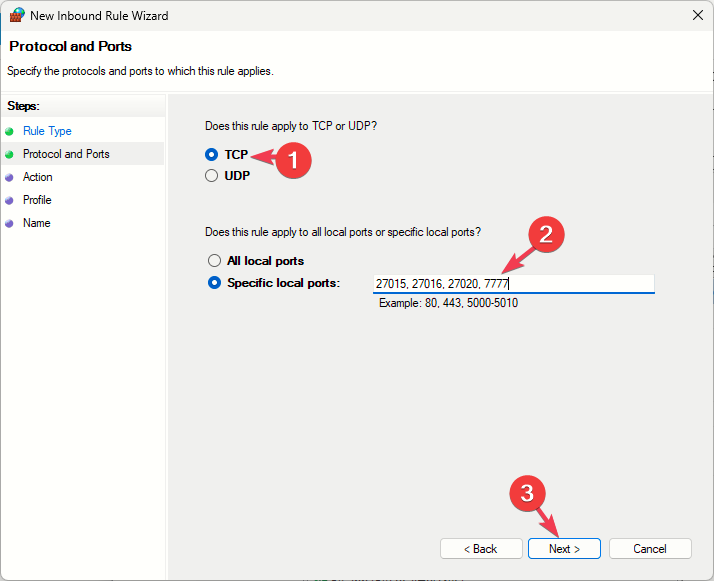
- Select TCP and select the Specific local ports option, and type 27015, 27016, 27020, 7777, and click Next.
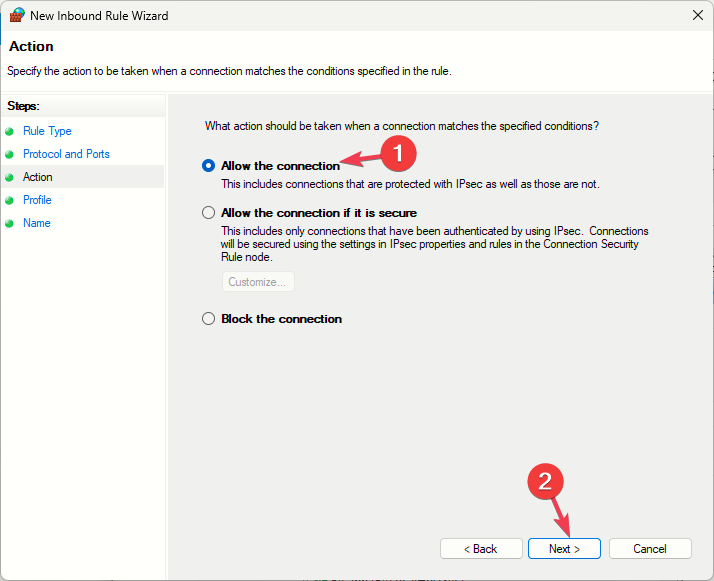
- Choose the Allow the Connection option and click Next.
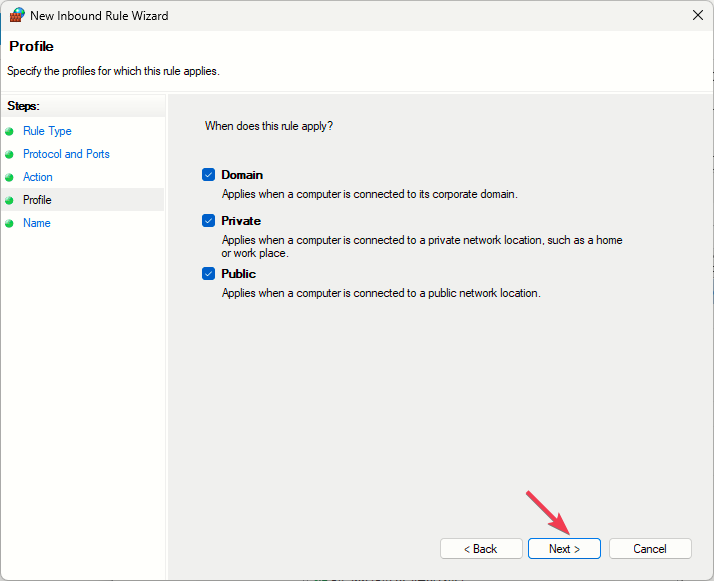
- On the When does this rule apply page, select Domain, Private, and Public, then click Next.
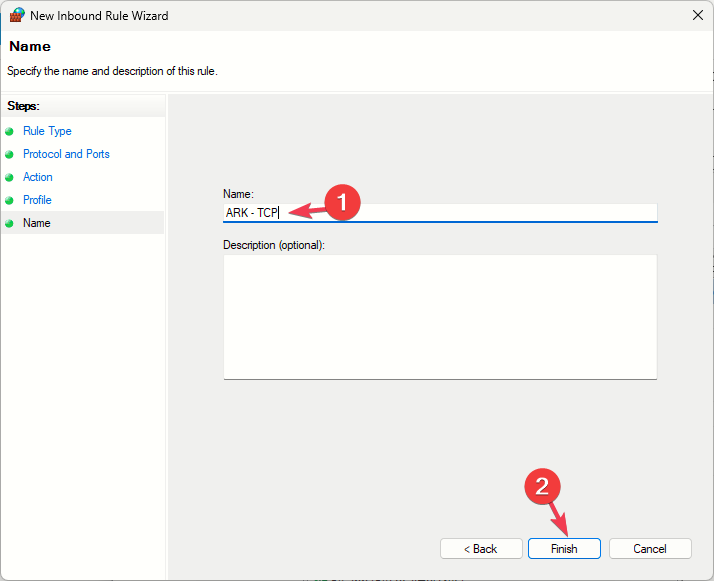
- Name the rule and click Finish.
Now repeat the steps from 3 to 8; instead of selecting TCP, choose UDP and follow the instructions, then name the rule accordingly.
Adding the additional port can also help you resolve other issues like the server not responding on ARK: Survival Evolved; read this guide to learn more.
If nothing worked for you, we suggest you contact ARK customer support, explain the issue & fixes you tried for further assistance.
To sum up, to avoid the Ark Survival Ascended server not showing up, ensure you have a stable internet connection, the game is allowed by your firewall, and your system meets the minimum requirements for seamless gameplay.
Did we miss a step that helped you fix the issue? Don’t hesitate to mention it in the comments section below. We will happily add it to the list.





User forum
0 messages