How to Fix AutoCAD When It's Not Opening: Step-by-Step
If you're unable to run AutoCAD in Windows 10 or 11, a quick reinstall can help set things straight
5 min. read
Updated on
Read our disclosure page to find out how can you help Windows Report sustain the editorial team. Read more

AutoCAD not opening? Many people report similar issues, especially after updating their operating system. The app might show a Run initializing message, but won’t get past that.
A common cause is version compatibility. If you run an out of date software, make sure to update. PC clutter and corrupt files may also contribute.
How do I fix AutoCAD not opening?
1. Reinstall AutoCAD
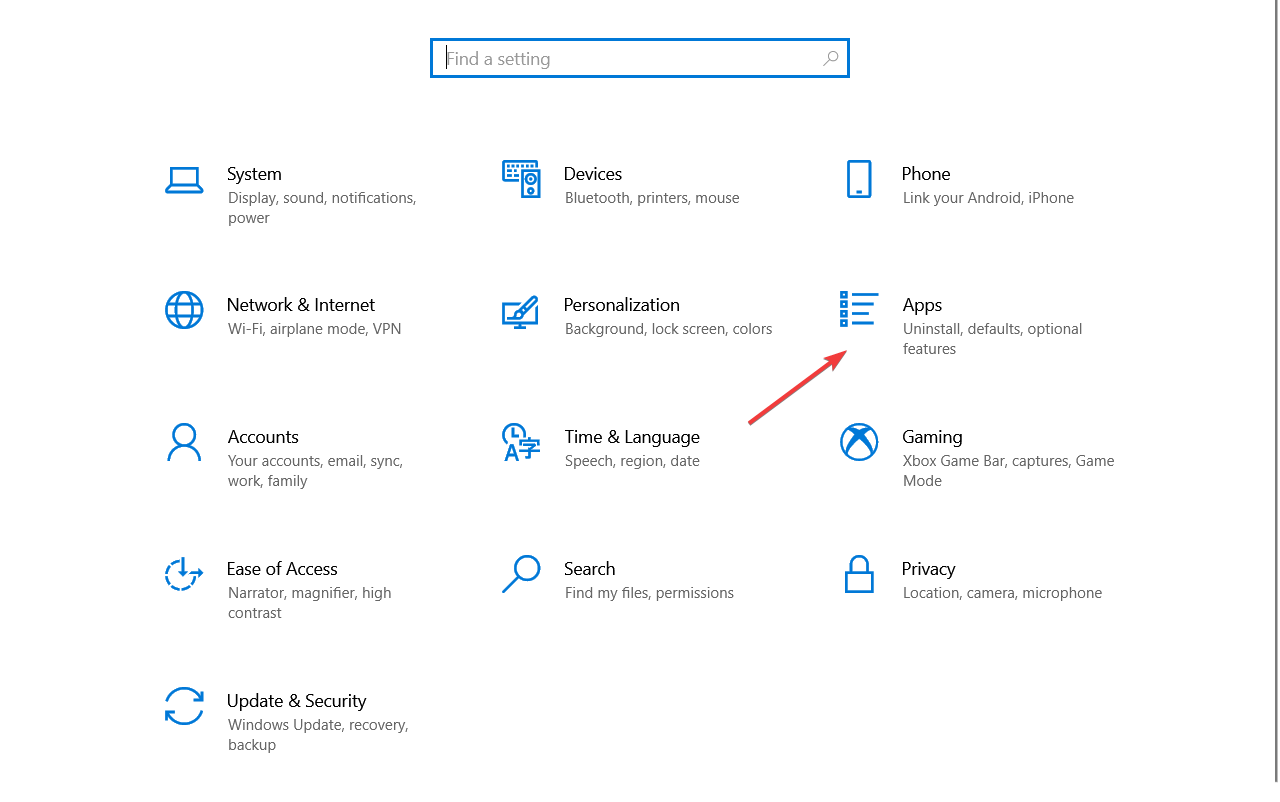
- Click on the Start button and select Settings from the list.
- Now select Apps from the set of options.
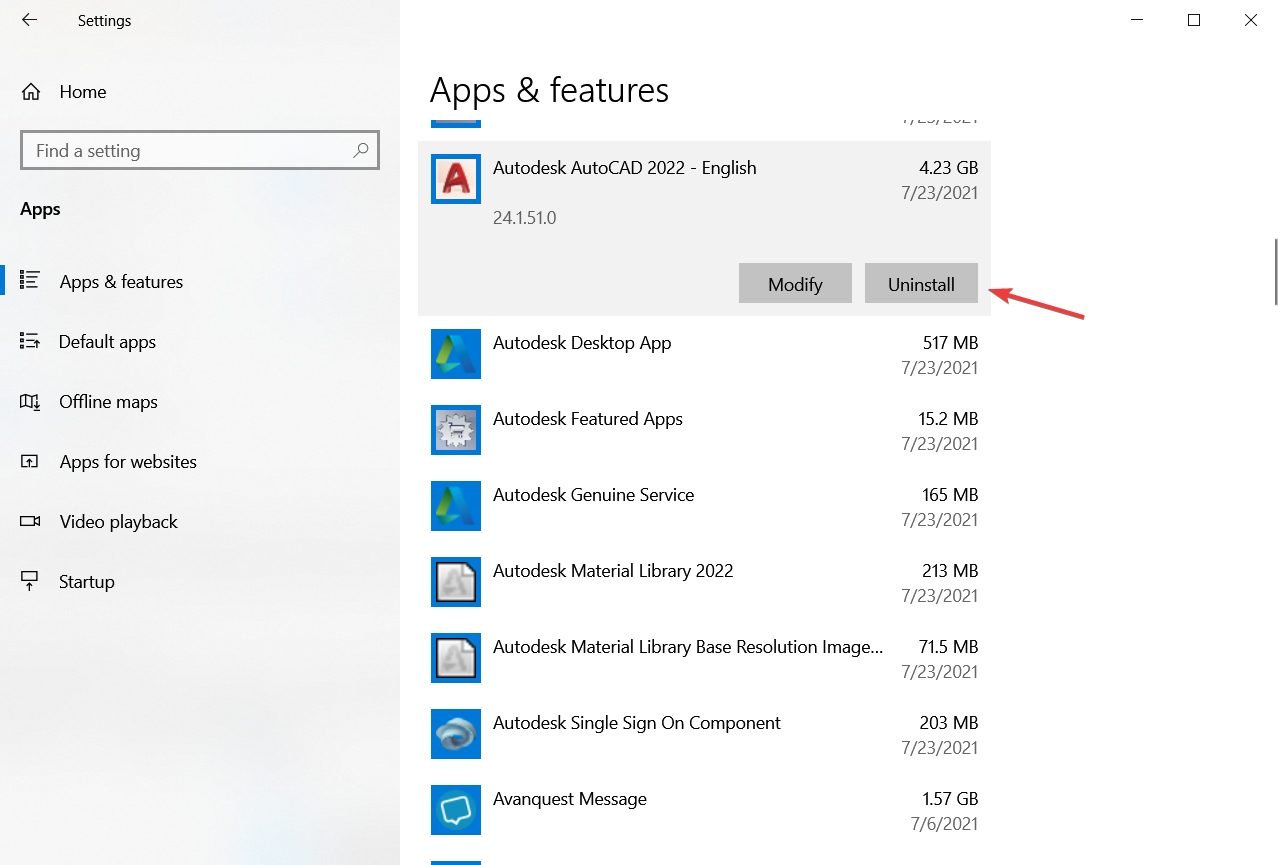
- Scroll down and find AutoCAD, click on it and select Uninstall.
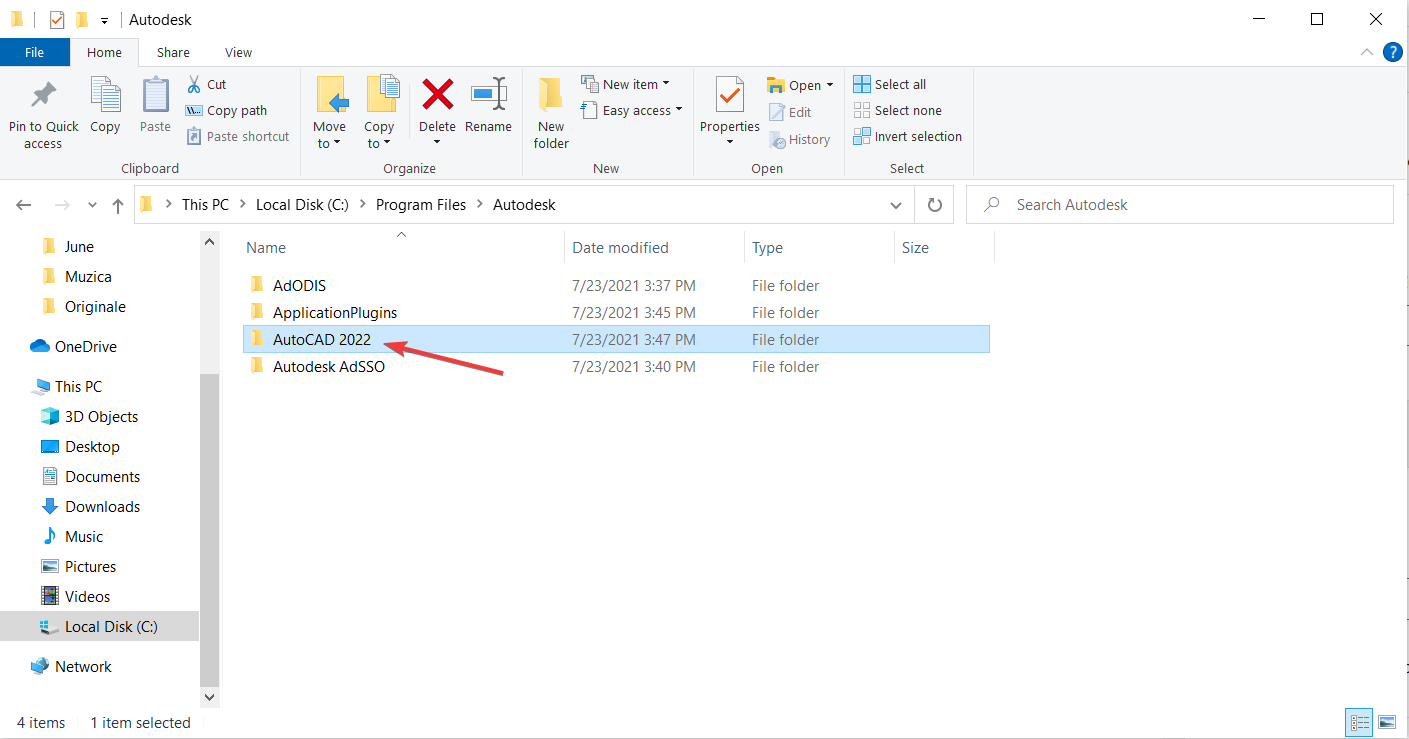
- Now open File Explorer and go to the folder you have AutoCAD installed. Usually, it’s:
C:\Autodesc\AutoCAD 20xx - Delete the contents of the folder.
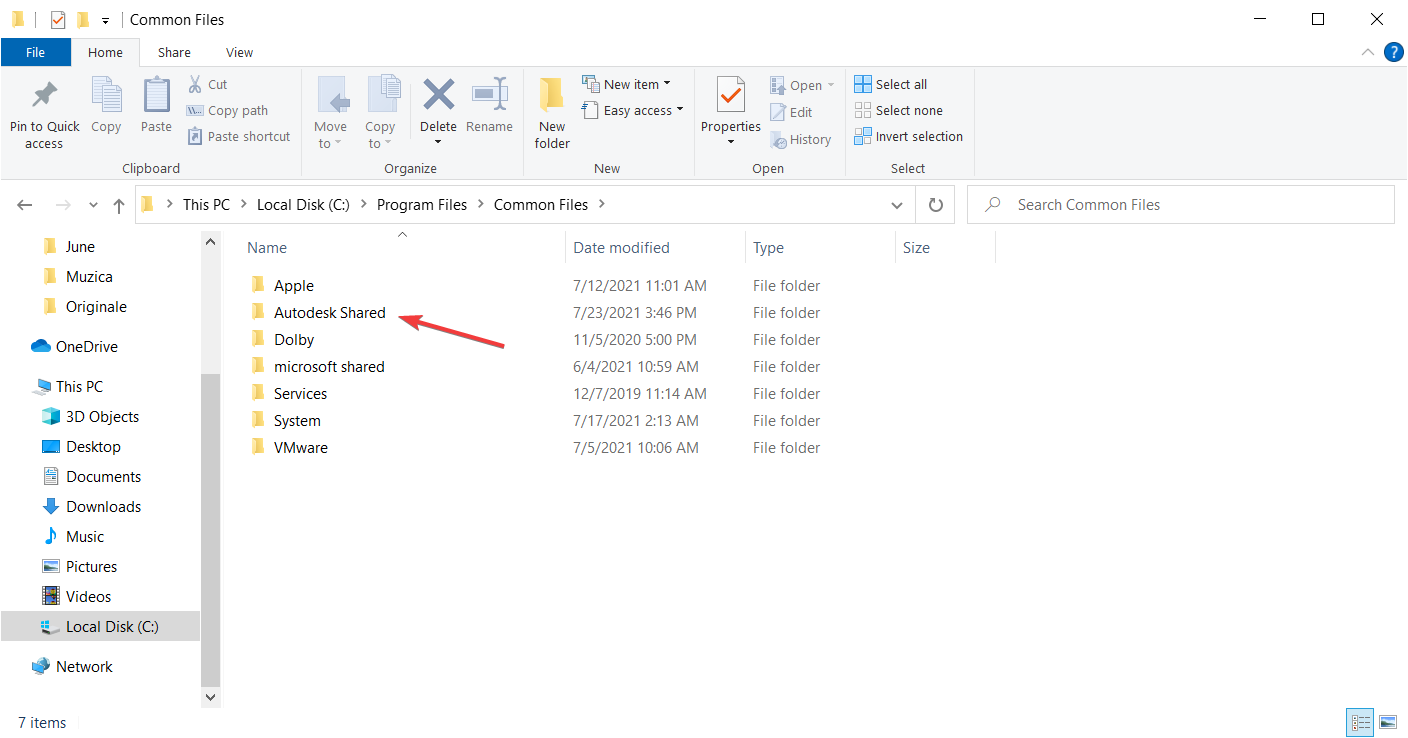
- Up next, delete the following folder too:
C:\Program Files\Common Files\Autodesk Shared - Press the Windows key + R to start the Run app.
- Type regedit and press Enter or click OK.
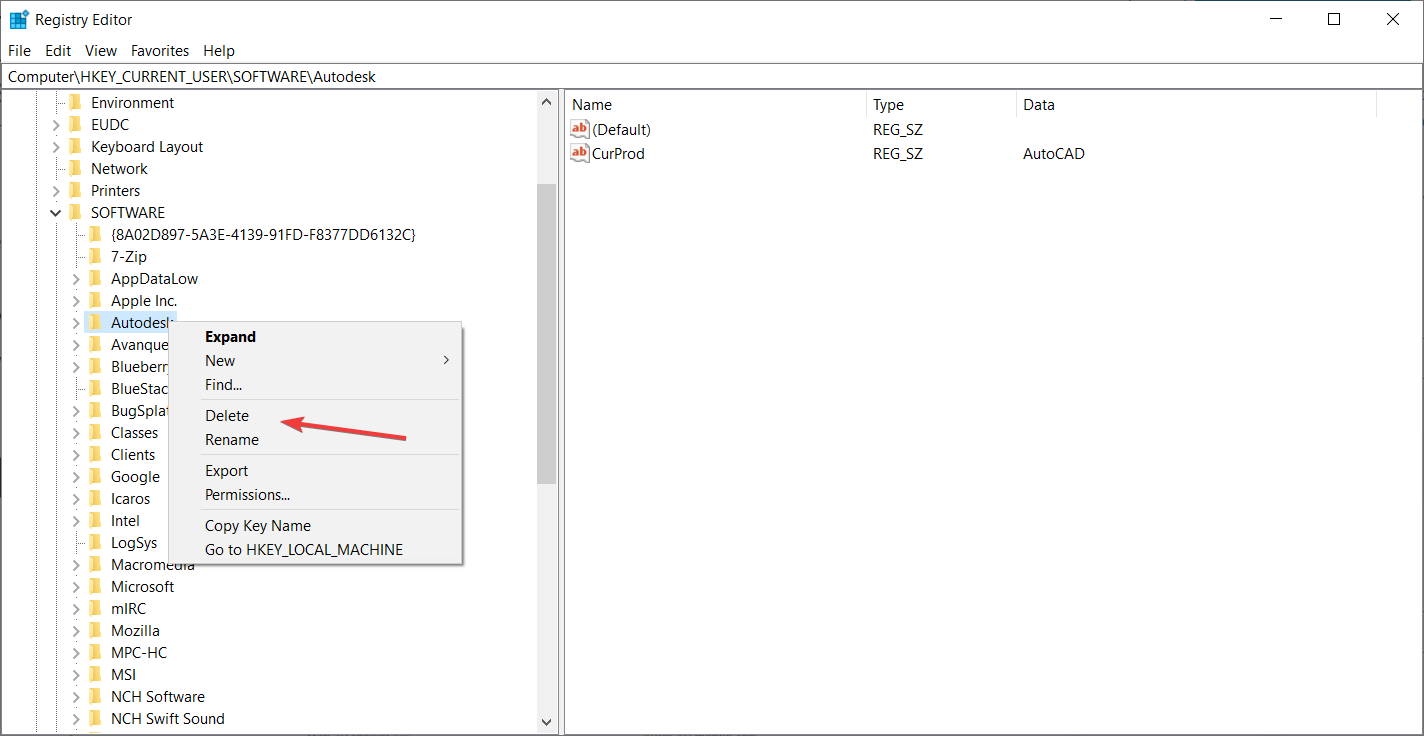
- Navigate to the following keys and delete them:
HKEY_CURRENT_USER\Software\AutodeskandHKEY_LOCAL_MACHINE\Software\Autodesk - Now that you’ve completely eliminated AutoCAD, you can download and install it.
- Run the installer and follow the instructions on the screen to complete the installation. You will also need to restart your system.
Before starting to reinstall AutoCAD, make sure you back up all your important CAD files.
2. Change the Registry settings
- Press the Windows key + R to start the Run application.
- Type regedit and press Enter or click OK.
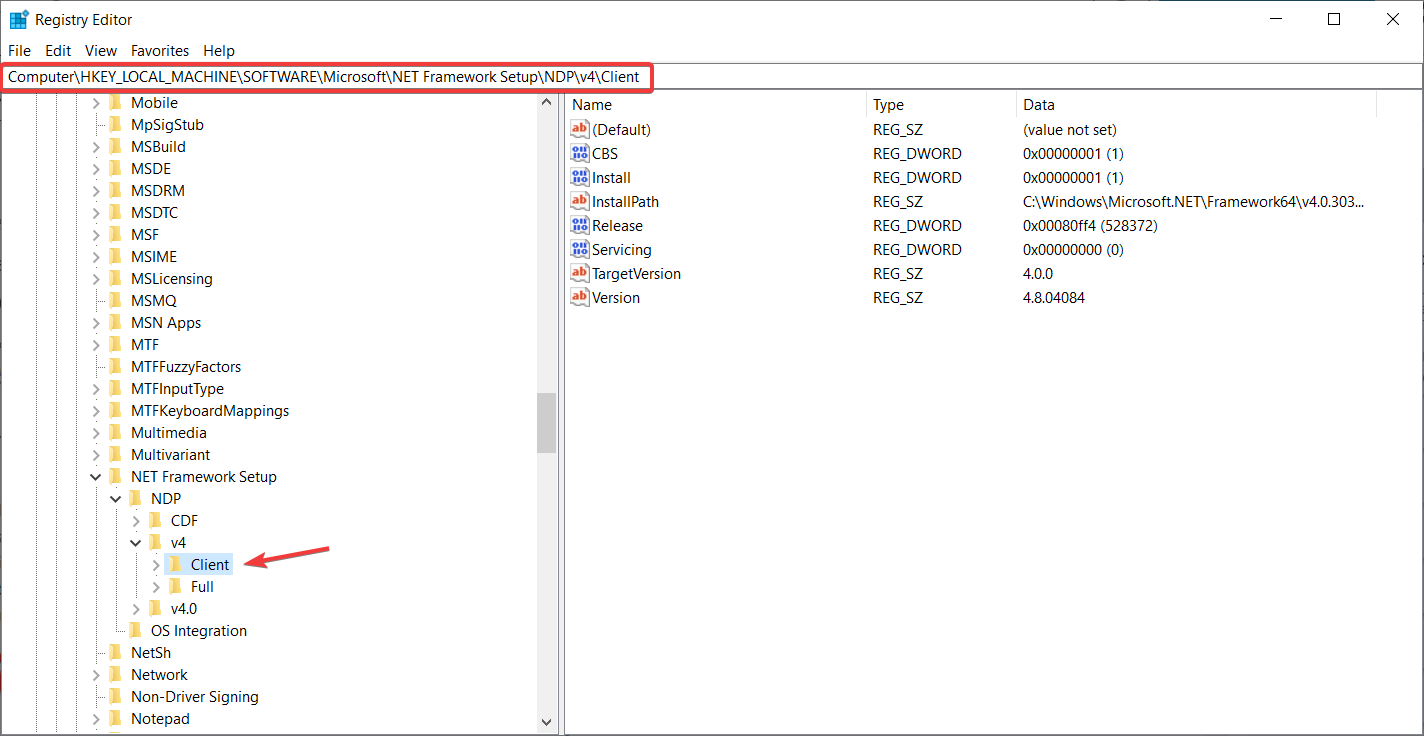
- When the Registry Editor opens, navigate to the following key:
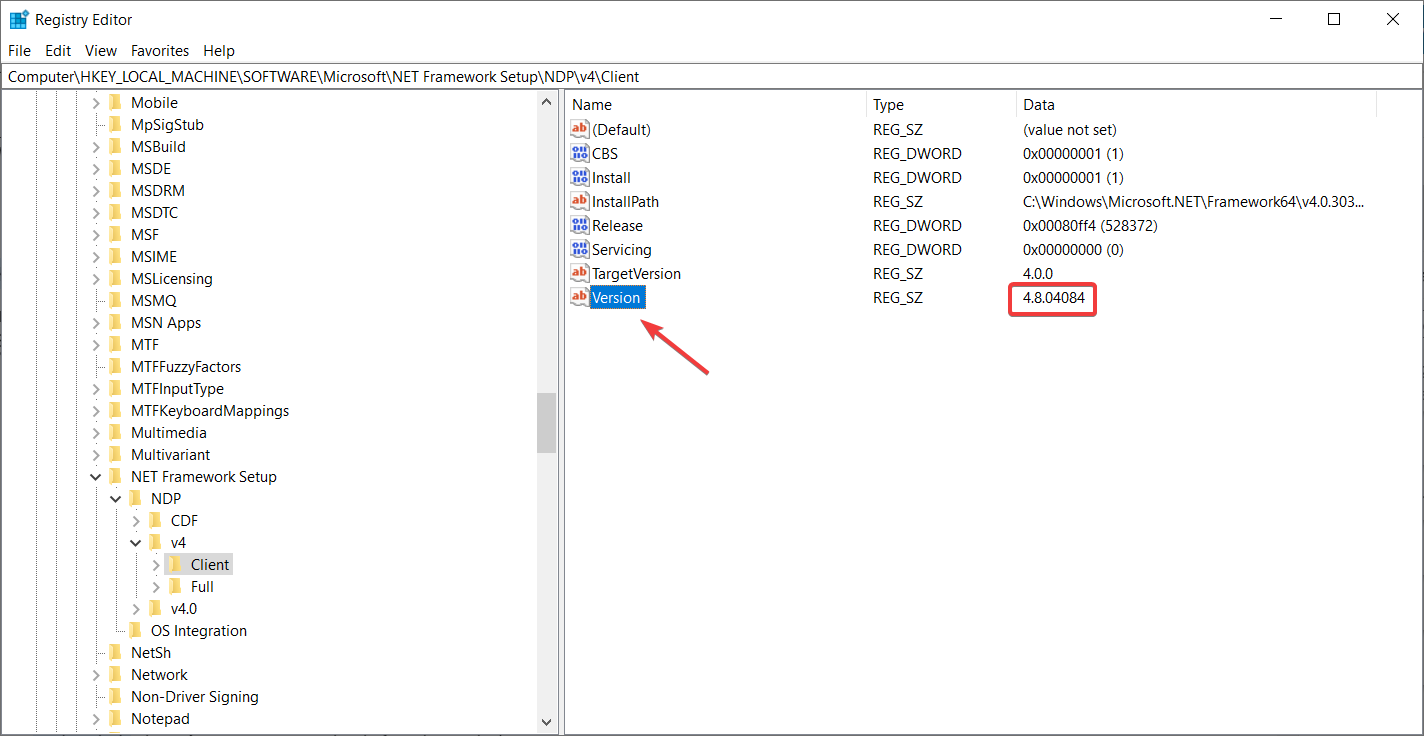
HKEY_LOCAL_MACHINE\SOFTWARE\Microsoft\NET Framework Setup\NDP\v4\Client - Find the key called Version. Find its value and remember it or write it down, because you’ll need it later.
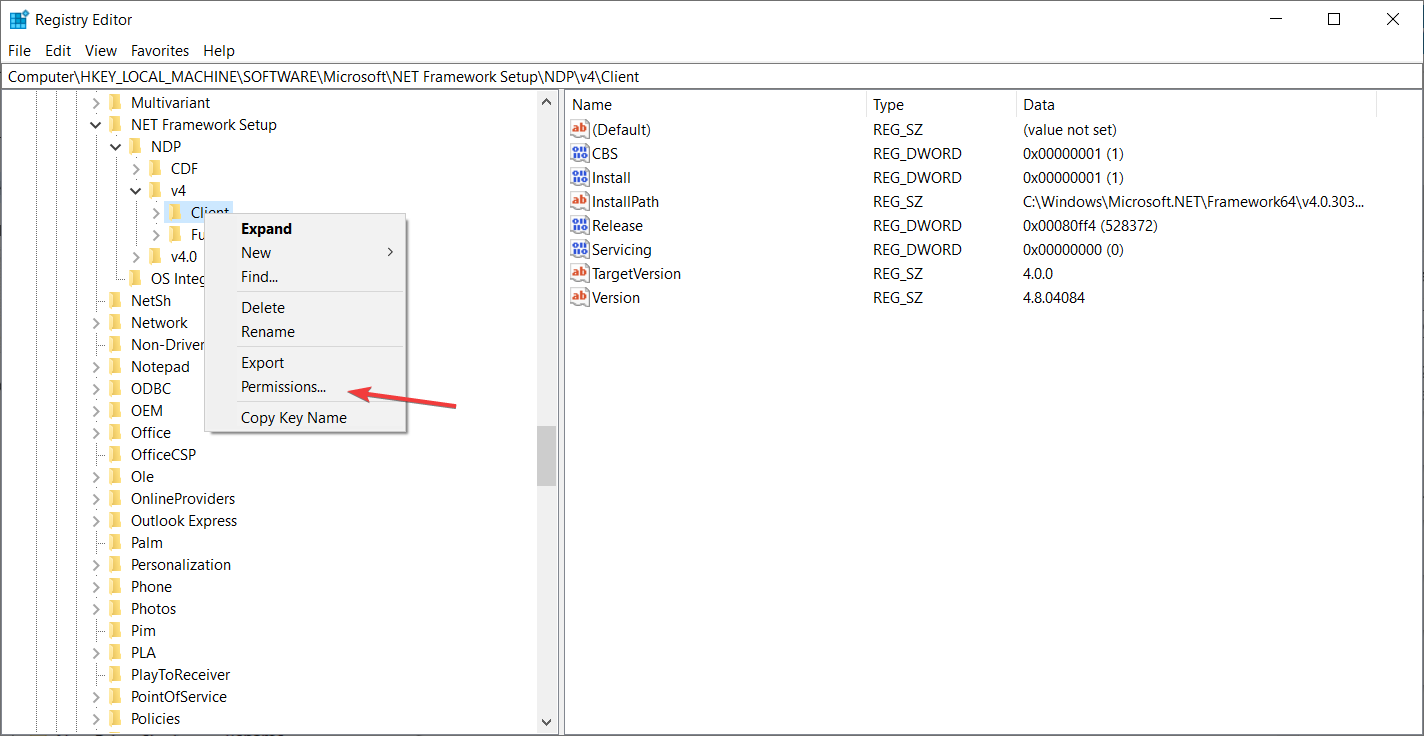
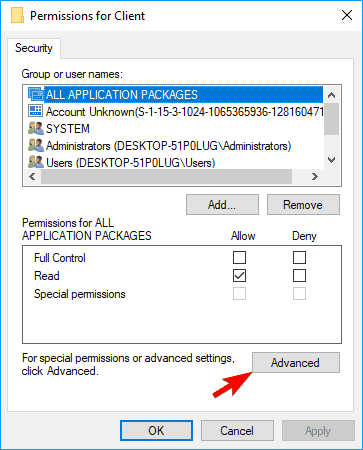
- Now, right-click the Client entry on the left side and choose Permissions.
- Click the Advanced button.
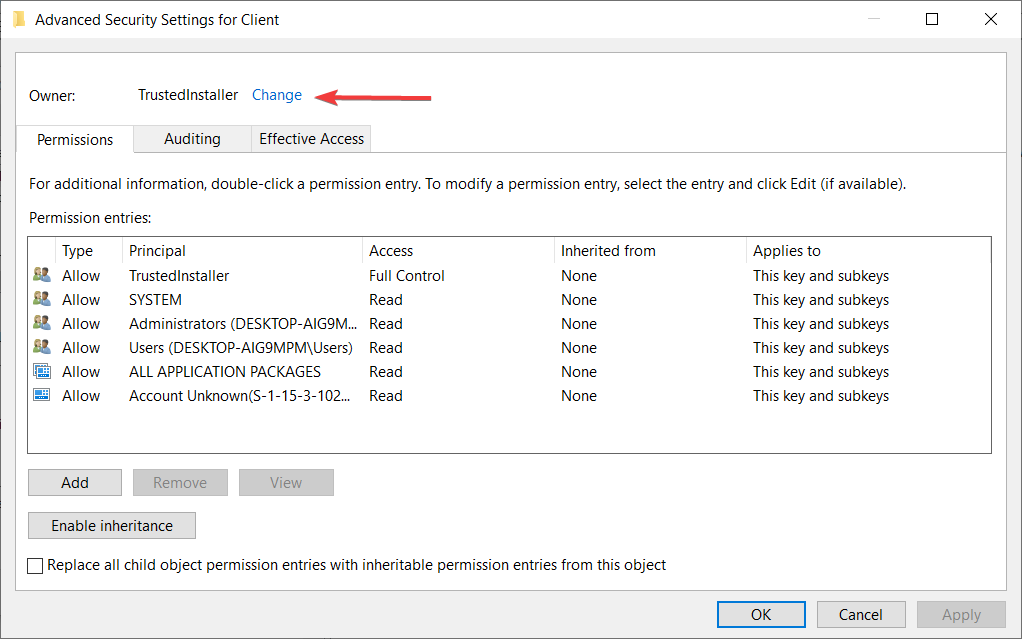
- Find the Owner section on the top and next to the TrustedInstaller click Change link.
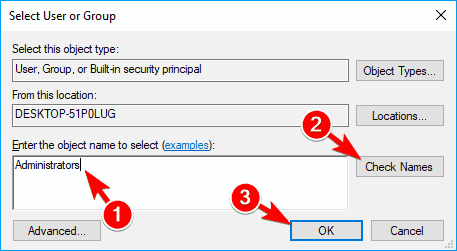
- In the Enter the object names to select field enter Administrators. Click on the Check Names button, then click on OK.
- If you don’t have the Administrators account, fill in your administrator account name.
- Click Apply and OK to save your settings.
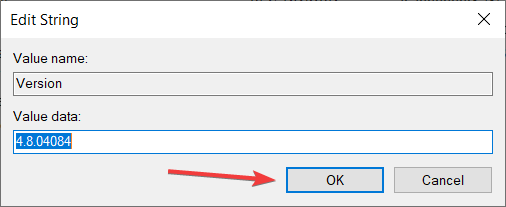
- Change the Value of the Version key in Registry Editor to 4.5.0. Click on OK to save the changes.
- Without closing the Registry Editor, run the AutoCAD setup and install it.
- After the installation is completed, in Registry Editor, navigate to this path once again:
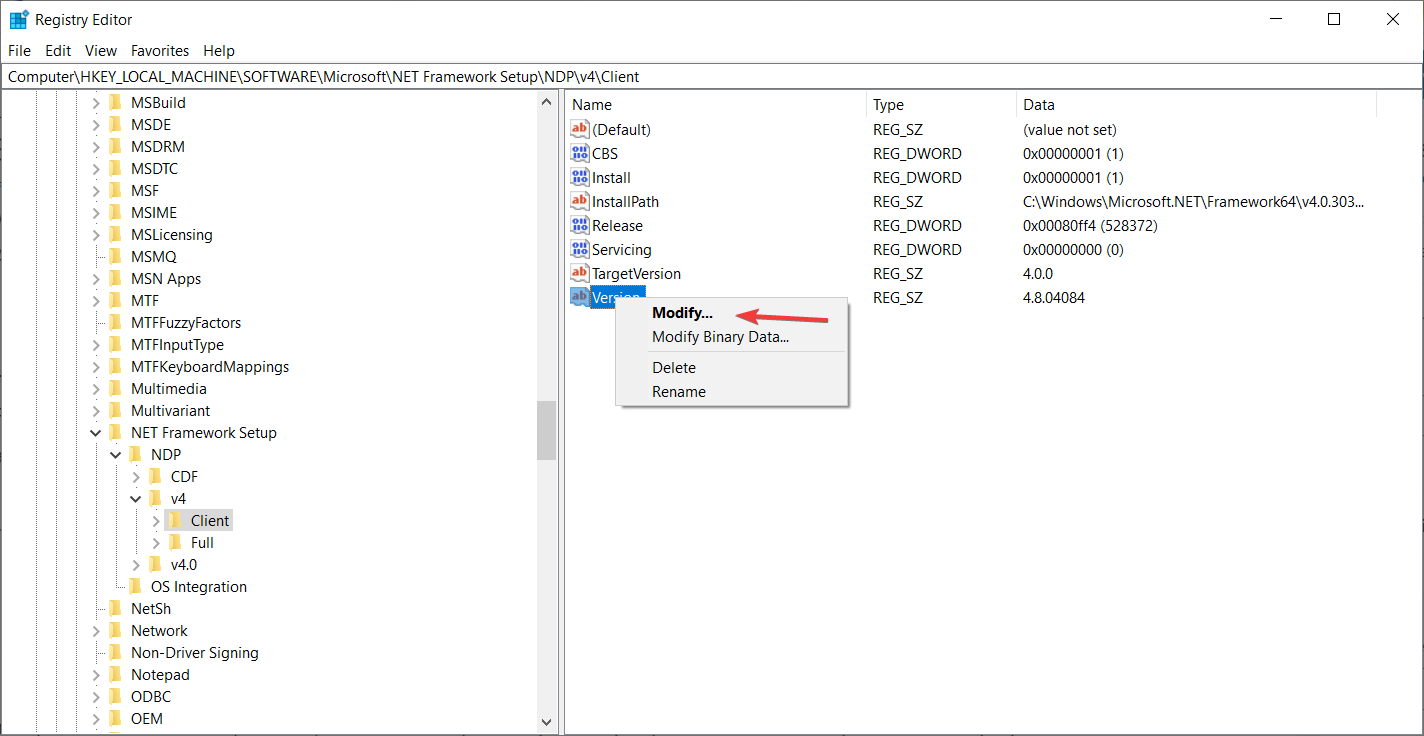
HKEY_LOCAL_MACHINE\SOFTWARE\Microsoft\NET Framework Setup\NDP\v4\Client - Find the Version key, right-click on it, and select Modify.
- Set its value from the current one to the value that you got from Step 4, then click OK.
3. Reset AutoCAD settings to default
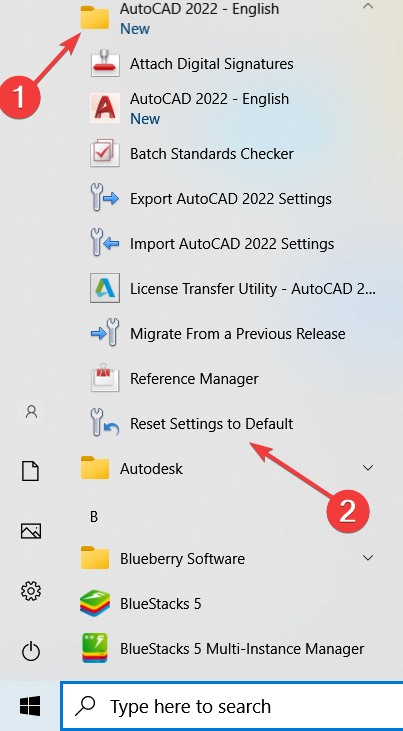
- Click on the Start button in Windows and look for AutoCAD 20xx from the menu.
- Select it and click on Reset Settings to Default.
4. Disable User Account Control
- Press Windows key + S and enter user control. Select Change User Account Control settings.
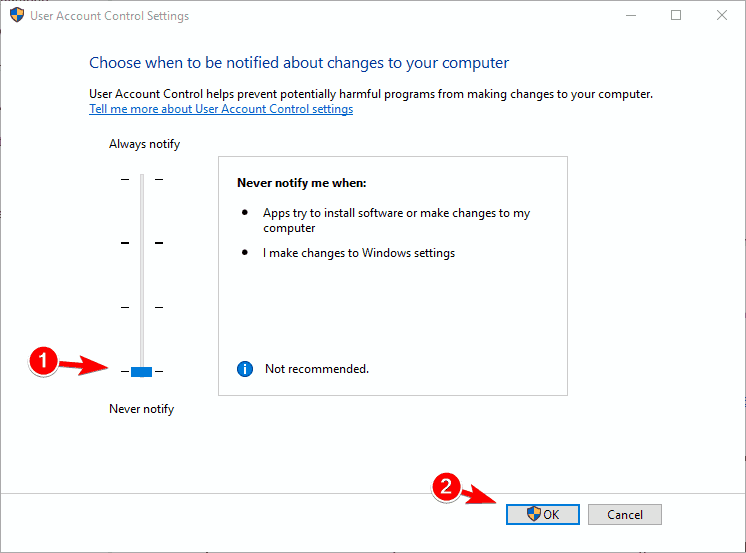
- When User Account Control Settings window opens, move the slider all the way down to Never notify. Now click on OK to save changes.
5. Disable or remove your antivirus software
5.1 Disable your antivirus
- Look for your antivirus program in the system tray.
- Right-click on its icon and select Disable. Most antivirus products have a disable feature accessible from the system tray. If not, start the antivirus and you should find it in its main menu.
If that doesn’t solve the problem, you may need to move to the next step and uninstall it at least temporarily.
5.2 Uninstall your antivirus
- Click on the Start button and select Settings.
- Now click on the Apps option from the menu.
- Scroll down on the list of programs, find your antivirus program, click on it and select Uninstall.
To remove all files associated with your antivirus software, users are suggesting using one of the best removal tools from our list.
 NOTE
NOTE
6. Try to install AutoCAD as Administrator
- Find the AutoCAD setup file on your PC. By default, the setup files are usually extracted to the C:\Autodesk directory, so make sure to navigate there.
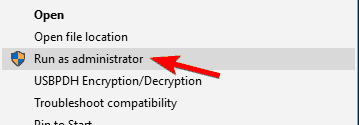
- Right-click on it and select the Run as administrator option. You will need administrator privileges to do that.
If the procedure is not working, read our guide on what to do if nothing happens when you select Run as administrator.
7. Run AutoCAD in compatibility mode
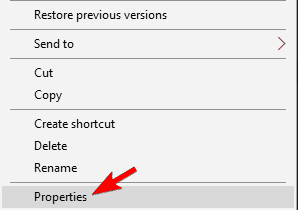
- Right-click on the AutoCAD shortcut and choose Properties from the menu.
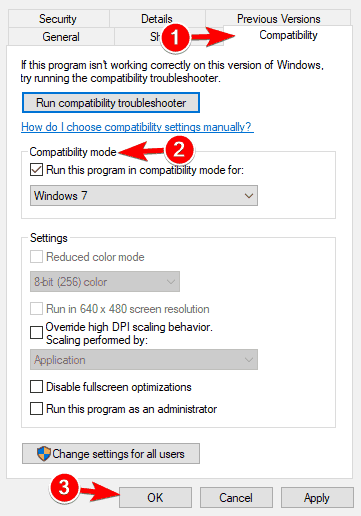
- Navigate to the Compatibility tab and check Run this program in compatibility mode for. Now select the desired version of Windows from the list. Lastly, click OK and Apply in order to save the changes.
According to users, if AutoCAD is not working, you might have to run it in Compatibility mode. This is a useful feature of Windows that allows you to run older software that might not be fully optimized for Windows 10.
8. Install the necessary VisualC++ Redistributables
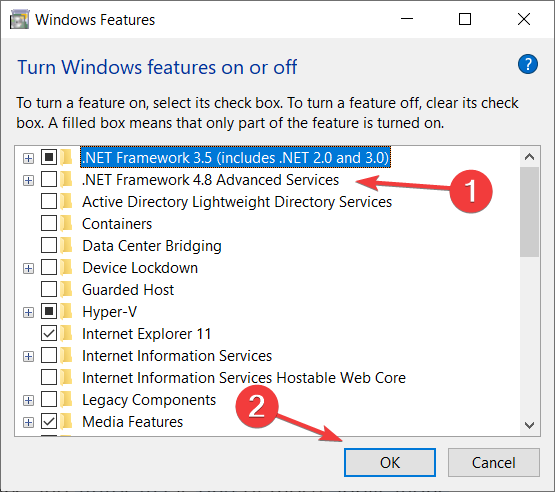
- Press the Windows key + S to show the search bar, type windows features, and select Turn Windows features on or off from the list of results.
- Locate DotNet Framework 4.8 on the list and uncheck it. Now click on OK to save changes.
9. Install the latest updates for AutoCAD
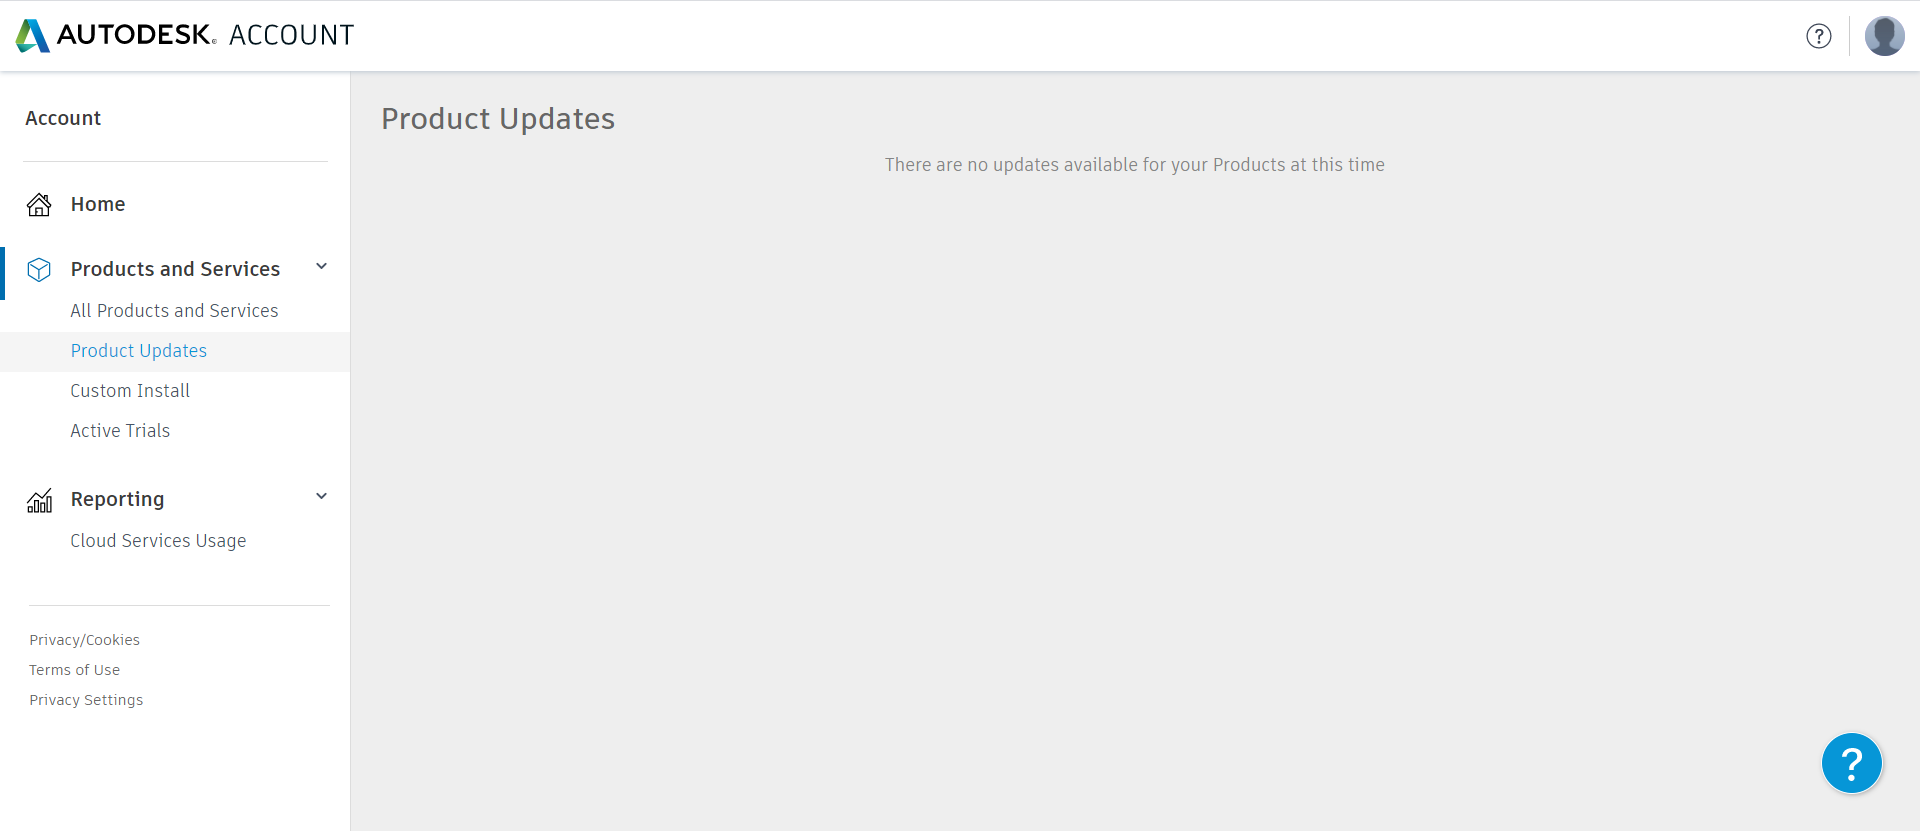
- Go to the Autodesk account page and log in with your account.
- Click on the Product updates option from the left.
- In the next window, you should see any available updates for your Autodesk products, available for download.
That’s about it, we hope at least one of these solutions helped you solve the AutoCAD not opening problem. While you managed to fix AutoCAD, you might also be interested in our guide on how to fix AutoCAD files in Windows 10.
If you have any questions, comments, or suggestions, just reach out to the comments section below.











User forum
2 messages