Black Screen After Changing Refresh Rate [Solved]
Check the connections and graphics driver
5 min. read
Published on
Read our disclosure page to find out how can you help Windows Report sustain the editorial team. Read more
Key notes
- To get rid of a black screen after changing the refresh rate, use a compatible cable, update the graphics driver, or disable G-Sync and V-Sync.
- The problem manifests due to an incompatible graphics driver or when the monitor doesn't support the set refresh rate.
- Keep reading to find out how our Windows Report experts fixed things in no time!
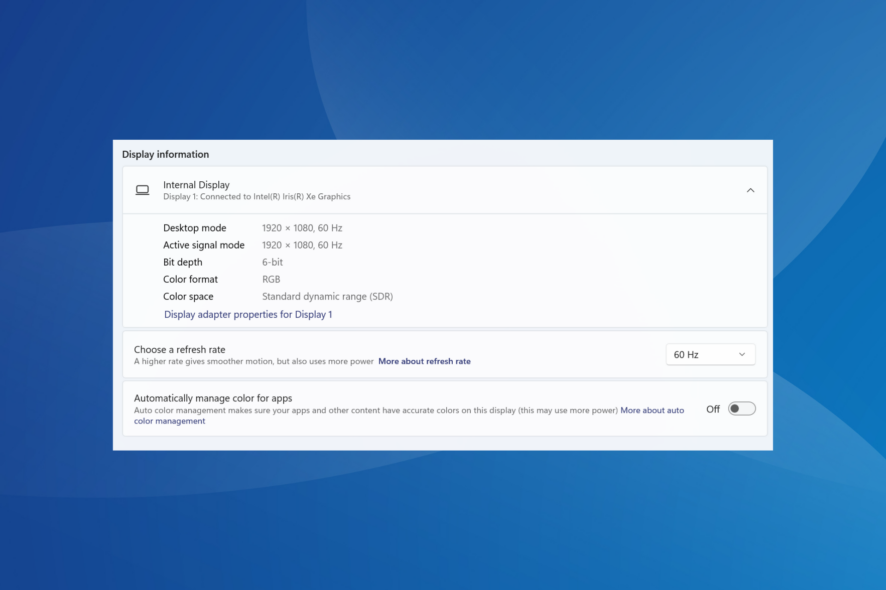
Often, you will get a black screen after changing the refresh rate, both with integrated displays on laptops and external monitors. The problem is independent of the OS and usually arises due to issues with the graphics driver or the monitor’s functionalities.
In a few cases, changing the refresh rate also leads to flickering or a small visible strip/line at the top of the display.
Does refresh rate affect display?
The higher the refresh rate, the smoother the display, which results in better app performance and gameplay. That’s the general rule. But if you set a refresh rate that is not supported by the monitor, it will black out or have horizontal lines appear across the display.
What can I do if I get a black screen after changing the refresh rate?
Before we start with the slightly complex solutions, try these quick ones:
- Use another monitor to lower the refresh rate and make sure the monitor supports the refresh rate you are trying to set.
- If using HDMI, switch to DisplayPort and vice-versa, depending on the connection supported by the monitor at the configured refresh rate.
1. Enable low-resolution video (640×480) and lower the refresh rate
1.1 Enable low-resolution video
- Shut down the computer, then turn it on, and as soon as the Windows logo appears, hold the Power button to turn it off again.
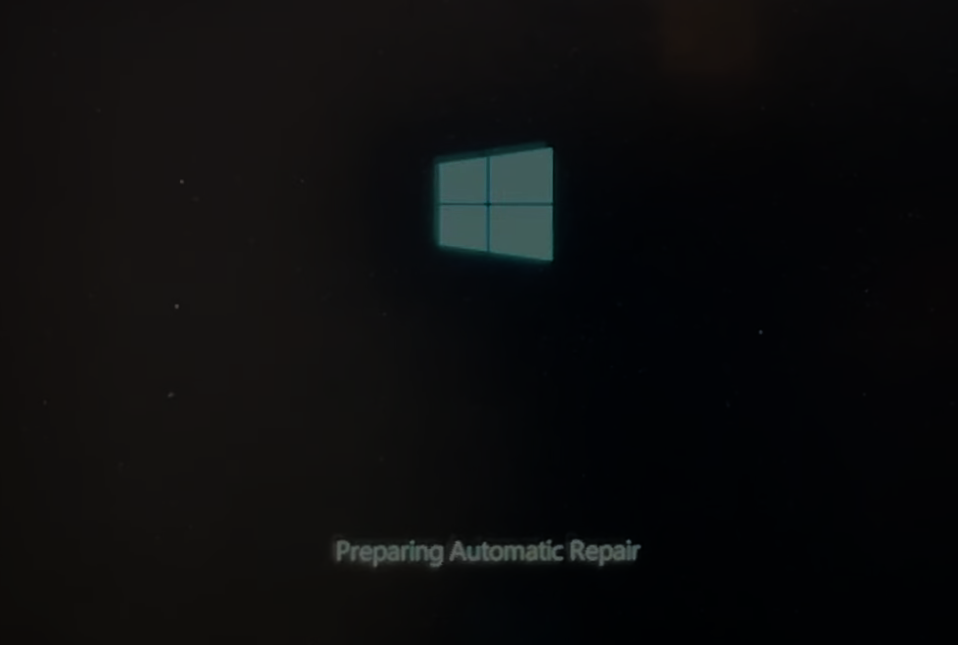
- Repeat this thrice, and on the fourth attempt, Windows will start Preparing Automatic Repair, sensing that there is a problem with the OS. Let it run.
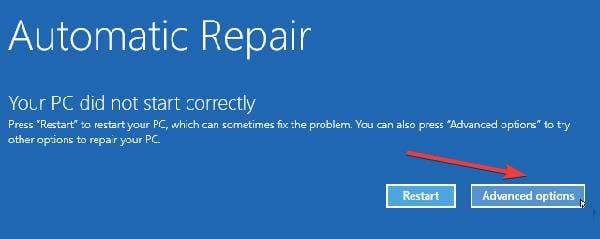
- Now, click on Advanced options.
- Click on Troubleshoot.
- Again, click Advanced options.
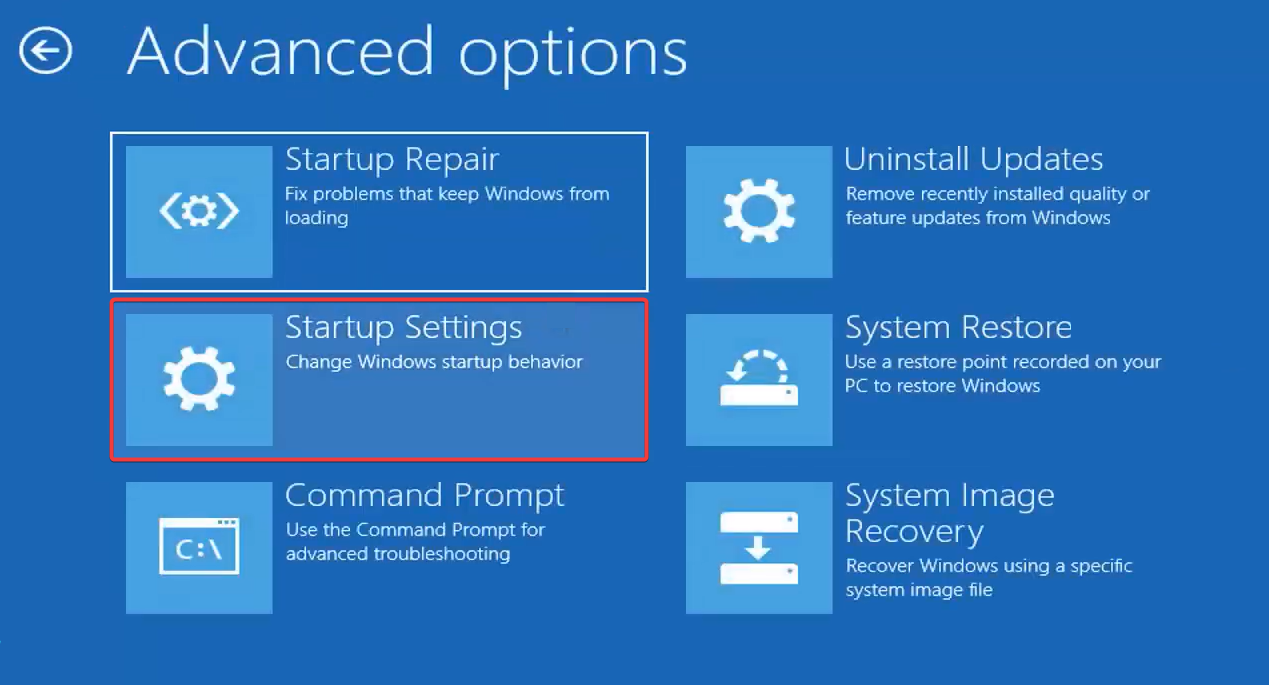
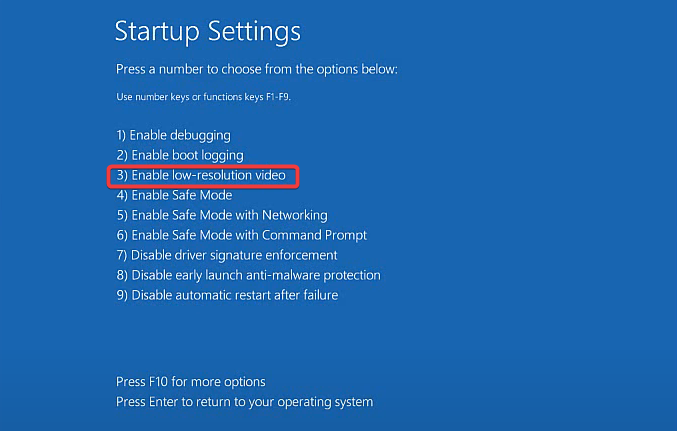
- Select Startup Settings from the list of options.
- Press 3 or F3 to Enable low resolution video mode.
1.2 Lower the refresh rate
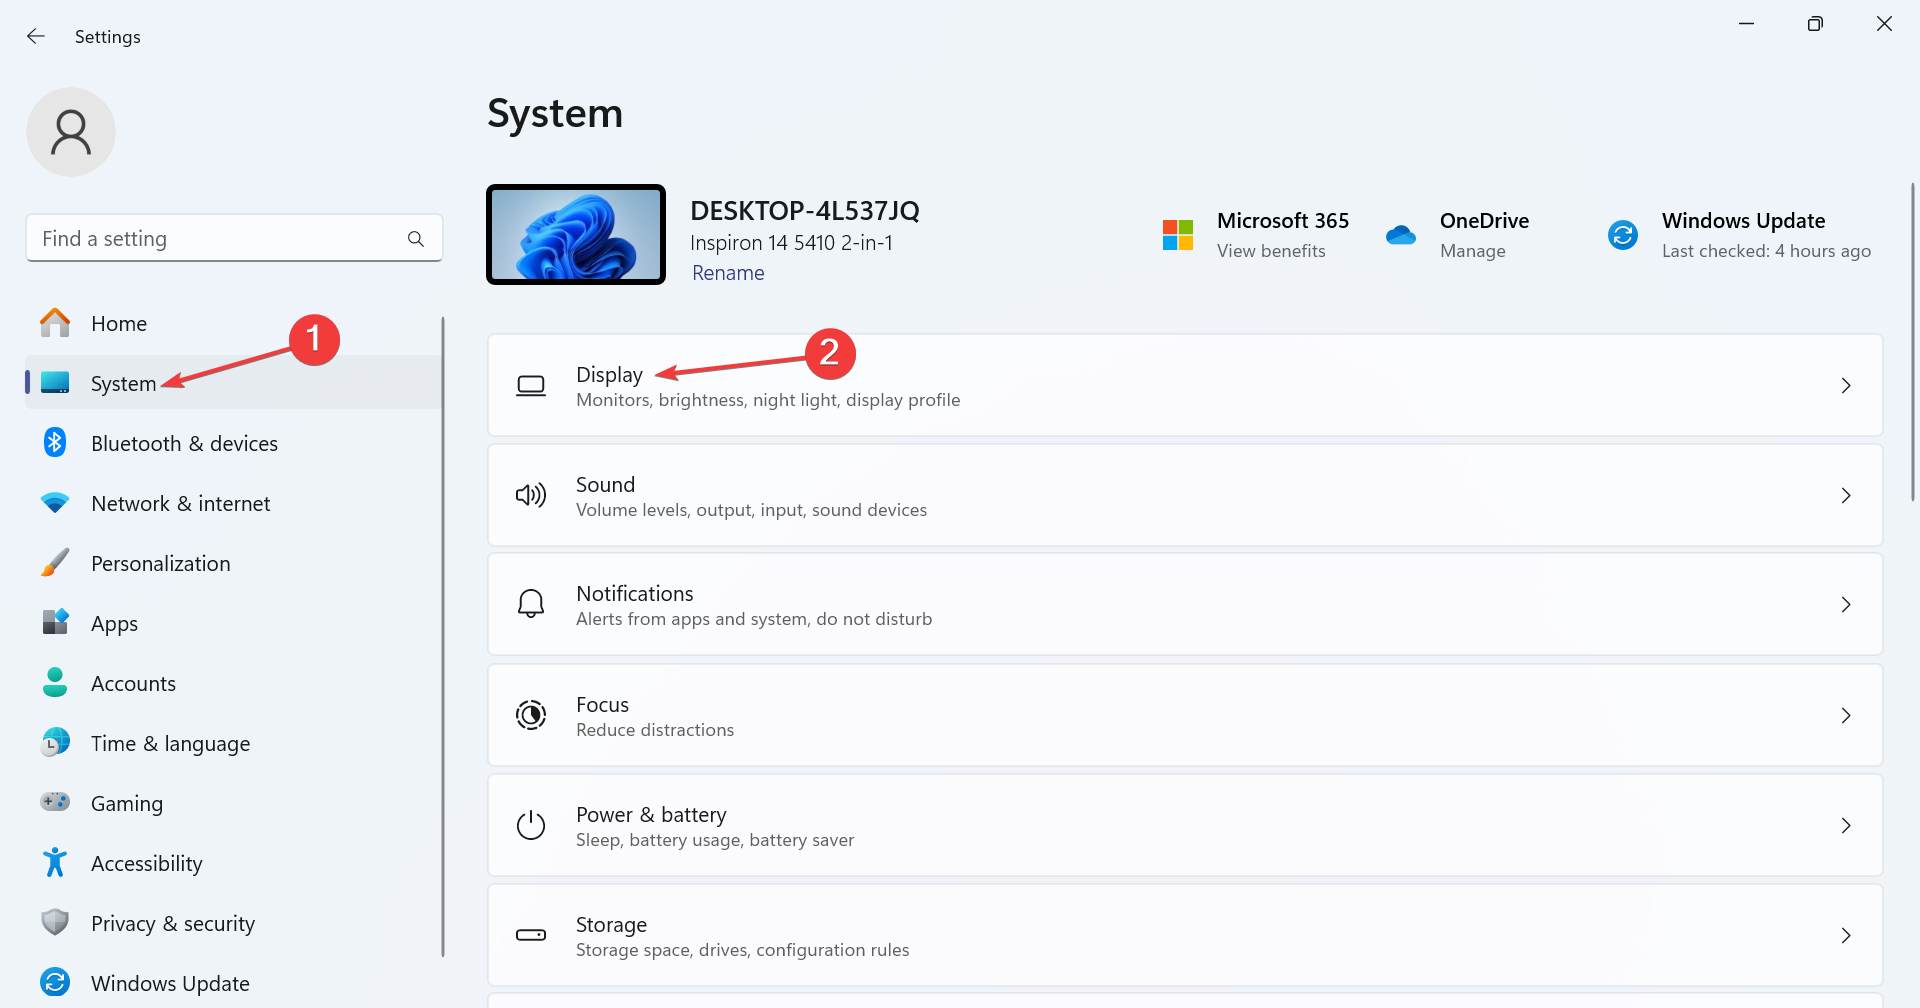
- Once the OS loads, press Windows + I to open Settings, go to System from the navigation pane, and click on Display.
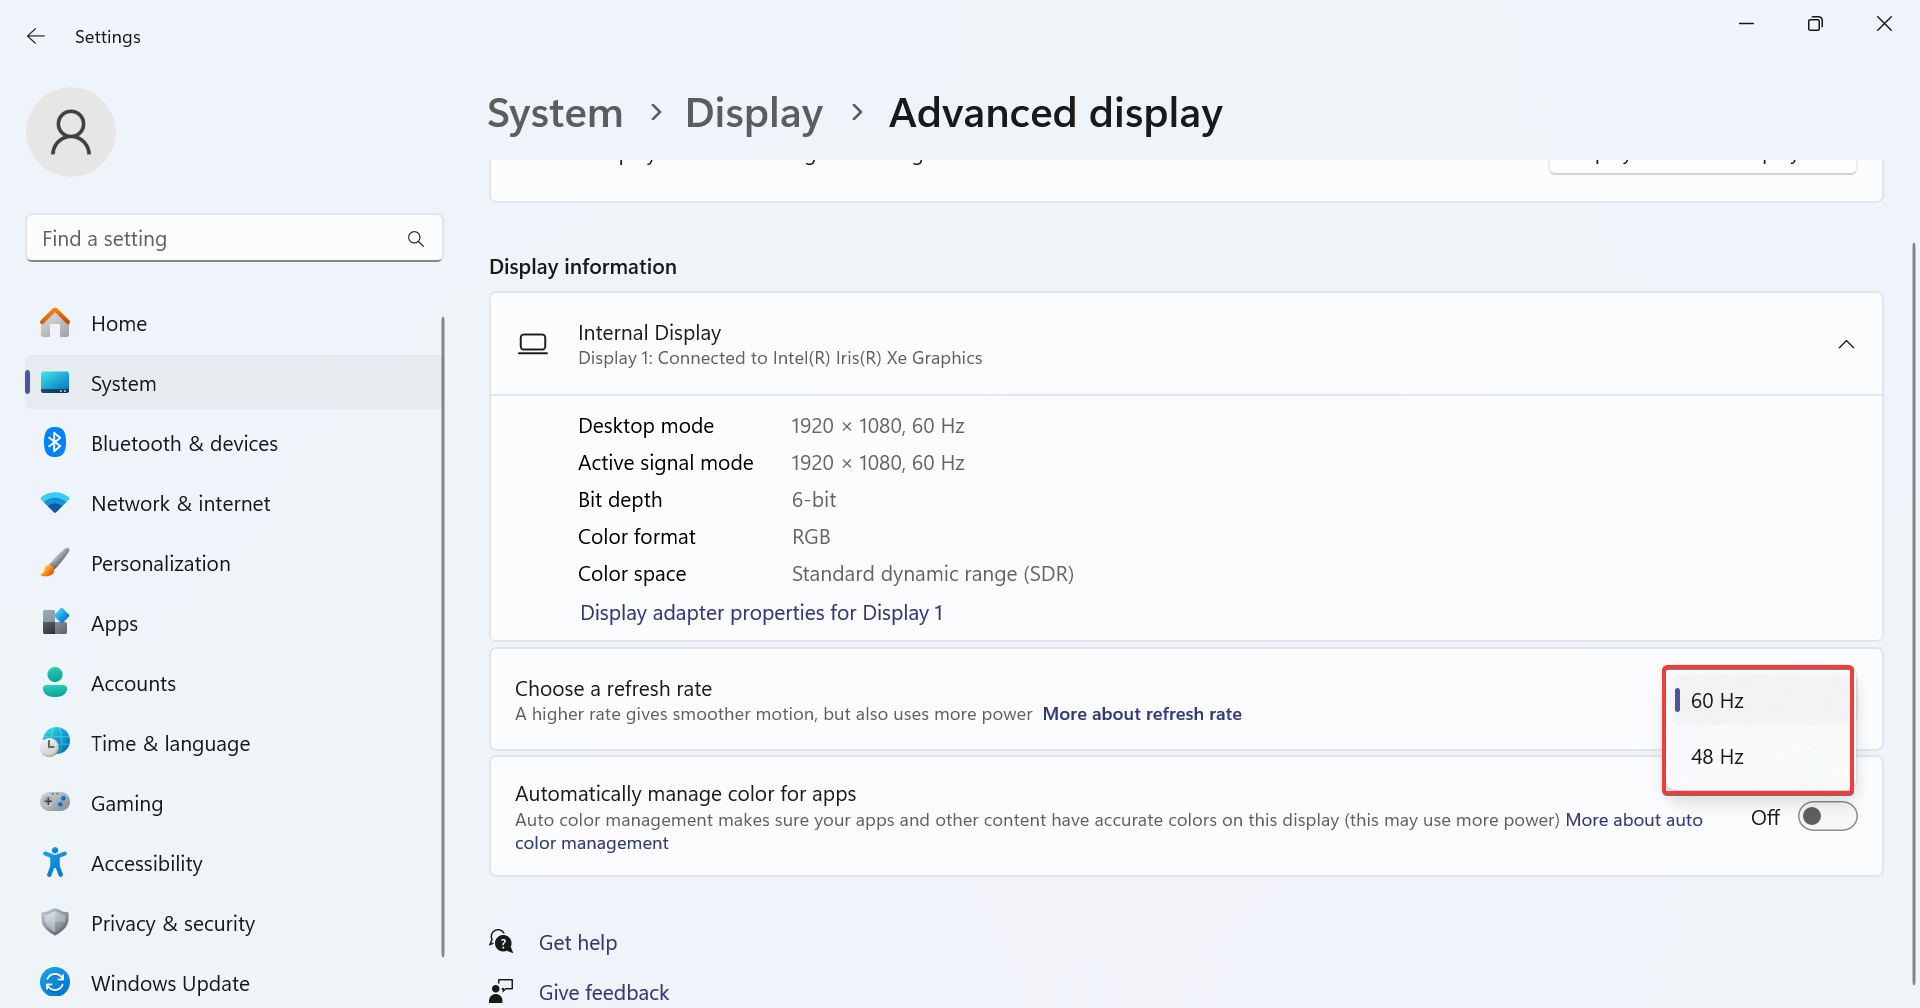
- Now, scroll down and click on Advanced display under Related settings.
- Finally, choose a lower refresh rate from the dropdown menu, one that’s compatible with the monitor and graphics card.
When stuck on a black screen after changing the refresh rate, your primary approach should be to revert to the previous stable configuration. Because otherwise, none of the troubleshooting measures can be executed.
2. Update the graphics driver
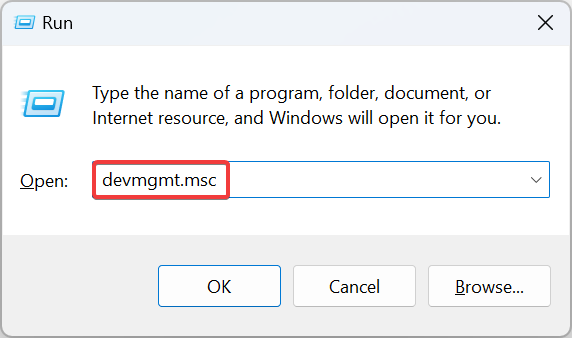
- Press Windows + R to open Run, type devmgmt.msc in the text field, and hit Enter.
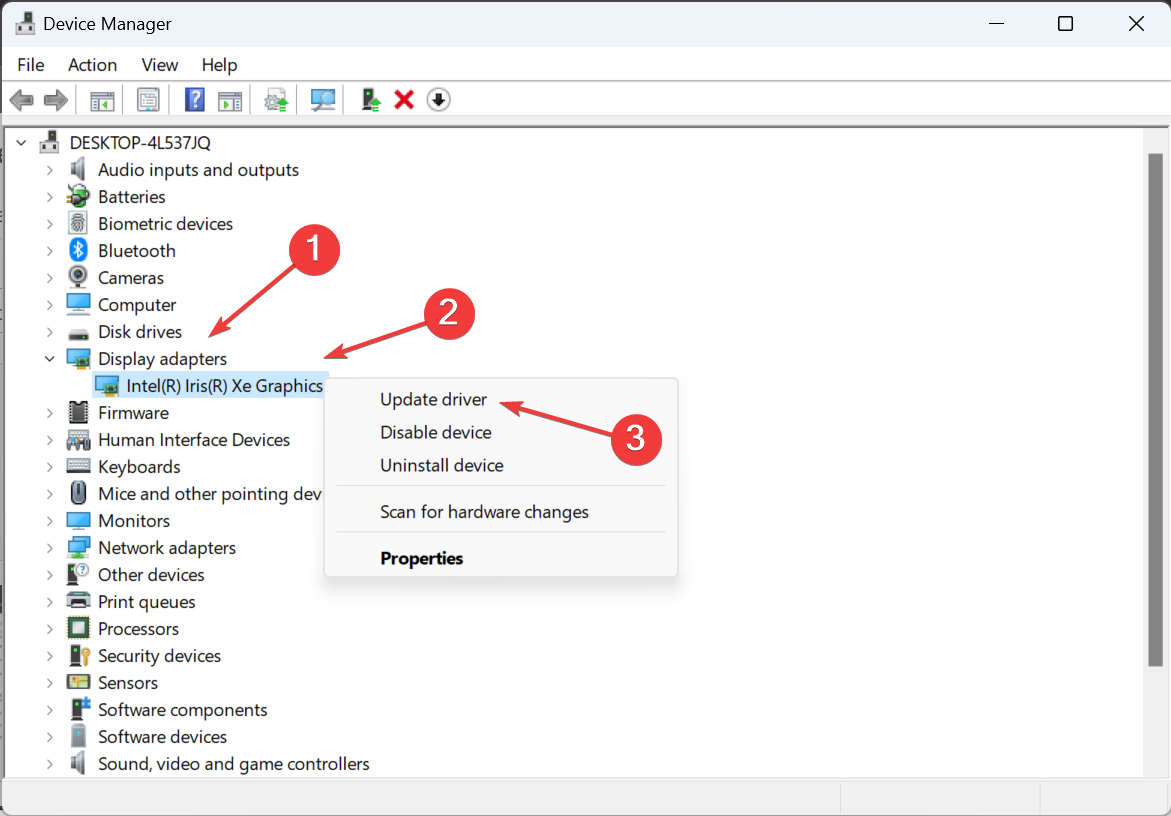
- Expand the Display adapters entry, right-click on the active graphics adapter, and select Update driver.
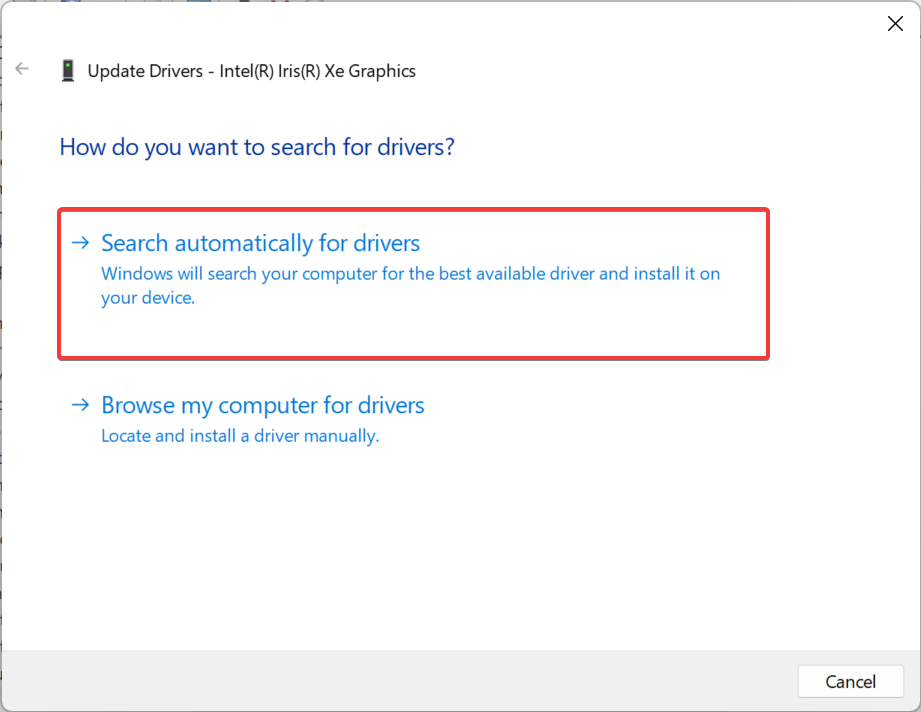
- Click on Search automatically for drivers and let Windows locate and install best locally available version.
- If a new driver is installed, reboot the device.
An incompatible or outdated driver is often the reason you get a black screen after changing the refresh rate. And in this case, updating the graphics driver will do the trick. This also helps if Windows shows a black screen after sleep.
Besides, if Windows can’t find an update, head to the manufacturer’s website, locate the latest version, and manually install the driver. Here are the direct links to download pages for the three major manufacturers:
- Download and install the Outbyte Driver Updater app.
- Launch the software and wait for the app to detect all incompatible drivers.
- Now, it will show you a list of all faulty drivers to select the ones to Update or Ignore.
- Click on Update & Apply Selected to download and install the newest versions.
- Restart your PC to ensure the applied changes.

OutByte
Keep your GPU in a flawless state without worrying about possible driver issues.3. Reinstall the graphics driver
- Press Windows + X to open the Power User menu, and select Device Manager.
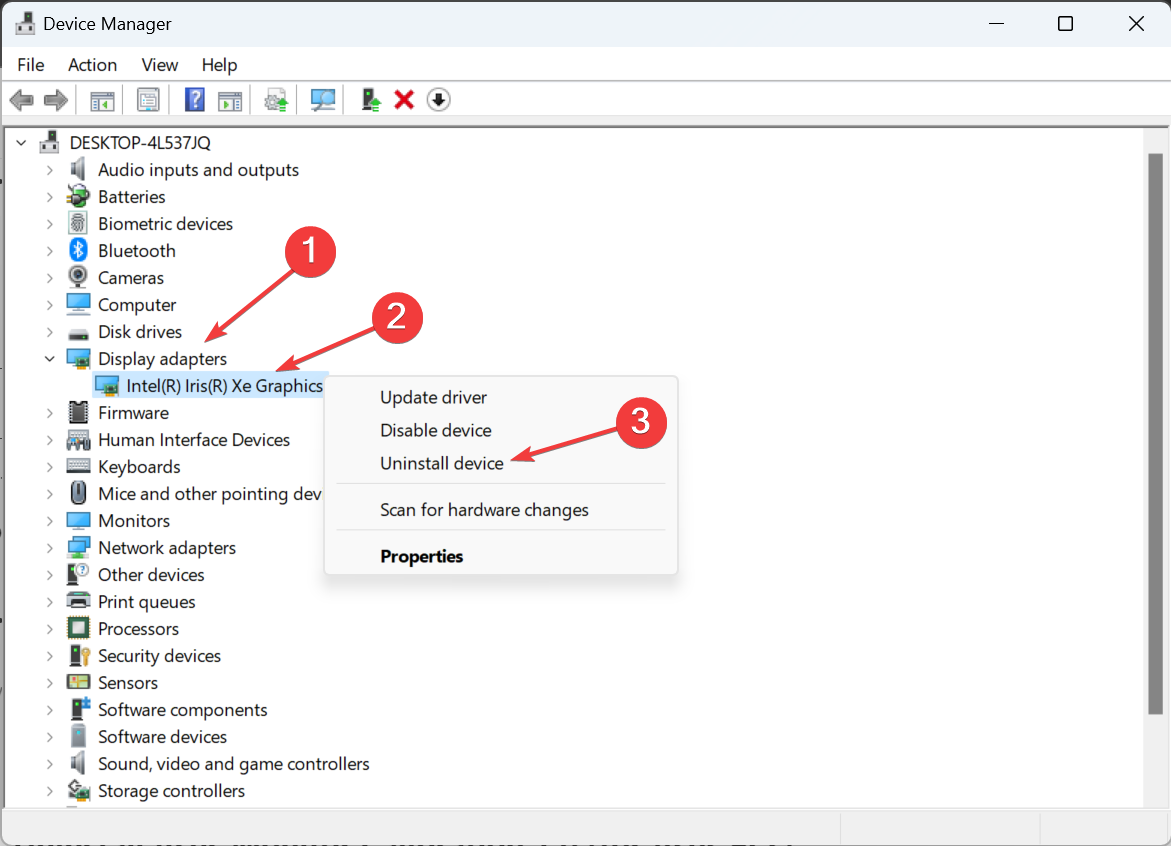
- Double-click on Display adapters, right-click on the active one, and select Uninstall device from the context menu.
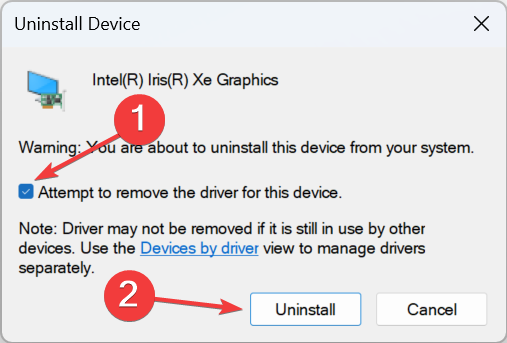
- Tick the checkbox for Attempt to remove the driver for this device and click on Uninstall.
- Reboot the device and Windows will automatically install a fresh driver.
If that doesn’t work, get the driver from the manfaucturer’s website, use a reliable driver uninstaller tool to get rid of all files, and then run the downloaded setup to reinstall the driver.
4. Disable G-Sync and V-Sync in the NVIDIA Control Panel
 NOTE
NOTE
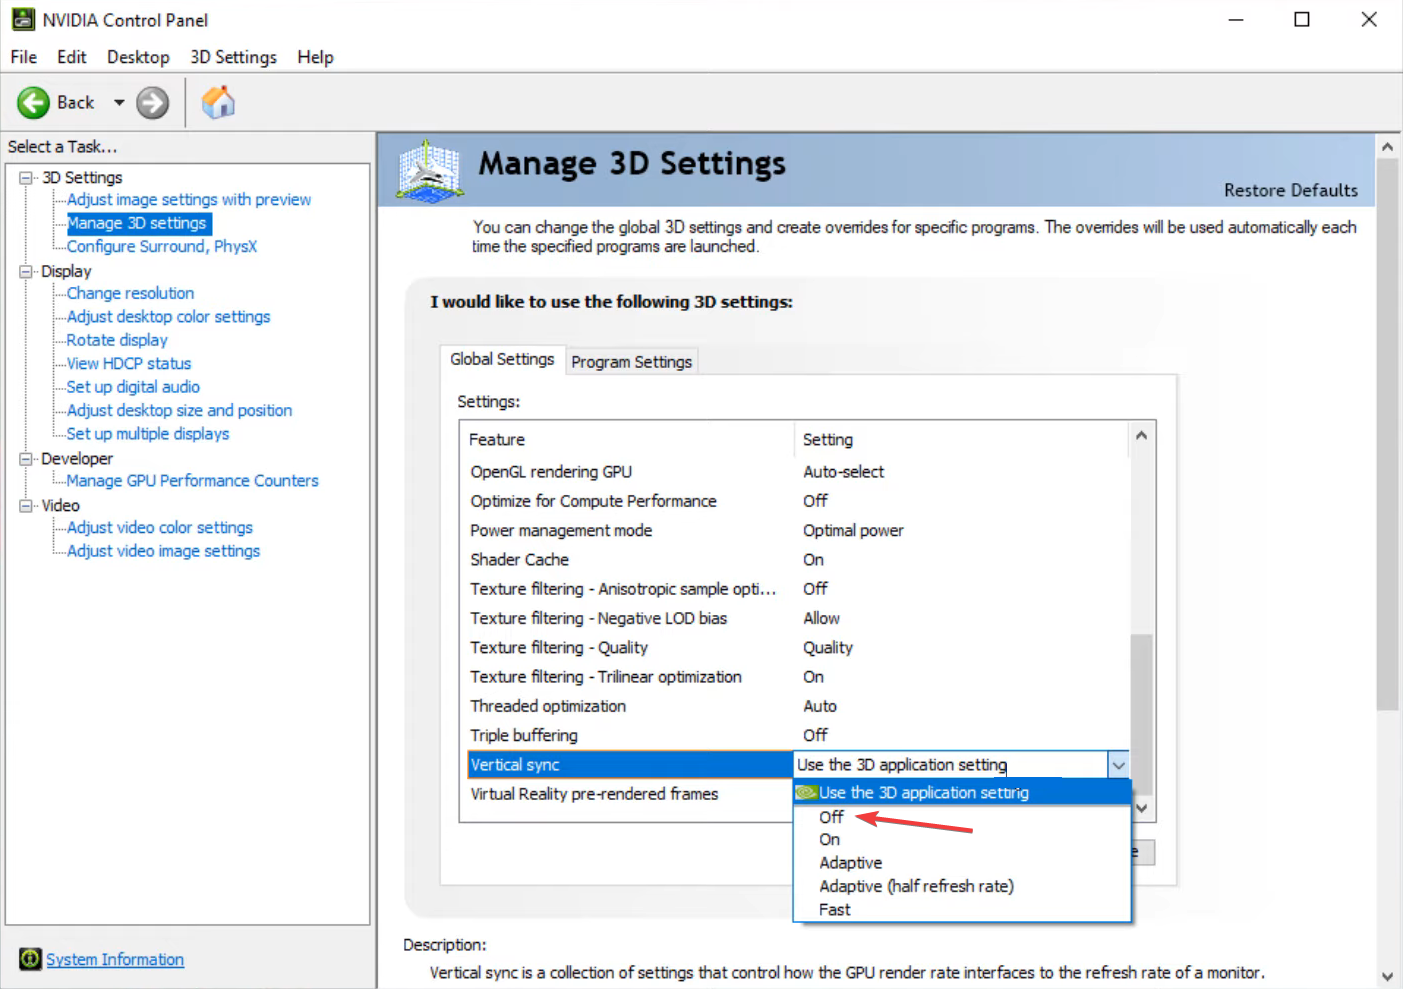
- Open the NVIDIA Control Panel, and go to Manage 3D settings from the left pane.
- In the Global Settings tab, expand the dropdown menu next to Veritical sync and select Off.
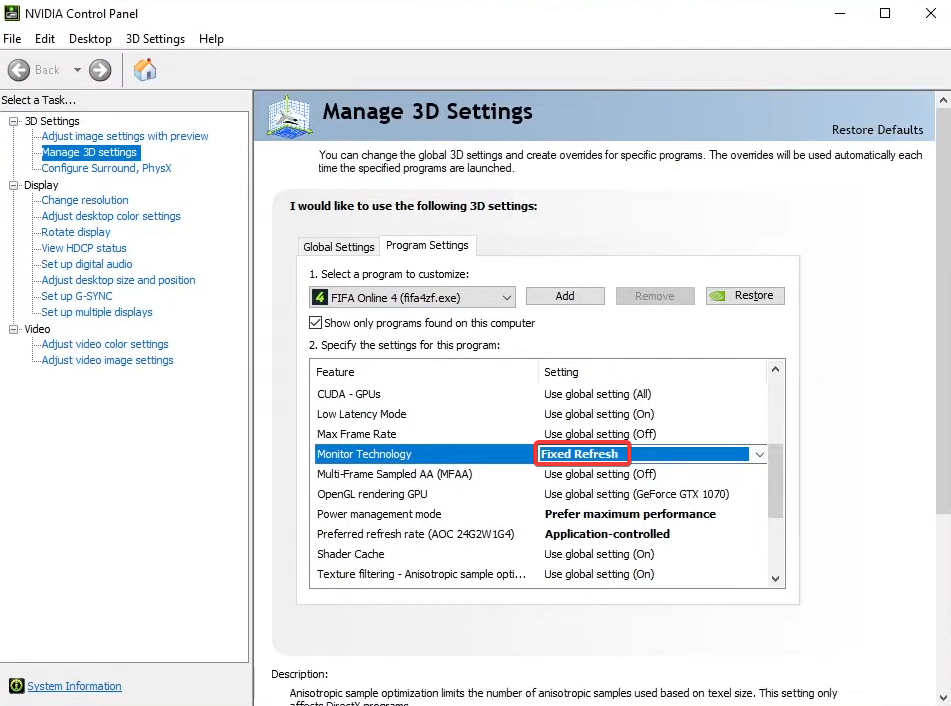
- Now, go to the Program Settings tab, select an app from the dropdown menu, expand the Monitor Technology dropdown menu, and select Fixed Refresh.
- Similarly, disable G-Sync for all applications.
- Once done, click Apply to save the changes.
Disabling the two also helps if the monitor is stuck at 60 Hz.
5. Uninstall Asus Monitor Calibration (for Asus PCs)
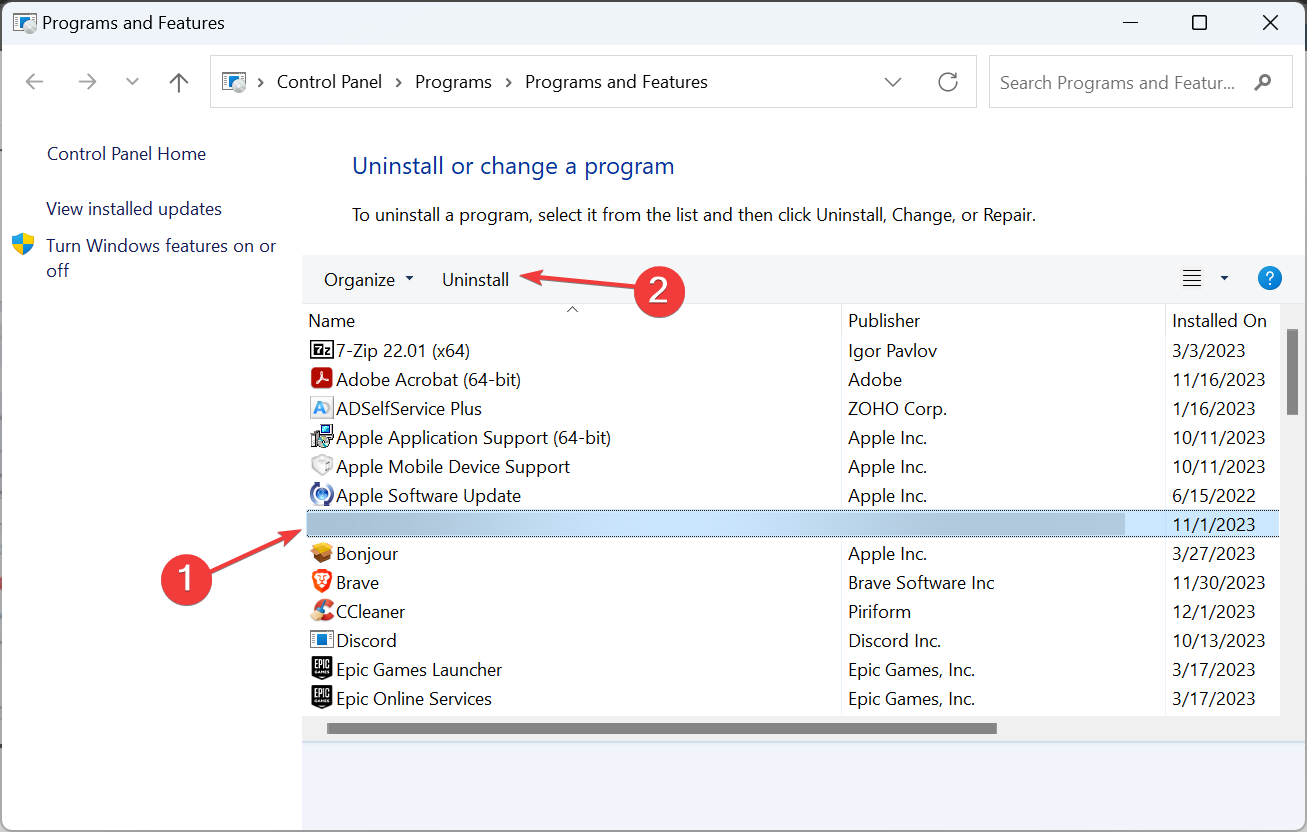
- Press Windows + R to open Run, type appwiz.cpl in the text field and hit Enter.
- Locate the Asus Monitor Calibration software from the list, and click on Uninstall.
- Follow the on-screen instructions to complete the process.
- Once done, reboot the PC and verify whether you can safely increase the refresh rate without the display going black.
If you changed the resolution and refresh rate and now have a black screen, it could be the Asus Monitor Calibration software to blame, and uninstalling the app should work. In case the problem persists, use an effective software uninstaller tool to get rid of the leftover files and Registry entries.
These are also the ways to fix things when you get a black screen after changing the refresh rate. Remember, it’s usually the graphics driver, the display, or the connection to blame. But based on users reports, we can’t negate the possibility of third-party apps triggering conflicts.
Before you leave, discover the best display settings for Windows and configure them to prevent such issues!
For any queries or to share what worked for you, drop a comment below.



User forum
0 messages