2 Ways to Block a Program in Firewall
Tested and practical methods to block an app on your firewall
3 min. read
Updated on
Read our disclosure page to find out how can you help Windows Report sustain the editorial team. Read more
Key notes
- Blocking a program in a firewall allows you to keep the app but prevent it from using your network.
- You have the option of using the Windows Defender Firewall advanced settings.
- Another option is to block the app temporarily.
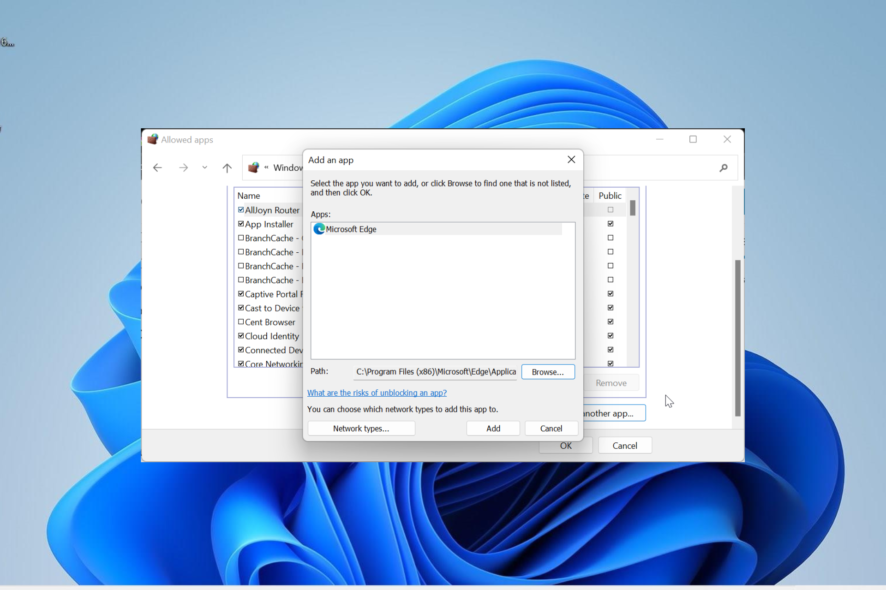
Sometimes you want to keep a program on your PC but prevent it from accessing the internet. To do this, you need to block the program in your Firewall.
While this sounds simple and straightforward, you still need to know how to proceed. In this guide, we will detail the steps you need to follow to achieve this feat quickly.
Why do I need to block a program?
The major reason users block a program in Firewall is to monitor the use of their PC resources. This is especially true for programs that use your network.
Also, you can block an app or process from accessing your PC. This protects your PC from harmful software and ensures your safety.
How do I block a program in Firewall?
1. Block a program with advanced settings
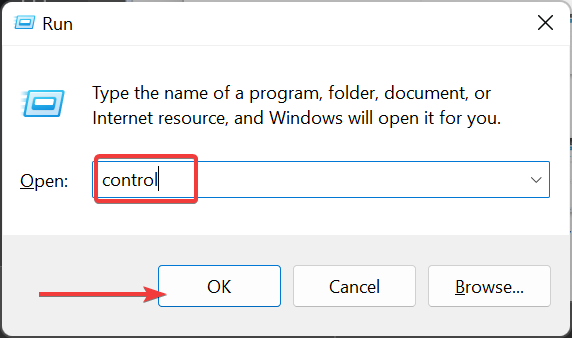
- Press the Windows key + S, type control, and select the Control Panel option.
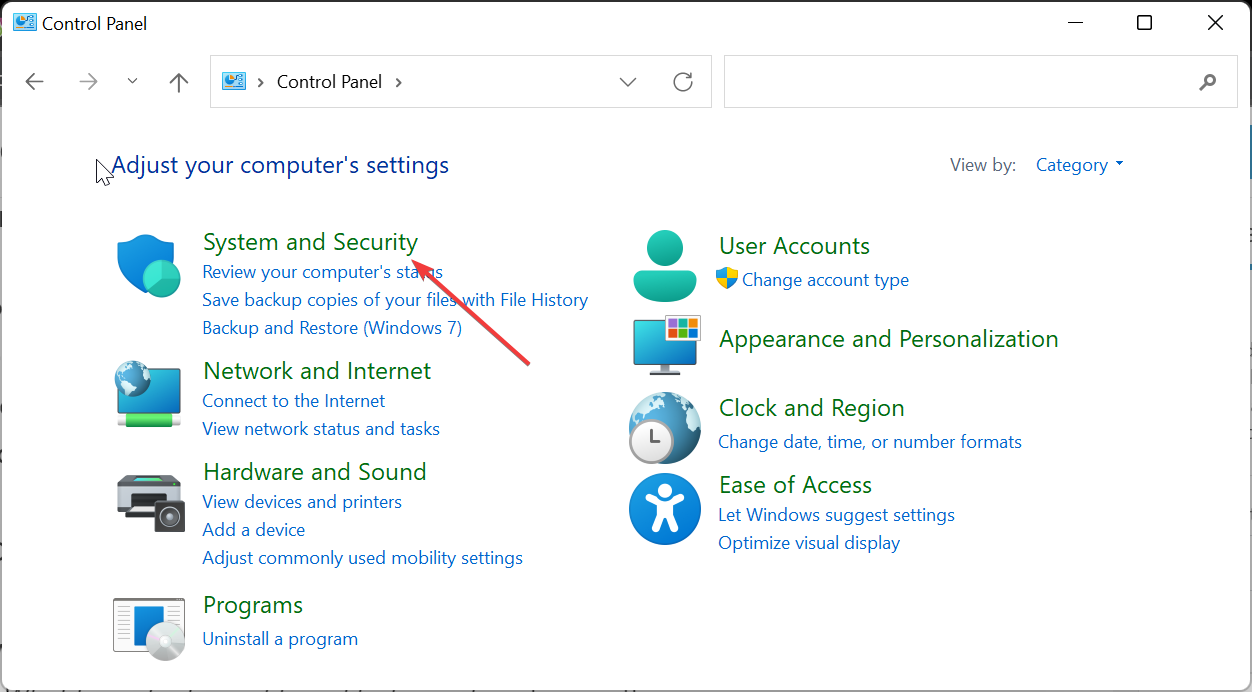
- Select the System and Security option.
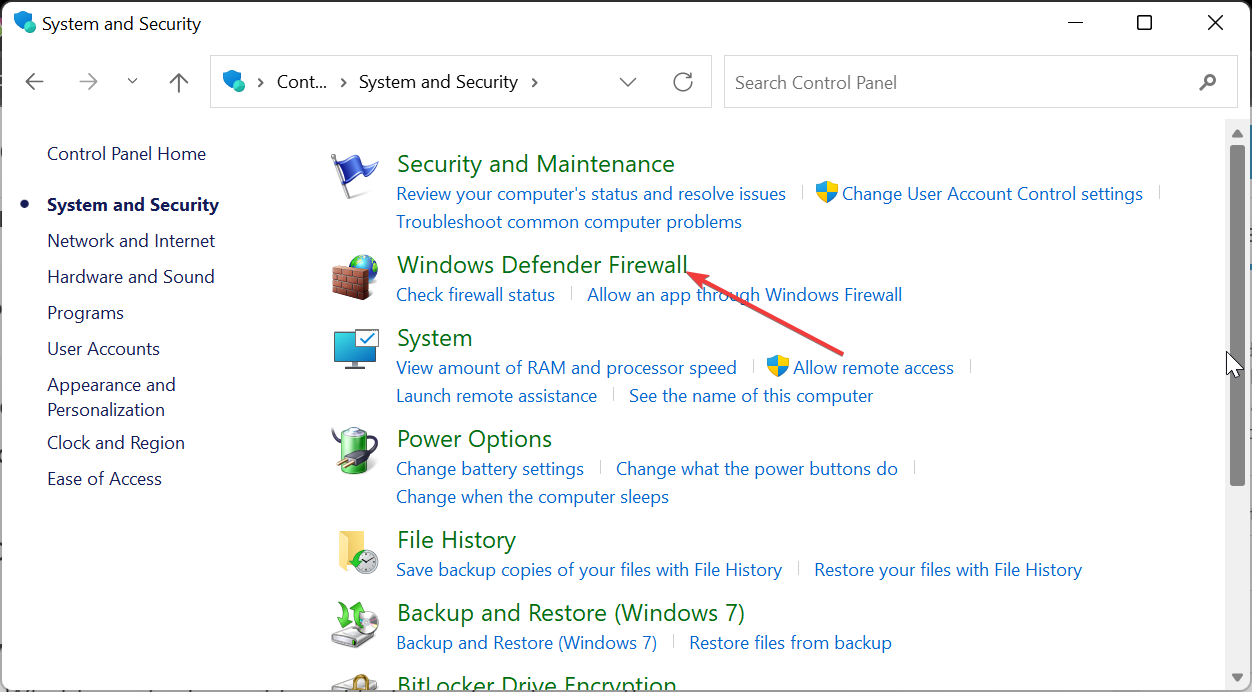
- Now, choose the Windows Defender Firewall option.
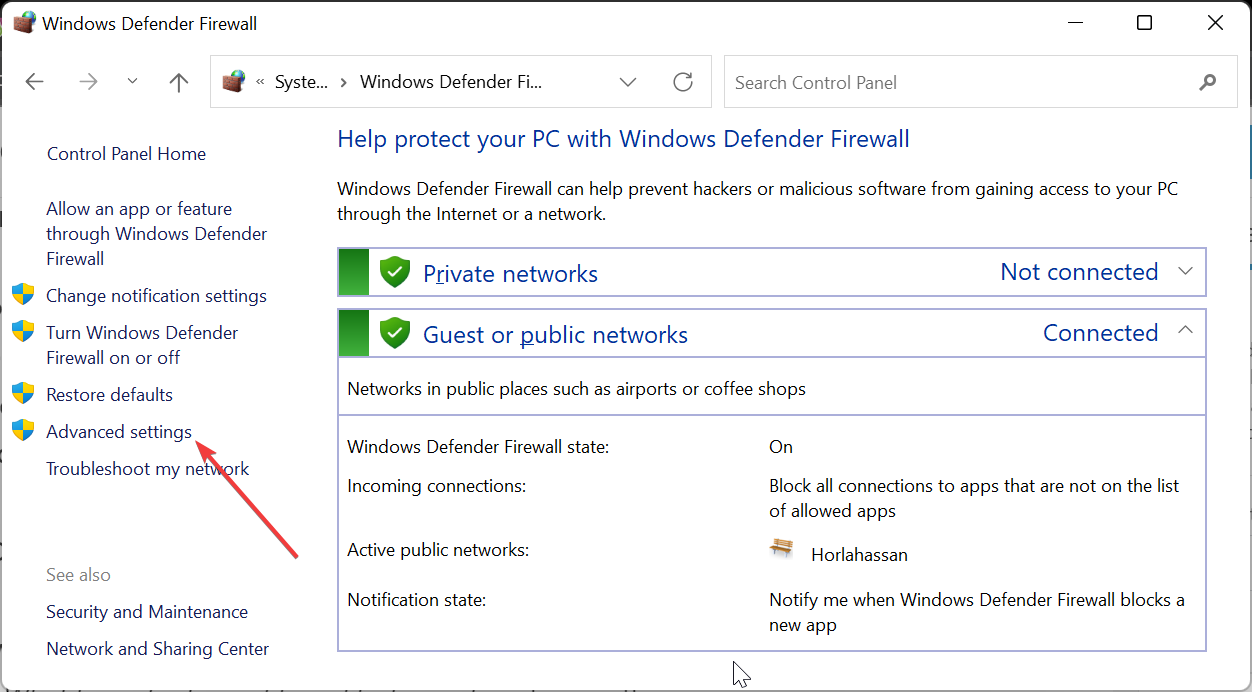
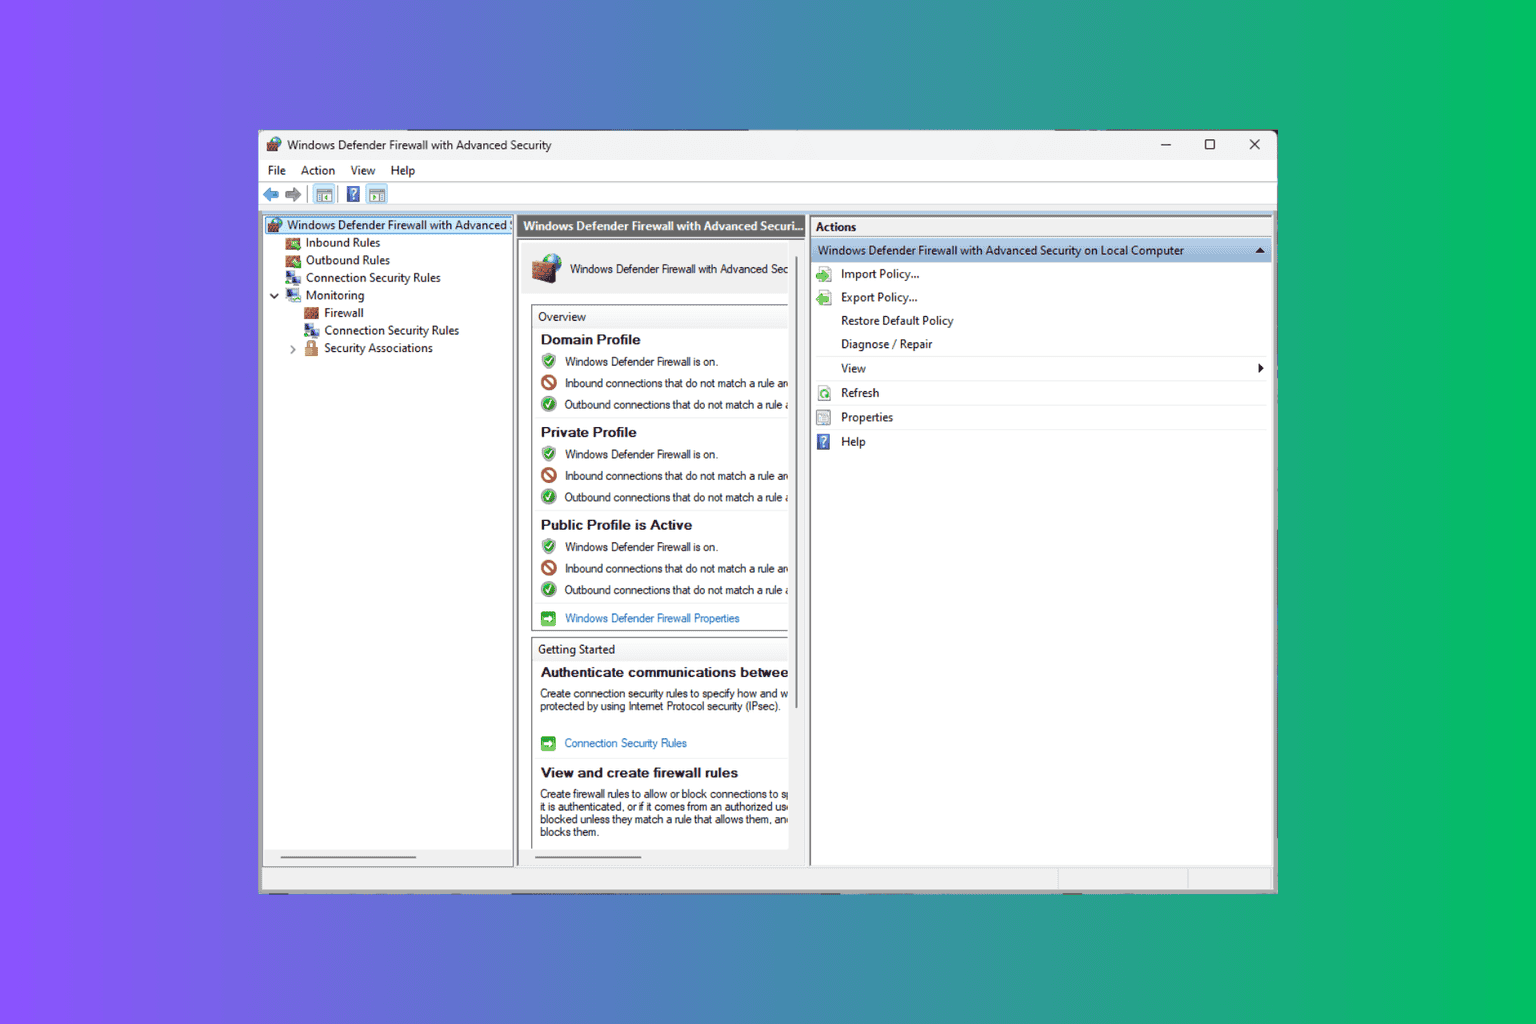
- Select Advanced settings in the left pane to launch Windows Defender Firewall with Advanced Security app.
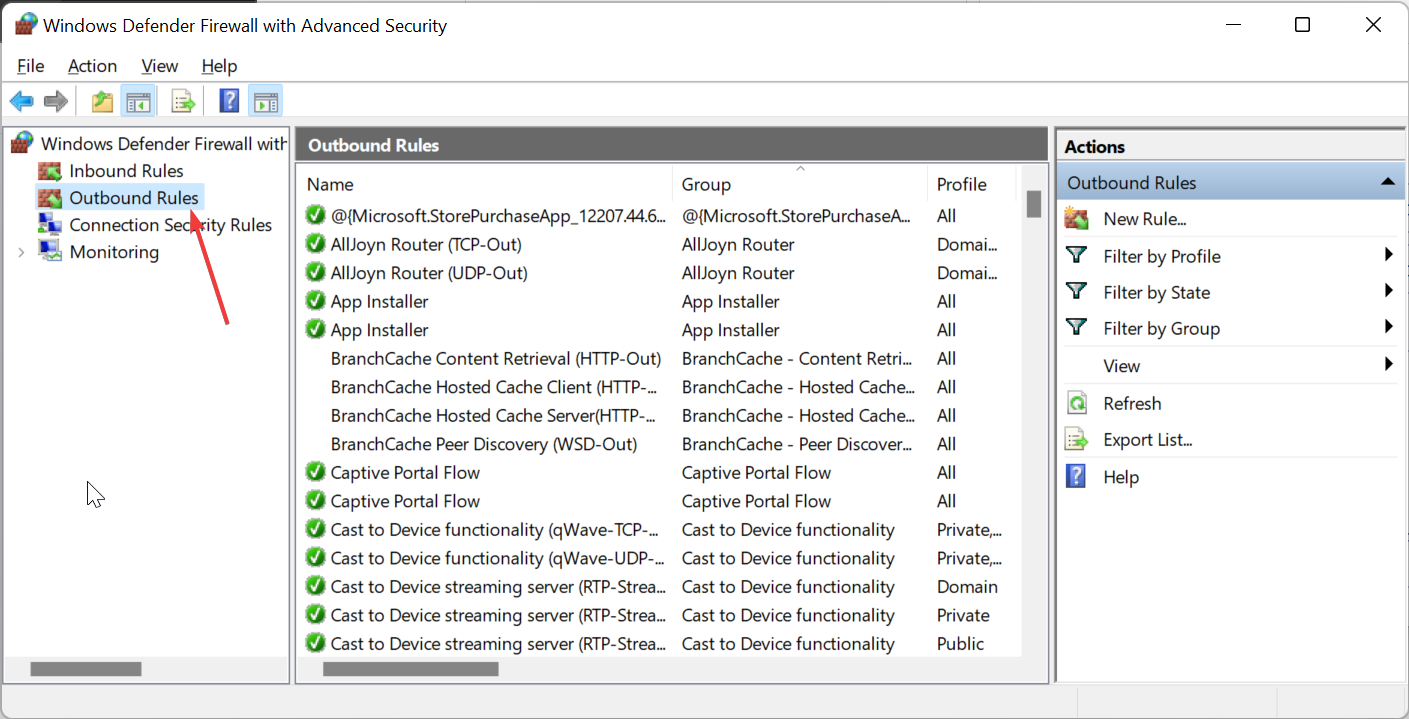
- Next, click the Outbound Rules option in the left pane. This will show all the outbound firewall rule you have in the middle of the window.
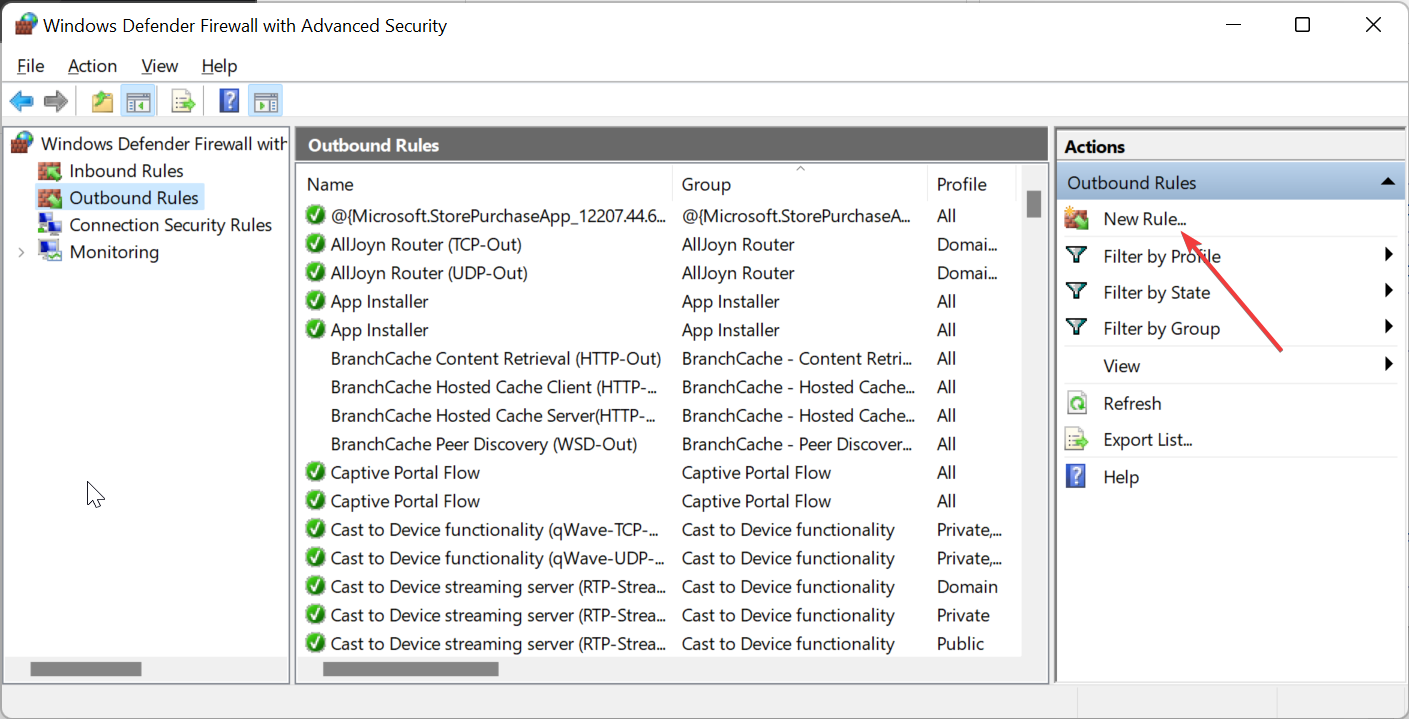
- Choose the New Rule option under the Outbound Rules Actions column.
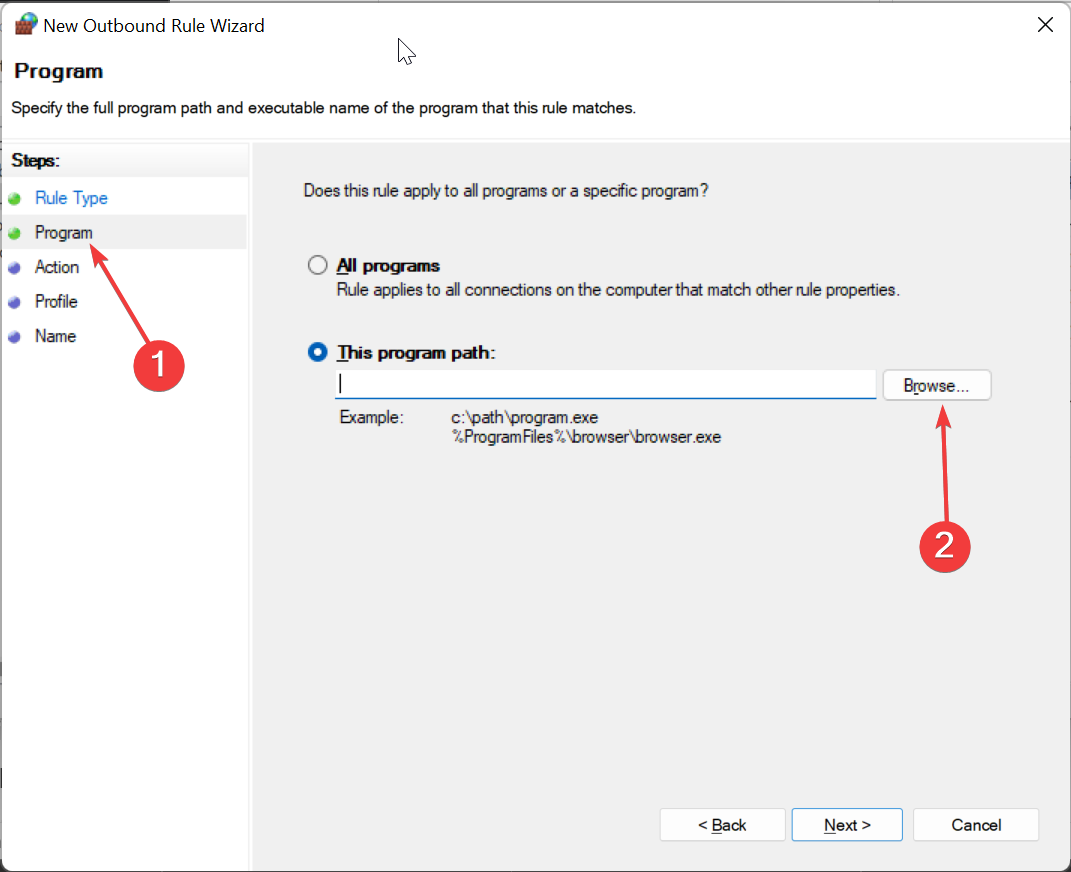
- From here, select the Program option.
- Tick the This program path radio button.
- Click Browse button to locate the path of the program you want to add.
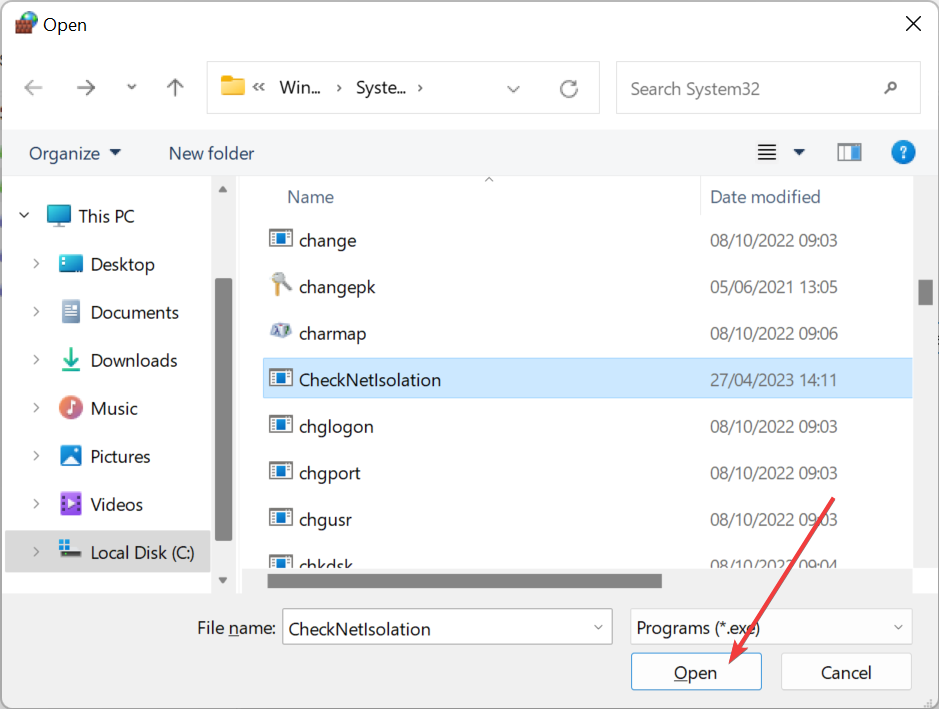
- Choose the program and click the Open button.
- After selecting the program, you might notice that the path is restructured. You can prevent this by simply copying the file path into the box instead of using the Browse button.
- When everything is set, click the Next button in the next three pages.
- Finally, enter the name of the rule and click the Finish button.
With this, you can block a program using the Windows Defender Firewall advanced settings. The program added in the new rule will not be able to access the internet going forward.
2. Block the program temporarily
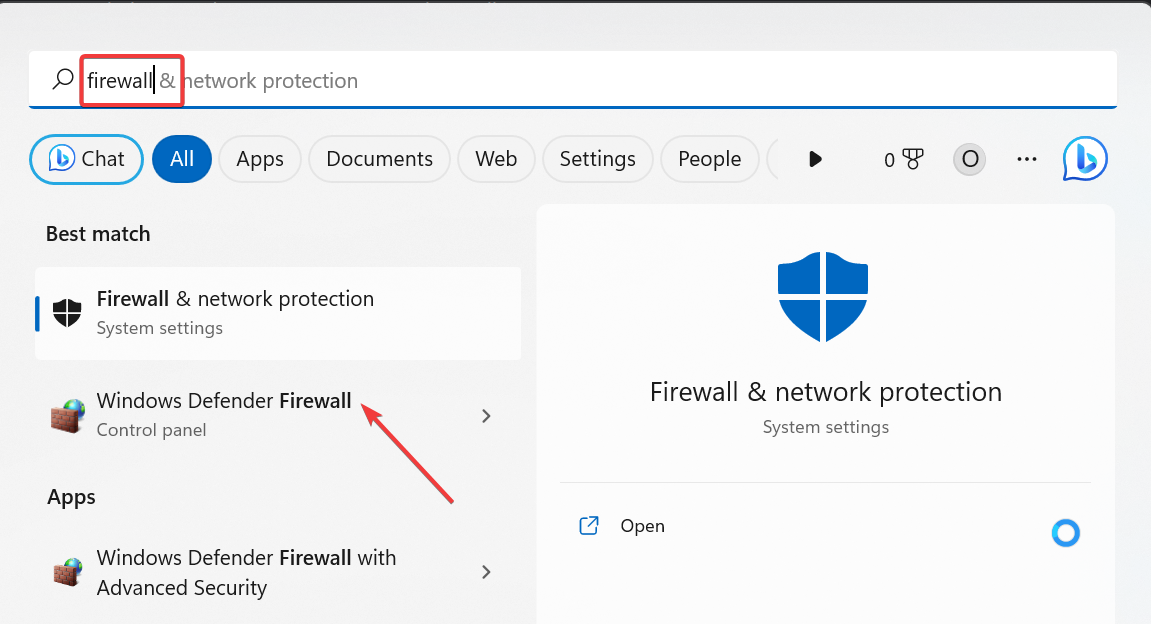
- Press the Windows key, type firewall, and select Windows Defender Firewall.
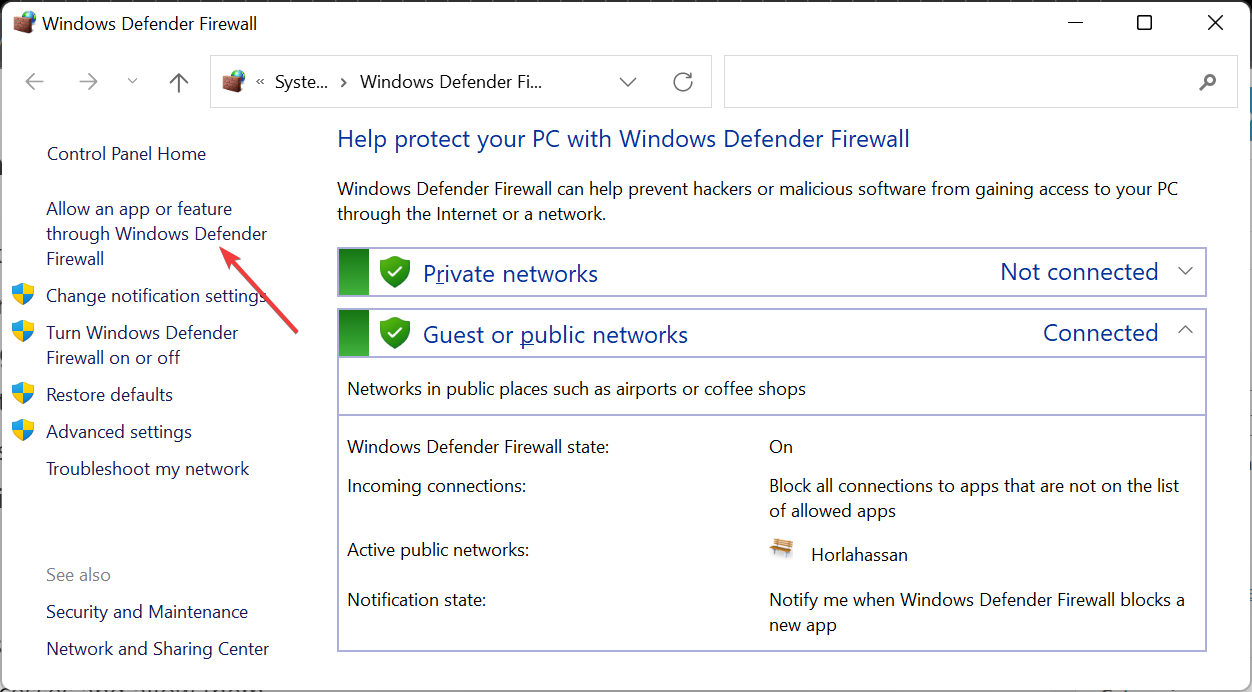
- Choose the Allow an app or feature through Windows Firewall option in the left pane.
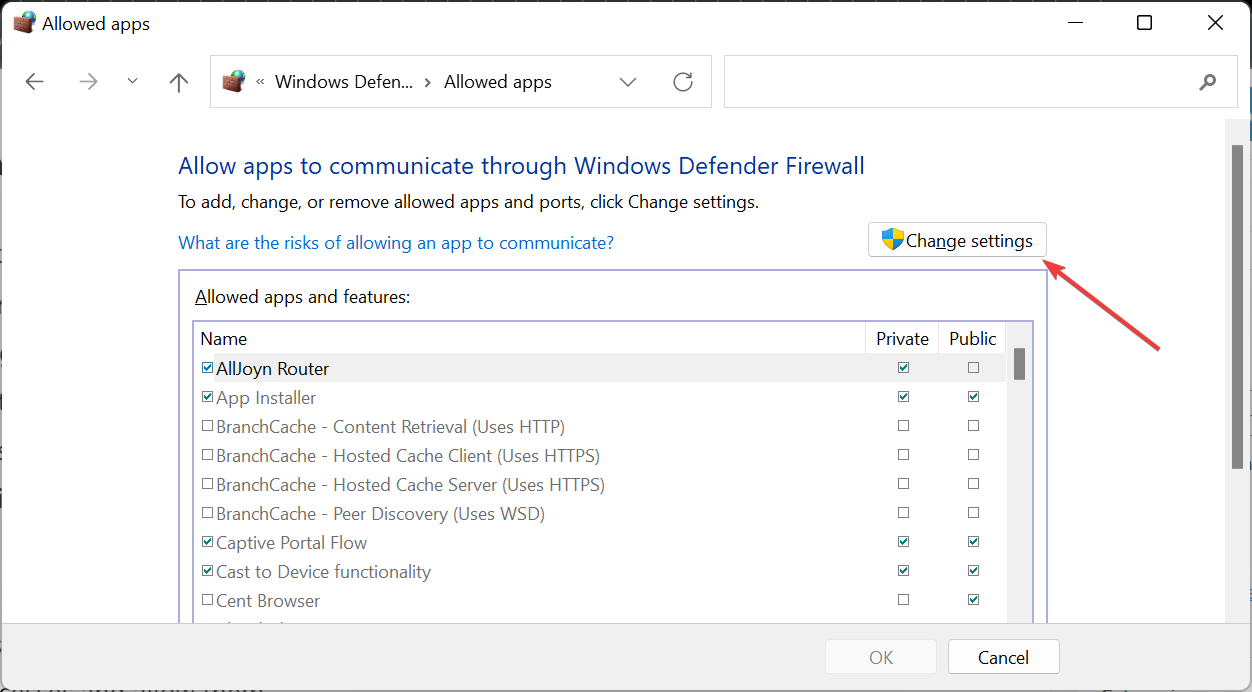
- Now, click the Change settings button.
- Next, check the program you want to block on the list.
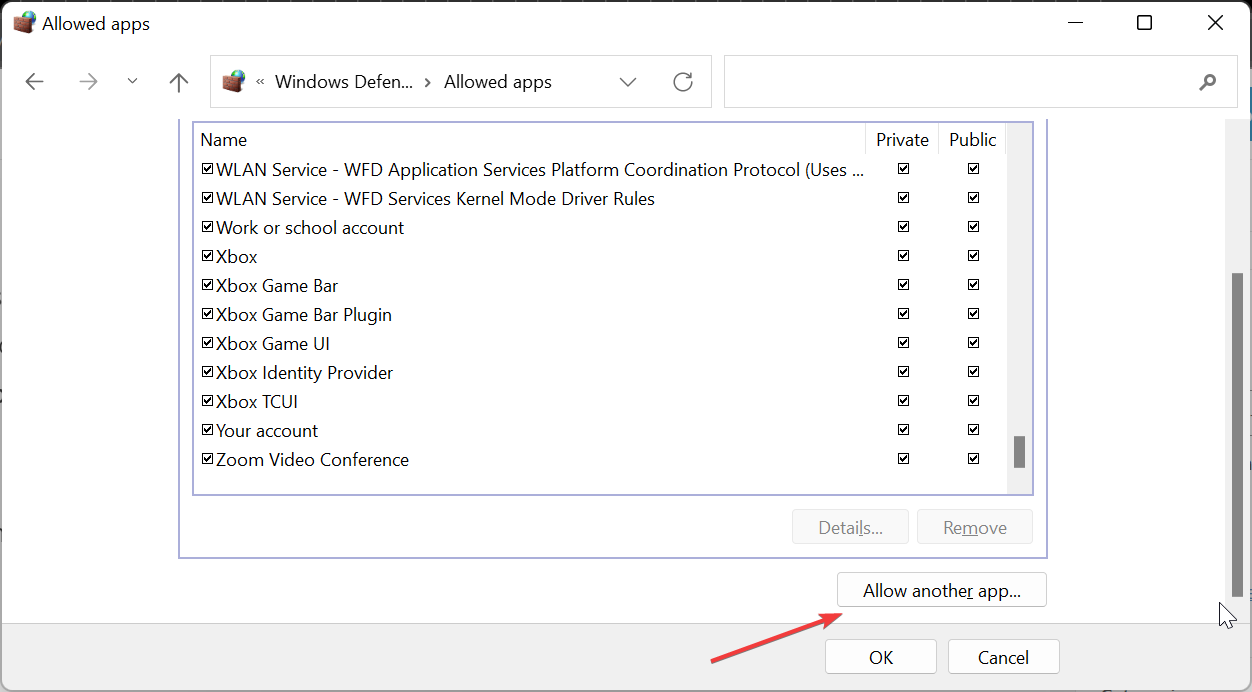
- If you can’t find it, click the Allow another app option.
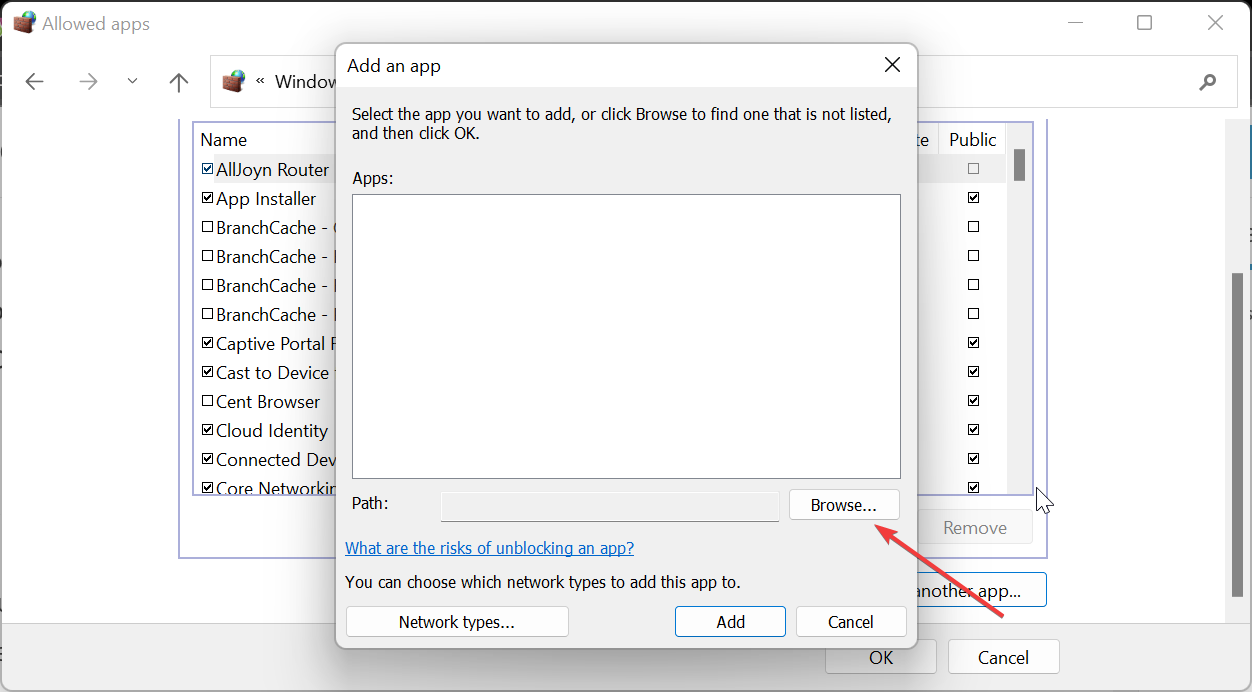
- From here, click the Browse button.
- Navigate to the program locate and select it.
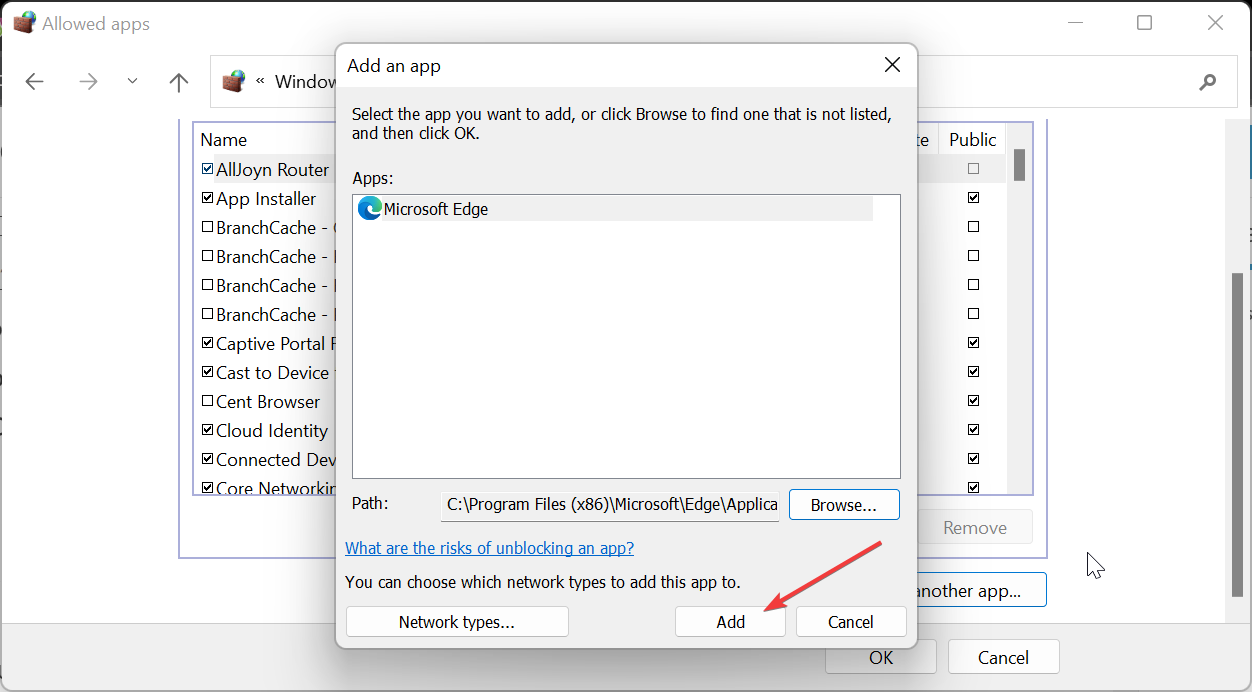
- Click the Add button to add it to the list.
- Now, ensure the box for the program is not check on the left pane. This means that the program is blocked.
- Finally, click the OK button to complete the process.
To temporarily block a program on Windows Defender Firewall, you need to follow the steps above. This method is easier, as the settings are easy to change.
Whenever you need to allow the app through your firewall, you only need to check the box to the left of the program.
There you have it: everything you need to block a program in your Firewall. The solutions above are for Windows Defender Firewall only.
If you use any third-party firewall, you need to check its settings to know the steps to follow.
If you want to know if your firewall is blocking a port or program, check our detailed guide for the steps to follow.
Feel free to let us know in the comments below if you encounter any problems while applying the steps above.



User forum
0 messages