CCleaner Problems With Windows 10: Best Ways to Fix Them
A list of common CCleaner issues and surefire solutions to them
4 min. read
Updated on
Read our disclosure page to find out how can you help Windows Report sustain the editorial team. Read more
Key notes
- CCleaner is one of the most popular tools for cleaning and optimizing your Windows PC.
- This excellent software is not free of issues, with users complaining that it is not responding or opening, among other problems.
- You can fix most of these issues by disabling your antivirus and firewall.
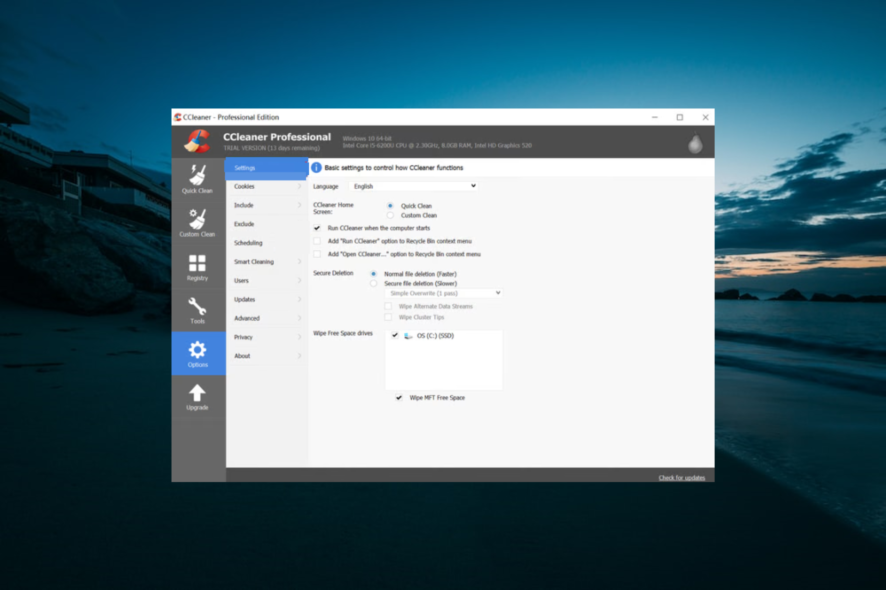
CCleaner is one of the most popular tools for cleaning and optimizing your Windows computer. Unfortunately, quite a number of users are facing some CCleaner problems with Windows 10.
In this article, we’ll list the most common CCleaner issues you may encounter on your PC, as well as the corresponding workarounds to help you get the tool up and running again.
Is CCleaner OK for Windows 10?
Inevitably, a lot of dead weight accumulates on your computer: temporary files, broken shortcuts, corrupt files, and other problems.
Hence, it would be best to have a top PC cleaner in CCleaner to keep your Windows 10 device clean and prevent technical issues. This not only prevents problems but also creates valuable spaces for other activities.
How can I fix CCleaner problems with Windows 10?
1. CCleaner not opening
1.1. Disable antivirus and firewall
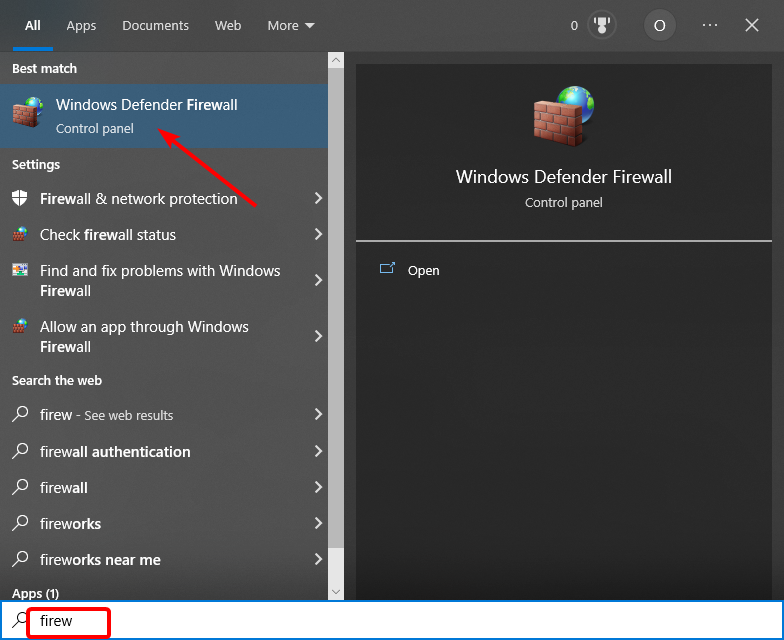
- Press the Windows key, type windows defender, and select the Windows Defender Firewall option.
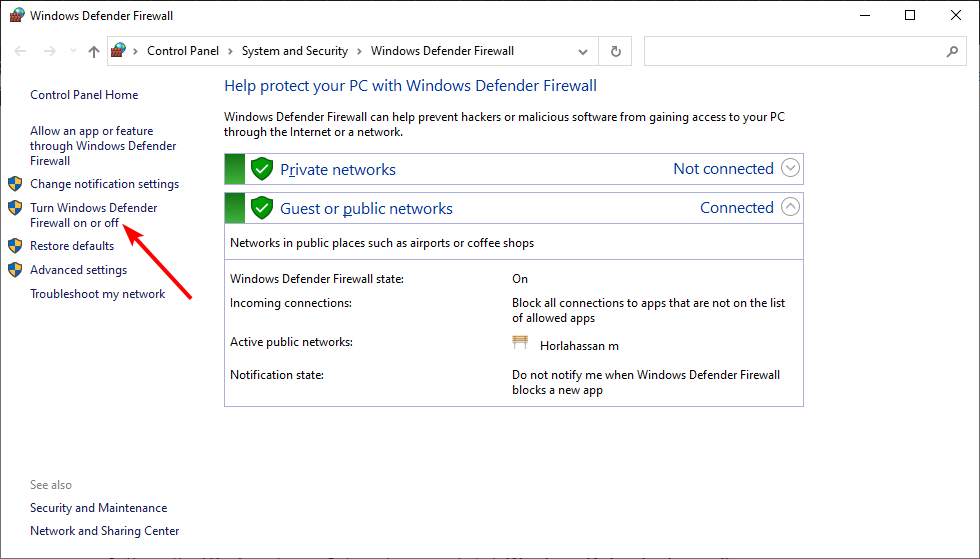
- Find and click Turn Windows Defender Firewall on or off on the left pane.
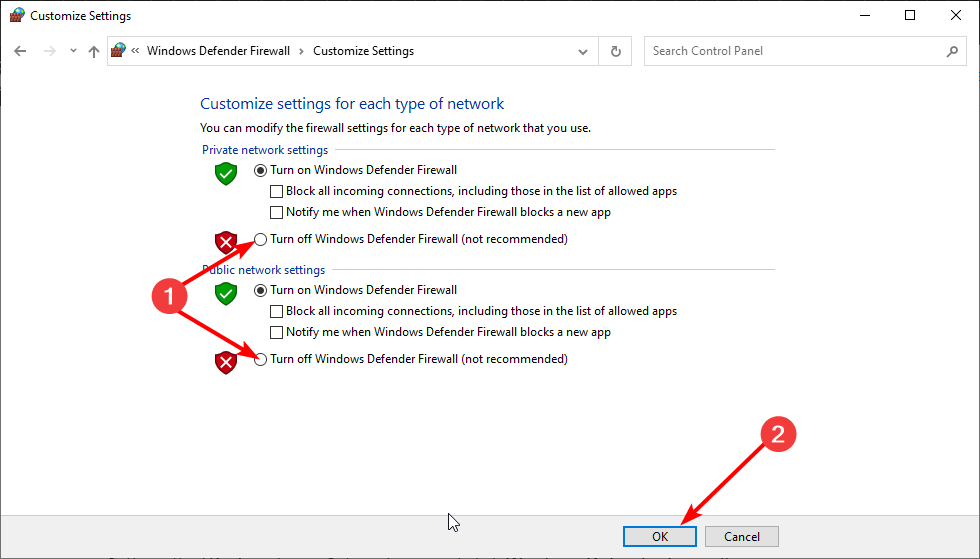
- In the Customize Settings window, select the Turn off Windows Defender Firewall (not recommended) radio buttons for both the Private and Public network settings.
- Click OK to disable Windows Firewall.
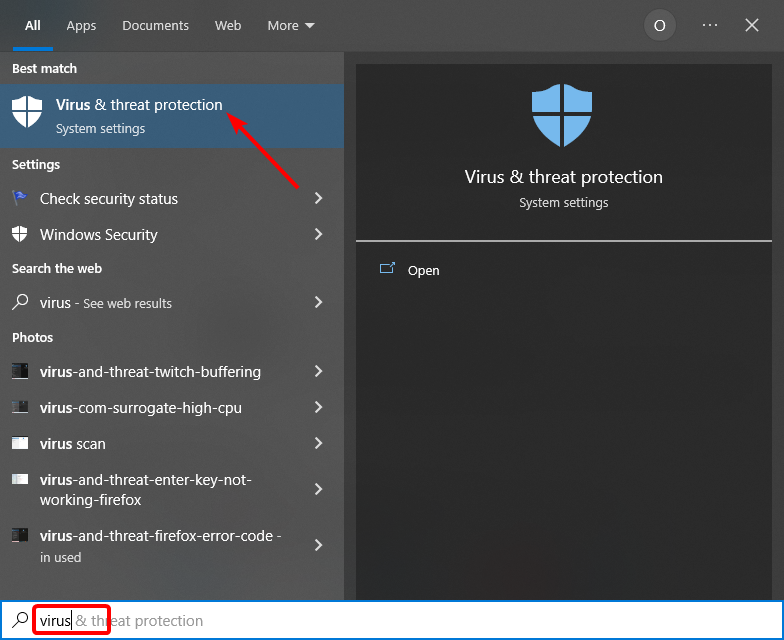
- Next, press the Windows key, type virus, and select Virus & threat protection.
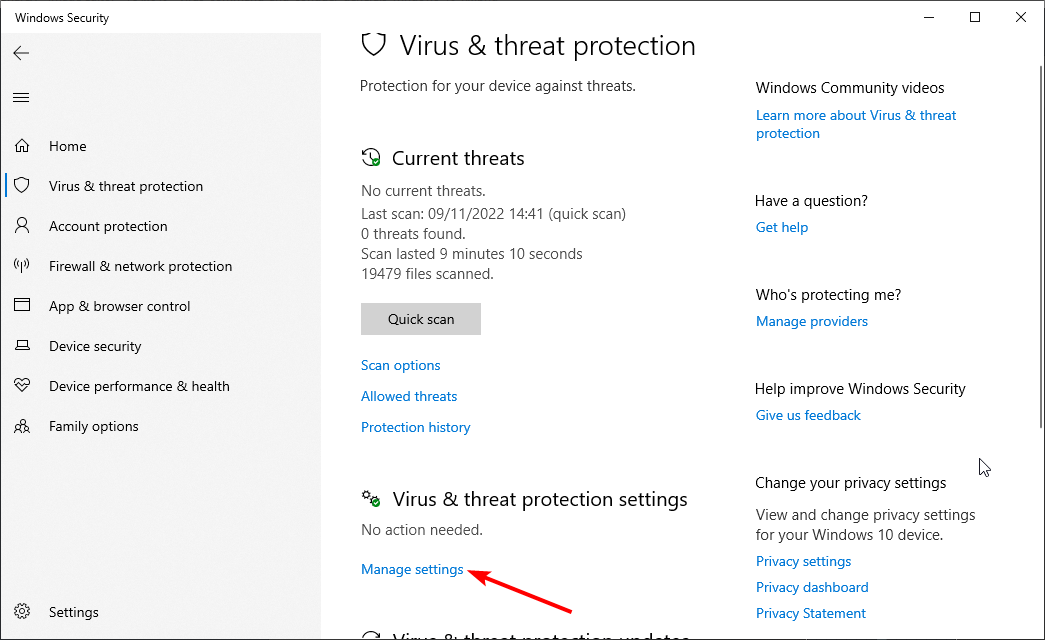
- Click the Manage settings link.
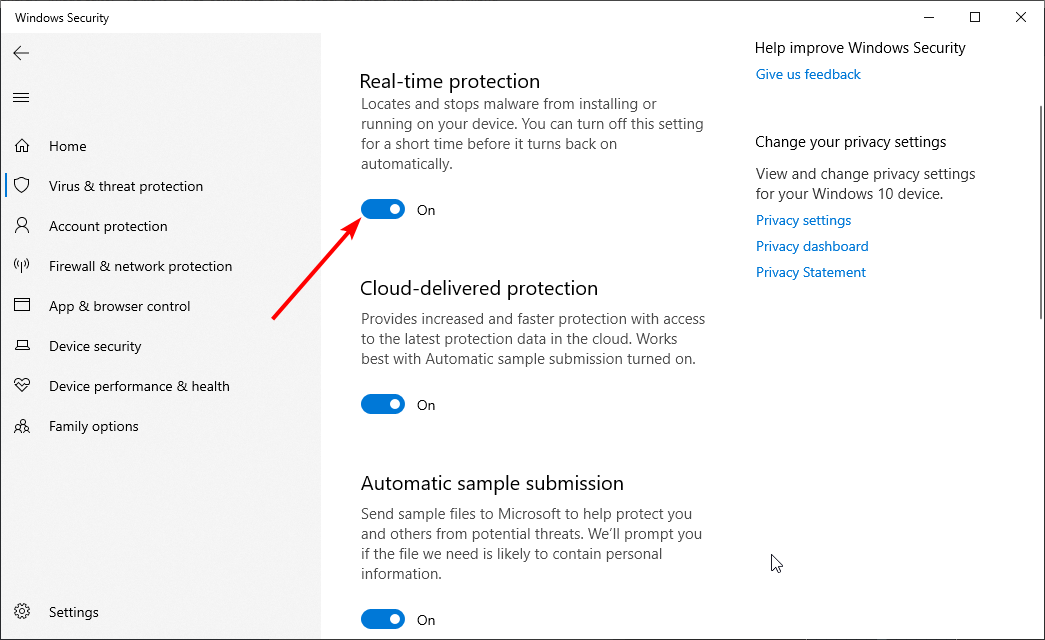
- Finally, toggle the switch under Real-time protection backward to disable it.
If CCleaner is not opening on your computer, disable your antivirus and firewall. If you have a third-party antivirus, you can turn it off by right-clicking the icon on the taskbar and selecting Disable.
1.2. Remove CCleaner entries from your registry
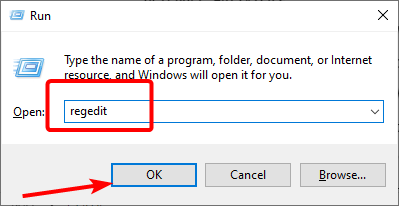
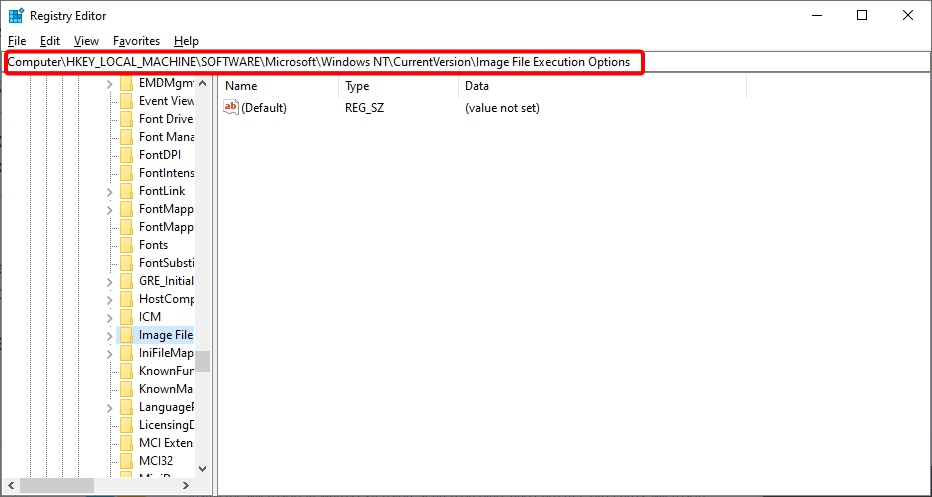
- Press the Windows key + R, type regedit, and click OK.
- Navigate to the path below in the left pane:
HKEY_LOCALMACHINE\SOFTWARE\Microsoft\Windows NT\CurrentVersion\Image File Execution Options\ - Now, right-click the CCleaner key and select Delete.
Sometimes, you might be dealing with the CCleaner not opening problems on your Windows 10 PC because of leftover CCleaner files in your registry.
2. CCleaner will not uninstall
2.1. End CCleaner process Task Manager
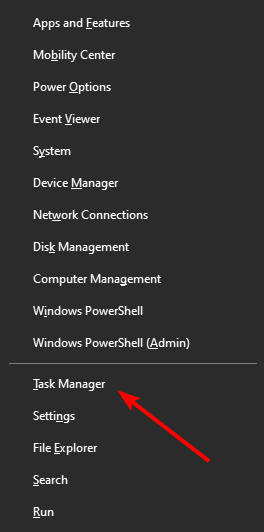
- Press the Windows key + X and select Task Manager.
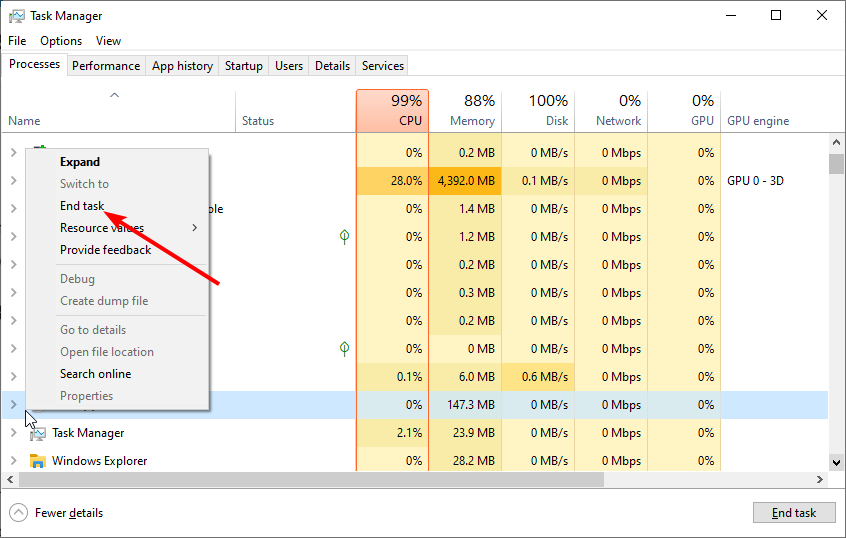
- Right-click all CCleaner processes.
- Now, select End task.
- Finally, try uninstalling the app again.
2.2. Use its uninstaller.exe
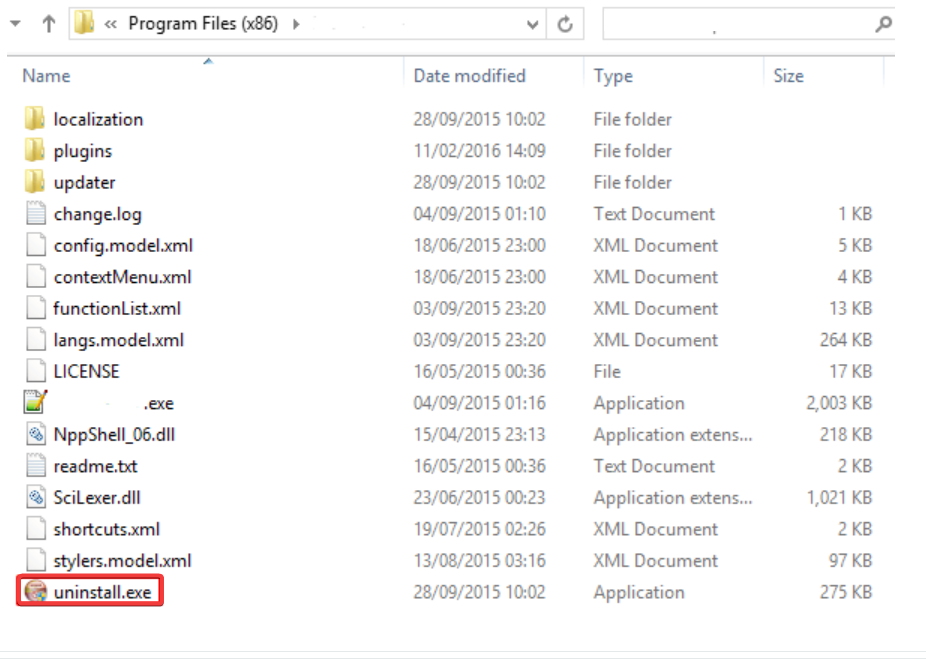
- Press the Windows key + E to open File Explorer.
- Navigate to either C:\Programs files or C:\Program files(x86).
- Now, open the CCleaner installation folder and locate uninstall.exe or uninst000.exe.
- Finally, run the file and follow the instructions.
Some users have been having problems trying to uninstall the CCleaner on Windows 10. With the two solutions above, you can remove the app easily.
3. CCleaner is not responding
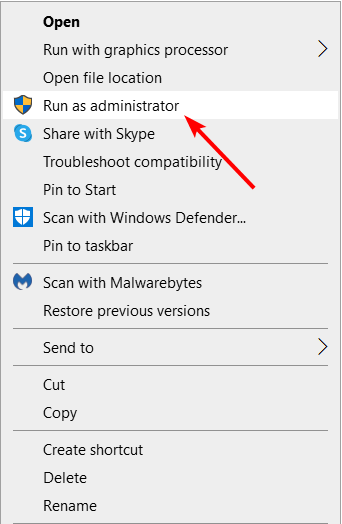
3.1. Run the app as an admin
3.2. Disable antivirus temporarily
Another solution, if you are dealing with CCleaner not responding problems, is to disable your antivirus and firewall temporarily. We have shown how to do this in solution 1.
4. CCleaner is not working
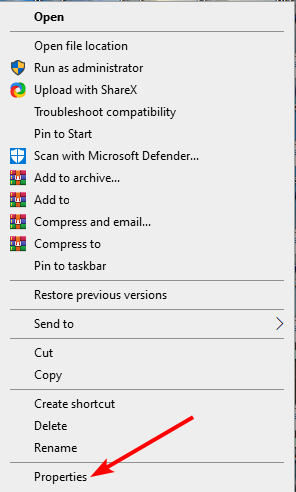
- Right-click the CCleaner icon and select Properties.
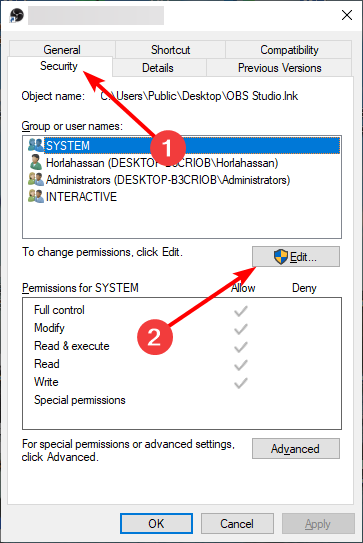
- Click the Security tab at the top.
- Now, click the Edit button.
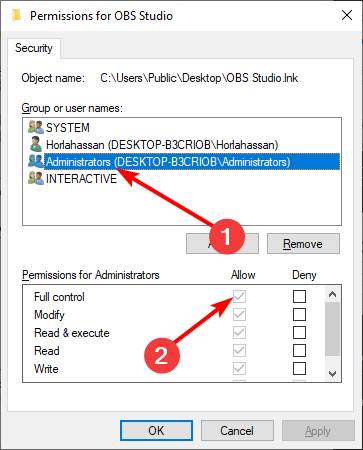
- Check the box before Full Control under the Allow section.
- Finally, click the OK button.
In some cases, CCleaner might not work correctly if it does not have the necessary permissions. The solution is to grant it complete control and restart the app.
If this does not work, you can temporarily disable your antivirus and firewall.
5. CCleaner keeps starting with Windows
5.1. Disable from within the app
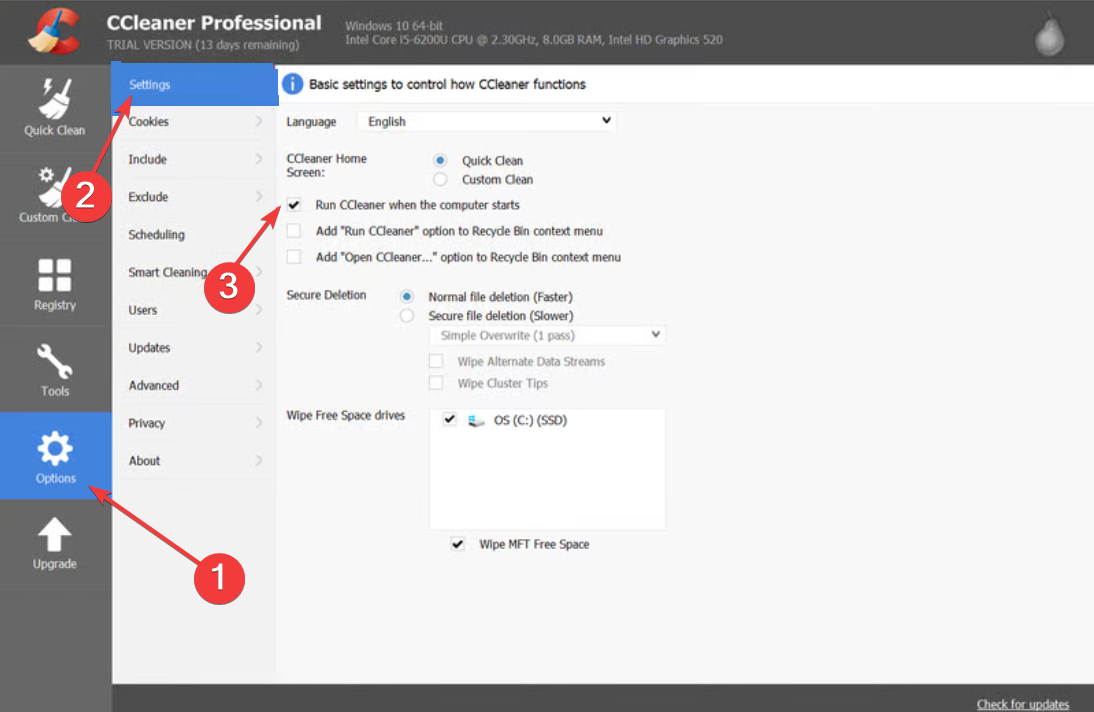
- Launch CCleaner and click Options in the left pane.
- Now, select Settings.
- Finally, uncheck the box for Run CCleaner when computer starts.
CCleaner has a built-in option that allows it to start with your PC. It would be best if you disabled this option to stop it from doing so.
5.2. Stop it from Settings
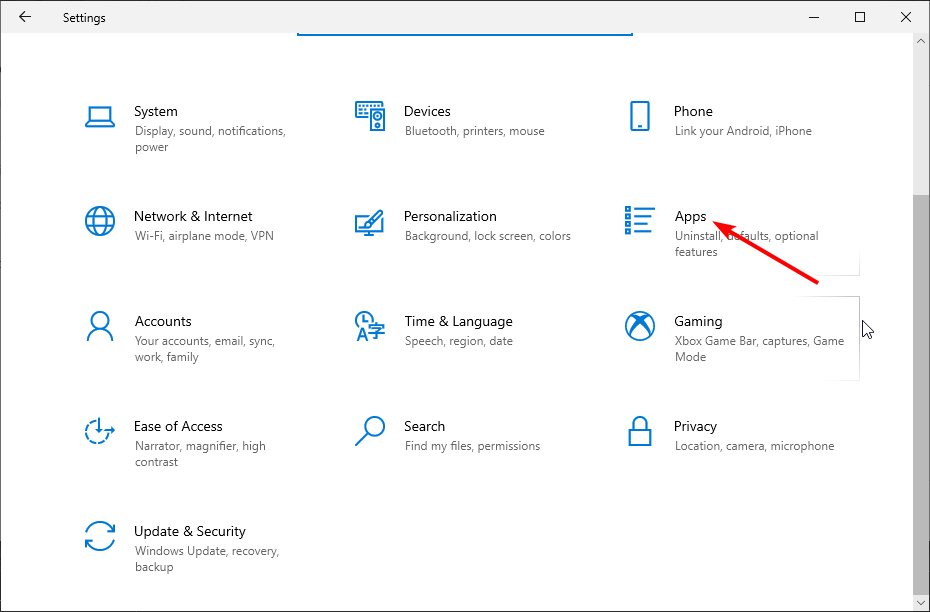
- Press the Windows key + I and select the Apps option.
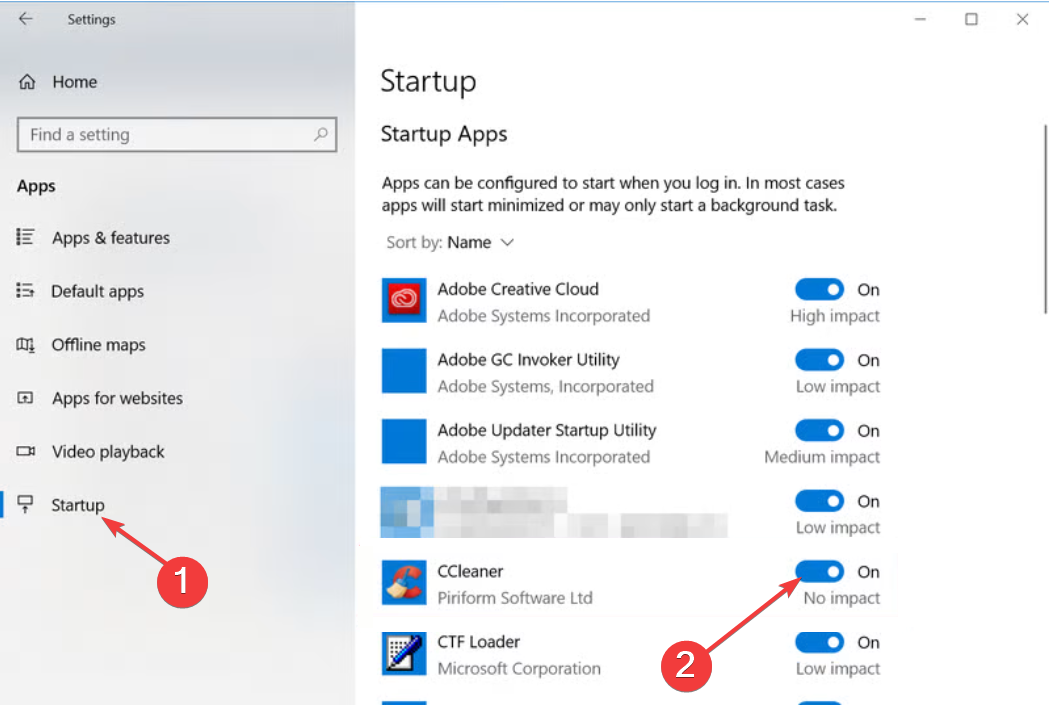
- Click Startup in the left pane.
- Now, toggle the switch for CCleaner backward to disable it.
If CCleaner keeps starting with Windows 10, it is because it is part of your startup apps. The solution to this is to remove it from there.
That’s for the common CCleaner problems on Windows 10 and their fixes. Most of these solutions work interchangeably for other issues. So, you can always try them.
Similarly, if CCleaner won’t install on your PC, check our detailed guide to fix it quickly.
Feel free to let us know the solution that helped you solve the problem in the comments below.



User forum
2 messages