Compname is Not Accessible: 3 Ways to Fix it
Delete previously saved credentials if you face this issue
Key notes
- You can run into the Compname not accessible error when the computer can’t connect to the target computer.
- Network connection issues and access restrictions can cause the error on your PC.
- Turning on File and printer sharing or enabling network discovery can fix the issue.
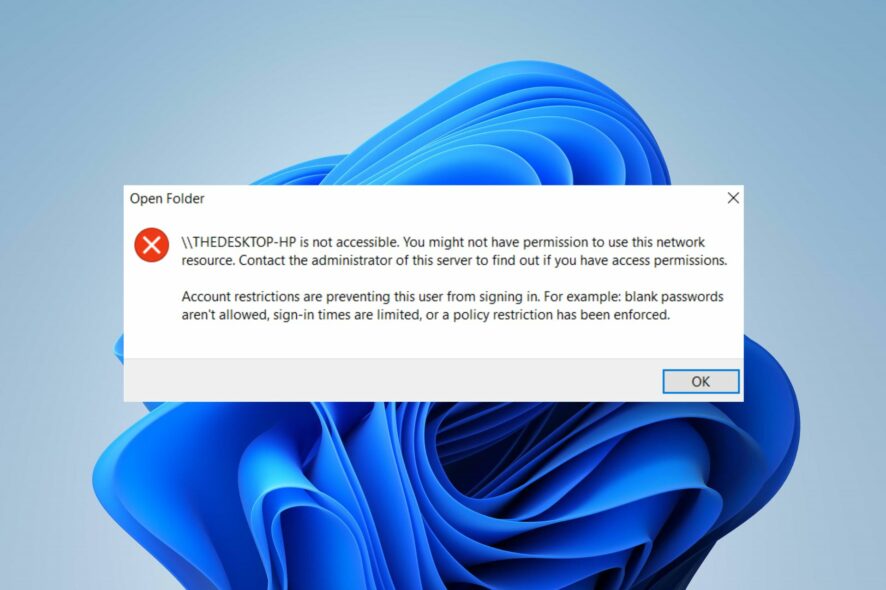
The Compname not accessible error typically occurs when you try to access a computer or network resource but encounter difficulties. It causes issues connecting to a computer or network. However, this guide will discuss how to fix the error on Windows 11.
Also, you can check our article about the group or resource that is not in the correct state error and ways to resolve it on your PC.
Why am I getting the Compname not accessible error?
Many factors may be responsible for the compname not available error. Some are:
- Incorrect network path or address – If you enter an incorrect computer name or network path when trying to access a computer or resource, it can result in the compname not accessible error. Double-check the name or path to ensure its accuracy.
- Network connectivity issues – The computer resource you are trying to access may have connectivity issues, such as network congestion, misconfigured network settings, or firewall restrictions.
- Permissions and access restrictions – If your user account does not have the necessary access rights, you may encounter the compname not accessible error.
- Network name resolution issues – If the computer or network resource cannot be resolved by the DNS (Domain Name System) or WINS (Windows Internet Naming Service) servers, you may experience difficulties accessing it.
- Firewall and security software – Firewalls or security software on your computer or the target computer/resource may block the connection. These security measures could prevent you from accessing the resource, resulting in an error.
Thus, the above-listed causes are liable to vary on different computers. Regardless, you can fix the issue by following the troubleshooting steps in the next section.
How can I fix Compname is not accessible message?
Before proceeding with any advanced troubleshooting steps, we recommend you go through these preliminary checks:
- Check network connection – Ensure you have a stable network connection and that the target computer or resource is accessible.
- Verify computer name or network path – Double-check the network path or computer name you are using to access the resource to ensure it is accurate and properly formatted.
- Check Permissions and access – Confirm that your user account has the necessary permissions to access the resource.
- Add credentials for the machine to all the computers in the network – This should be done after turning off password protected sharing.
- Disable firewalls and security software – Temporarily disable any firewalls or security software on your computer and the target resource to prevent any interference from causing the issue.
- Use IP Address instead of computer name – Try accessing the resource using its IP address instead of using the computer name. This bypasses any potential name resolution issues and allows a direct connection.
If the above preliminary checks can resolve the problem, go ahead with the solutions below:
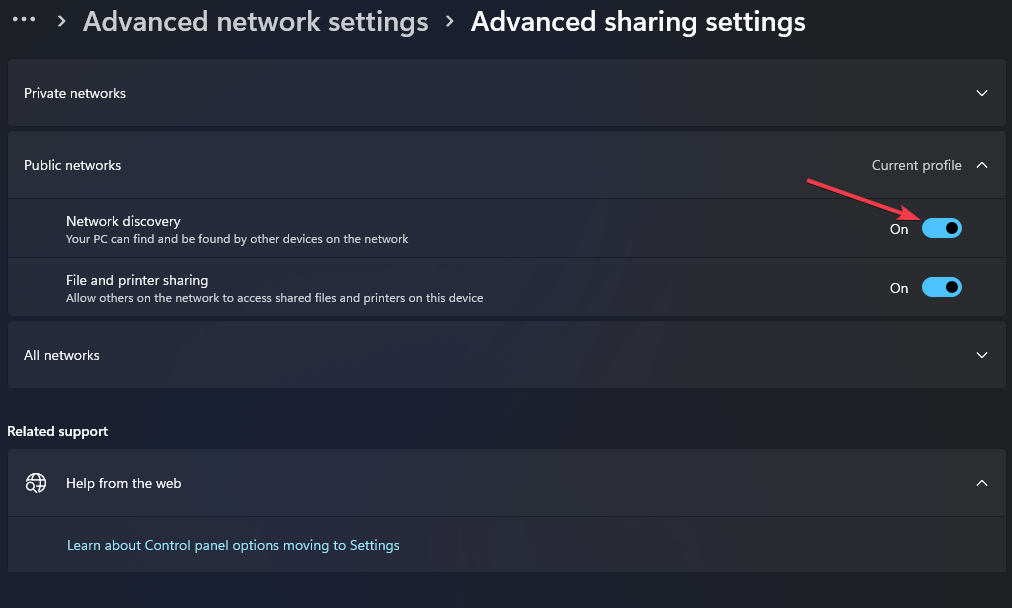
1. Turn on File and printer sharing
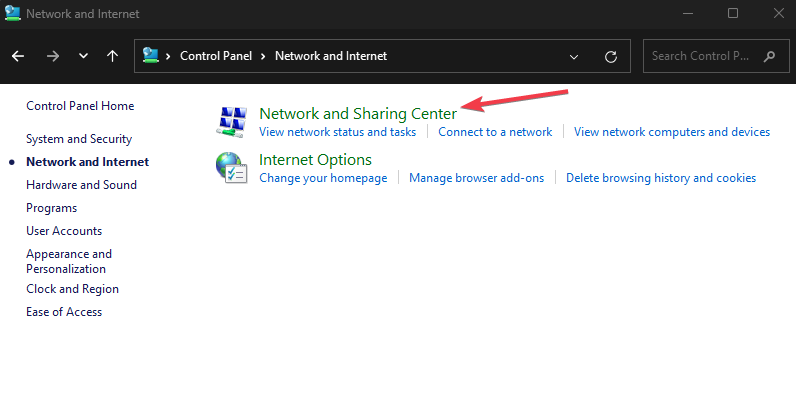
- Left-click the Start button, type the control panel, and launch it.
- Click on Network and Internet, then select Network and Sharing Center in the next window.
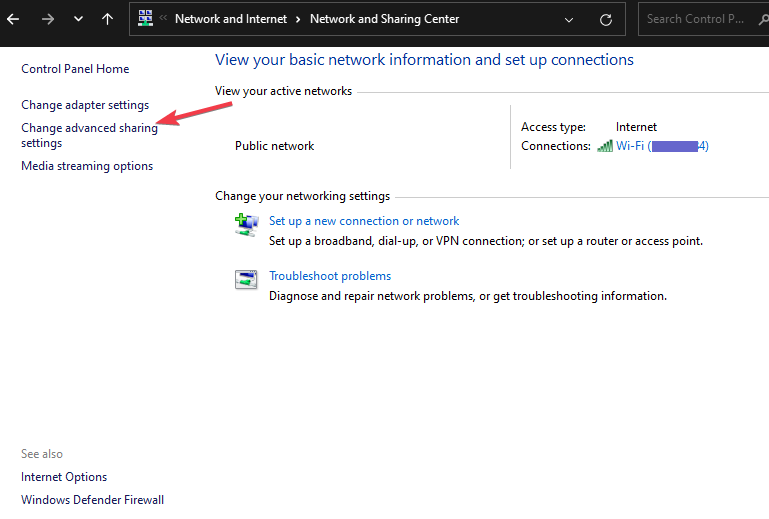
- Then, click on Change advanced sharing settings.
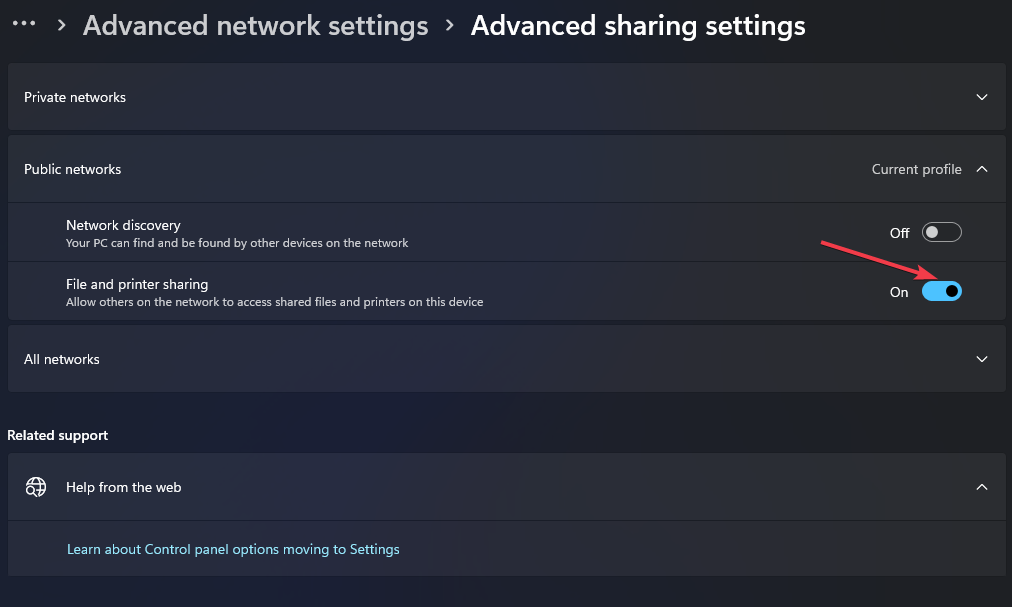
- Now, locate File and printer sharing, and toggle on the option.
- Press Windows + R to open the Run window, type services.msc, and click OK to open Windows Services.
- Locate the Workstation service and Computer Browser service, and double-click on each.
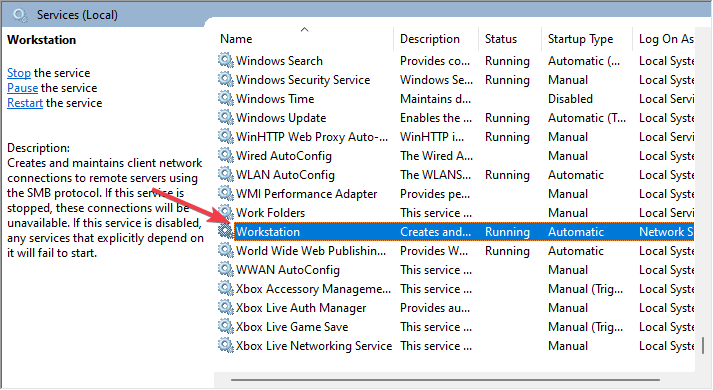
- Now, select Automatic under Startup type, and click on the Start button.
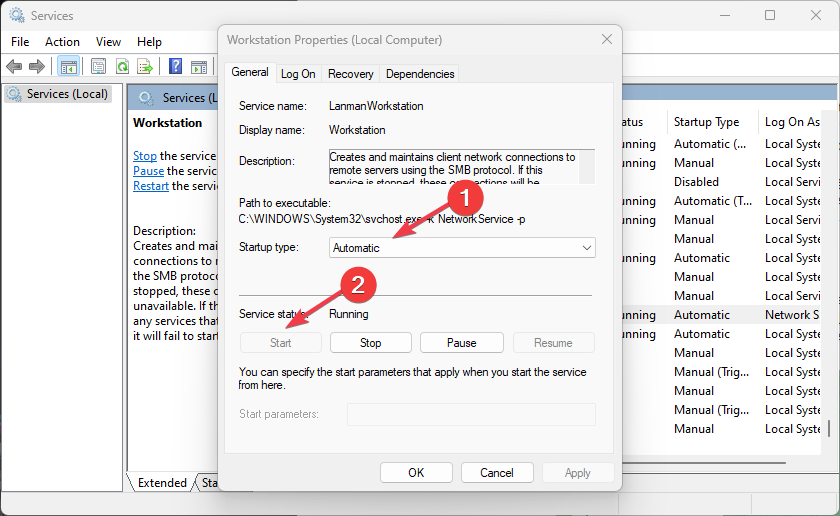
- Apply the changes and close the services.
With both of those services running, the File and printer sharing settings will remain on and ensure connection to other devices on the network.
2. Delete saved credentials
2.1 Use Command Prompt
- Left-click the Start button, type cmd, and click Run as administrator.
- Input the following and click Enter:
net use \computername\sharename /delete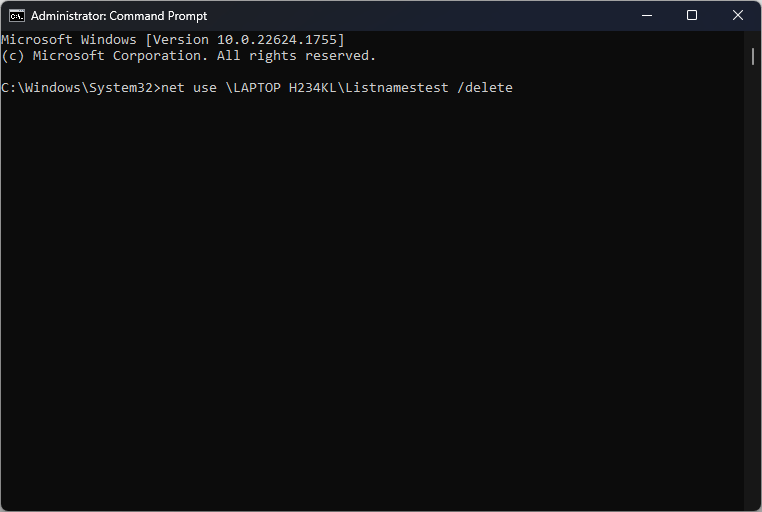
- Ensure to input the proper computer name and sharename above to replace the code.
- Then, close the Command Prompt and restart the PC to take effect.
2.2 Use the Control Panel
- Left-click the Start button, type credential manager, and launch it.
- Click On Windows credentials.
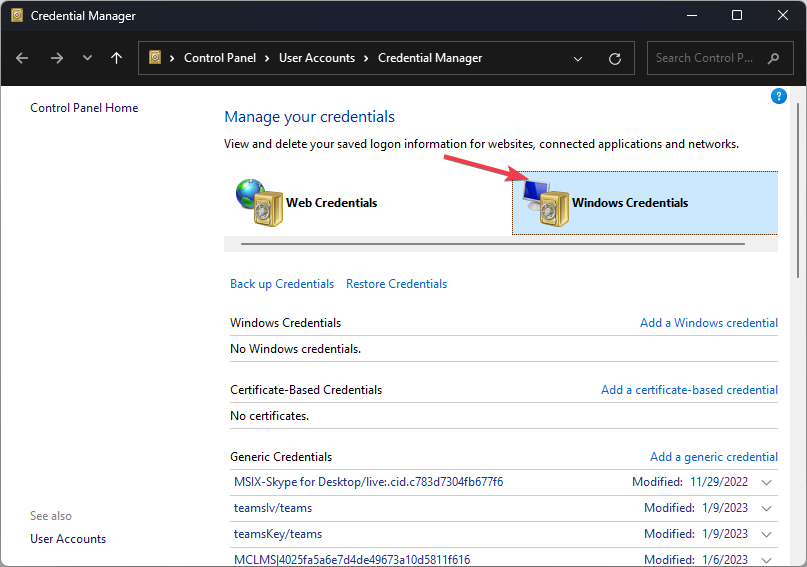
- Locate the name of the credential under Generic credentials, click on it to expand, and select Remove.
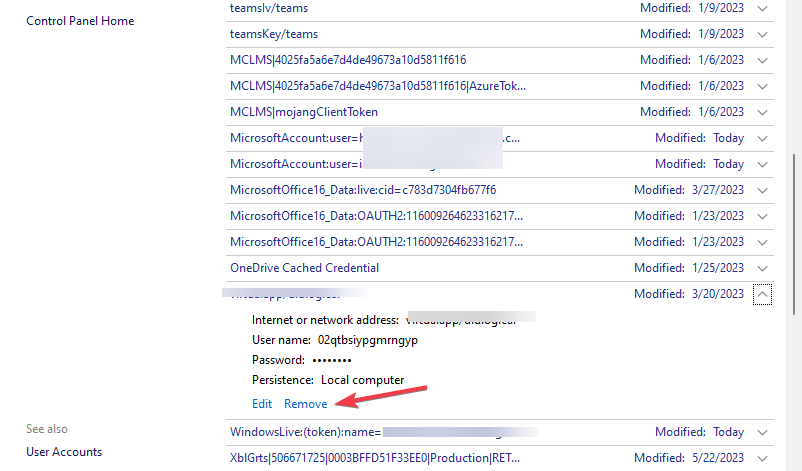
- Confirm the process and close the Control Panel.
By removing or deleting the saved credentials, you can input a new one to fix the error as claimed by some users.
3. Enable network discovery
- Left-click the Start button, type the control panel, and launch it.
- Click on Network and Internet, then select Network and Sharing Center in the next window.
- Then, click on Change advanced sharing settings.
- Toggle on the Network discovery option.
In conclusion, you may be interested in our article about how to fix the specified network password is not correct on Windows PCs.
If you have further questions or suggestions regarding this guide, kindly drop them in the comments section.
Read our disclosure page to find out how can you help Windows Report sustain the editorial team. Read more


Improve this guide


User forum
0 messages