The Connection Has Timed Out: How to Fix it on All Browsers
Changing the system's internet default time out is a quick solution
11 min. read
Updated on
Read our disclosure page to find out how can you help Windows Report sustain the editorial team Read more
Key notes
- Connection time-outs usually make you unable to connect to a particular website.
- Today we are looking at why this happens and solutions to fix them.
- You may try to adjust LAN settings, test your browser, and troubleshoot your router.
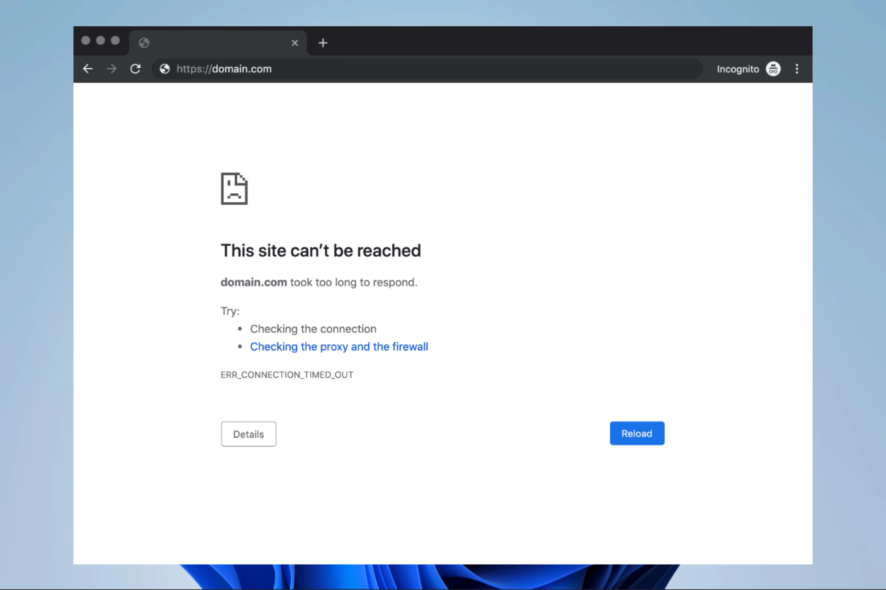
One of the most annoying things when trying to access your favorite website is a connection timed-out error, which can happen on all browsers.
It’s usually not your fault because the server of the site you want to access is probably not available at the moment, so sometimes, all you can do is wait.
But, sometimes, users cause connection timed-out errors by consciously or unconsciously changing Windows settings.
So, follow the instructions from this article to ensure you didn’t cause this error and find out how to solve the problem.
What does it mean when it says the connection has timed out?
When a connection timeout occurs on the client’s end, it often means that the client has lost contact with the server or is unable to connect to it for some other reason, such as a distant firewall blocking traffic or the web server going down.
What can cause a connection timeout?
Most web browsers seem to feature a few-minute timeout or keep-alive setting. This implies that the browser will immediately sever the connection if there is no network activity between it and the server hosting the web page.
Connection timed out can be a problematic error, but users reported the following errors as well:
- Connection timed out WiFi – This error message can appear on any PC, but according to users, it’s most common while using a WiFi connection.
- Your connection either timed out or was lost – This is a standard variation of this message, and it appears mostly if your Internet connection is unresponsive.
- Connection timeout TCP – In some rare cases, this error can be caused by your TCP configuration. To fix this problem, you need to edit your TCP configuration manually.
- Connection error timed out – This is another variation of this error, and you can fix it simply by using one of the solutions from this article.
- The connection request timed out – This error message can sometimes appear, and your network configuration usually causes it. To fix it, you’ll need to adjust your network settings.
- Connection attempt timed out – Sometimes, your connection can get timed out due to network issues. After diagnosing and fixing the issue, the problem should be resolved.
- Connection server timed out – This problem usually appears if the server doesn’t respond in time, and according to users, the issue is generally caused by a network problem.
- The connection has been reset, closed by the server – Sometimes, this error can occur simply because your connection was closed by the server. If your configuration isn’t correct, the server might reject your connection.
- Connection timed out Firefox, Chrome – Users reported this problem on all major browsers – According to them, this issue appears mostly on Firefox and Chrome.
Is your current browser using too many PC resources? It's time for an upgrade
Opera GX is the first gaming browser that allows custom control over resources. It lets you set a custom limit for how much RAM and CPU each tab can use.
You can also limit bandwidth usage and benefit from online privacy with a free, unlimited VPN. Enabling battery mode, dark mode and the adblocker can also help load pages faster.

Opera GX
Surf the web error-free with this lightweight browser with customizable performance features!How do I fix the connection has timed out error?
1. Change the default timeout setting
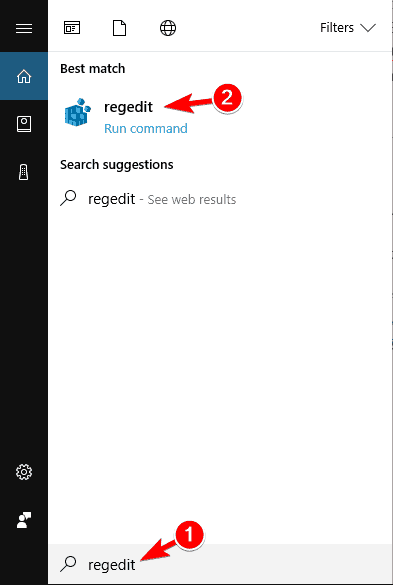
- Go to Search, type regedit, and open Registry Editor.
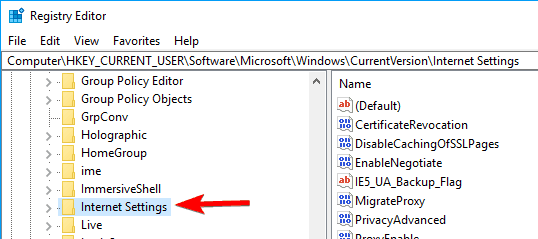
- Navigate to the following path:
HKEY_CURRENT_USER\Software\Microsoft\Windows\CurrentVersion\Internet Settings
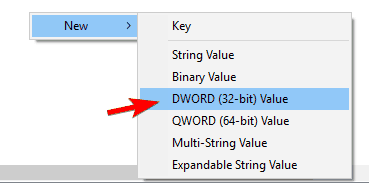
- In this subkey, add a DWORD, name it ReceiveTimeout, and set its value to <number of seconds>*100. For example, if you want the timeout duration to be 8 minutes, set the value of the ReceiveTimeout entry to 480000 (<480>*1000).
- Restart the computer.
Browsers usually have a timeout limit for the site’s server to respond, and they automatically show a connection timed-out warning if the server doesn’t respond.
So, if you think your favorite site’s server will respond in, let’s say, 20 minutes, and the timeout limit is set to 10, you’ll get the error.
There’s a way to change the default timeout limit in Windows, and it’s not that complicated. So all you have to do is to perform one Registry fix.
But since sites usually don’t take 20 minutes to load, this probably won’t solve the problem (at least you learned how to change your timeout limit, in case you need it). So, check out some of the following solutions.
2. Adjust LAN Settings
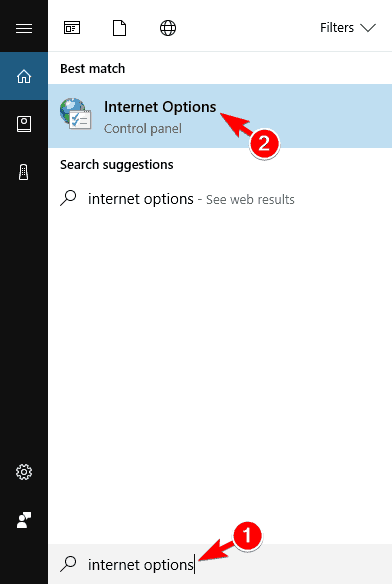
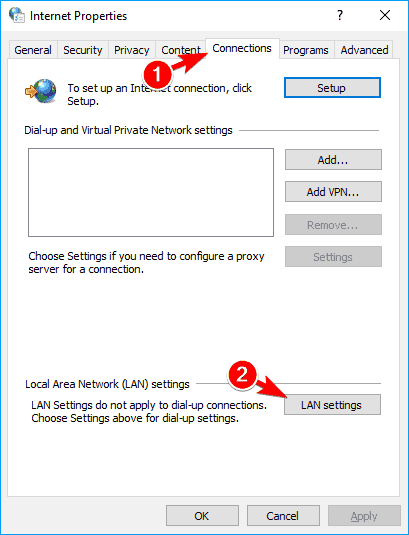
- Go to Search, type internet options, and open Internet Options.
- Go to the Connections tab and then to LAN Settings.
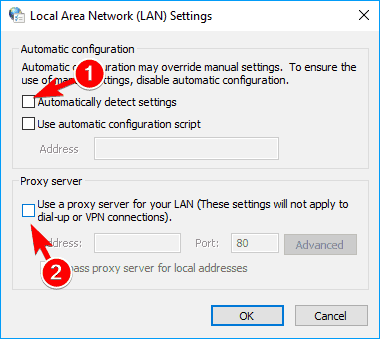
- Uncheck Automatically Detect Settings, and Use Proxy Server for your LAN.
- Restart your computer.
Try to reaccess your favorite site after changing LAN Settings, and if the error shows again, try the next solution.
3. Edit Windows Hosts File
- Go to this location below:
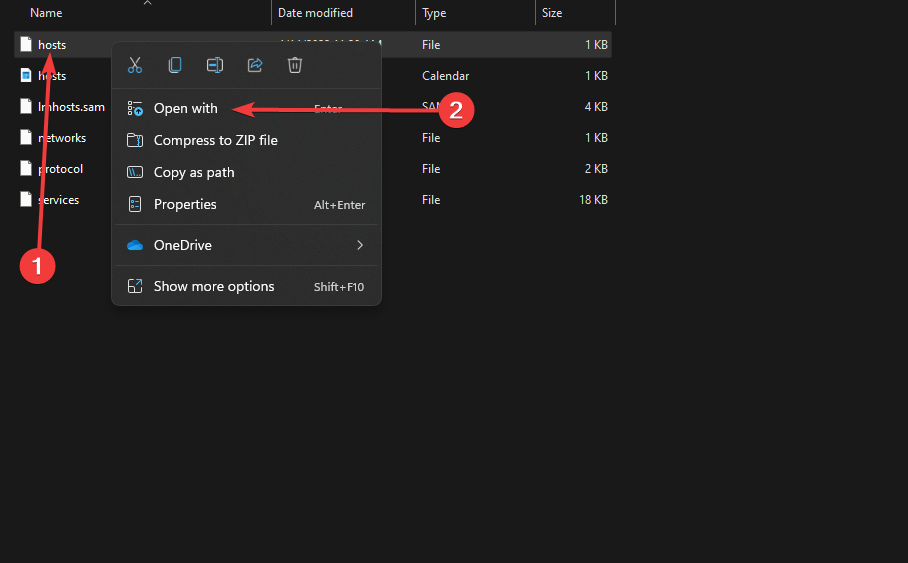
C:Windows\System32\drivers\etc - Find the host file, right-click on it, and open it with Notepad.
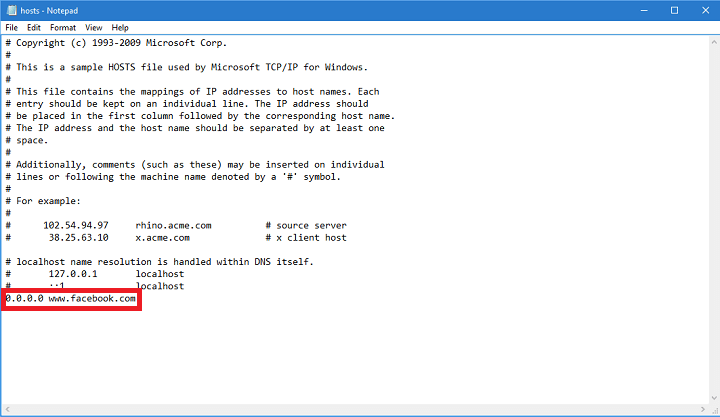
- At the very bottom of the file, check if there are any sites listed
- If there are any sites listed, delete them
- Save the host file and if you’re having a problem saving it, check out our article about getting permission for folders and files in Windows.
There’s a chance you’ve blocked a specific website in your Host’s file, so logically, you cannot access it now.
4. Renew DNS and IP
- Right-click on the Start Menu, and choose Windows Terminal (Admin).
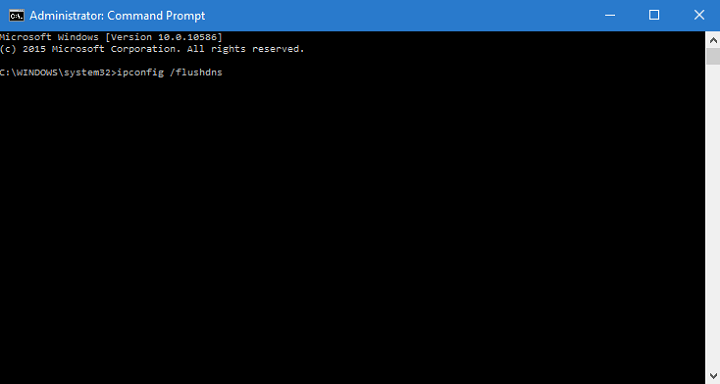
- Add the following commands, and press Enter after entering each one:
ipconfig /flushdns - Next, input the commands pressing Enter after each successive one
ipconfig /registerdnsipconfig /releaseipconfig /renew - After the process is finished, restart your computer.
DNS cache could also cause a connection timed-out error, so we’ll clear the cache, just in case.
5. Disable problematic extensions
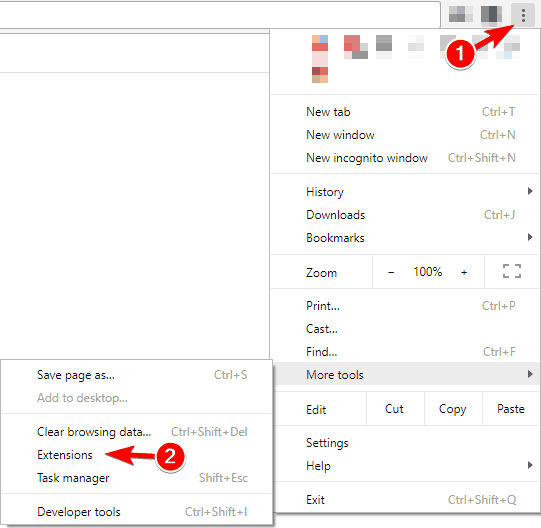
- In your browser, click the Menu icon in the top right corner.
- Choose More tools > Extensions.
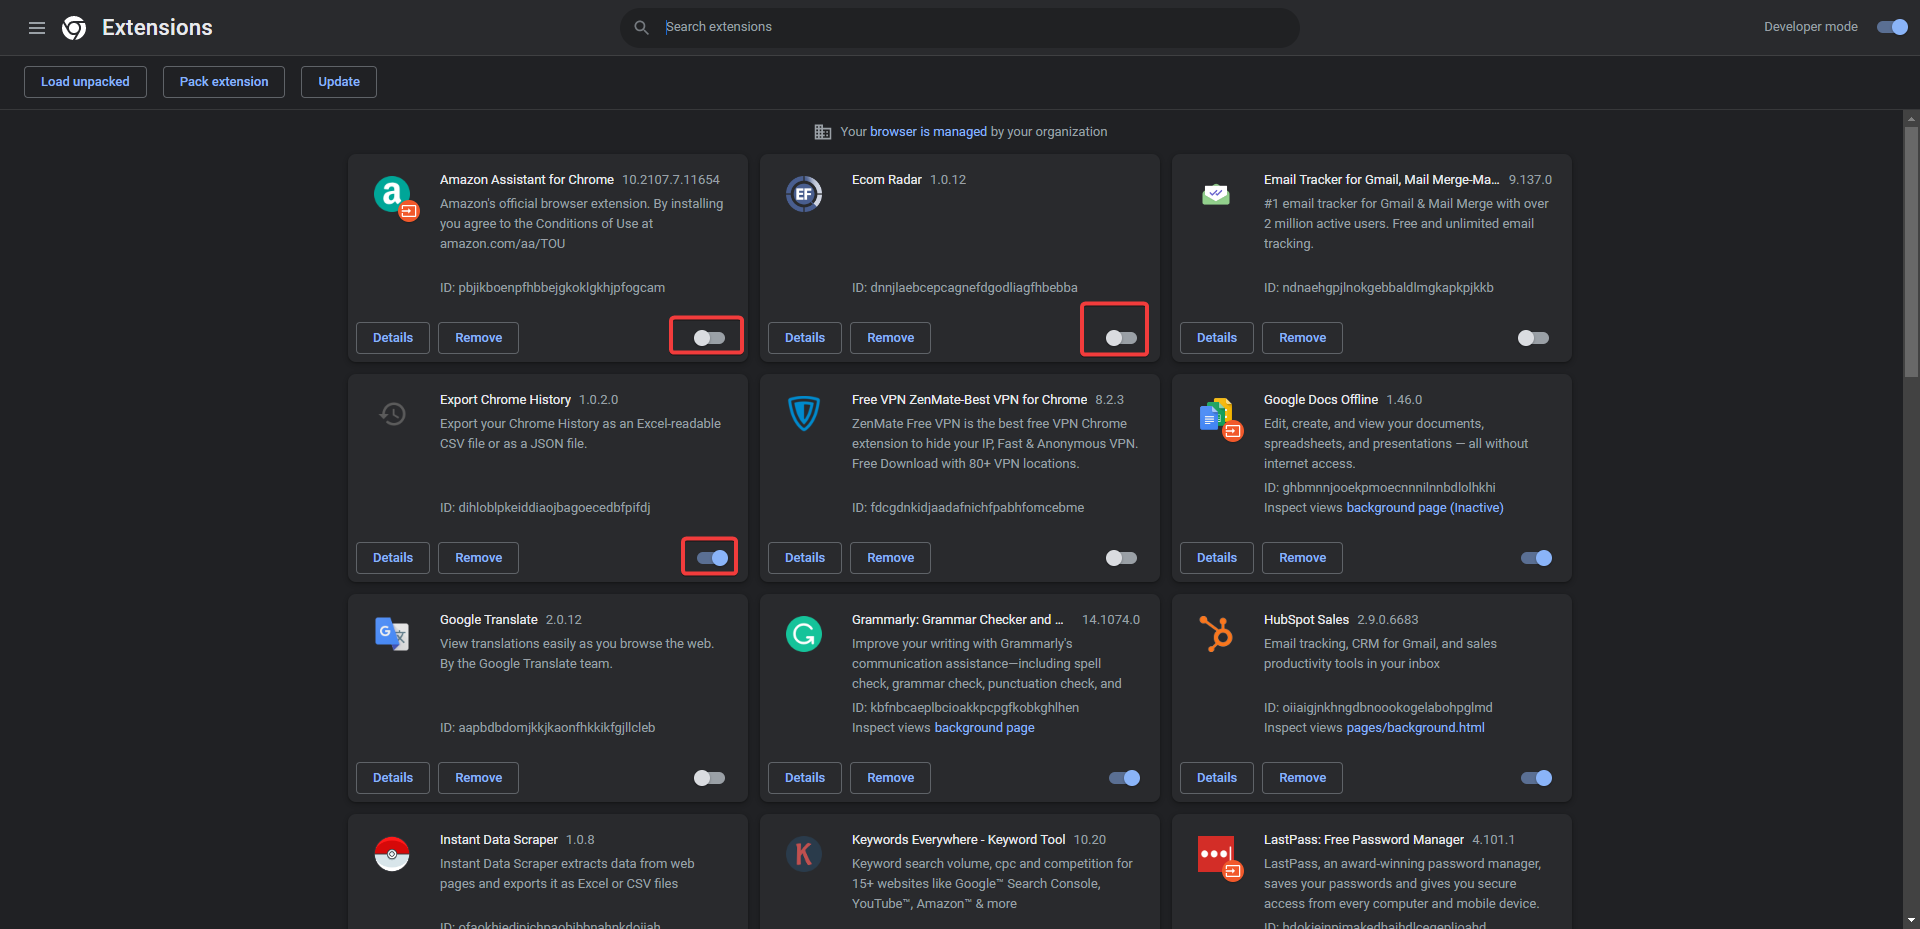
- A list of extensions will now appear. Disable all extensions by toggling off the switch below to the extension name.
- After disabling all extensions, restart your browser and check if the problem still appears. If not, you’ll have to enable extensions one by one until you find the one causing this error to occur.
Many users use various extensions, but sometimes your extensions can interfere with your browser and cause Connection timed out a message to appear.
To fix the problem, you need to find and disable the problematic extension.
Users reported that the HTTPS Everywhere extension was the cause of this problem, so if you use it, be sure to disable it and check if that solves the problem.
If you use the problematic extension frequently, update it to the latest version and check if that solves the problem.
6. Reset your browser to default
- Launch the browser.
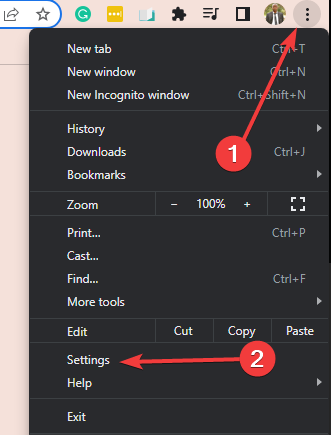
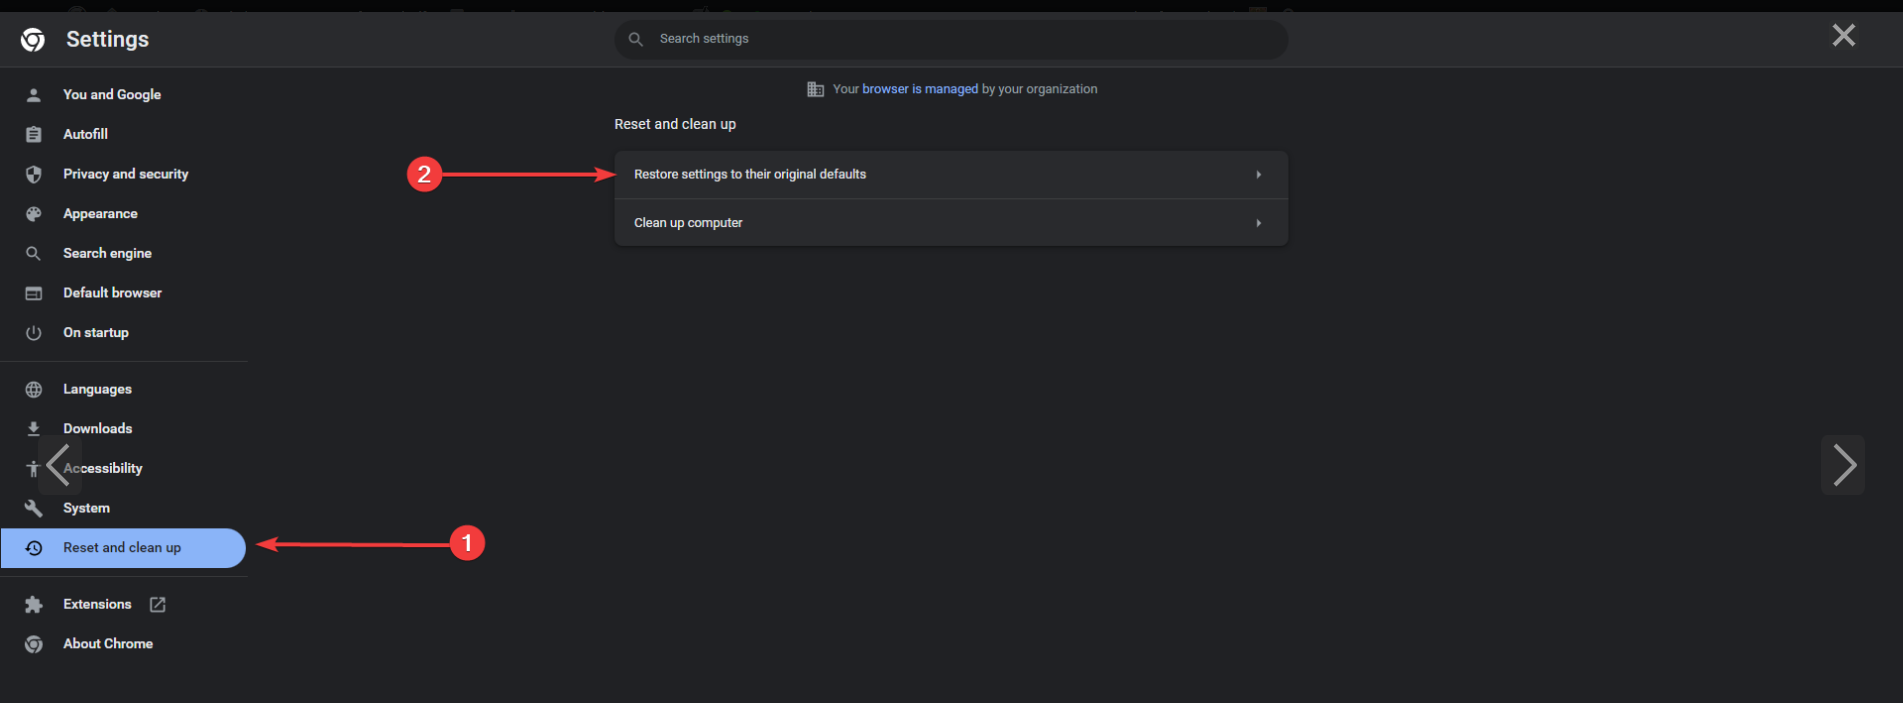
- Click on the menu icon and then click the Settings option.
- On the left pane, click Reset and clean up, then click Restore settings to their original defaults on the right.
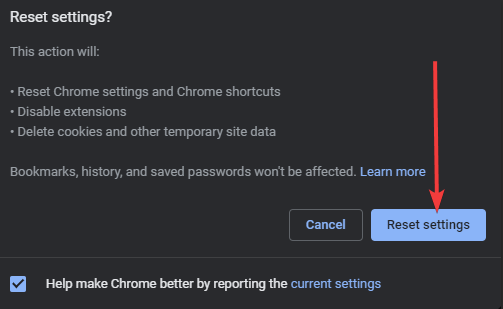
- Finally, click the Reset Settings button.
After that, your browser will be reset, and all your cookies, history, and extensions will be removed.
If you’re getting the Connection has timed out message, you might want to try resetting your browser settings to default, and this can be done in all browsers.
Sometimes this issue can appear due to your browser configuration, and to fix this problem, it’s advised to reset your browser to default.
7. Run your browser in Compatibility mode
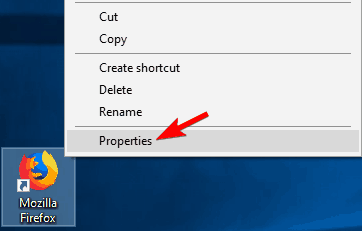
- Locate your browser’s shortcut and right-click it. Choose Properties from the menu.
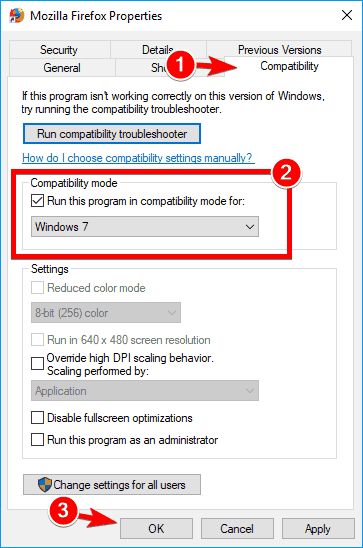
- When the Properties window opens, navigate to the Compatibility tab, check Run this program in compatibility mode, and select an older version of Windows.
- Now click on Apply and OK to save changes.
Sometimes you can fix Connection timed out message simply by running your browser in Compatibility mode.
After setting the compatibility mode, the problem should be resolved. However, remember that you might have to experience different settings to find the location that works for you.
You can also use Compatibility mode simply by right-clicking your browser and choosing Troubleshoot compatibility from the menu.
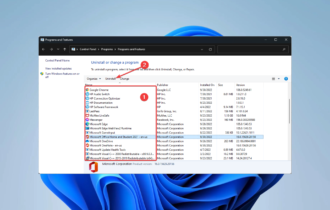
8. Remove Trusteer Rapport
According to users, the Trusteer Rapport application is a common cause for Connection timed-out messages.
This software offers an extra layer of security, but many users reported that it usually interferes with your browser, causing this error to appear.
To fix the issue, users are recommending thoroughly uninstalling Trusteer Rapport. After removing the application, the problem should be resolved entirely.
9. Make sure that you’re using the 64-bit version of your browser
Most PCs today support 64-bit architecture, and to achieve maximum performance, it’s recommended to use 64-bit applications on your PC.
Users reported the Connection timed out message while using a 32-bit version of Chrome on a 64-bit Windows.
We recommend removing your browser and installing the 64-bit version to fix the issue. After doing that, the problem should be resolved entirely.
10. Restart your router
According to users, you might be able to fix the problem simply by restarting your router.
To do that, press the power button on your router to turn it off. Then, you can disconnect all the cables from your router and leave it for a minute.
Now reconnect and press the power button to turn your router on again. After that, wait while your router starts and check if the problem is resolved.
This is a simple solution, and several users reported that it works, so feel free to try it out. However, in some cases, users found that the router was the issue, so you might consider getting a new one.
11. Make sure that your browser is up to date
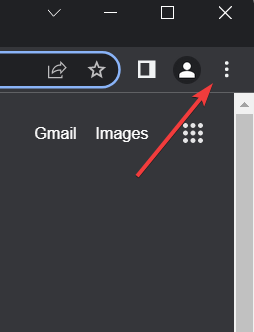
- Open Google Chrome and click on the menu from the top-right side.
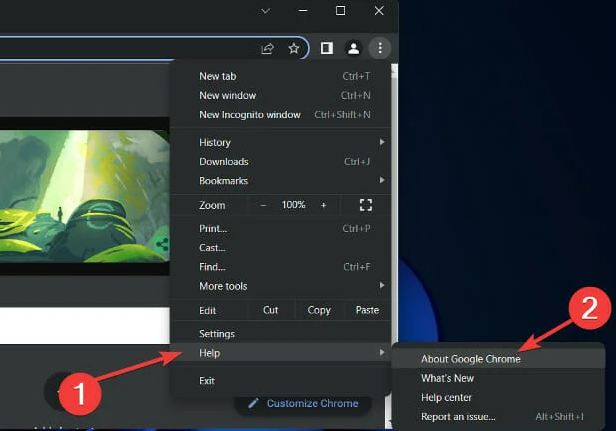
- Click the Help option and choose About Google Chrome.
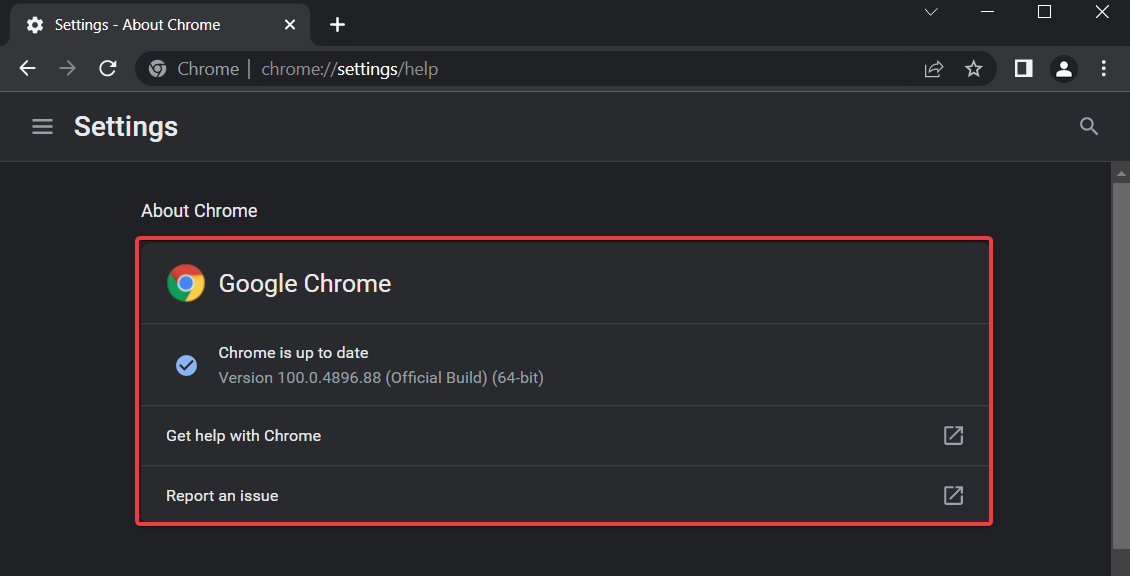
- If your version is not up-to-date, click on the Update button. In our case, it is, hence the missing Update button.
Sometimes the Connection timed out message can appear if your browser is out of date. This is because outdated software can have compatibility issues and bugs that can cause this and other errors.
To fix the problem, ensure your browser is up to date.
After you update the browser, check if the issue persists. If the problem still appears, you might want to download and install a beta version of your browser.
Several users reported that installing Google Canary fixed the problem, so be sure to try that.
Alternatively, you can try a browser we can’t recommend enough, making all the Chrome-induced aches a thing of the past.
Opera is a great alternative solution that offers smooth browsing and safety online.
12. Clear your browsing data
- Launch the Chrome browser.
- Paste the path below into the Address bar and click Enter.
chrome://settings/clearBrowserData - Ensure all the checkboxes are ticked, then click the Clear data button.
After clearing your cache, restart your browser and check again. Sometimes, the Connection has timed-out message can appear due to an old cache, and removing the cache may fix it on all browsers.
13. Use Google’s DNS
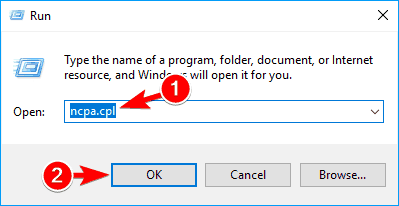
- Press Windows key + R, enter ncpa.cpl, and click OK.
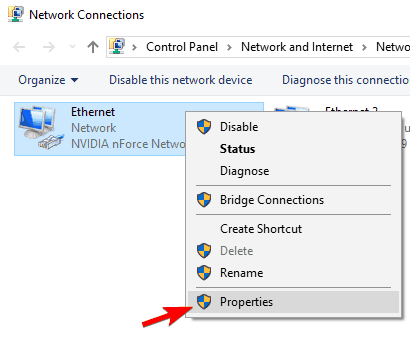
- Network Connections window will now appear. Right-click on your network connection and choose Properties from the menu.
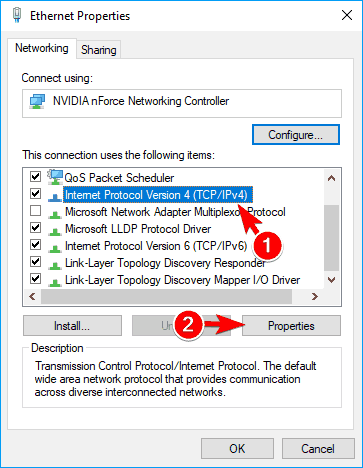
- Select Internet Protocol Version 4 (TPC/IPv4) and click on Properties.
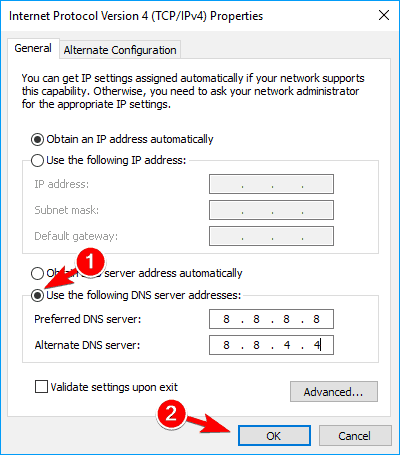
- When the Properties window opens, select Use the following DNS server addresses. Now enter 8.8.8.8 as the Preferred DNS and 8.8.4.4 as the Alternate DNS server.
- Now, click OK to save changes.
After doing that, check if the error message still appears.
14. Disable IPv6
- Follow Steps 1 and 2 from the previous solution.
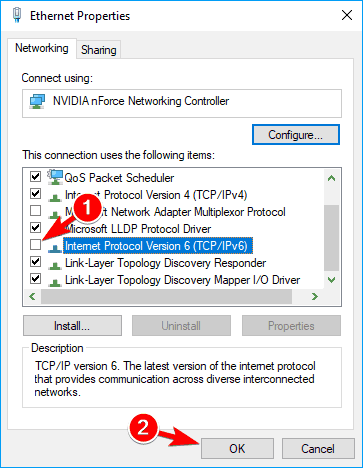
- When the Properties window opens, locate Internet Protocol Version 6 (TCP/IPv6) on the list and uncheck it.
- Now, click on OK to save changes.
- After doing that, restart your PC to apply the changes.
Once your PC restarts, check if the problem still appears. If any new issues appear after disabling IPv6, be sure to enable it back again.
How do I fix the connection has timed out on Windows 11?
Fixing the connection has timed out error on Windows 11 is pretty straightforward. The causes are similar to Windows 10, and the solutions are basically the same.
Hence, go through the list of fixes in this guide and apply them accordingly on Windows 11.
Why am I getting the connection has timed out on all browsers?
If you are getting the connection timed out error on all browsers, it is likely due to problems with the server of the site you are trying to visit.
This is because browsers have a limited time for a website’s server to respond. So if the server does not answer, you will get the connection timed out error.
Also, it might be down to issues with your network. So, you need to make sure it is solid and active.
That’s about it; once again, performing all these solutions doesn’t mean you’ll be able to access the site because it’s often their error.
Note that you will be able to apply these solutions also if the network connection has timed out on AnyDesk, or if you get the error message connection timed out: no further information.
We also have a great guide on The remote device won’t accept the connection error, so don’t miss it.
If you have some questions, reach out in the comments below.

