3 Ways You Can Create a Task from an Email in Outlook
You can do it straight in Outlook!
5 min. read
Updated on
Read our disclosure page to find out how can you help Windows Report sustain the editorial team Read more
Key notes
- To create a task from an email, you can use the drag & drop method, Follow-up feature, or create a Quick Step.
- Find the detailed steps for each of the methods down below.
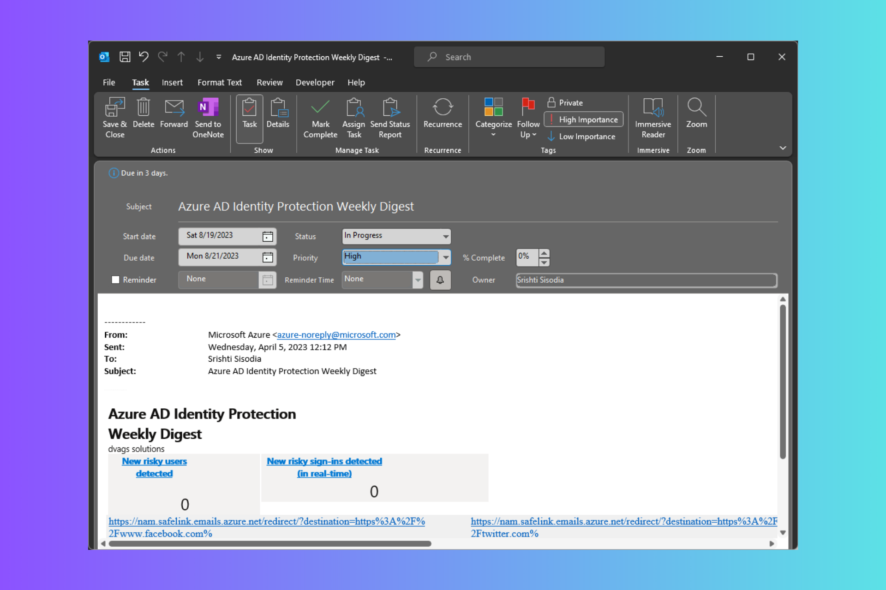
Outlook is one of the best email clients, giving you plenty of features and room for customization to stay ahead in the game.
One such feature is the ability to create a task from an email, which saves you from re-entering all the information, thereby increasing efficiency and reducing effort.
In this guide, we will discuss some of the easiest methods with step-by-step instructions to convert email to task in Outlook and add it to your to-do list.
How do I create a task from an existing email?
1. Use the drag-and-drop method
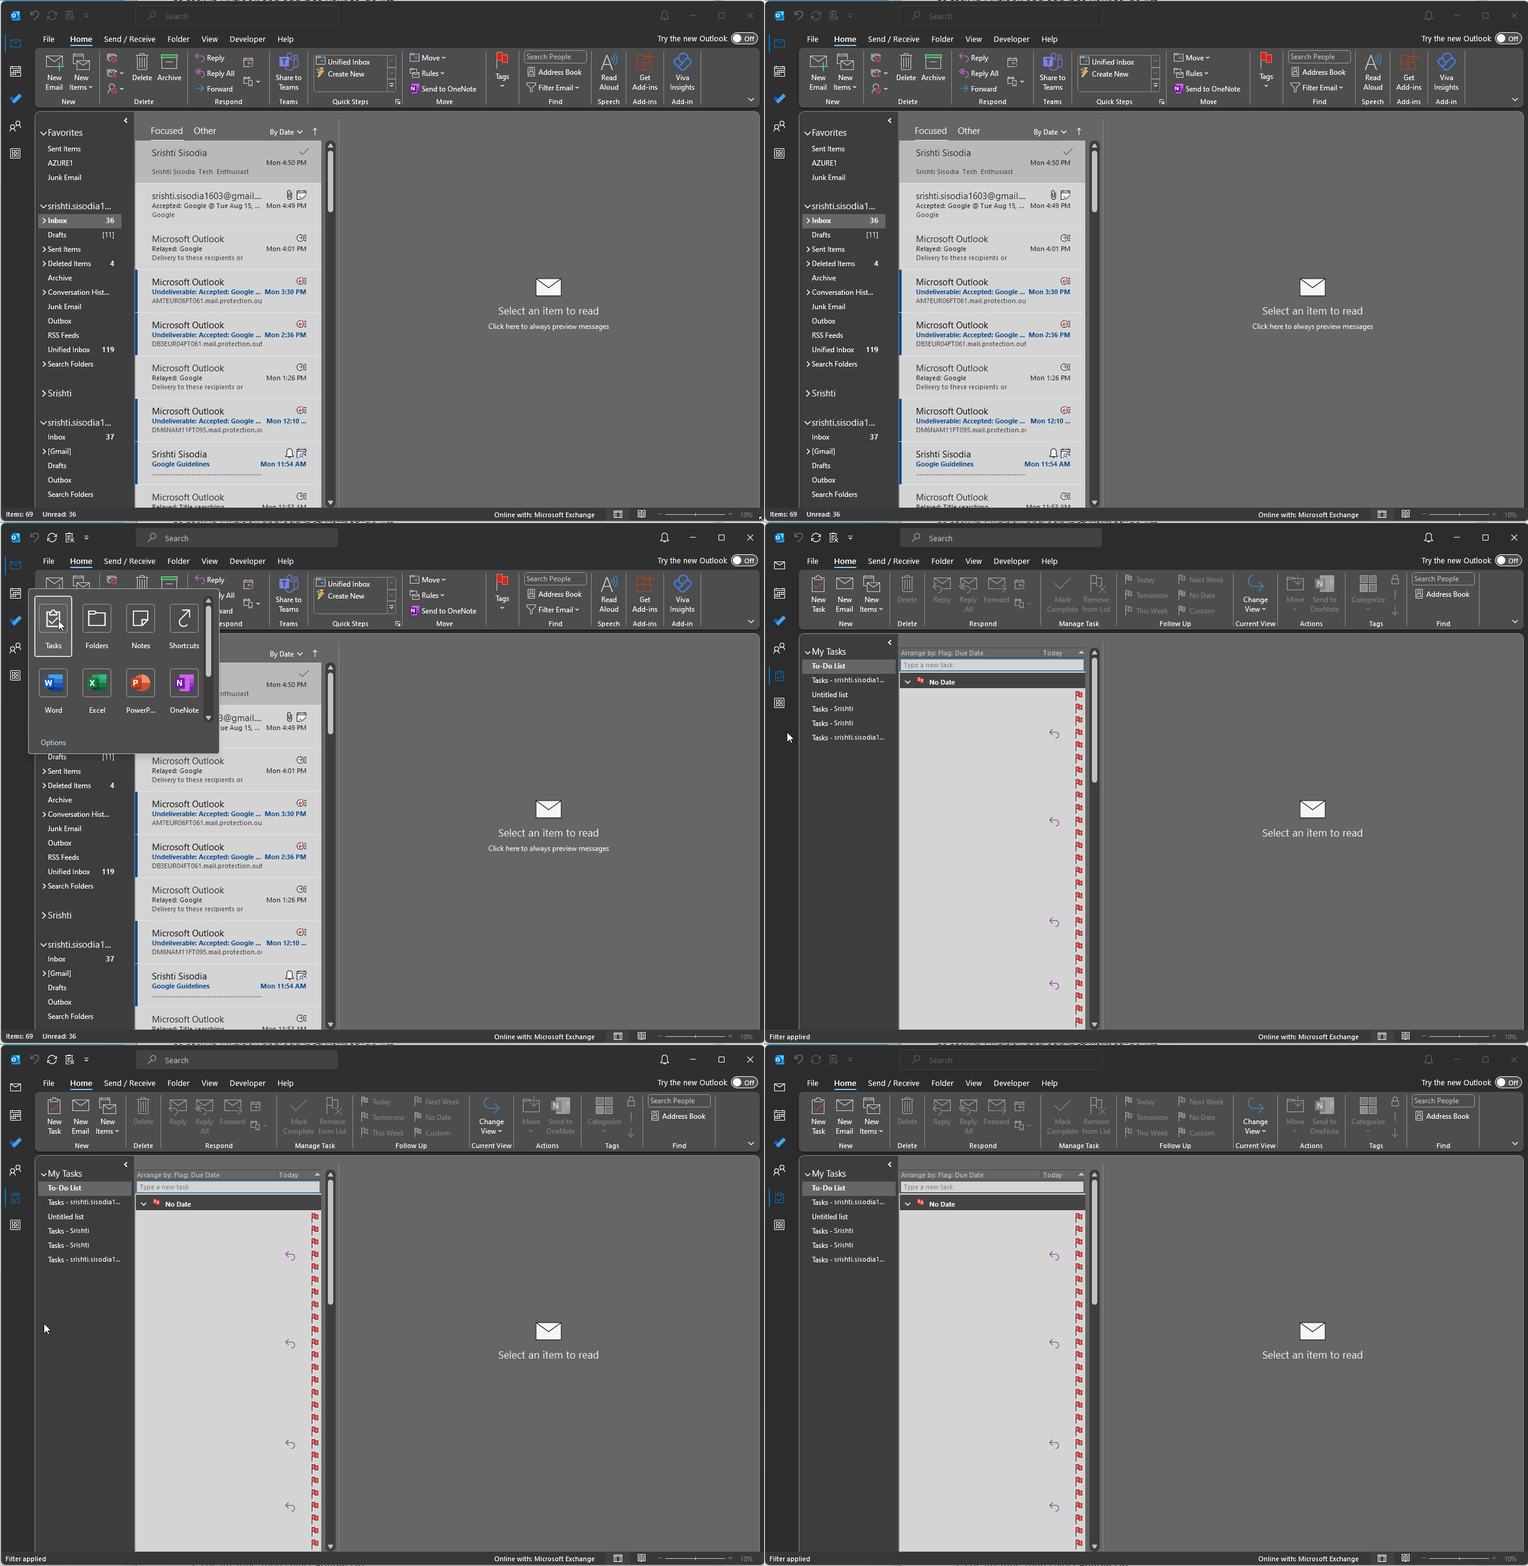
- First, check if you can see the Tasks tab in the navigation menu; if not, go to More Apps, click it, and choose Tasks.
- Right-click Tasks and select Pin to keep it on the navigation bar.
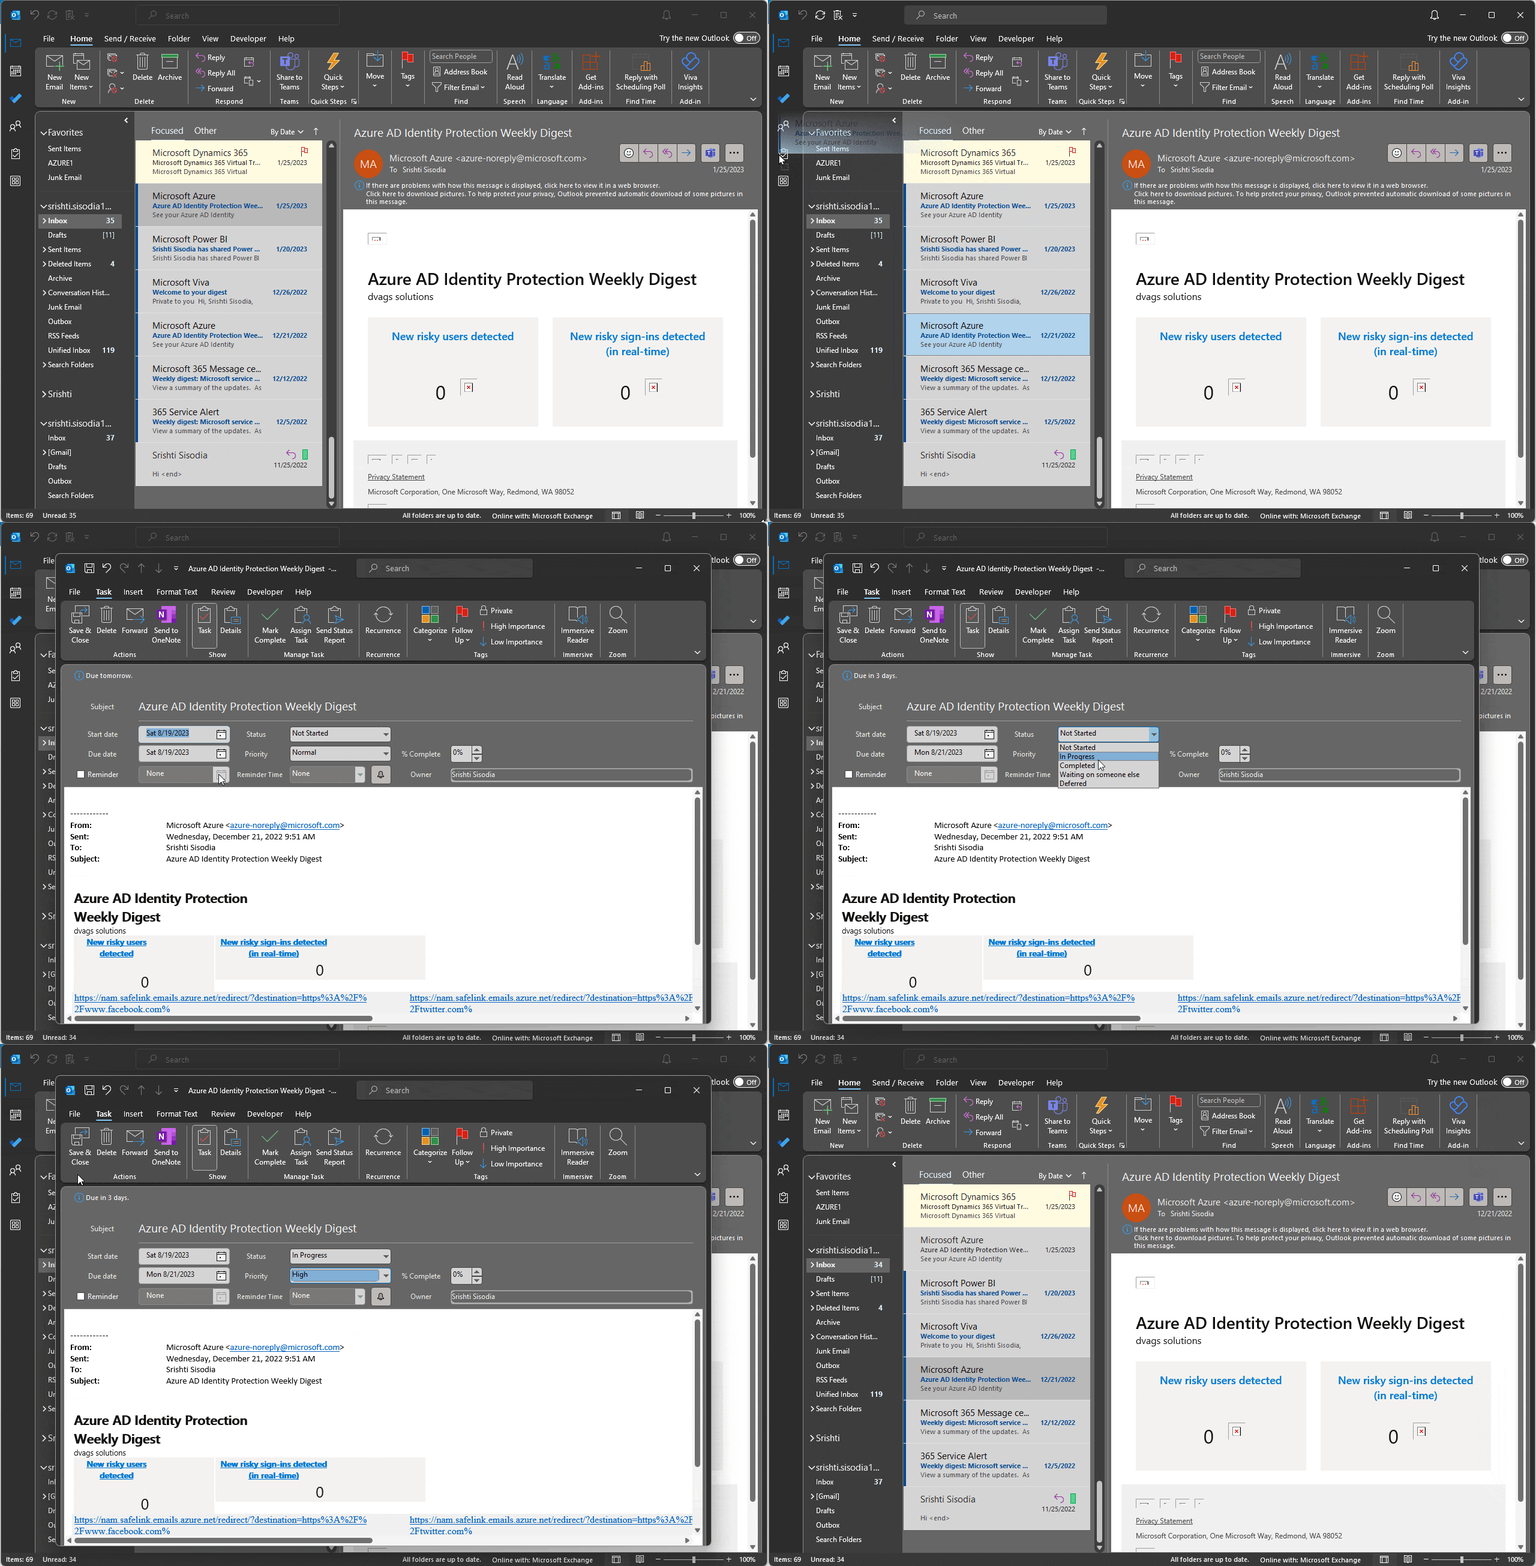
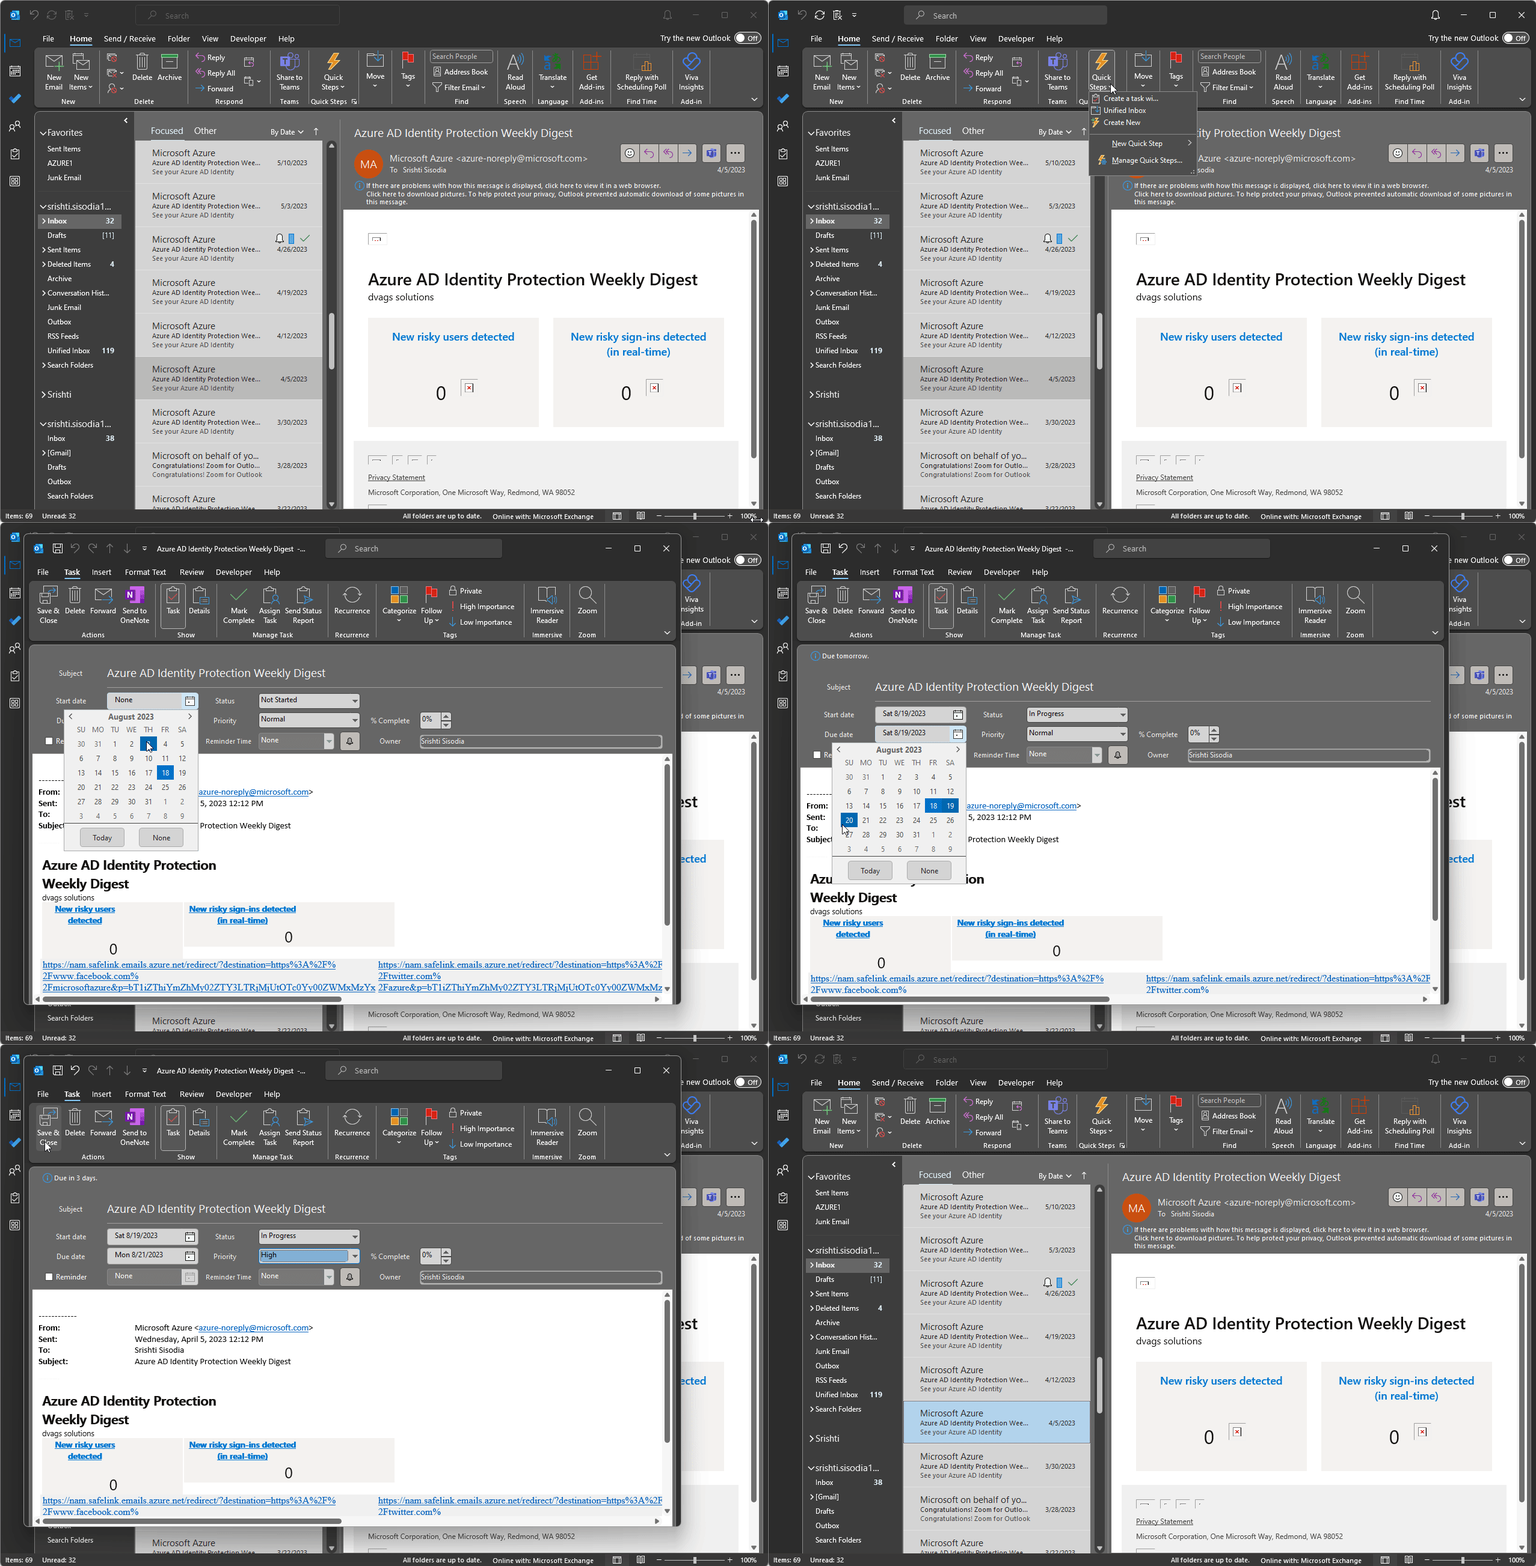
- On the Outlook main window, select the email message for which you want to create a task. Drag it to the Tasks tab using the left mouse button and drop it by releasing it.
- This will open the Task window with all the content from the original email. To customize it further, you can edit, remove, or add information, including Start date, Due date, Status, and Priority.
- Once done, click Save & Close.
This email to task automation method is the easiest way to create & save tasks in the Tasks list while keeping the email in the Inbox.
Another great thing to enhance productivity and streamline your workflow could be keeping the best Outlook keyboard shortcuts at hand.
2. Use the Follow-Up feature
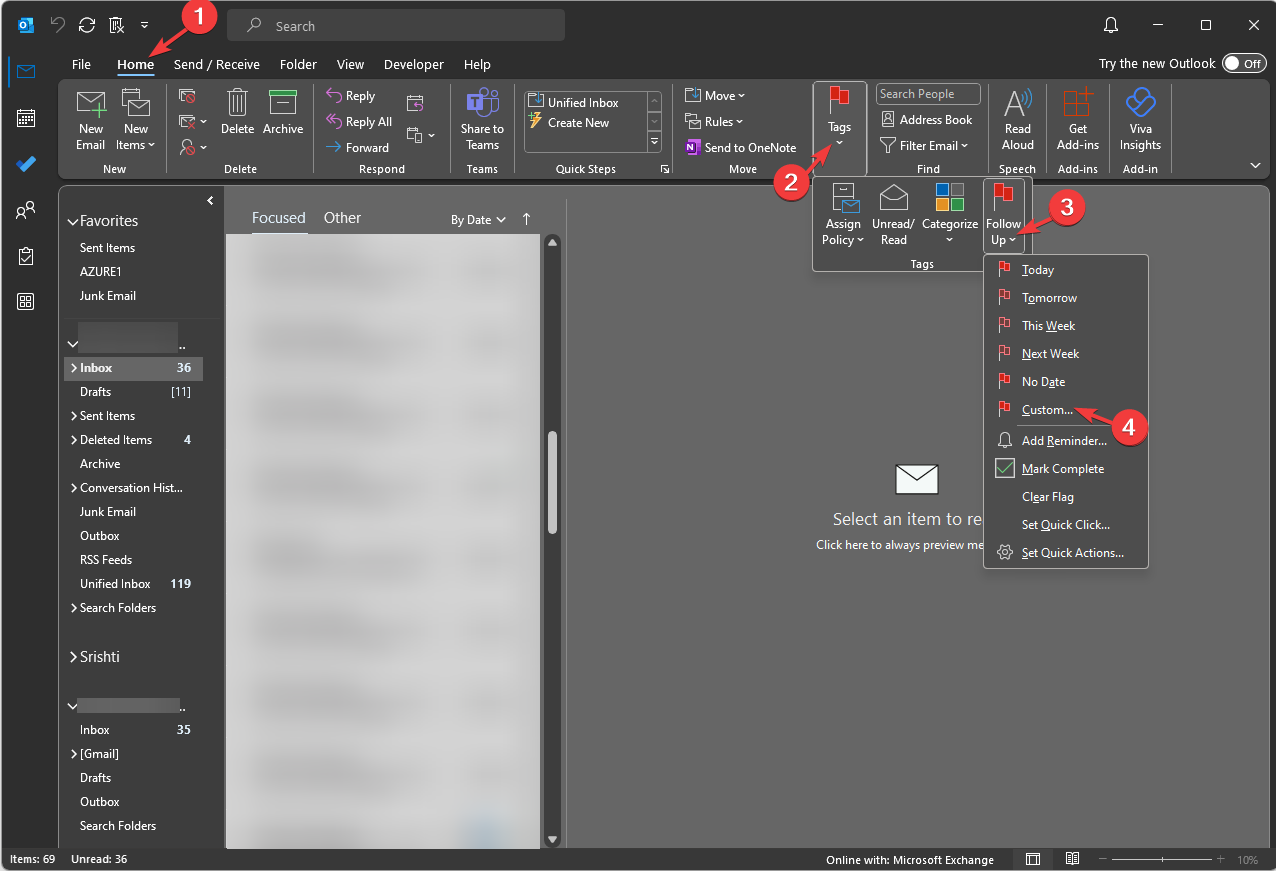
- Select the email from the Outlook main window and go to the Home tab. In case you have the message open, go to the Message tab.
- Locate Tags, then select Follow Up.
- From the drop-down list, choose Custom.
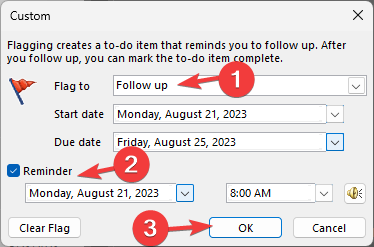
- In the Custom dialog box, place a checkmark next to the Reminder option and select a desired date and time.
- You also use fields like Flag to, Start date, and Due date to enter more details.
- Click OK.
When you flag an email message, it appears in the Tasks peek under your To-Do list. On the selected date and time, you will receive a reminder alert to perform the task related to the email.
This method helps turn emails into tasks just as the drag & drop method but cannot be relied on as if you delete the email message related to it; the flag will be removed from the Tasks tab or the To-Do list.
3. Use the Quick Steps feature
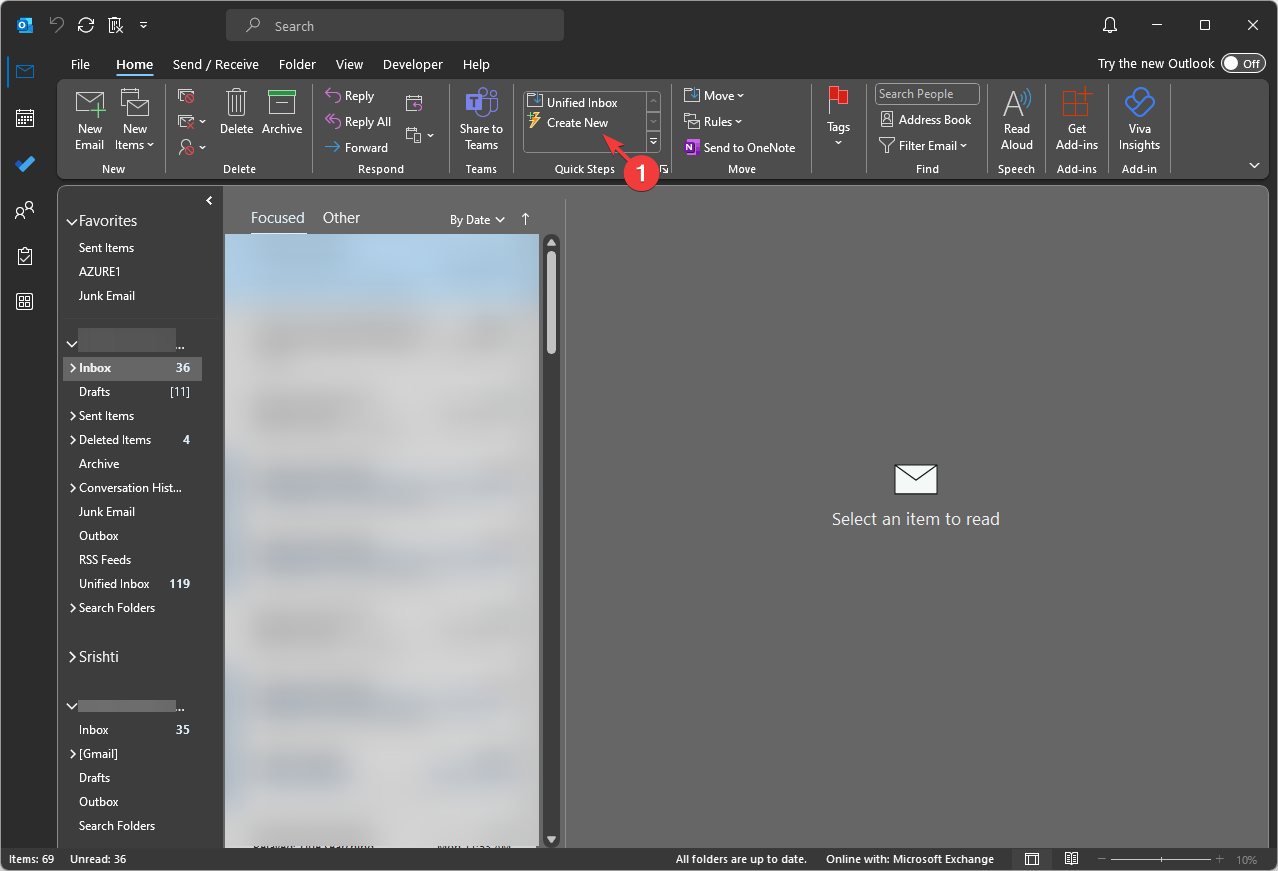
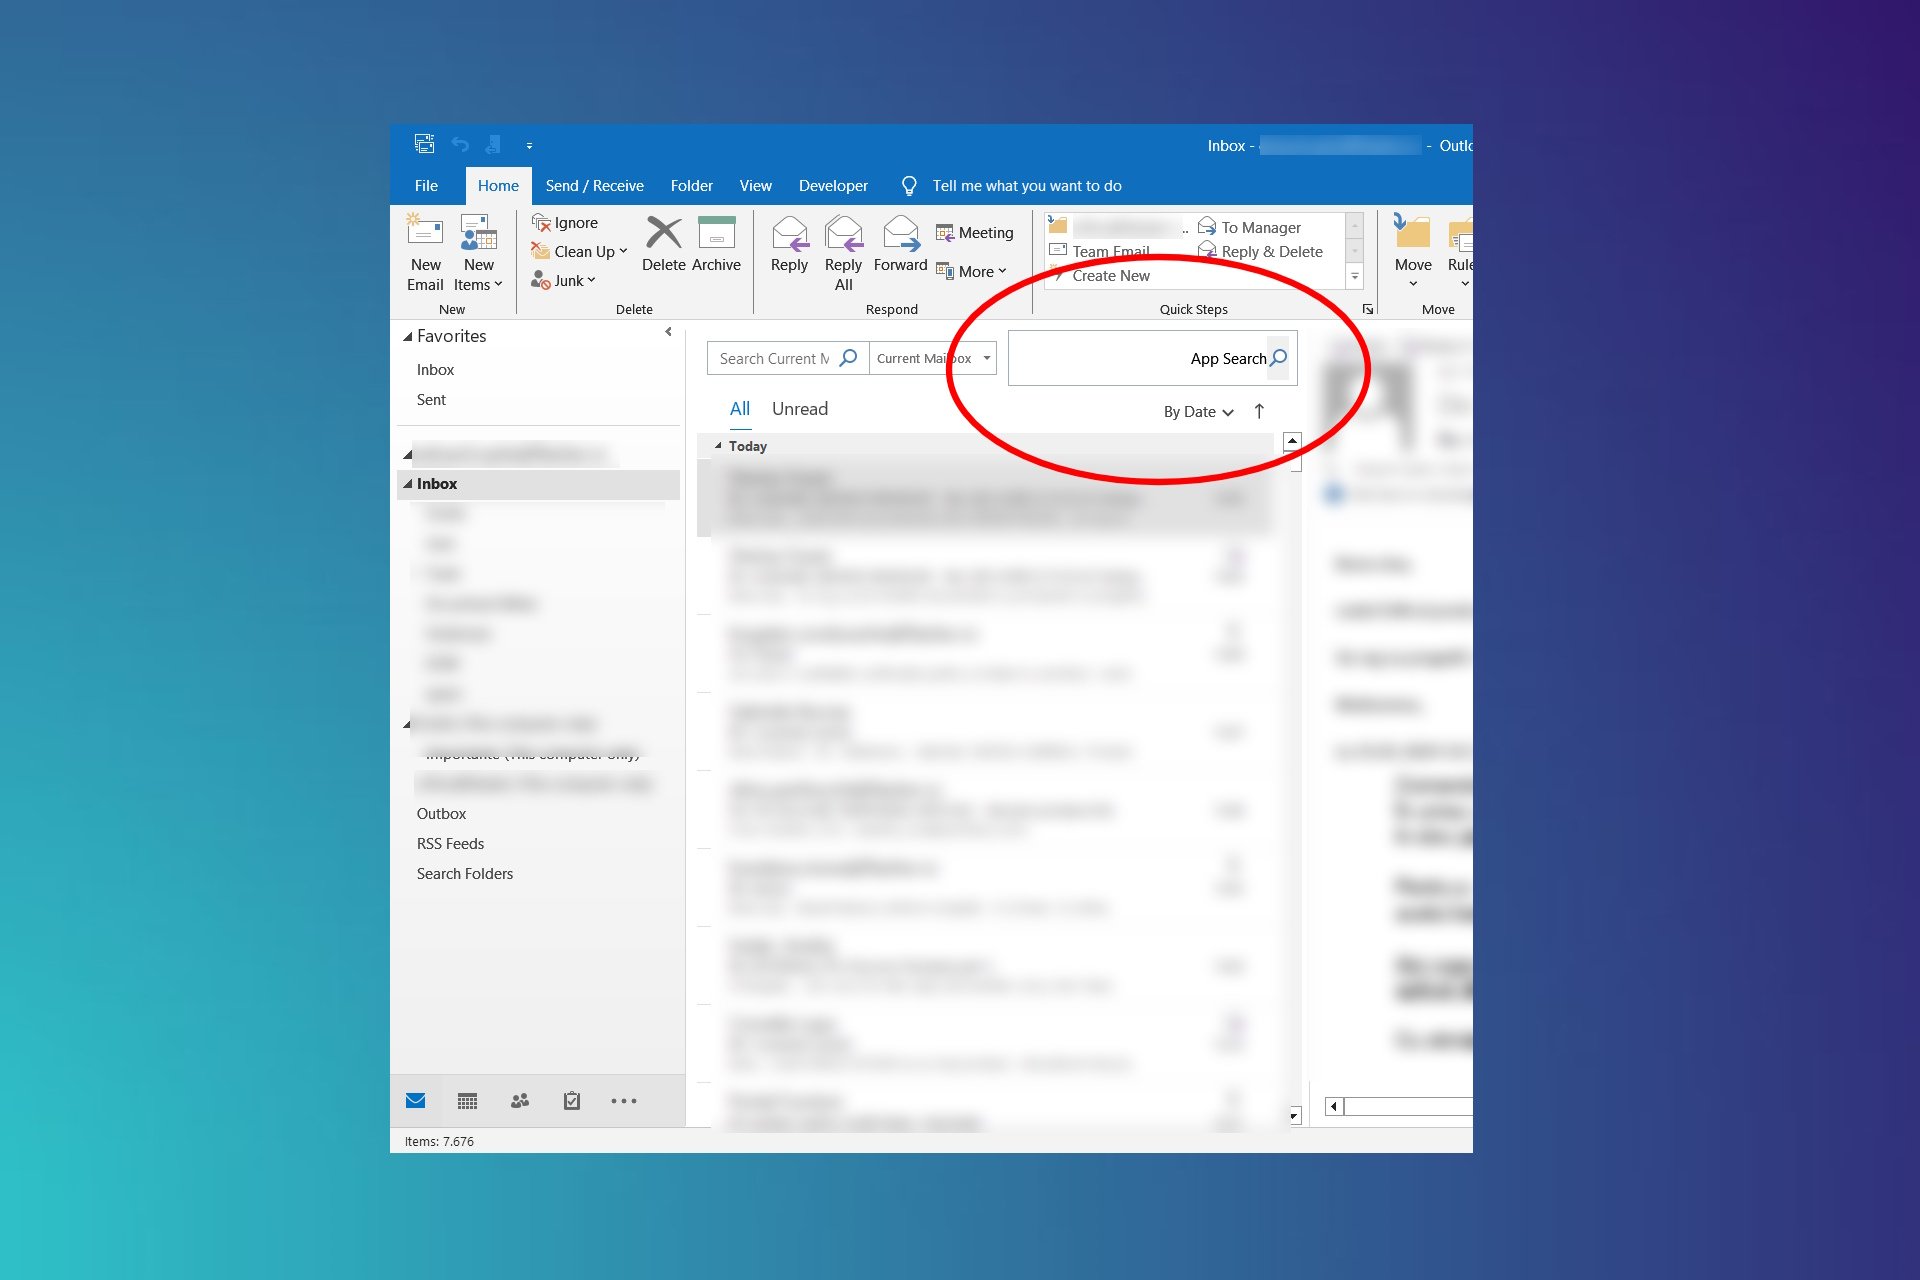
- On the Outlook main window, go to the Home tab and locate Quick Steps.
- Click Create New or locate New Quick Step, and choose Custom.
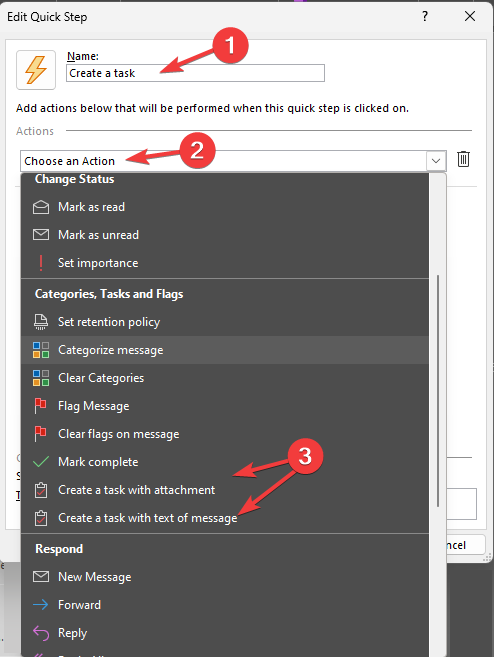
- On the Edit Quick Step window, enter a name for the Quick Step.
- Under Actions, for the Choose an Action drop-down menu, locate the Categories, Tasks, and Flags section, and click Create a task with attachment or Create a task with text of message.
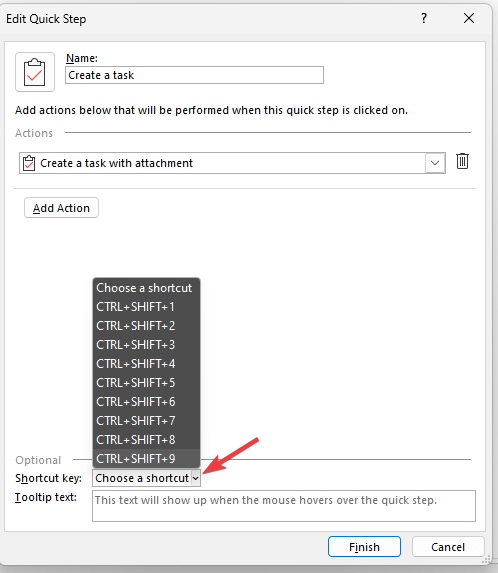
- Further, you can use the Shortcut key option to assign a shortcut key from the drop-down next to it.
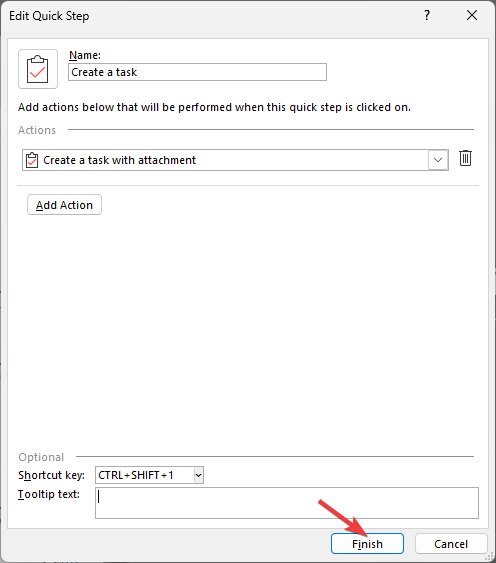
- Once everything is in place, click Finish to save the Quick Step.
- The Quick Step you created will now appear in the Quick Steps box. To access it, click the email in your Inbox, select the Quick Step you created, or press the Shortcut key if assigned.
- A new task window will open. Enter the required details, and click Save & Close.
Apart from Outlook task creation, Quick Steps can help automate repetitive tasks with a single click, such as moving an email to a specific folder, deleting an original message, and more.
If creating shortcuts and customizing tasks is your thing, you must also personalize the Outlook toolbar for better productivity.
How do I turn an email into a planned task?
If you want to convert emails to tasks and add them to your Planned task list, you can use the Follow-up function and To Do tab. Here is how you can do that:
- Go to the Outlook main window, and go to the email you want to create a task for.
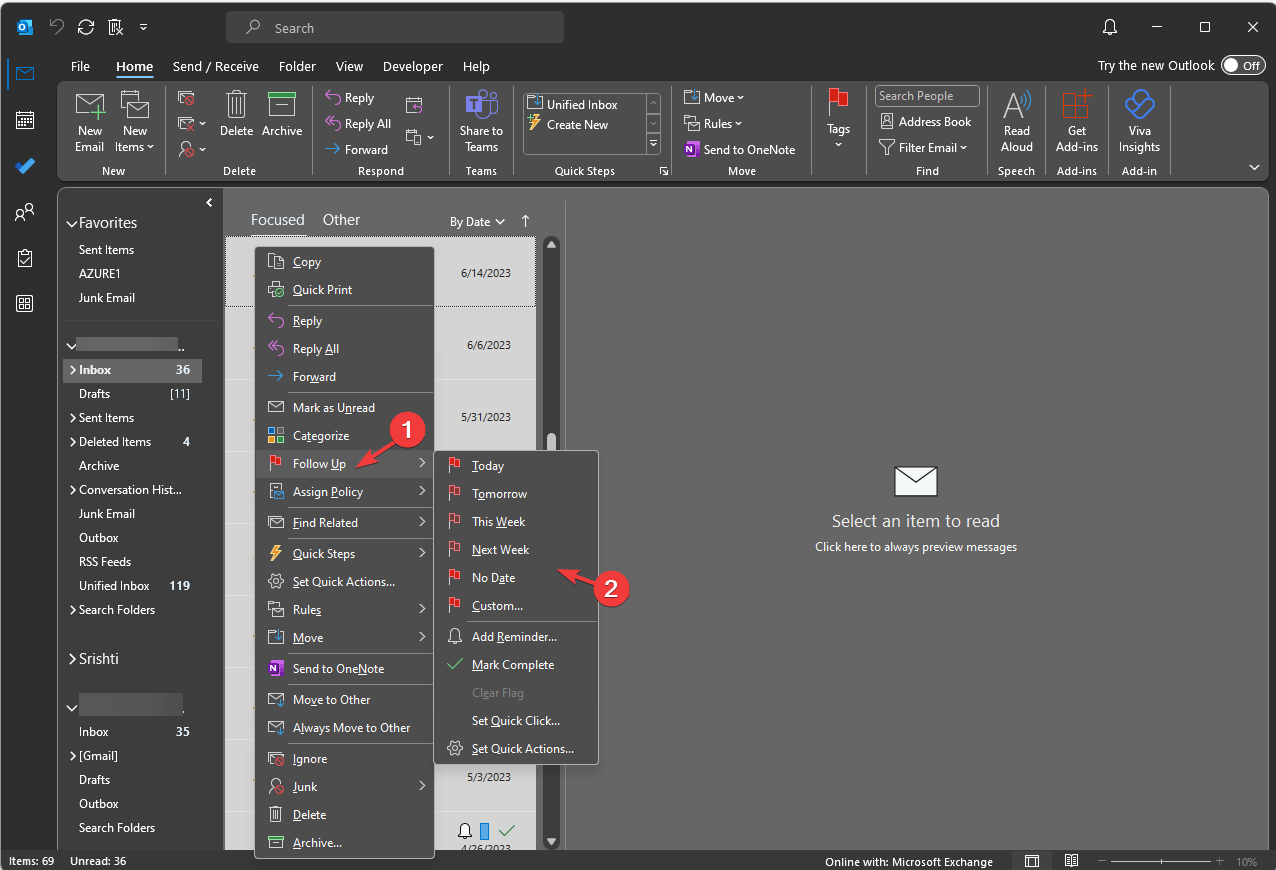
- Right-click the email and select Follow up, then choose the Flag icon for No Date.
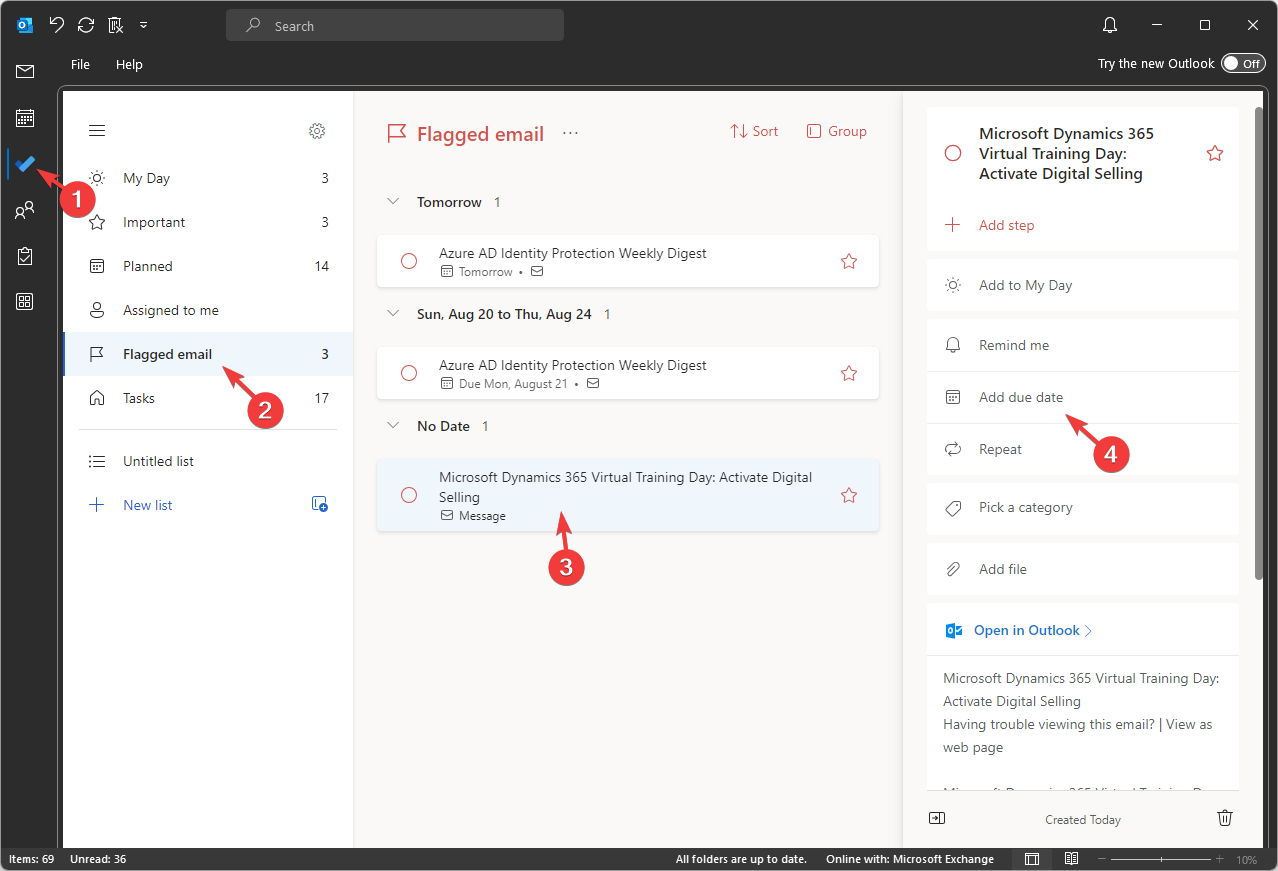
- Navigate and click the To Do tab on the navigation menu.
- Go to the Flagged email option from the left pane in the To Do window.
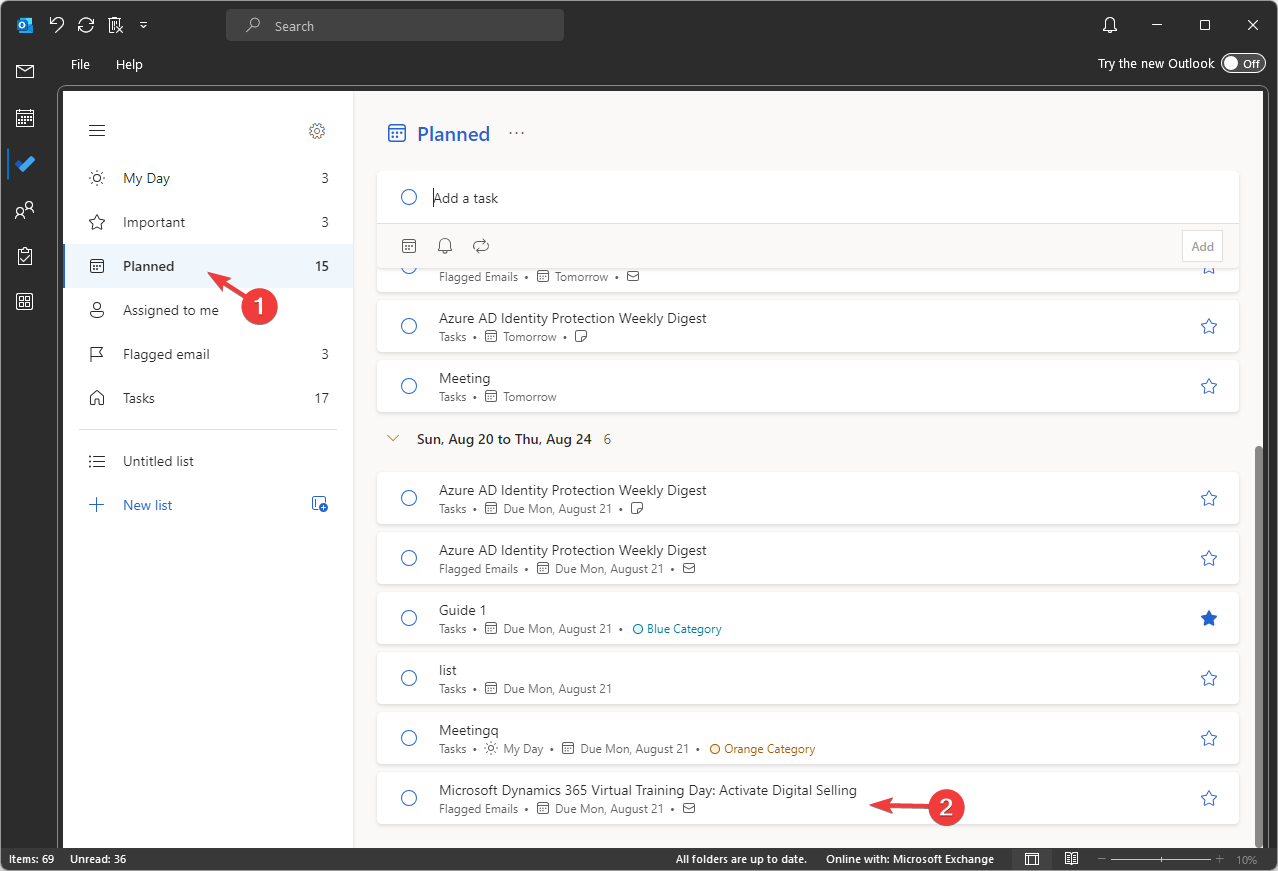
- You will get the list of flagged emails; select the one you just added. On the right pane, you will get options; click Add due date, and input a due date to add the task to the Planned list.
Creating a task from an email in Outlook can help boost productivity and promote better task management so that you never miss any due dates or important actions.
If you have any suggestions or questions regarding the methods explained here, feel free to mention them in the comments section below. We will be happy to help!

