Delayed Write Failed Error on Windows 11: How to Fix it
This issue is caused by connection problems with your external drive
4 min. read
Updated on
Read our disclosure page to find out how can you help Windows Report sustain the editorial team. Read more
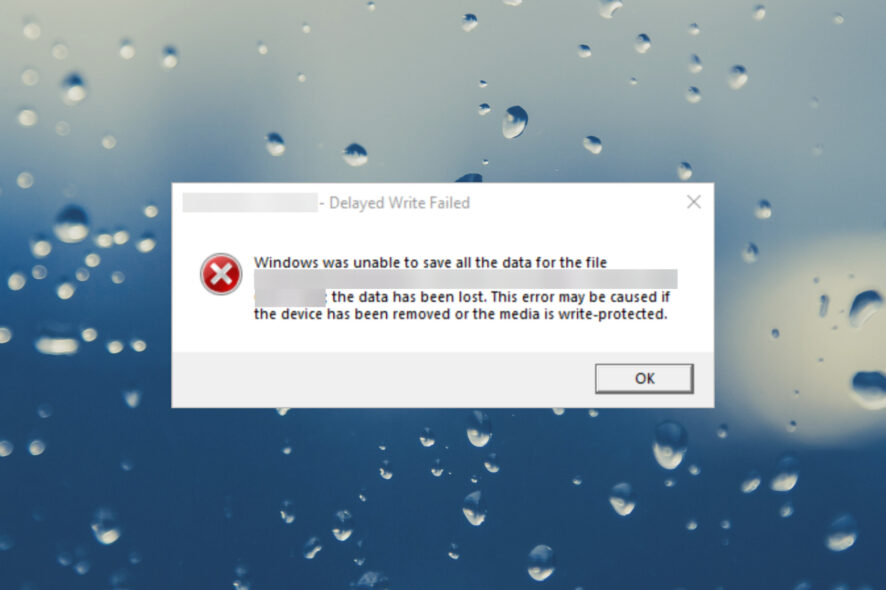
You were copying some files to an external storage media when the Delayed Failed Error on Windows 11 popped up unexpectedly. This may also pop up in a virtual media with the message VMware {delayed write failed} Windows was unable to save all the data for the file.
What does Windows delayed write failed mean? The Windows delayed write failed error means that the external drive is overloaded by data, or a simple connection problem might cause a problem with the Disk Write Caching.
In this article, we will show you how to get rid of the Windows delayed write failed error and prevent it in the future.
How do I fix delayed write failure in Windows 11?
Before applying the solutions below, check the following simple workarounds:
- Make sure that the external drive is connected properly to the PC. Trying another USB port and checking the connection cable for damage are also a must.
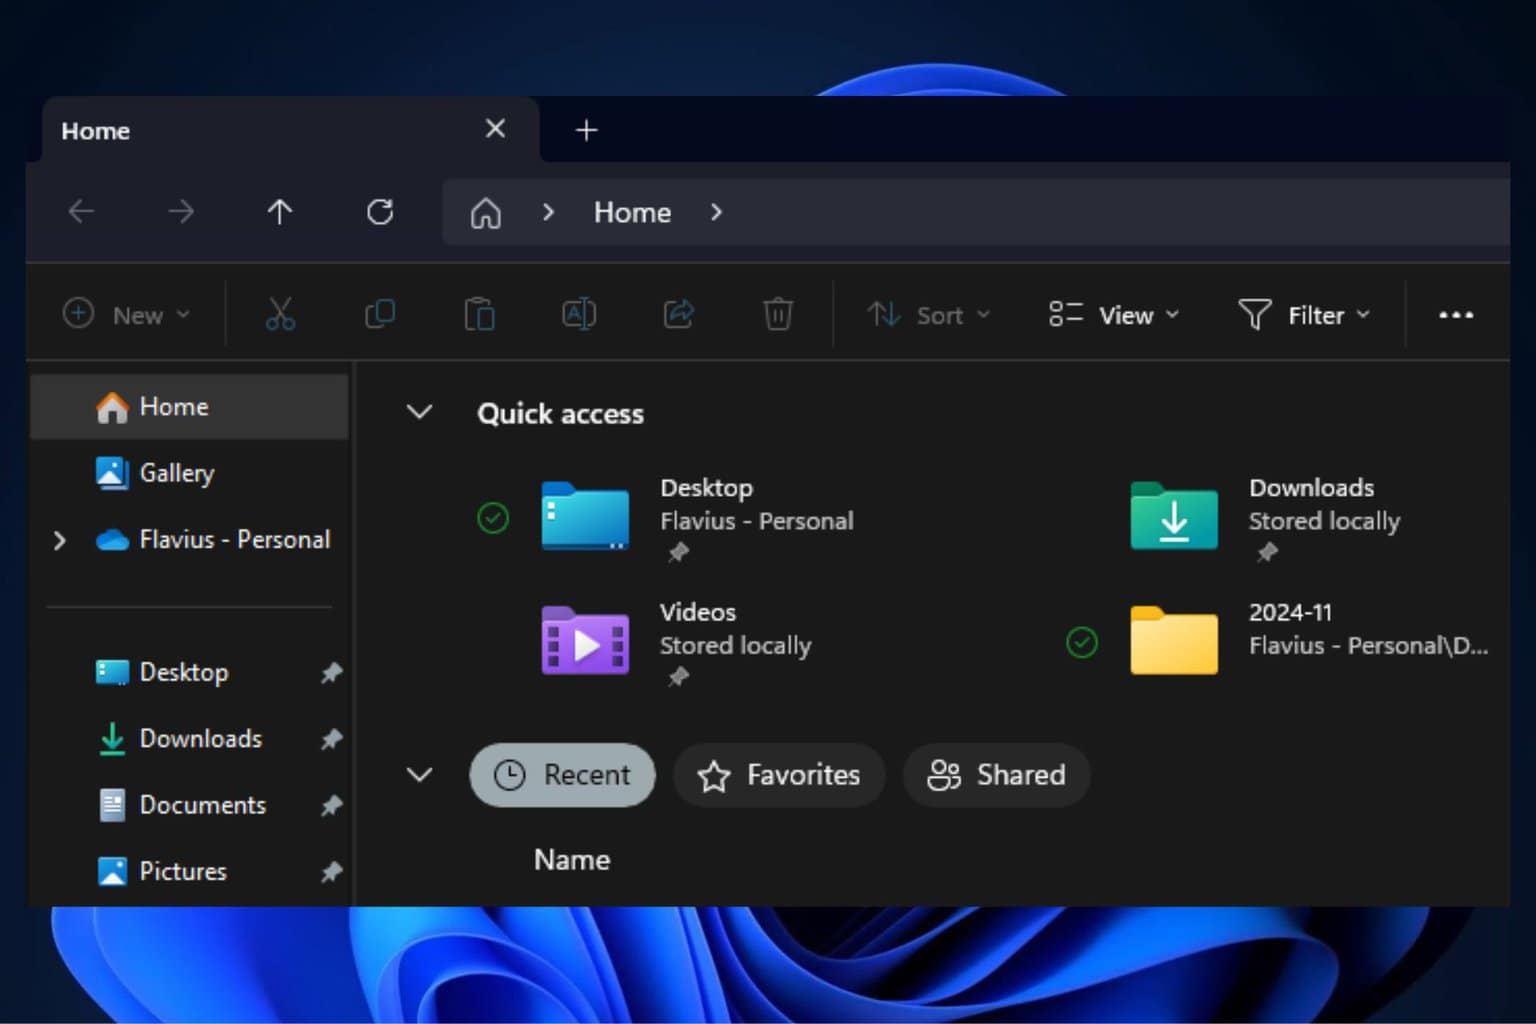
- Check if the external drive is full. You can verify that if you open File Explorer, right-click the external drive, and select Properties.
1. Turn Off Disk Write Caching
- Right-click the Start button and select Device Manager from the list.
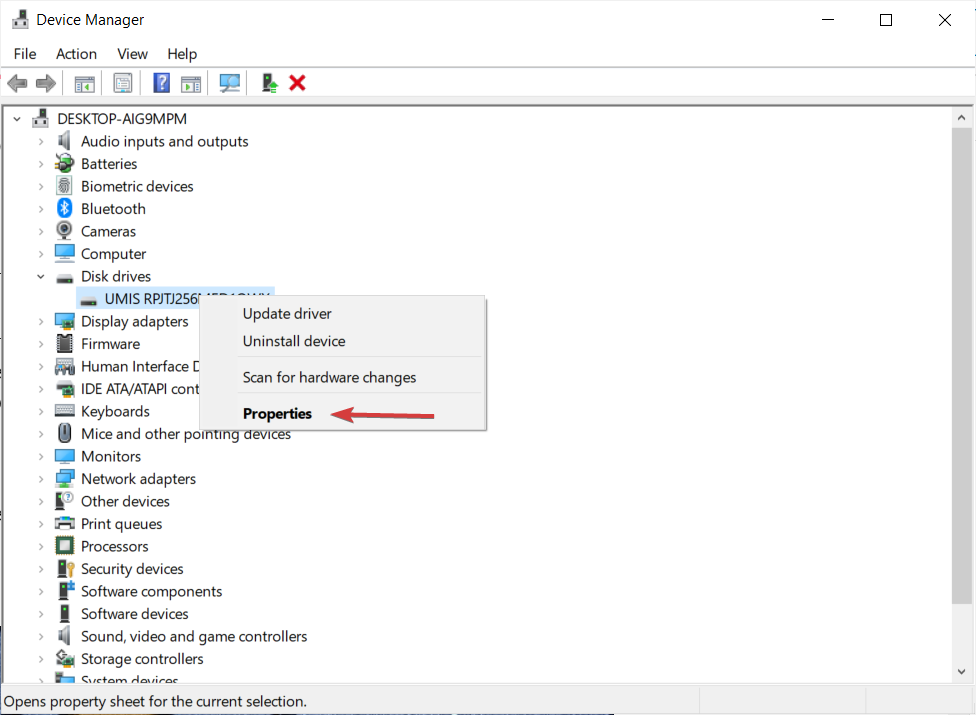
- Expand the Disk Drives section, right-click on the drive that caused the issue, and select Properties.
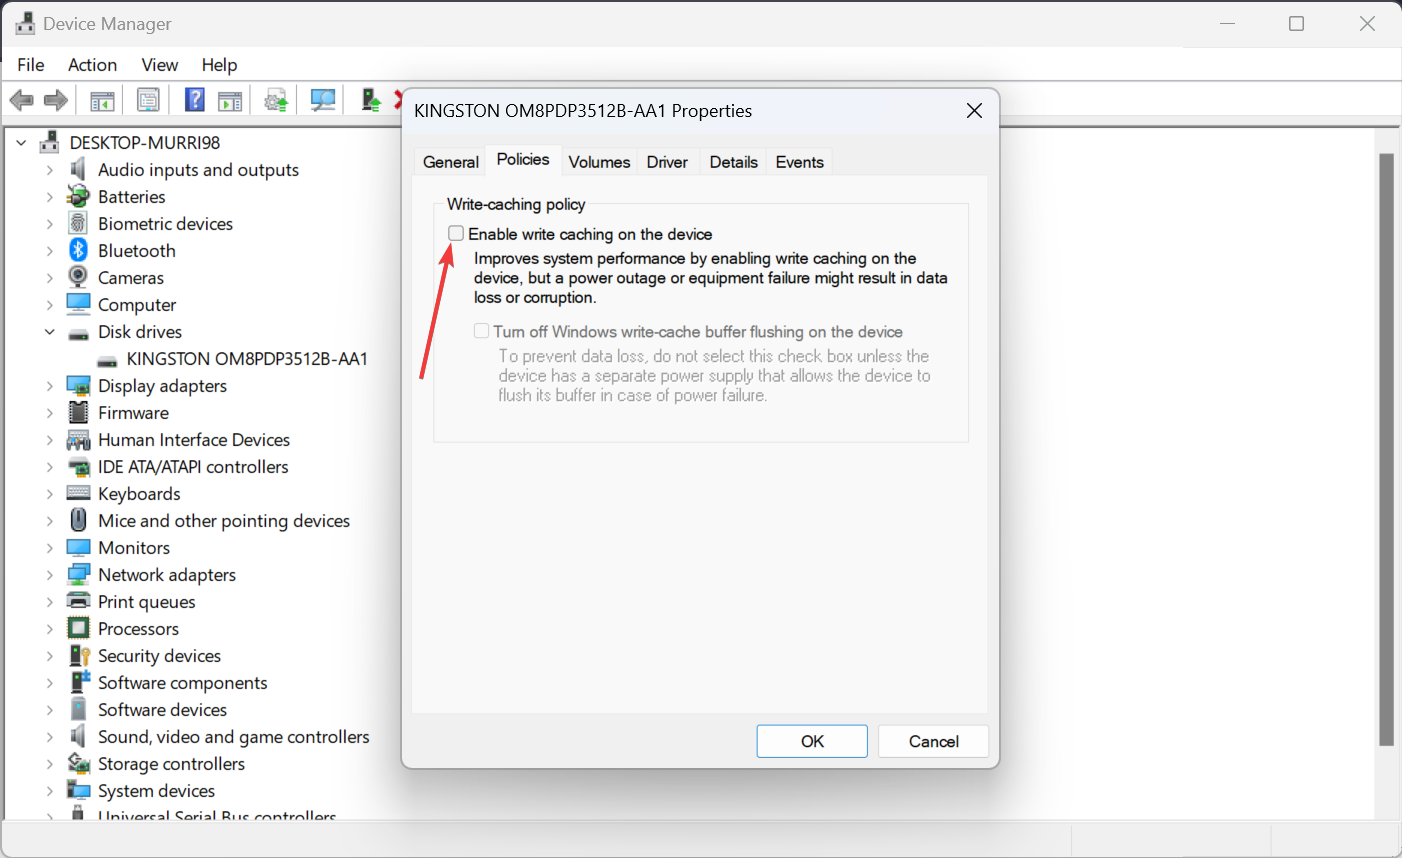
- Go to the Policies tab and uncheck the Enable write caching on the device box.
- Now, try to copy the files on the drive again.
2. Restore your system to a previous point in time
- Press the Windows key + R, type restrui, and press Enter to start System Restore.
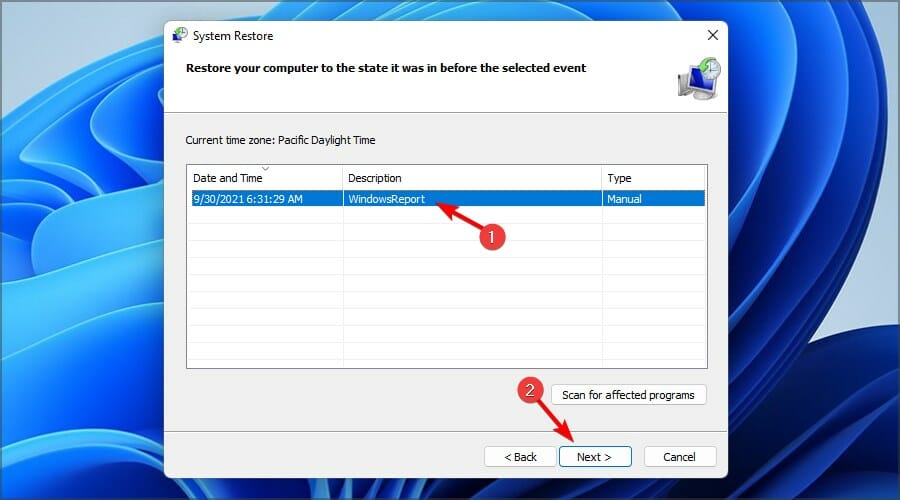
- Click Next, then select a restore point previous to this issue happening and click Next again.
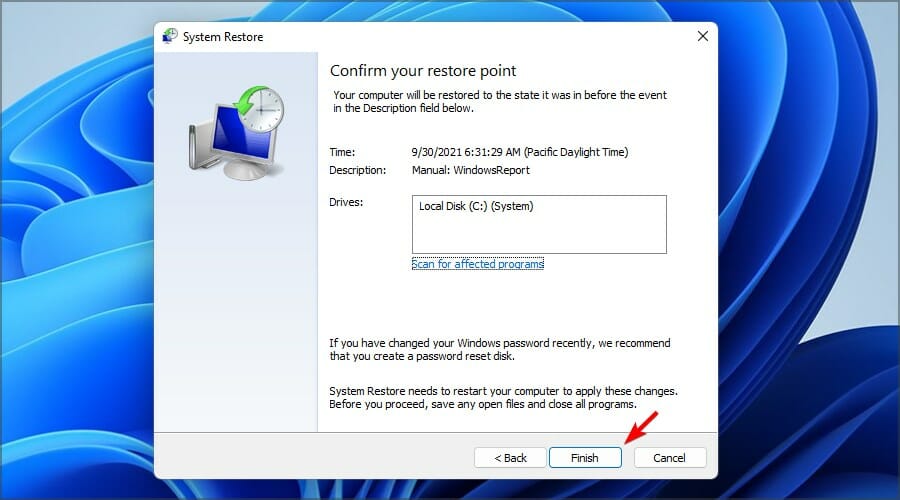
- Finally, click on Finish to confirm your selection and follow the instructions on the screen to complete the process.
- After restoring your system, check if your files are intact and try to copy them again.
You should note that this procedure only works if you have created a restore point before running into the Windows delayed write failed error.
3. Check the disk for errors
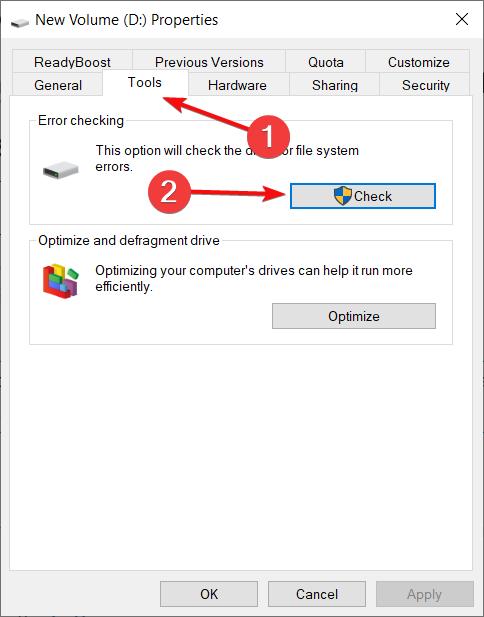
- Press the Windows key + E to start File Explorer, right-click on the drive you want to check, and select Properties.
- Go to the Tools tab and click on the Check button.
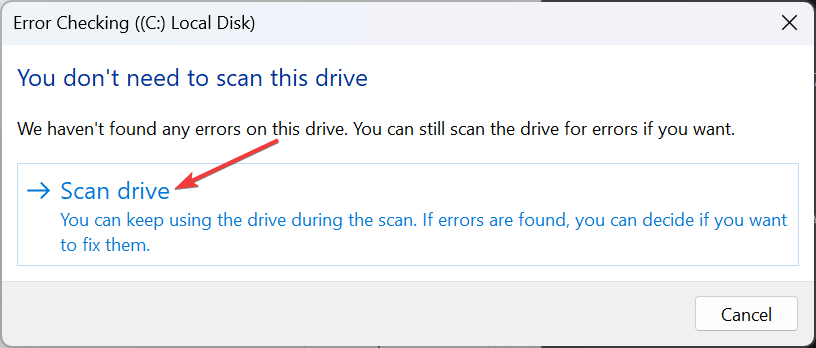
- If the system doesn’t detect any problems, you still have the option to click on Scan drive for a more thorough check.
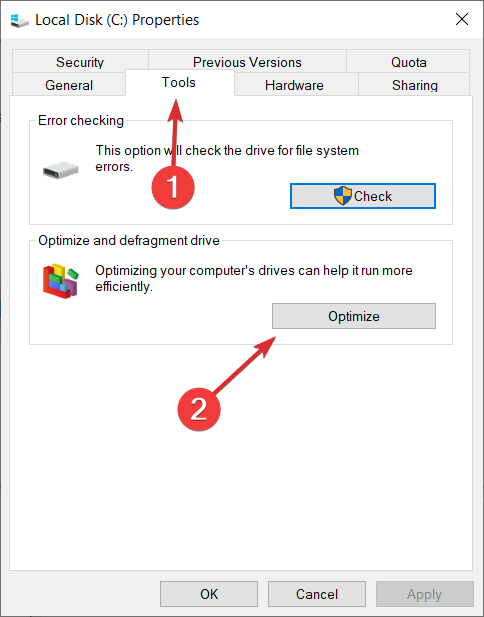
- Also, after this procedure, if you have an SSD, you can click on the Optimize button and hit Optimize again to fix any possible issues on the drive.
- For HDD, you can choose the defragmentation option to fix any bad sectors on it.
We also have a complete guide on how to repair your disk in Windows 11 that will provide more information.
4. Update the disk driver
- Right-click the Start button and select Device Manager from the list.
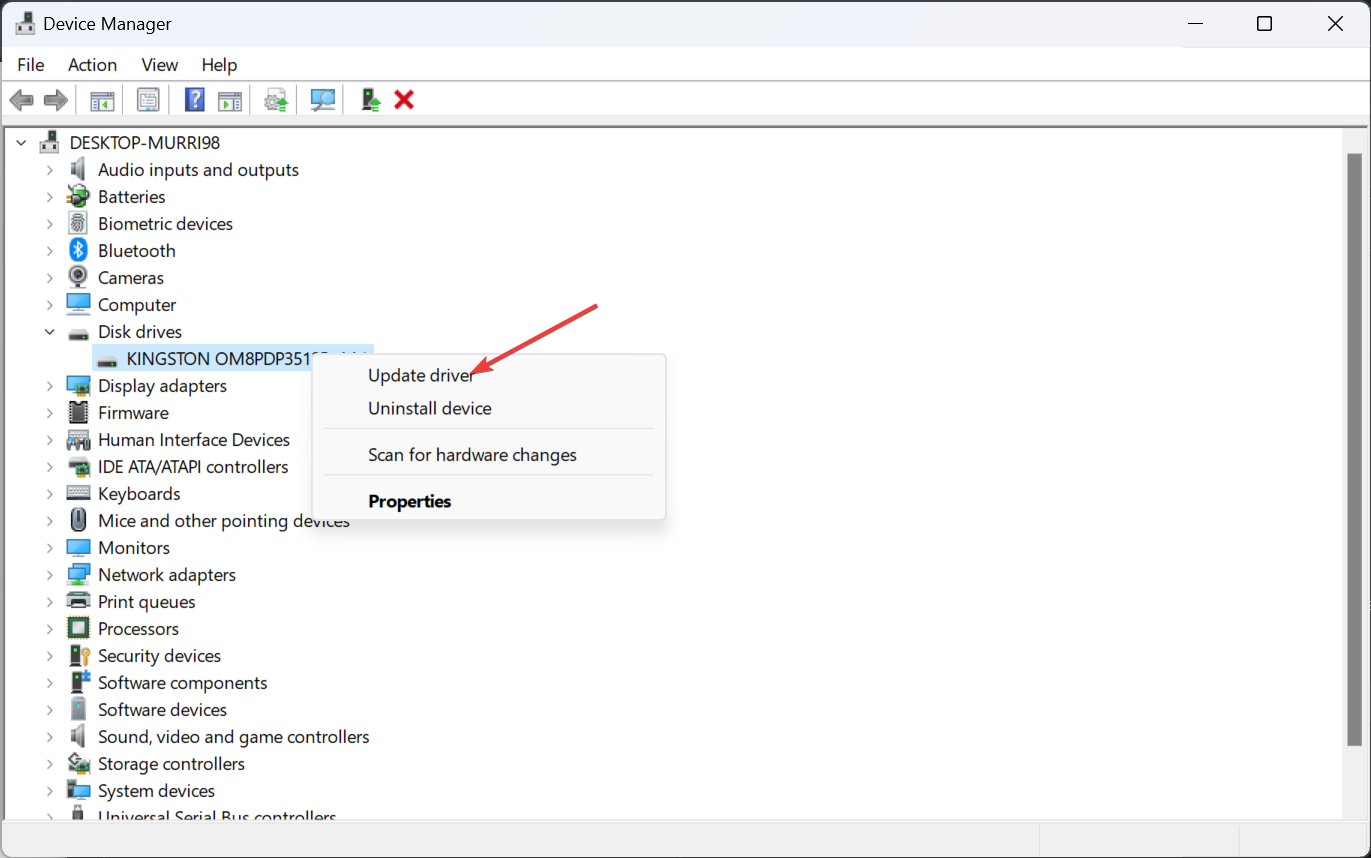
- Expand the Disk Drives section, right-click the drive that caused problems, and select Update driver.
- Click on Search automatically for drivers and follow the on-screen instructions to finish the process.
- If you have an older disk drive, you may also visit the manufacturer’s website and download the latest driver. Then, retake the steps and click on Browse my computer for drivers instead and point to its location on your computer.
If Windows 11 doesn’t recognize the external drive, the highlighted guide will help you fix the issue.
How do I prevent delayed write failed popup dialogs?
- Every time before you disconnect the external drive from your PC, use the Safely Remove Hardware and Eject Media feature. You can access it from the action tab of the toolbar, or you can eject the drive from File Explorer. Simply unplugging it from the USB port without this action can cause permanent damage to the drive.
- Check the connection between the external drive or flash drive and the computer. A malfunctioning or damaged cable can cause delayed write failed pop-ups and errors.
- Make sure that your Windows system and drivers are up to date.
We hope that our guide on how to fix the Windows delayed write failed error helped you copy the files you wanted.
You might also be interested in reading our guide on fixing the Windows search indexer high CPU usage issue.
Some readers also complained that they can’t open certain folders on their external drives. Click on the highlighted guide for solutions.
For any other questions or suggestions, feel free to access the comments section below and leave us a note.





User forum
0 messages