Dell XPS 17 overheating: 4 ways to quickly fix the problem
4 min. read
Updated on
Read our disclosure page to find out how can you help Windows Report sustain the editorial team. Read more
Key notes
- If your Dell XPS 17 laptop is overheating, things can be easily resolved with some quick troubleshooting.
- To fix the problem, first, disable fast startup.
- If that doesn't work, terminate the high-resource consuming apps in the Task Manager, or try the other methods listed here.
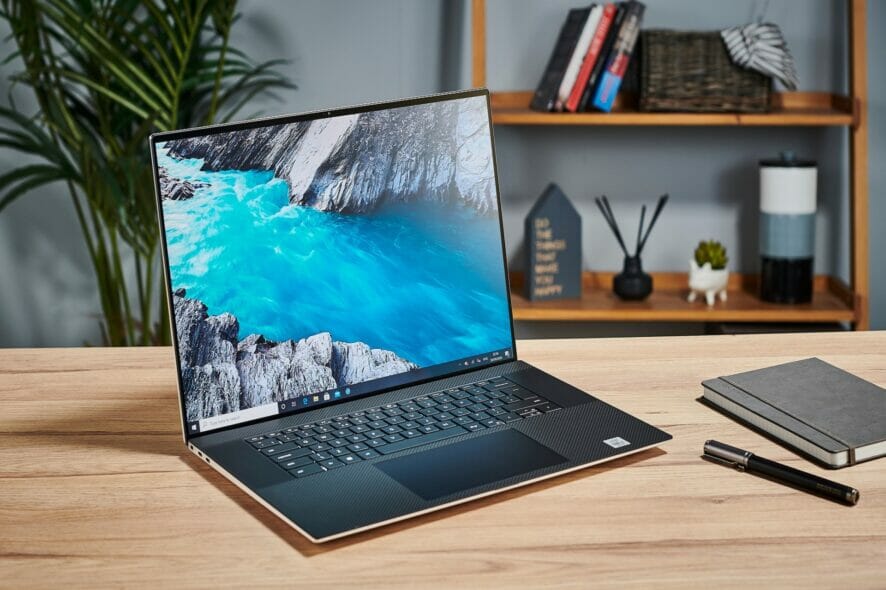
Users these days generally go with a high-end laptop because they don’t want to compromise on performance or encounter regular problems. But that’s not always the case. Many who purchased the Dell XPS 17 reported overheating issues with it.
When a laptop overheats, it not just affects the performance but could also damage the various built-in components. You can also manually check the CPU temperature, and if it reaches around 85°C, turn off the computer right away.
Many faced the issue when running the laptop, while for some, the Dell XPS 17 started overheating while sleeping.
There is a chance of the problem lies with the hardware, but before you go around fixing that, try the methods listed below. These have helped eliminate the problem for a lot of Dell XPS users.
What do I do if Dell XPS 17 is overheating?
1. Disable fast startup
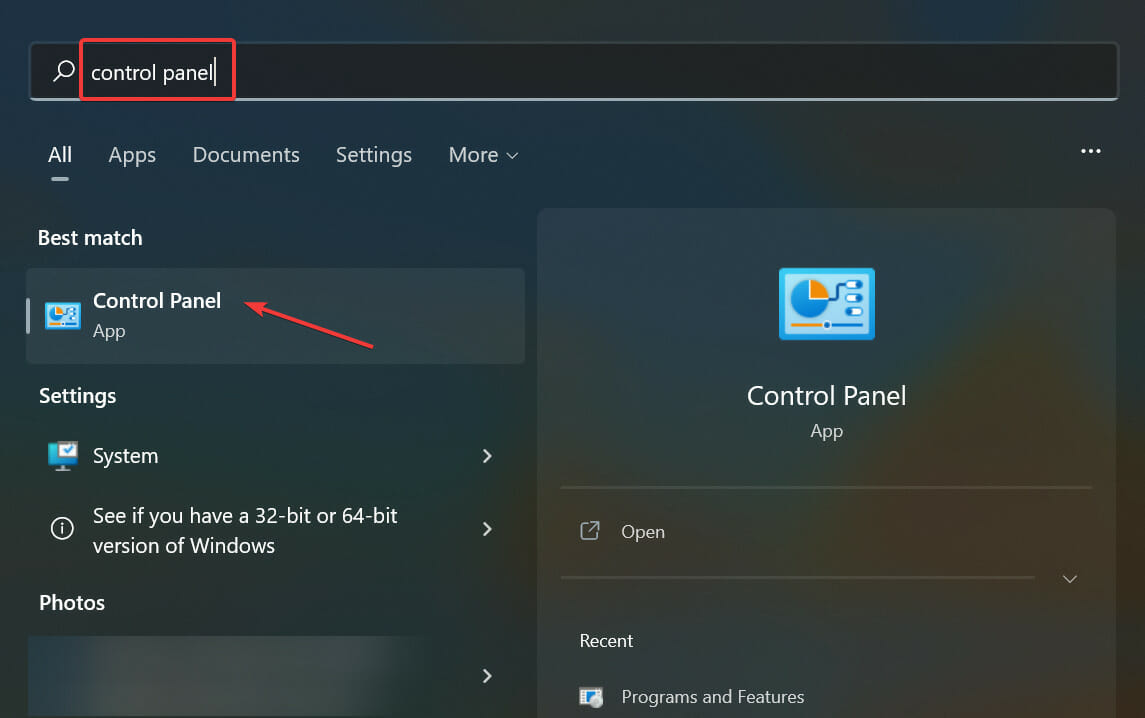
- Press Windows + S to launch the Search menu, enter Control Panel in the text field, and click on the relevant search result.
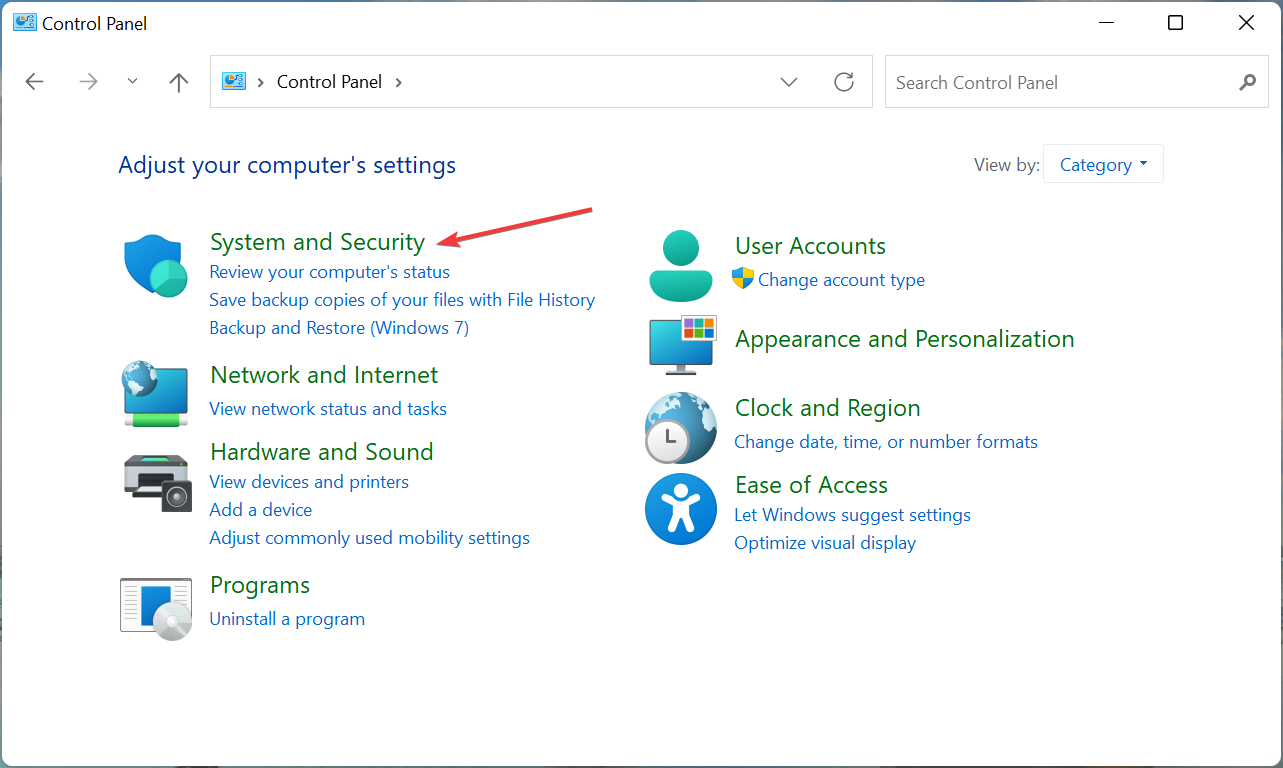
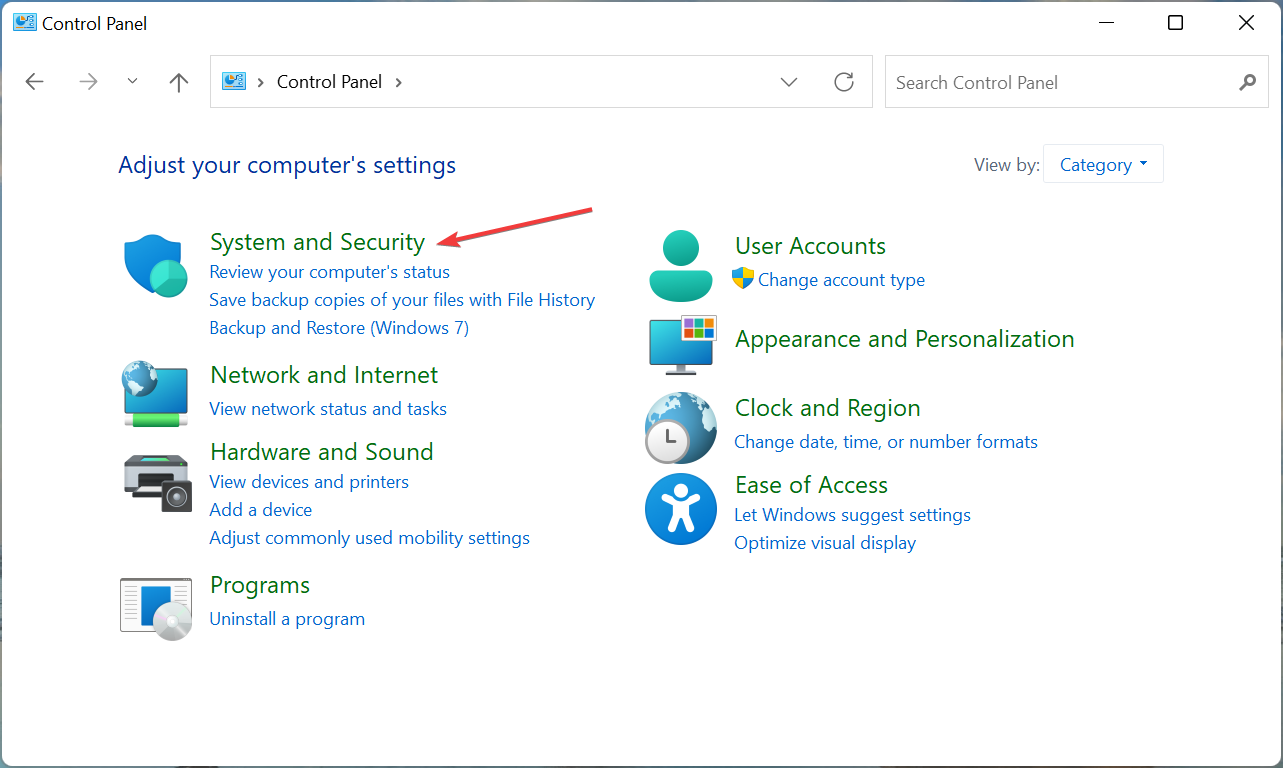
- Click on the System and Security option here.
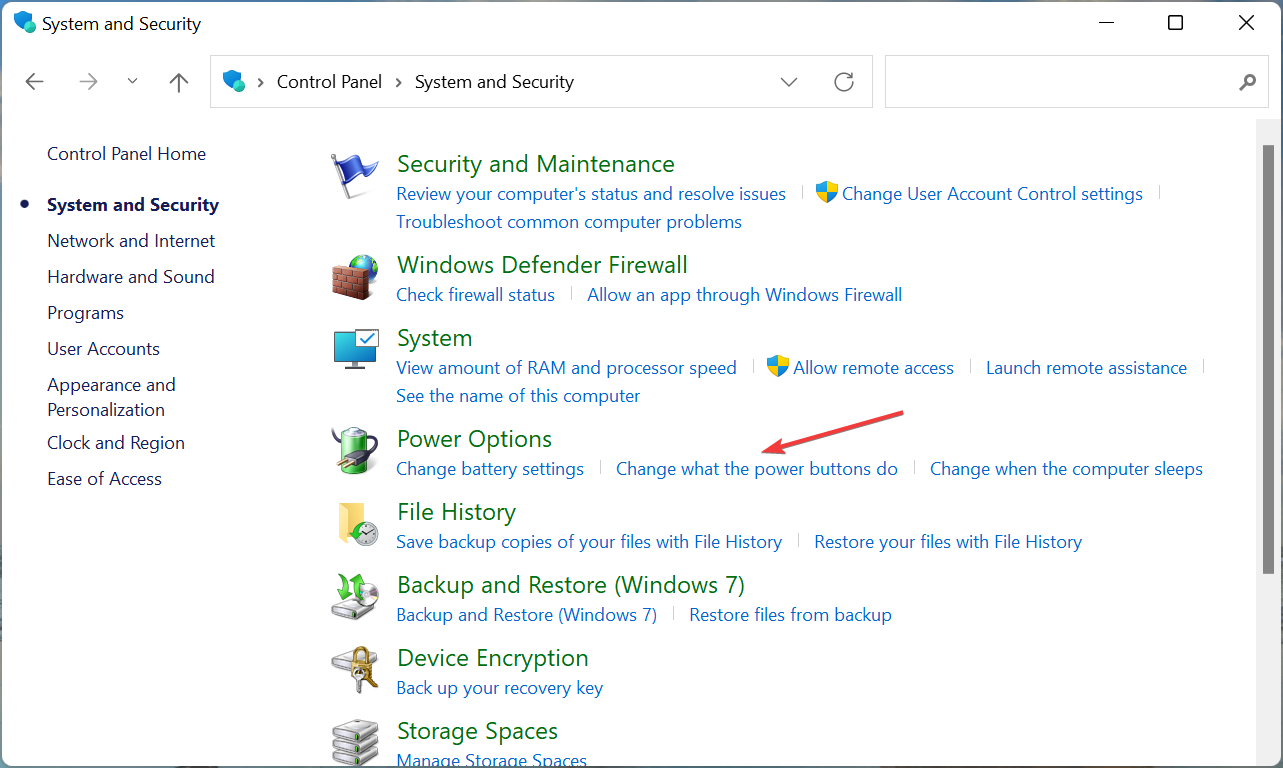
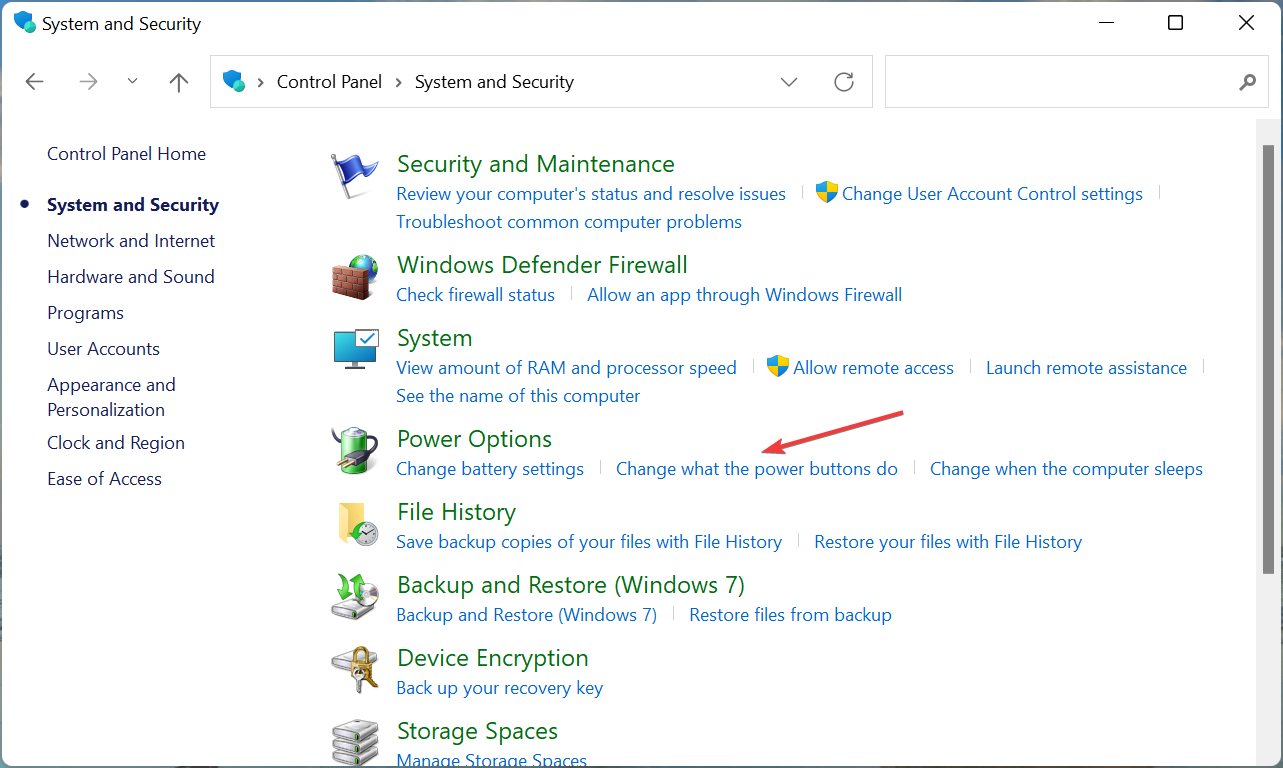
- Next, click on Change what the power buttons do under Power options.
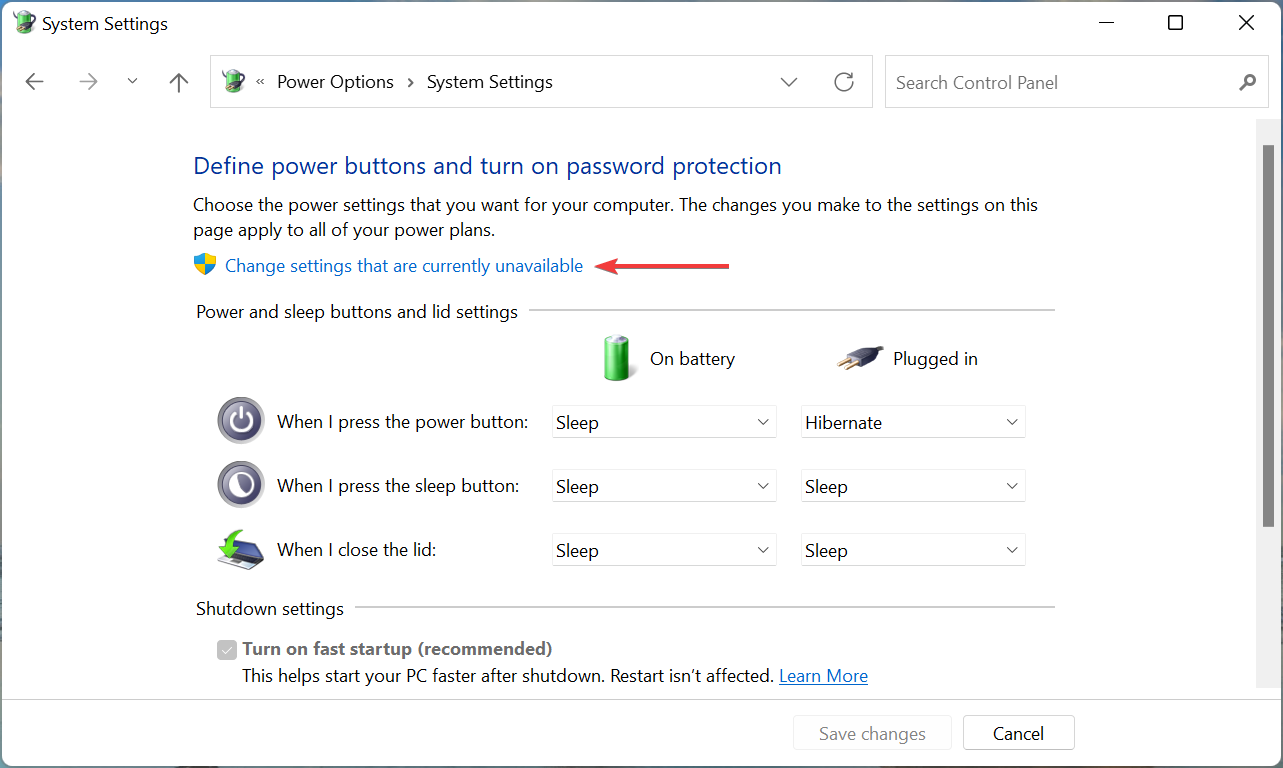
- Click on Change settings that are currently unavailable.
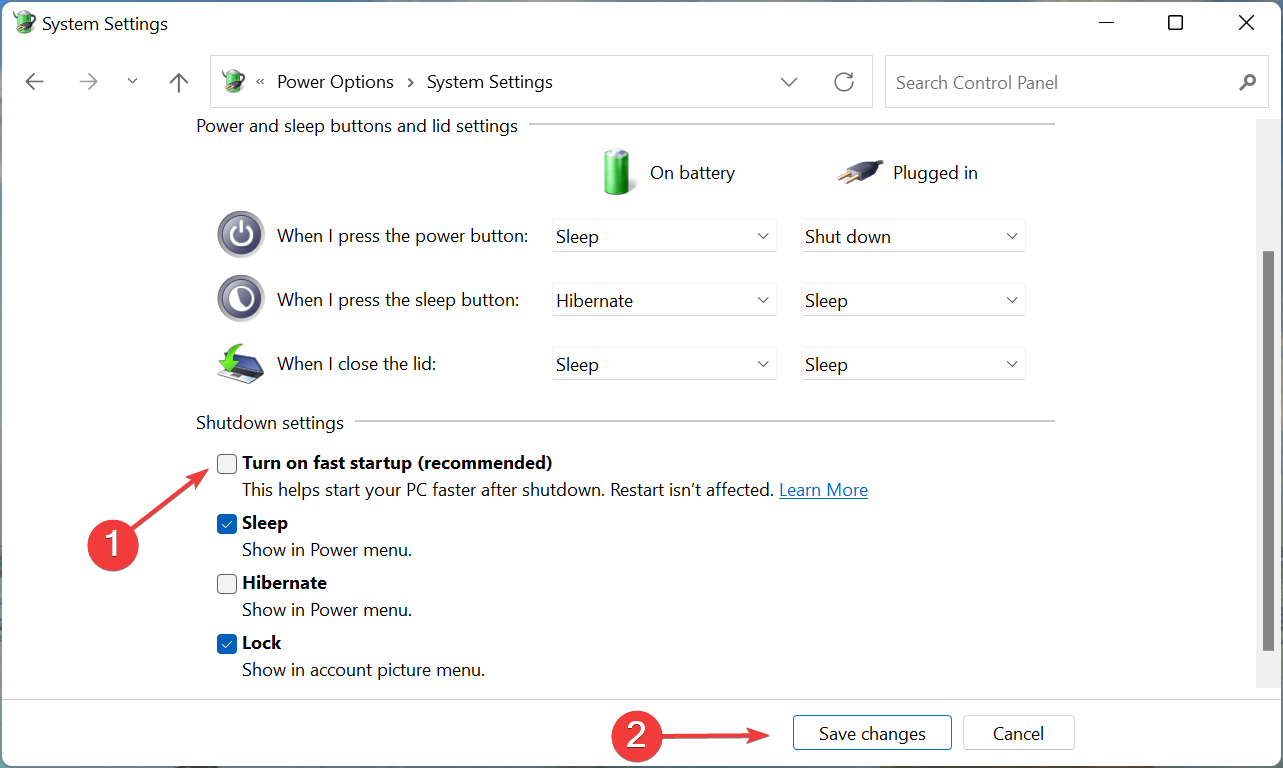
- Untick the checkbox for Turn on fast startup (recommended), and click on Save changes at the bottom.
Fast boot is a feature that reduces the boot time for Windows by storing some critical data on the disk before the previous shutdown. However, it’s known to cause conflicts with the functioning of the OS and applications, and you may consider disabling it.
Once done, restart the computer and check if the Dell XPS 17 overheating issue is fixed.
2. Terminate non-critical apps and processes
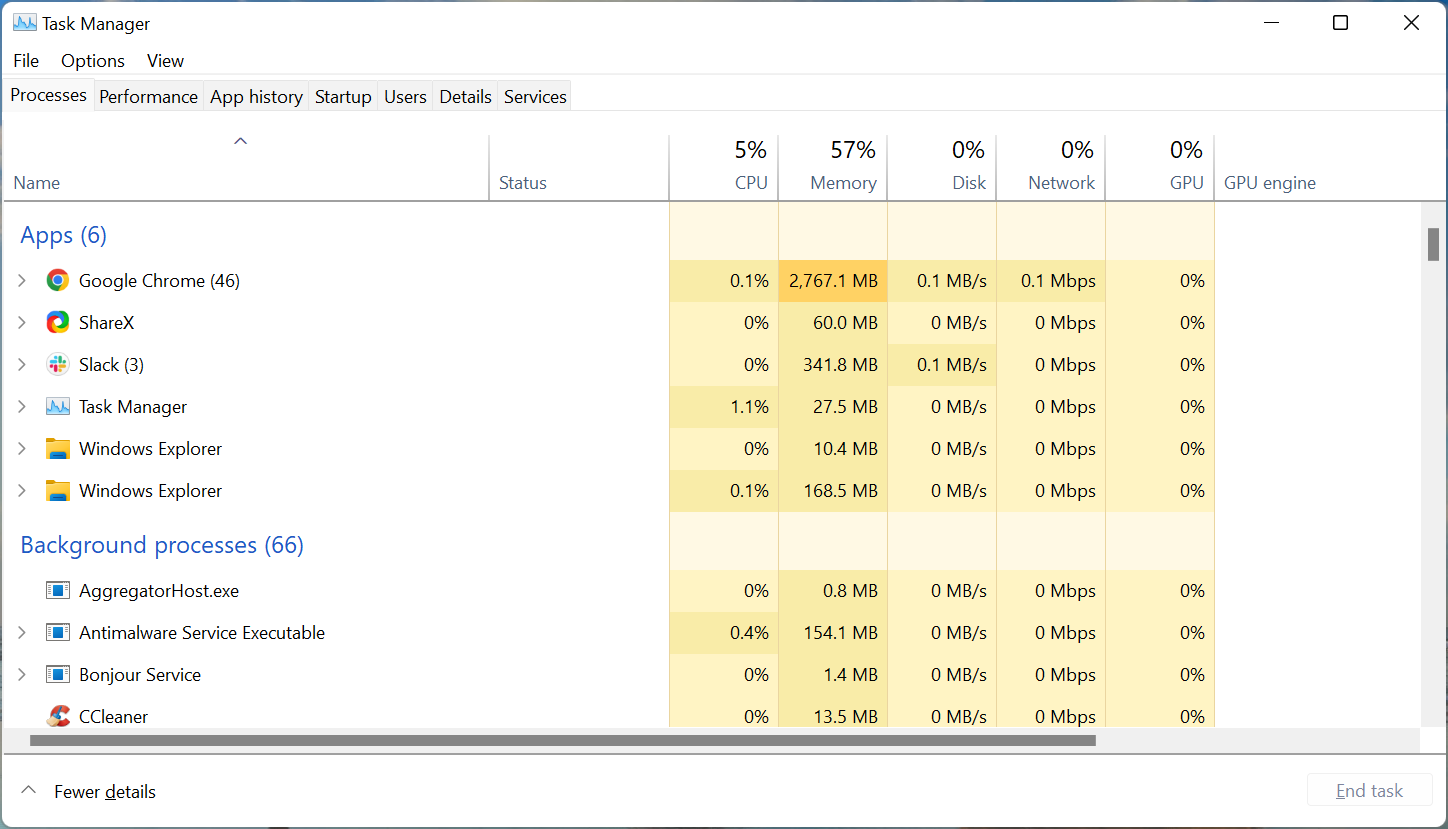
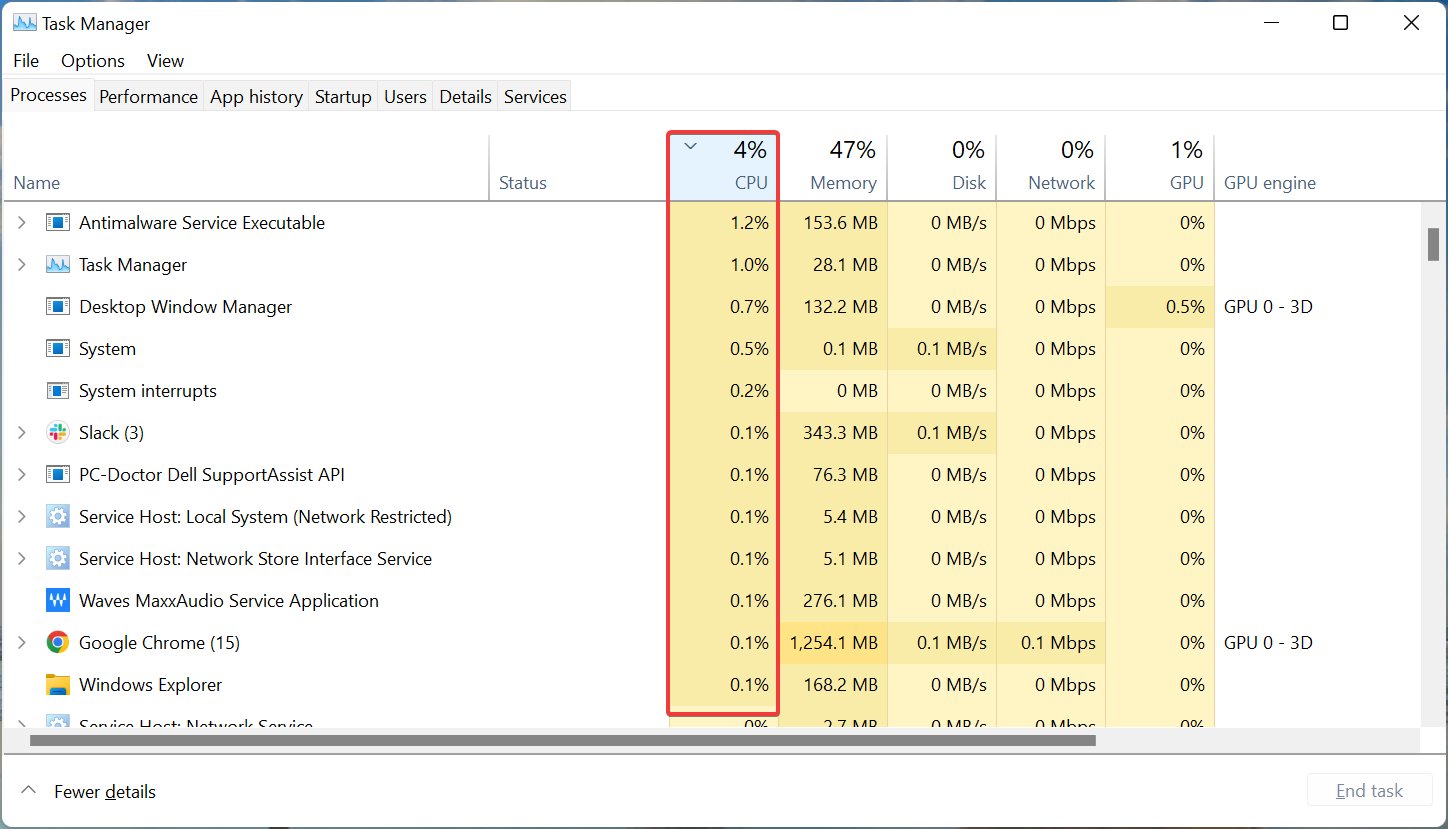
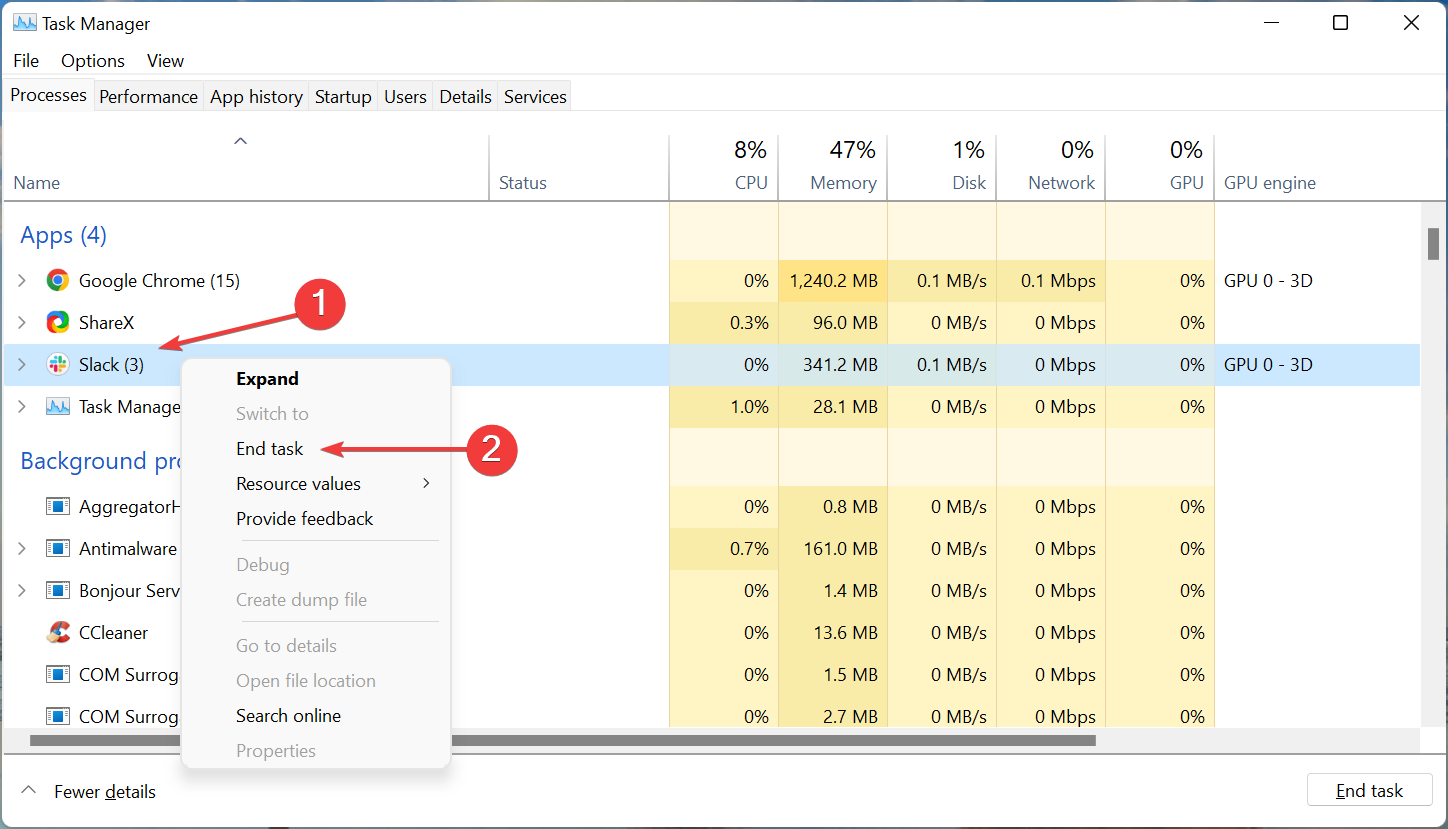
- Press Ctrl + Shift + Esc to launch the Task Manager, and locate the programs that are consuming a large volume of resources.
- You can also click on the top of the column to arrange the programs and processes in the decreasing order of consumption of that resource.
- Now, right-click on the non-critical apps, and select End task from the context menu.
Once done, wait for a few minutes for the laptop to cool down. Though this method will not exactly eliminate the Dell XPS 17 overheating issue, it will get the system up and running so that you can execute the other methods.
3. Set Dell XPS 17 to Hibernate instead of Sleep
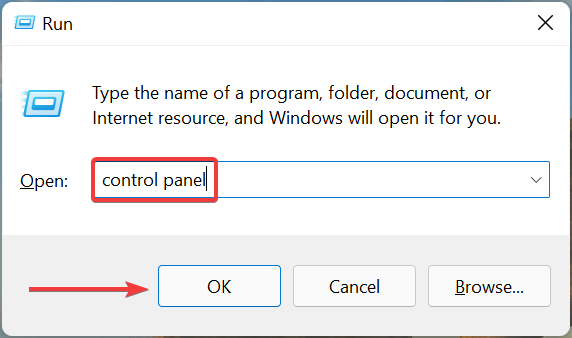
- Press Windows + R to launch the Run command, enter control panel in the text field, and either click on OK or hit Enter to launch it.
- Select System and Security.
- Click on the Change what the power buttons do option.
- Now, make sure to choose Hibernate from the dropdown menu for the situations when the laptop heats up, and then click on Save changes at the bottom.
Hibernate and sleep, both store the files that you are working on, but while the former stores it on the disk, the latter does so on the RAM. As a result, it also takes slightly longer to load the Windows from hibernation as compared to sleep.
Going with Hibernate mode instead of Sleep mode has been found effective to fix the Dell XPS 17 overheating problem.
4. Purchase a cooling pad
If the methods listed here have not worked, you can purchase a cooling pad for your Dell XPS laptop. A cooling pad helps facilitate proper airflow and ensures that the laptop’s temperature does not shoot.
There are several effective cooling pads available on the market and you can purchase one of these.
Besides, you may contact Dell customer support, by either calling on the dedicated number for your country or using the other available channels.
Also, find out what to do if the Dell XPS 17 laptop is freezing since several users have reported encountering the problem.
Tell us which fix worked for you in the comments section below.







User forum
0 messages