Windows 11 Overheating Issues: How To Reduce Heat
A high temperature can be dangerous for your PC
Key notes
- A lot of users after upgrading to Windows 11 have reported overheating, an issue that can both damage the computer and affect its performance.
- The problem is primarily caused due to dust buildup, running multiple applications at once, or using an outdated version of Windows.
- Also, find out about third-party tools that will let you control the speed of the computer fan for optimal cooling.

Windows 11, the recent OS upgrade from Microsoft, is also prone to errors as was the case with the previous ones. While most of them don’t pose much of a risk, the Windows 11 overheating problem can be a big turn off.
When your PC starts to overheat, it’s not only detrimental to the performance but may also damage the hardware components, likely to the ones that are fragile.
Hence, it becomes imperative to understand the various problems that cause the overheating problem in Windows 11, and their subsequent fixes.
Which issues cause Windows 11 overheating issues?
There are a bunch of problems that are responsible for overheating in a Windows 11 system. Some pertain to issues with the hardware or simply lack of maintenance, while others have to do with the software aspect. Let’s have a look at the issues:
- Lack of ventilation
- Dust build-up
- Issues with the hardware
- Running incompatible software
- Outdated version of Windows
- Using multiple high-end applications simultaneously
If you are able to identify the problem, head to the relevant fix. Or, simply execute them in the listed sequence for a quick troubleshooting experience.
How can I fix the Windows 11 heating issue?
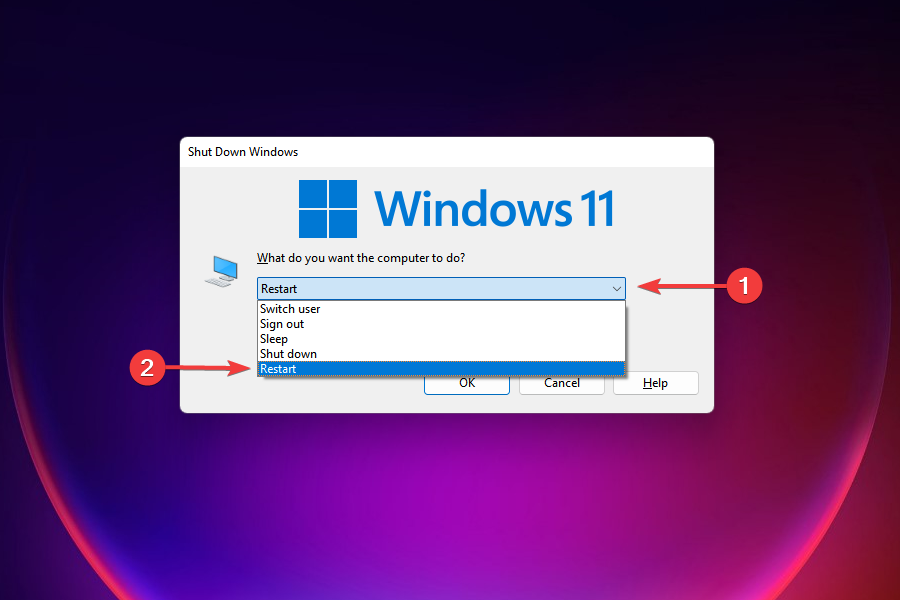
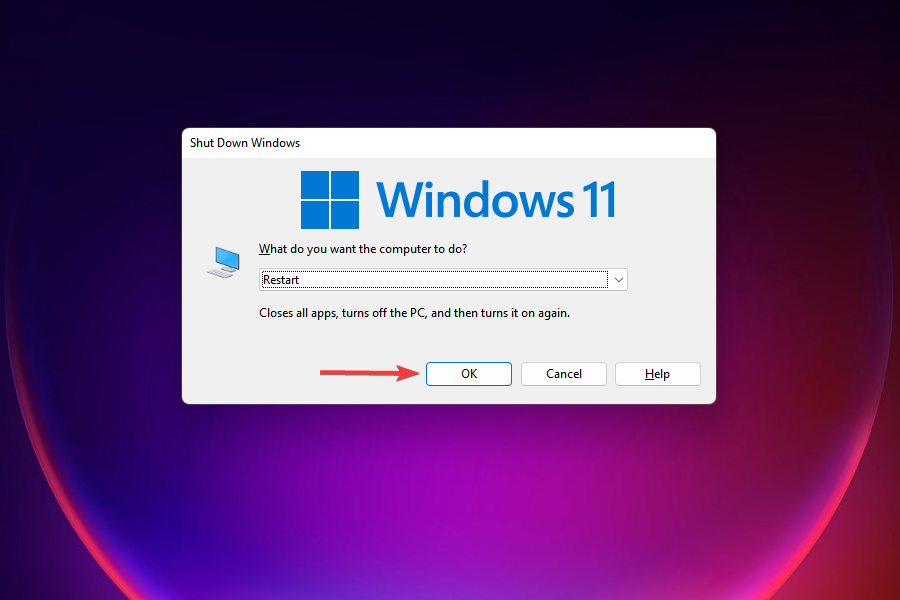
1. Restart the Windows 11 PC
- Navigate to the desktop and press Alt + F4 to launch the Shut Down Windows box.
- Click on the dropdown menu and select Restart from the list of options.

- Click on OK to restart the computer.

In many instances, it’s a particular process or program running in the background which is overloading the CPU and causing the system to overheat. A quick solution would be to restart the computer to eliminate any such process.
However, you must understand that rebooting Windows 11 is only a temporary fix that will help execute the others listed here. So, do go through the ones mentioned in the following sections for a permanent resolution.
2. Make sure the computer is properly positioned
An improperly positioned computer is also likely to cause the overheating problem in Windows 11. If the CPU is positioned such that the hot air from the fan cannot freely exit due to obstructions or lack of free space, the computer is bound to overheat.
In the case of a laptop, avoid resting it on beds or similar surfaces since the hot air is released from the bottom surface. Also, you can use cooling pads to keep the overheating in check and enhance the computer’s performance.
3. Check the computer fan
If the computer fan is functioning at reduced speeds or ceases to work altogether, the system will overheat. This could be due to dust build-up inside the fan, wires causing obstructions, or a faulty motor, in case the fan does not work.
Issues with the computer fan are easily fixable, but you must understand the various components and the connections. In case you are not acquainted with these, it’s best to get in touch with a professional to get things up and running.
After the laptop is cleaned and serviced, check if the overheating problem in Windows 11 is resolved.
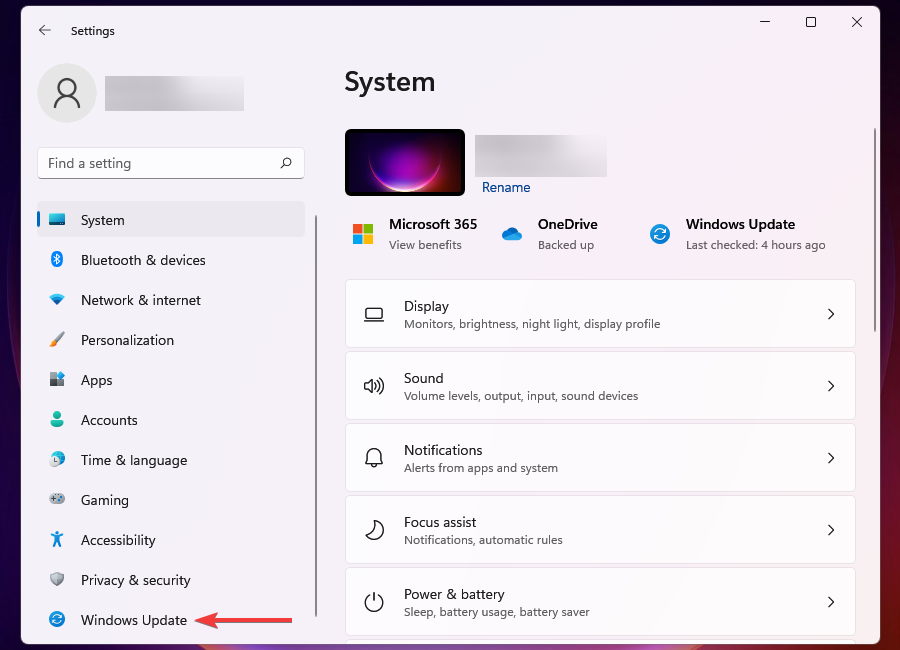
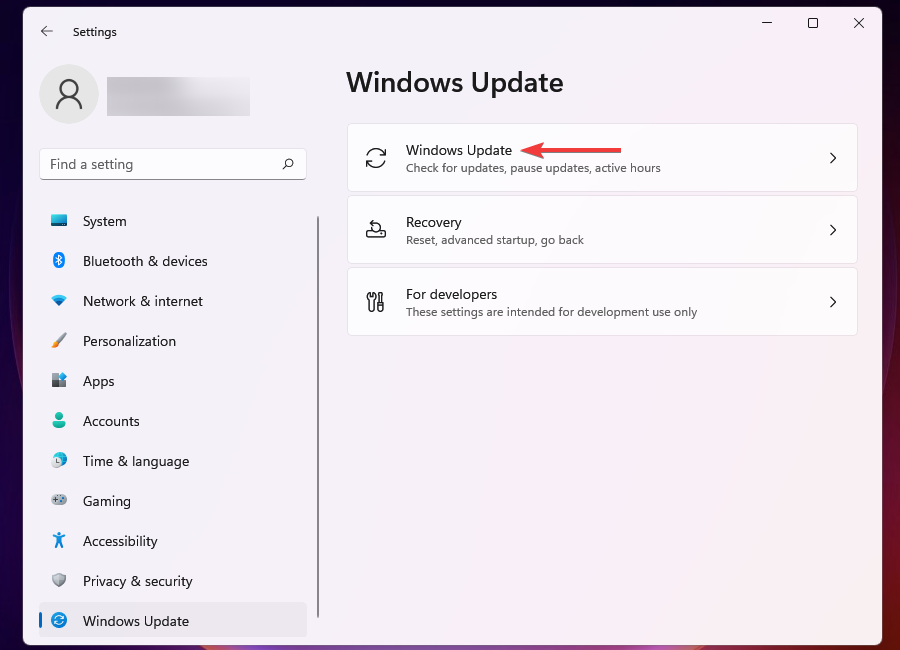
4. Update Windows 11
- Press Windows + I to launch the Settings app.
- Select Windows Update from the list of tabs in the navigation pane on the left.

- Click on Windows Update on the right.

- Click on Check for updates to scan for any available newer versions.

- Download and install the updates that show up after the scan.

Running an older or outdated version of Windows 11 is also likely to cause overheating. With each update, new features, patches for bugs, and other enhancements in terms of performance are introduced.
Hence, it’s recommended that you keep the Windows 11 up-to-date to prevent the PC from overheating.
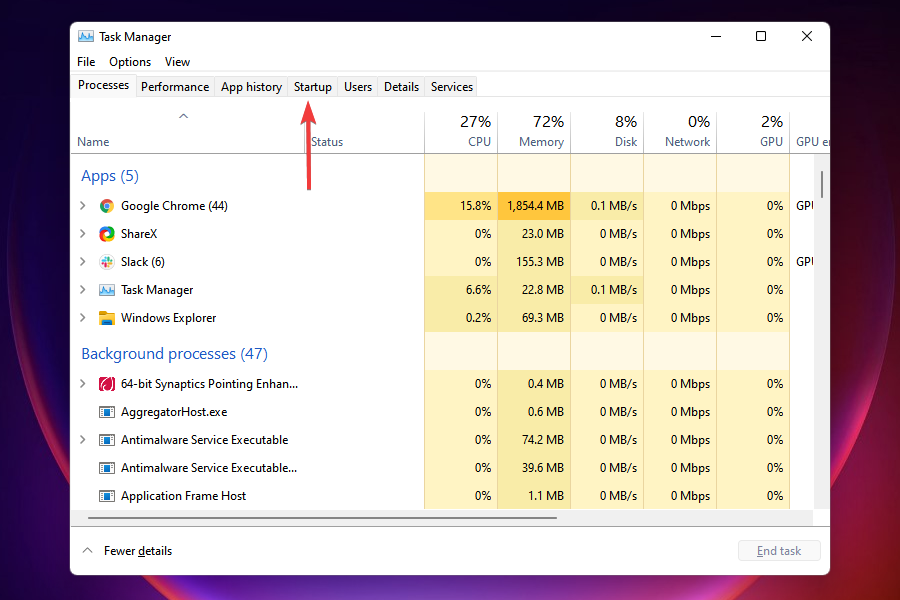
5. Disable startup apps
- Press Ctrl + Shift + Esc to launch Task Manager.
- Navigate to the Startup tab to view application that load when you boot Windows.

- Select the individual application to remove and click on Disable. Alternatively, you can right-click on it and select Disable from the context menu.

- Similarly remove the other apps as well.
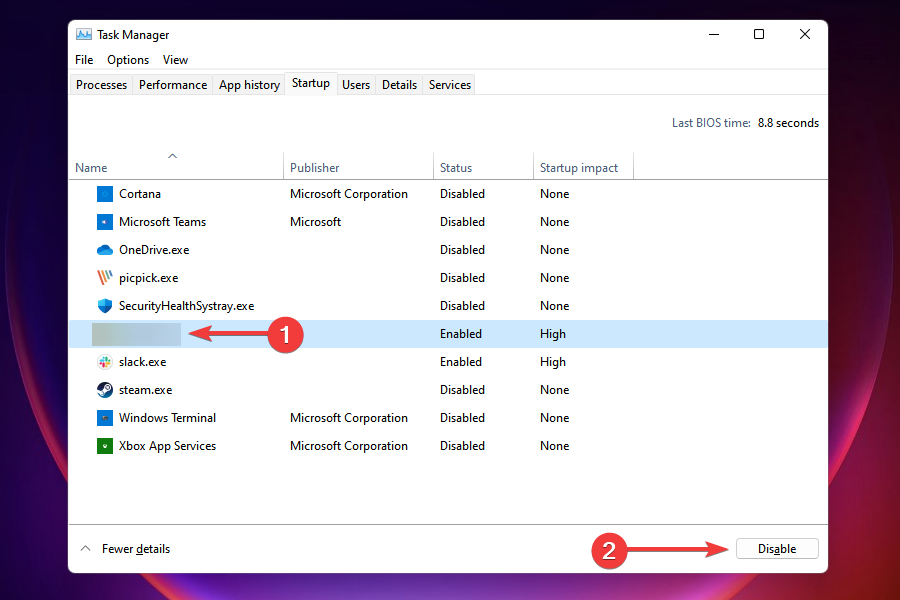
There are a bunch of apps on the PC that load when you turn it on. Apart from unnecessarily hogging the system resources and leading to overheating, these also increase the time taken by Windows to boot. A simple solution here is to disable these apps.
Do remember not to remove all of the apps that appear in the startup tab since some perform critical functions. After done with it, restart the computer and check if the overheating problem in Windows 11 is resolved.
In case you want to use any of the apps that you disabled from loading at startup, just manually launch them.
6. Terminate apps and processes
- Press Ctrl + Shift + Esc to launch Task Manager.
- in the Performance tab, scroll through the list of programs and identify the ones that are hogging the system resources.
- Select the one that you want to terminate and click on the End task button at the bottom.

- You can similalry disable the other apps and processes listed here, in case you don’t need them.
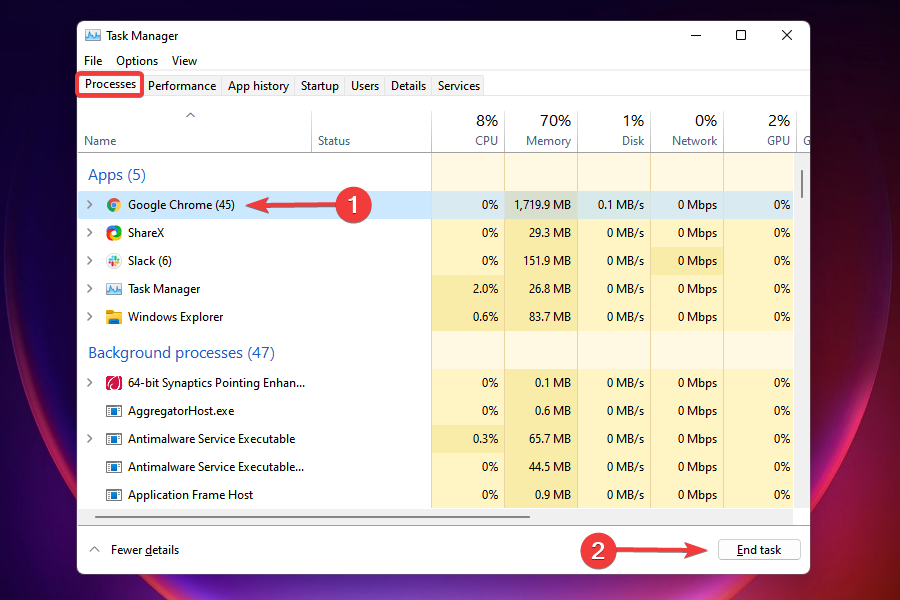
There are a bunch of non-critical apps and processes running in the background that hog the system resources. If you are facing issues with overheating in Windows 11, eliminating these tasks will come in handy and resolve the problem.
As was the case before, not all processes should be terminated. Some may consume considerable resources but are critical to the functioning of Windows.
Also, you might find a momentary spike in consumption of resources, for instance, while you update the Windows. And, these processes should be allowed to run.
7. Disable apps from running in the background
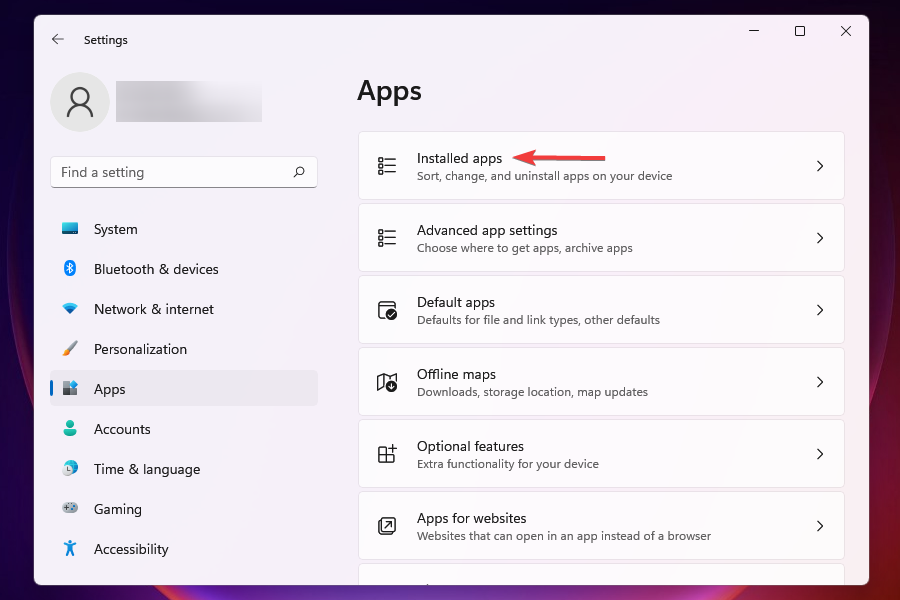
- Press Windows + I to launch the Settings app.
- Select the Apps tab from the navigation pane on the left.

- Next, click on Installed apps on the right.

- Locate the app that you don’t want running in the background, click on the ellipsis next to it, and select Advanced options from the menu that appears.

- Now, scroll down to Background app permissions and click on the menu under it Let this app run in the background.

- Select Never from the list of options that appear.

- Similarly disable the other apps from running in the background.
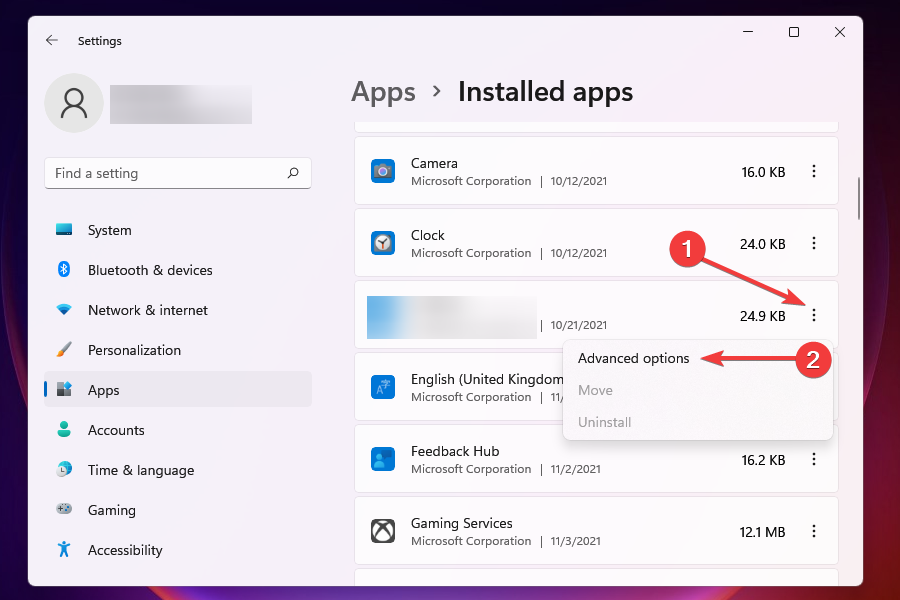


When you change the background app permissions to Never, the app won’t run at all in the background, thereby clearing considerable resources and resolving the overheating problem in Windows 11.
It’s actually recommended that you disable most of the non-critical ones anyway, since these consume resources and lead to overheating. Nevertheless, you can always manually launch them, whenever required.
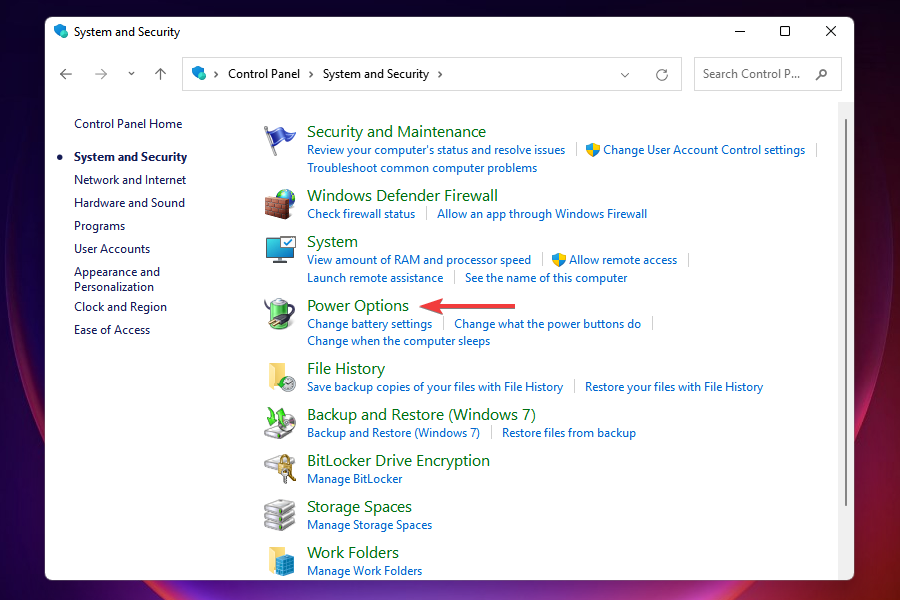
8. Change power plan settings
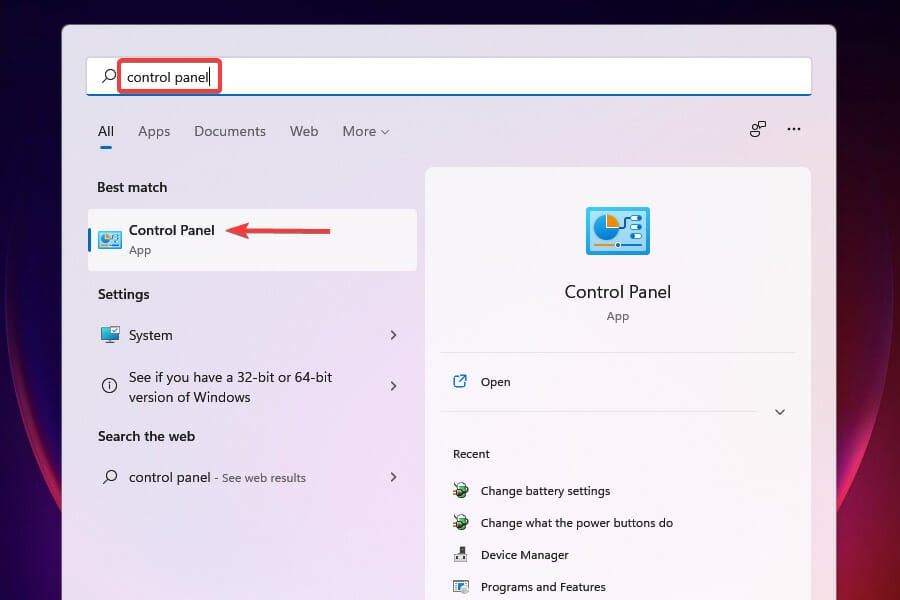
- Press Windows + S to launch the Search menu.
- Enter Control Panel in the text field at the top, and click on relevant search result that appears.

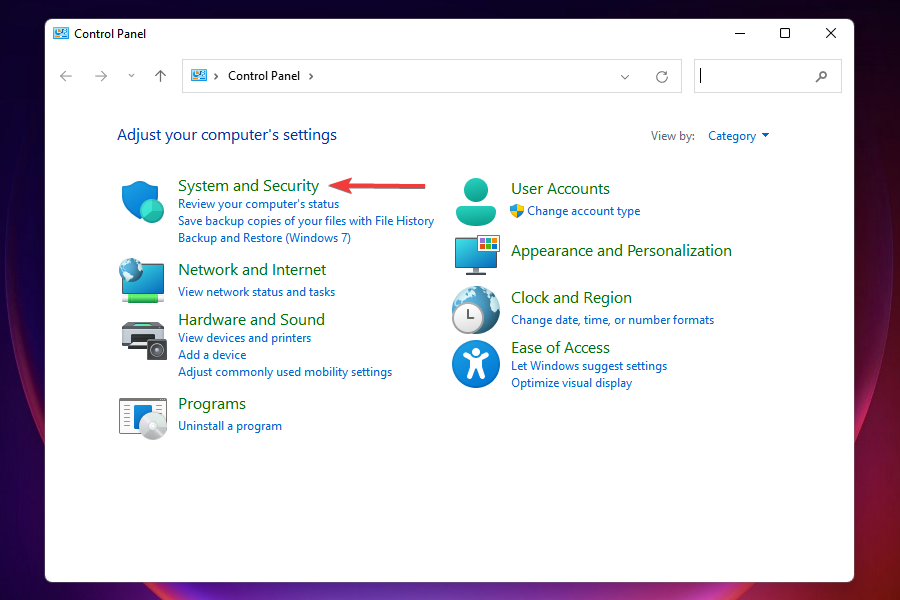
- Click on System and Security from the options that appear.

- Click on Power options.

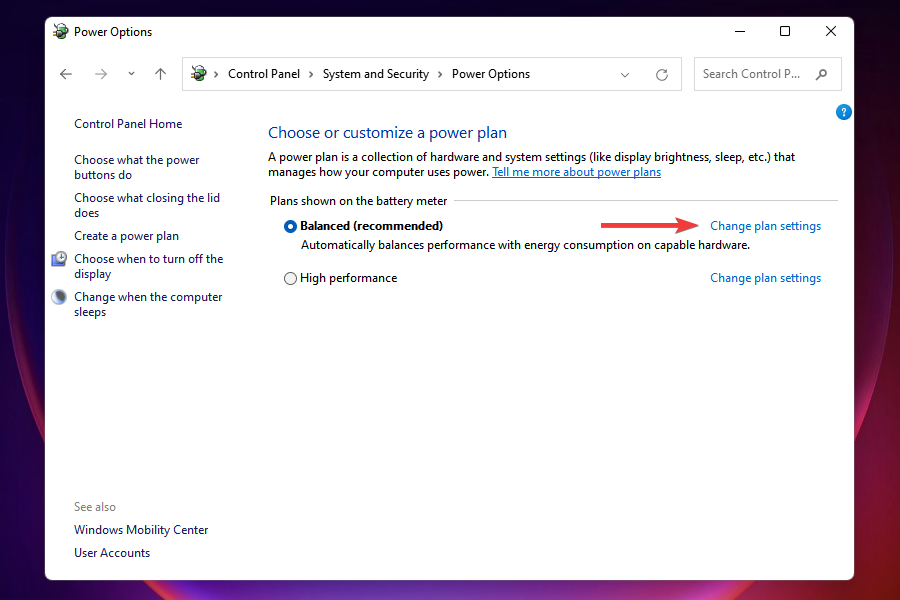
- Next, click on Change plan settings next to the current power plan.

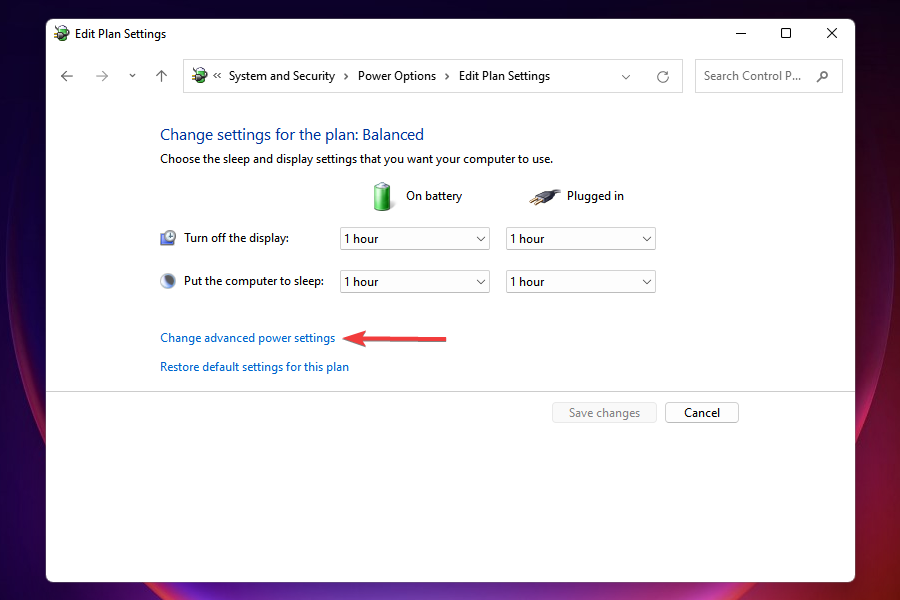
- Click on Change advanced power settings near the bottom.

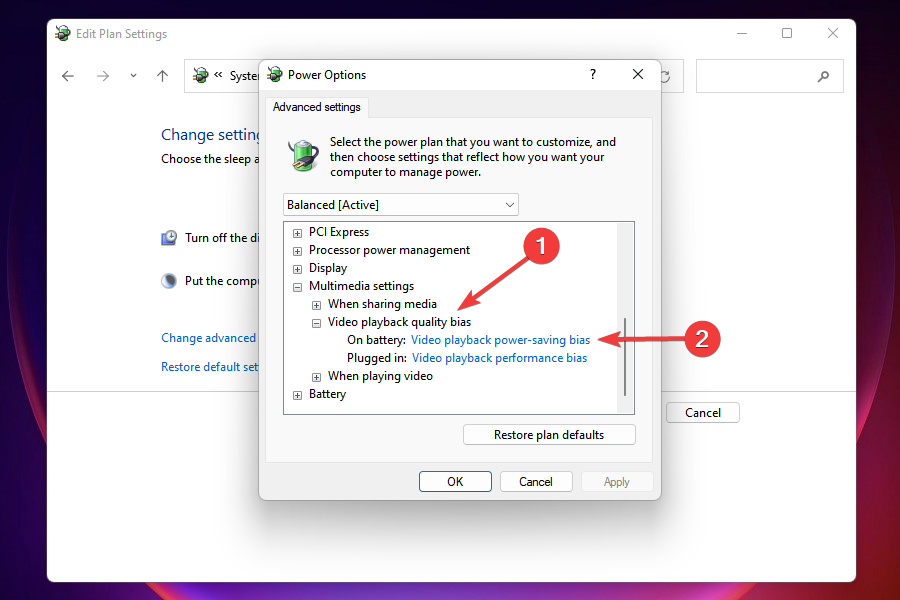
- In the Power Options window, scroll down and double-click on Multimedia settings.

- Now double-click on Video playback quality bias, and then on the menu next to On battery.

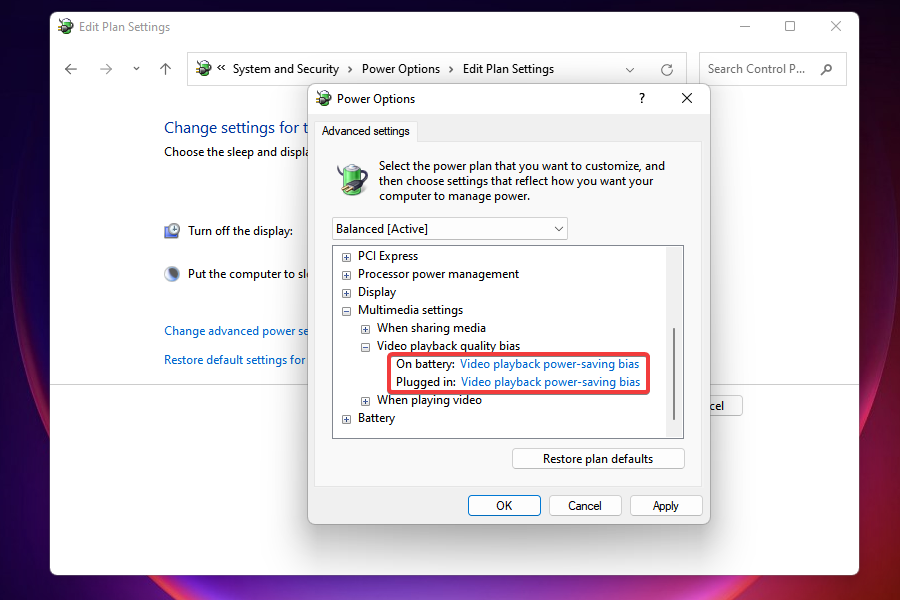
- Select Video playback power-saving bias from the list of options that appear.

- Similarly, select the same setting for Plugged in as well.

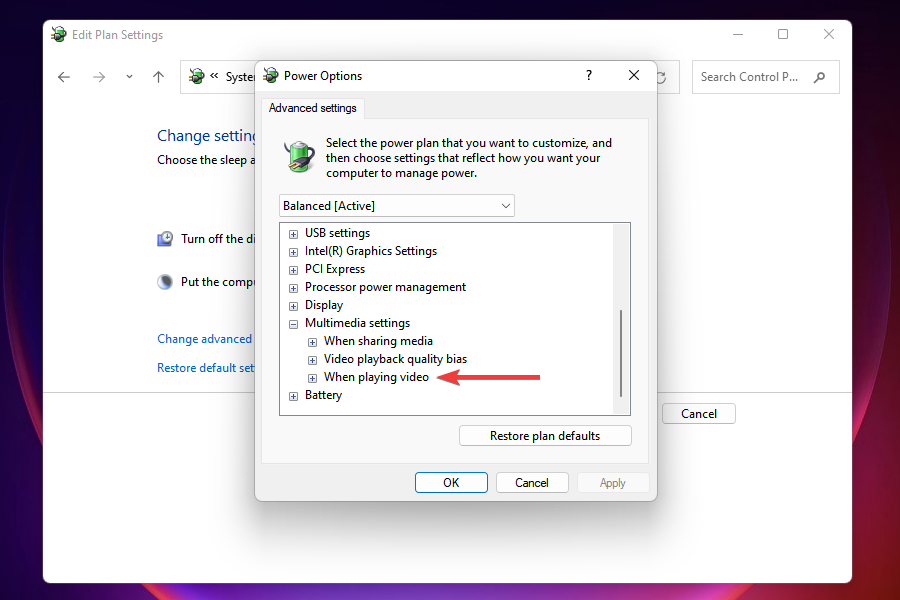
- Next, double-click on When playing video to expand and view the settings under it.

- Set both On battery and Plugged in as Optimize power savings, and click on OK to save the changes.

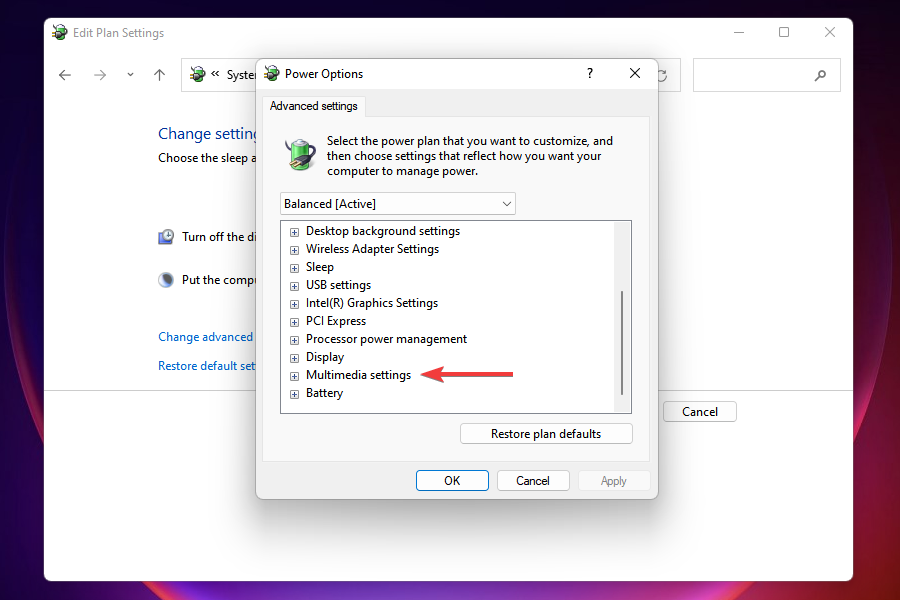

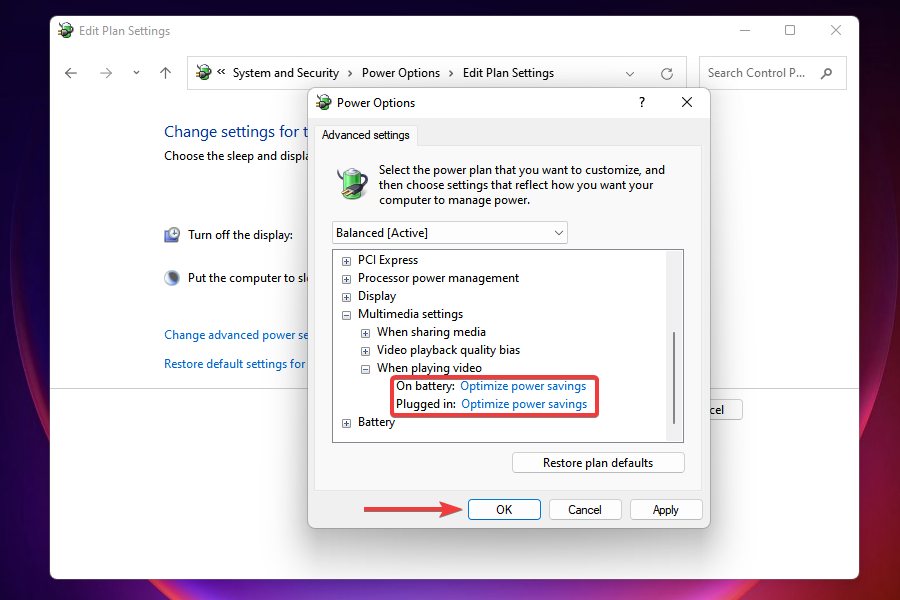
Another effective way of optimizing performance and eliminating overheating in Windows 11 is to modify the power plan settings. With these settings in place, Windows will optimize things such that your computer bears the minimum pressure, thereby eliminating the chances of overheating.
9. Update the graphics driver
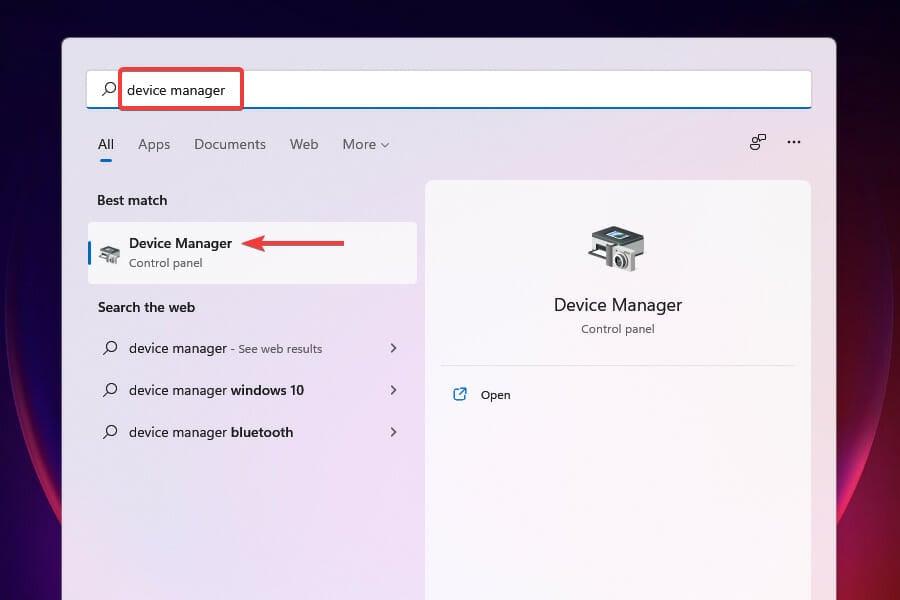
- Press Windows + S to launch the Search menu.
- Enter Device Manager in the text field at the top and click on the relevant search result that appears.

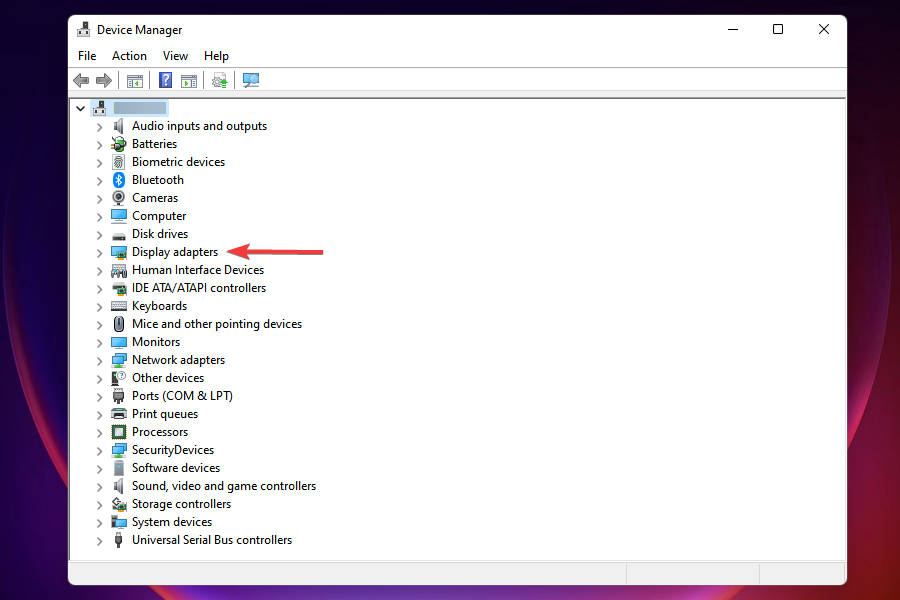
- Locate and double-click on the Display adapters entry.

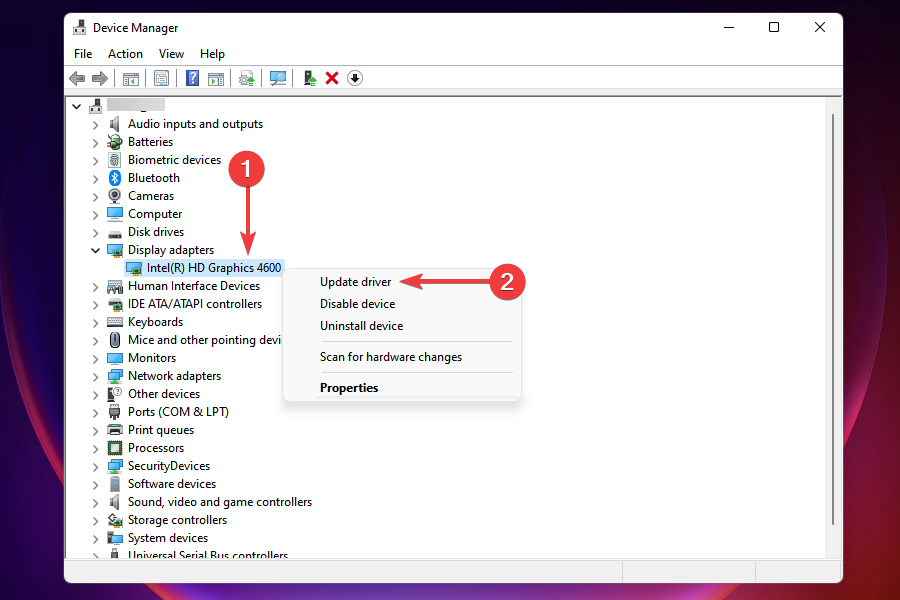
- Right-click on the graphics adapter and select Update driver from the context menu.

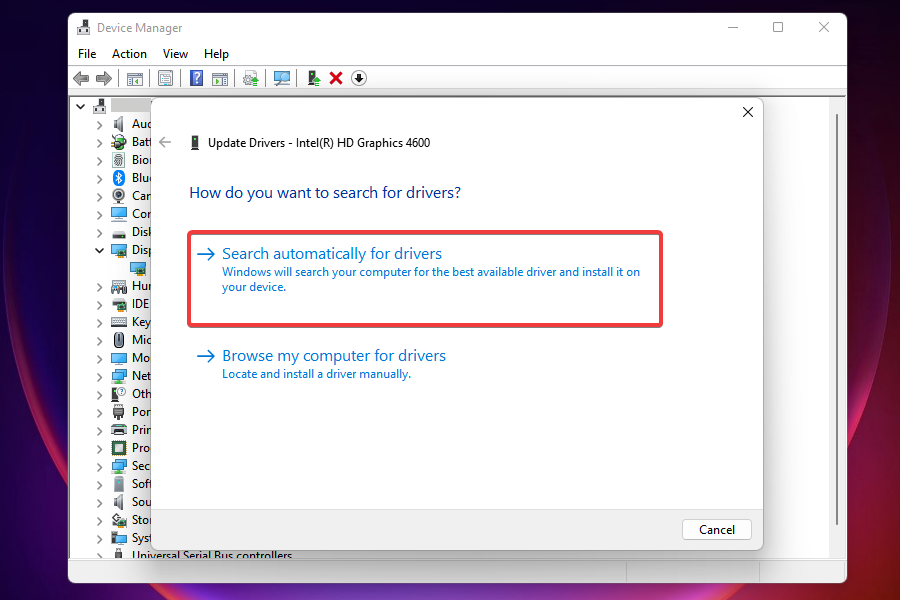
- Next, select Search automatically for drivers in the Update Drivers window, to let Windows look for the best available driver on the system and install it.

The graphics driver is one the most critical ones on the computer, and running an outdated version can cause a bunch of problems including overheating in Windows 11. To fix the problem, simply update the graphics driver.
When updating drivers via the Device Manager, you can only install the updates that have already been downloaded on the computer. In case you are unable to find a newer version, try updating the driver via other methods.
Also, we recommend using a dedicated tool such as Outbyte Driver Updater in that regard. After the driver is updated, the overheating problem in Windows 11 should be fixed.
How can I manually control the computer fan to avoid overheating?
Although it’s not recommended, you can still manually control the computer fan and set it to run at the desired speed to avoid overheating. Most manufacturers generally offer software that helps you modify the fan speed and you should first look out for these.
In case your manufacturer doesn’t offer one, there are a bunch of third-party tools to control the fan speed. But before you start using any of those, a thorough understanding of the optimal speed and certain settings is a must.
Also, never set the fan speed too low such that the temperature begins to rise. If the inside temperature reaches more than 95° C, the chances of damage to internal components are high. Though your PC, in all likelihood, should shut down before reaching that temperature.
These are all the ways you can avoid overheating in a Windows 11 PC along with boosting the system’s performance. In case these don’t work, reset Windows to its factory settings.
Apart from that, you can also look for the best computer fan models available in the market, in case the current one ceases to function.
Let’s know which fix worked for you in the comments section below or whether replacing the fan solved the overheating issue in Windows 11.
Read our disclosure page to find out how can you help Windows Report sustain the editorial team. Read more


Improve this guide


User forum
0 messages