Dell XPS 13 won’t shut down? 5 easy ways to fix the issue
3 min. read
Updated on
Read our disclosure page to find out how can you help Windows Report sustain the editorial team. Read more
Key notes
- For many years, the Dell XPS 13 laptop has been plagued with the issue of the inability to shut down properly. So, calm your mind. You're not alone.
- Many users have also complained about the non-response from the company. Only those who chat the support privately get suggestions on how to solve the problem.
- Meanwhile, the issue can be fixed with a hard reset of the system. We have highlighted the step-by-step guide on how to do this, plus other solutions.
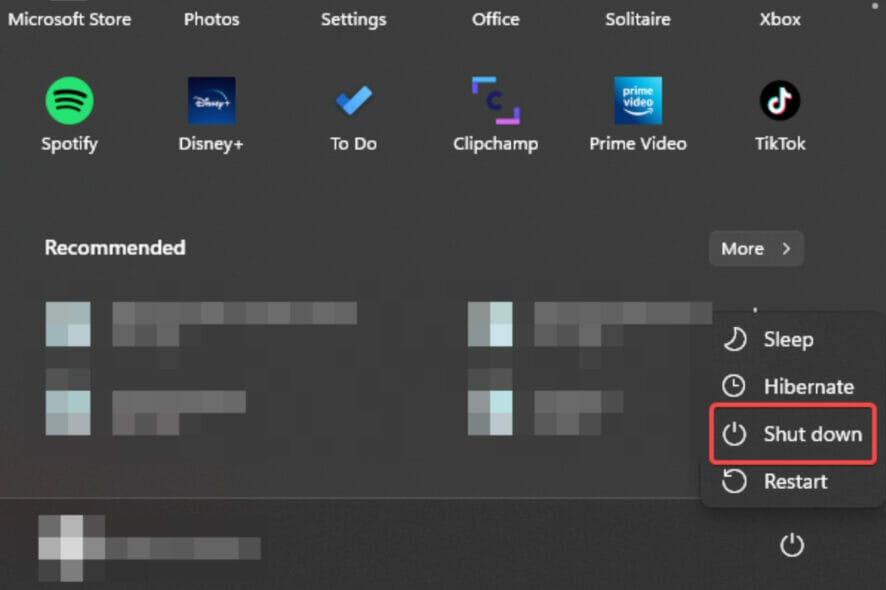
If your Dell XPS 13 won’t shut down, you are not alone. This issue has been on for years and it seems Dell has not done anything significant to permanently fix the problem.
Many users across forums especially Dell’s own website bitterly complained about the issue but for an unknown reason, the company usually request users to private chat its support for a guide on how to fix it.
How do I turn off my Dell XPS 13?
1. Disable the fast startup option
- Open Windows search by pressing Windows key + Q.
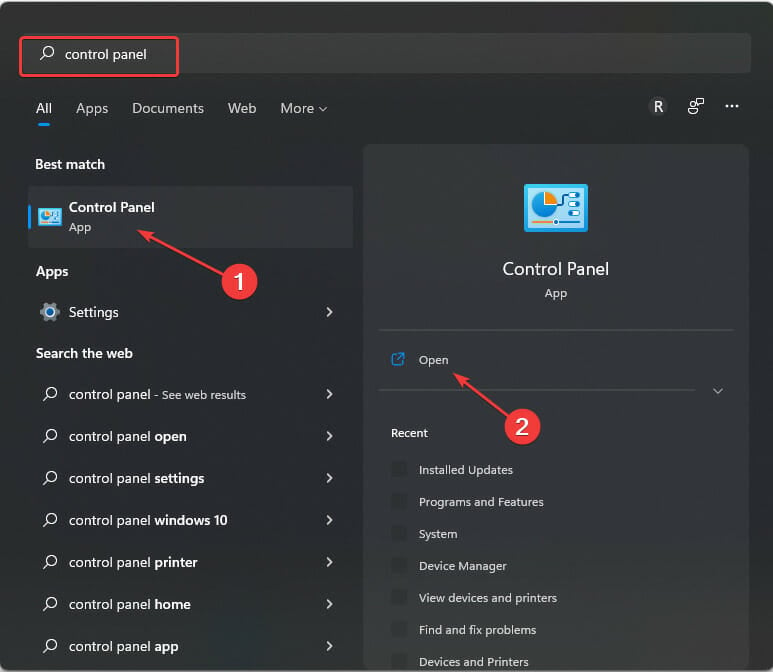
- Type control panel. Select Control Panel in the list of results. Click Open to launch.
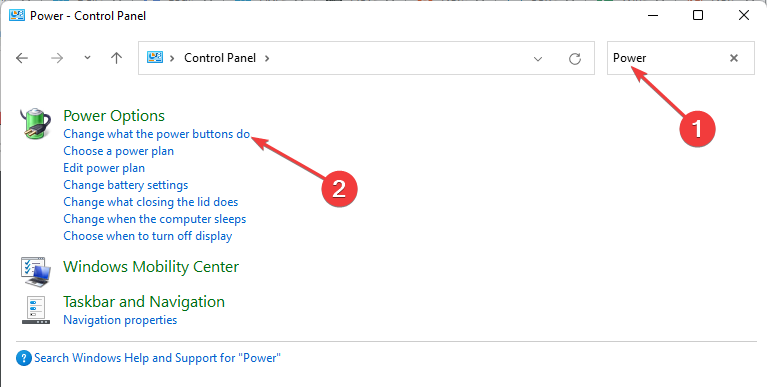
- Type Power in the Search Box. Next, select Change what the power buttons do.
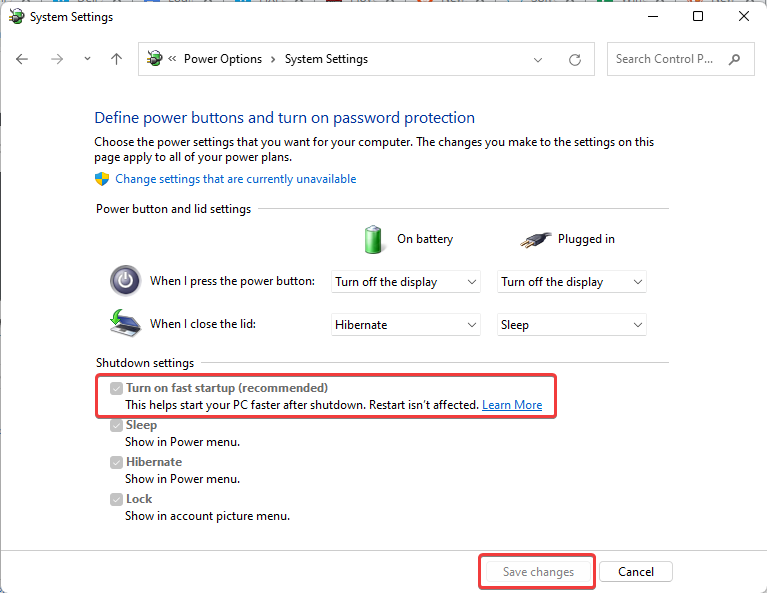
- Tick Turn on fast startup (recommended) if not yet selected. After that, Save changes.
2. Turn off Wake on LAN
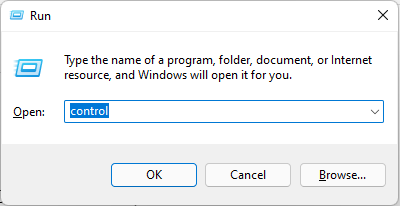
- Open Control Panel by pressing Windows key + R. Then type Control and next, press Enter.
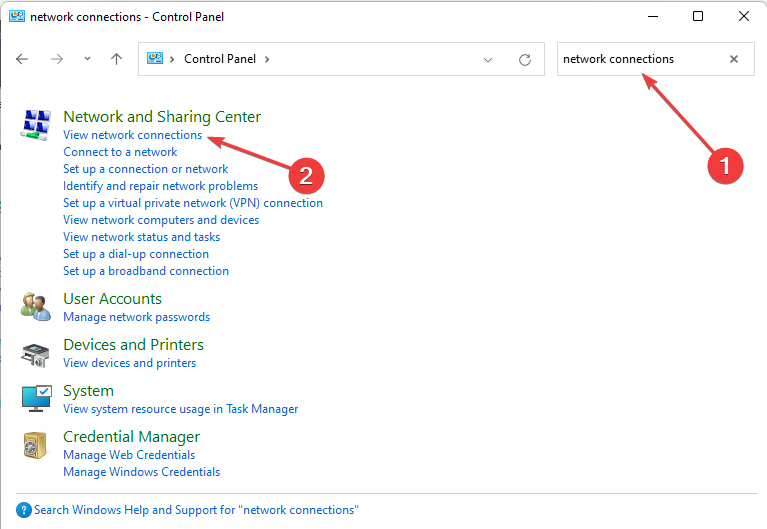
- Type network connections. Then click on View network connections.
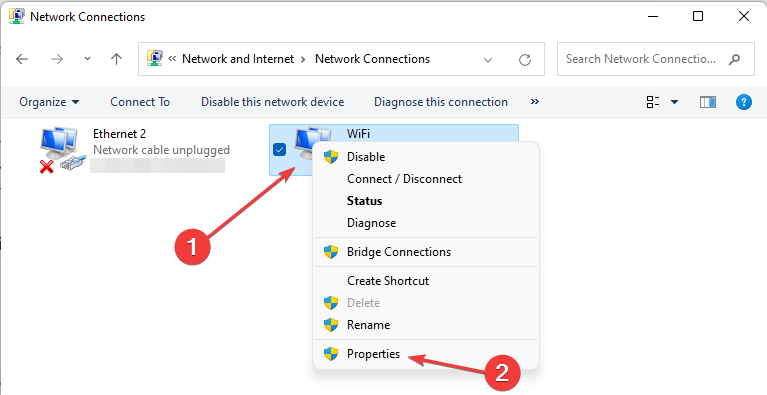
- Right-click on the current network, usually WiFi. Next, right-click on Properties.
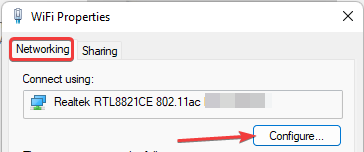
- With Networking selected, click on the Configure button.
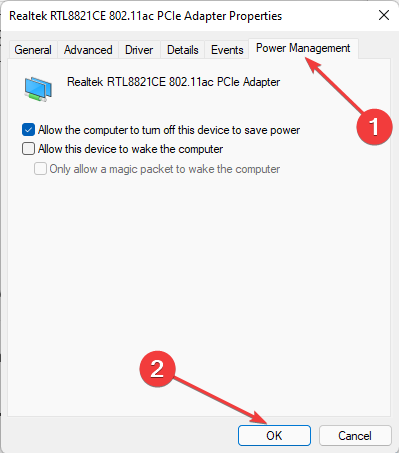
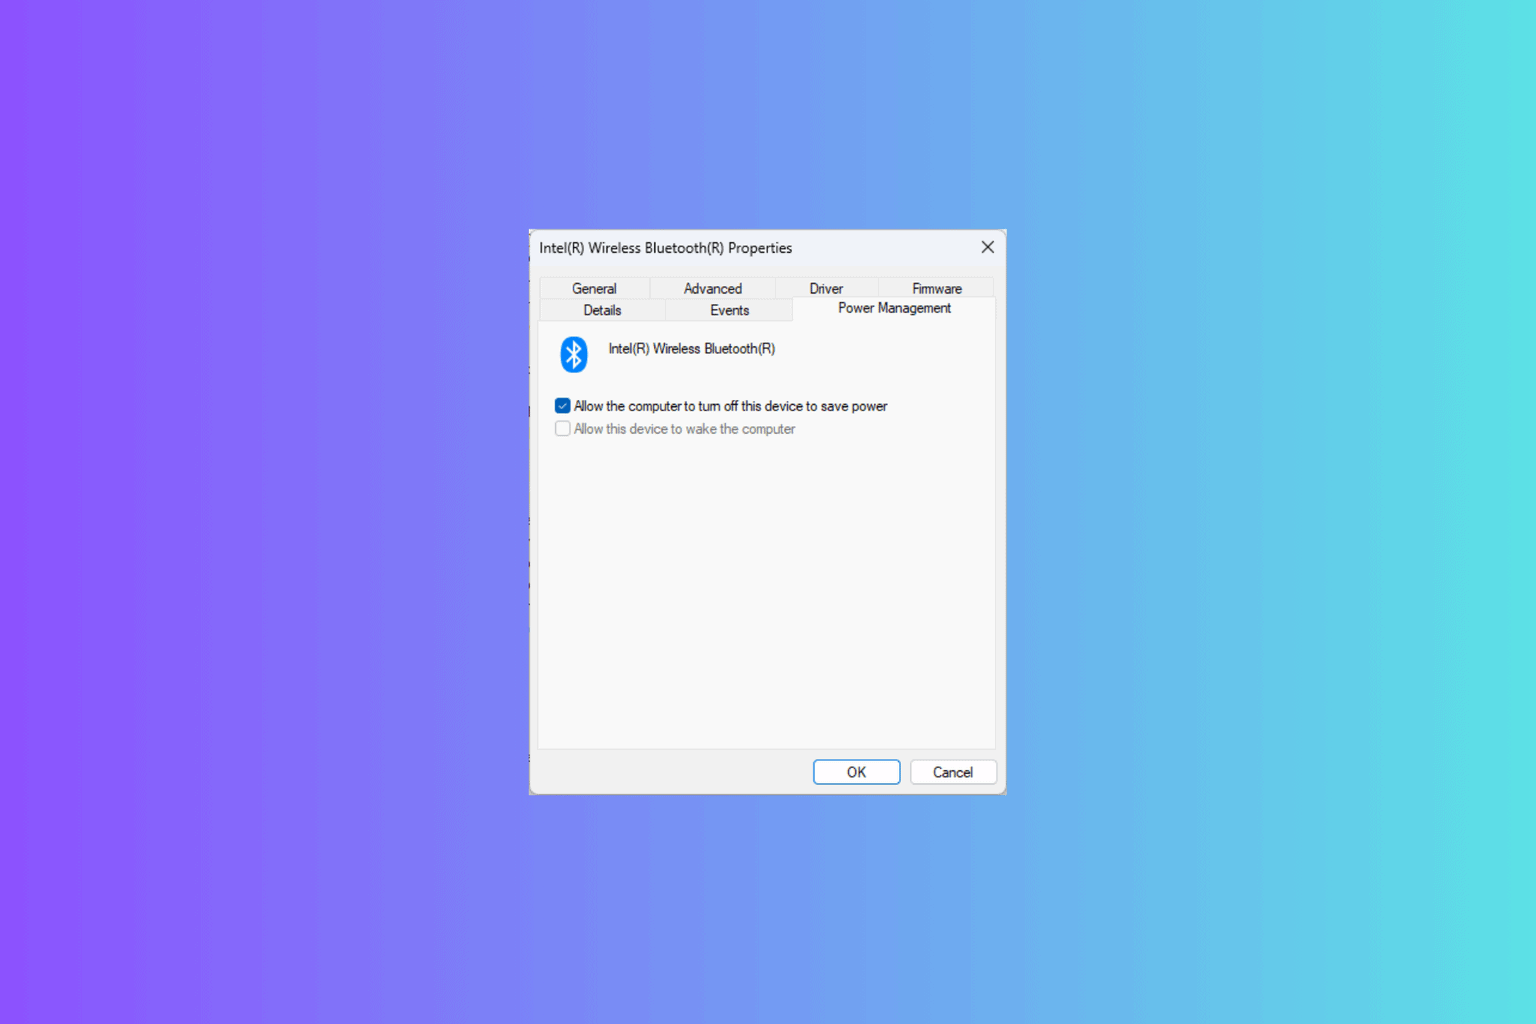
- Select Power Management. Make sure the Allow the computer to turn off this device to save power option is ticked. After this, click on OK.
3. Perform a hard reset
- Unplug all connected peripherals such as a mouse, keyboard, etc.
- If the power plug is connected, unplug it from the unit.
- Shut down the computer by holding the Power Button until off. Hold more for 30 seconds to drain any residual power from the motherboard.
- Boot system with the Power Button.
- Wait until the boot is complete, then try shutting down normally to check if the Dell XPS 13 won’t shut down.
4. Run troubleshooter
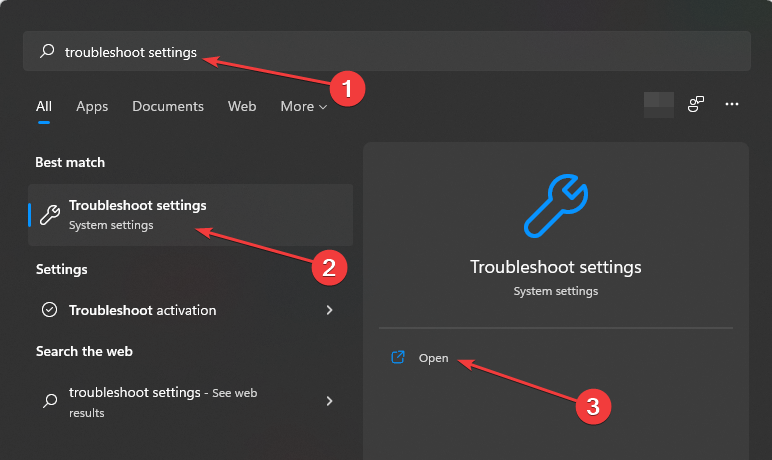
- Open Windows Search by pressing the Windows key + Q.
- Type troubleshooter settings in the Search Box. Next, select Open.
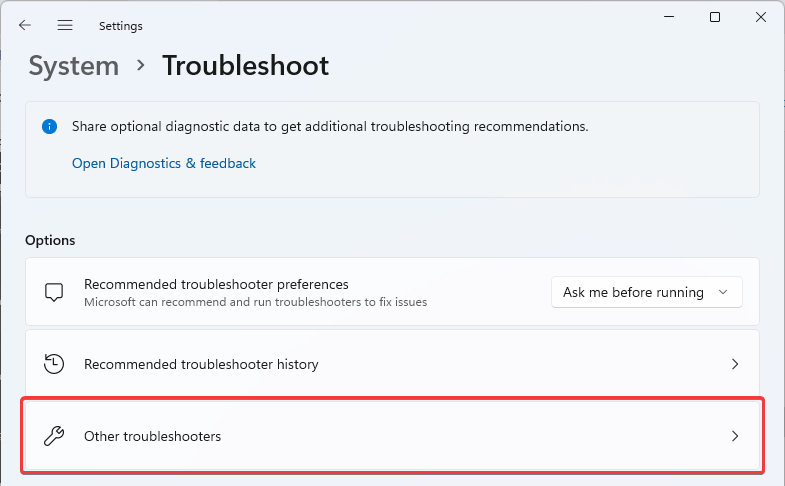
- If no Recommended troubleshooter preferences are displayed, select Other troubleshooters.
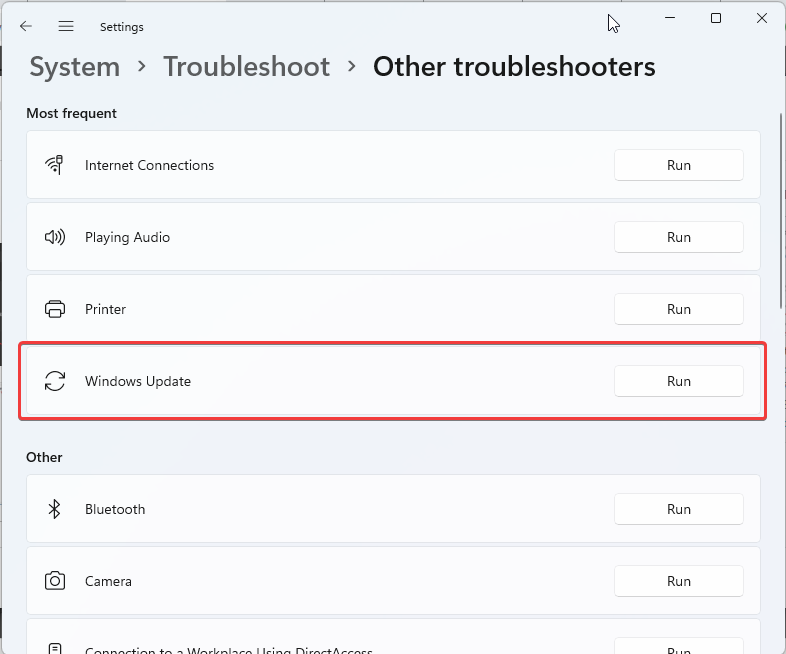
- Select Run for Windows Update.
5. Tweak the registry
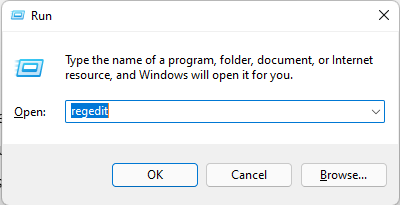
- Open Run by pressing Windows key + R. type regedit.
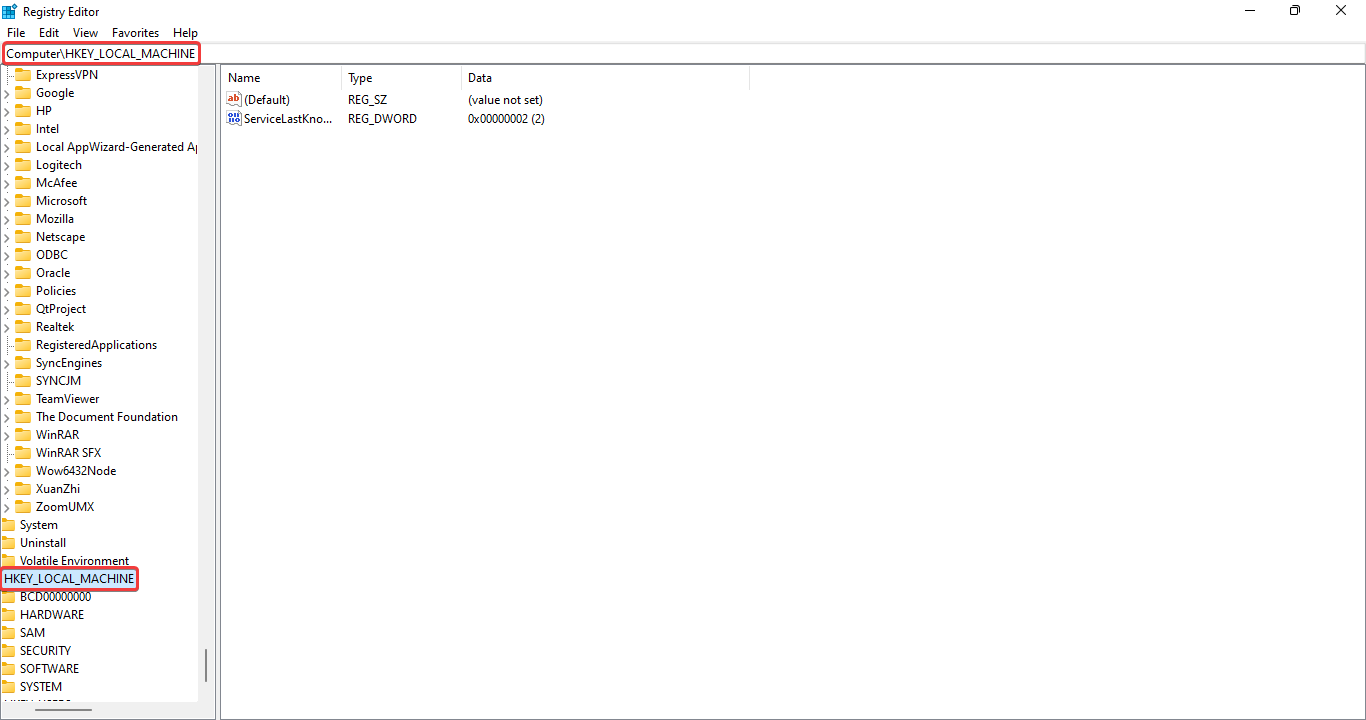
- Type the folder below or copy and paste it into the Address Box:
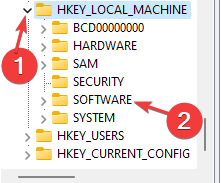
HKEY_LOCAL_MACHINE - Click on the small arrow beside the HKEY_LOCAL MACHINE folder. Next, do the same for the SOFTWARE folder.
- Find and locate the Microsoft folder. Expand it, and scroll to locate the Windows NT folder. Expand the folder to locate CurrentVersion.
- Scroll to find and locate Winlogon. Expand it and at the same time, click on it. This will display new files in the panel on the right.
- Check if PowerdownAfterShutdown is listed in the panel.
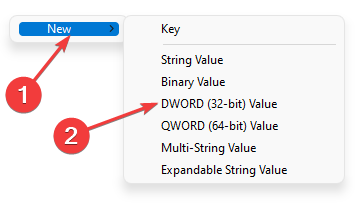
- If not, right-click on an empty space. Choose New. Next, select DWORD. Rename the DWORD as PowerdownAfterShutdown. Double click on the newly created file. Next, type 0 for the Data value.
- Exit the Registry.
- Restart your system.
By this time, using any of the methods we have taken you through above, the issue with your Dell XPS 13 should have been solved. The system can now be shut down successfully without using the power button to force it.
Those who are experiencing Dell XPS 15 shutdown issues can read our guide to fix it, in case the solutions discussed in this article don’t work for you.
Don’t hesitate to share in the comment section if you are able to solve this problem using another method.




User forum
0 messages