Black Screen after Disk Cleanup: 5 Ways to Fix it
Performing a system restore is the easiest fix
![]() 4 min. read
4 min. read
![]() Published on
Published on
Share this article
Improve this guide
Read our disclosure page to find out how can you help Windows Report sustain the editorial team. Read more

While it’s considered safe to run Disk Cleanup to clear storage space on the drive, some users have reported encountering a black screen either mid-way or after completion of the process!
A black screen after Disk Cleanup appears when critical system files or files responsible for booting Windows inadvertently get deleted during the process.
When you are stuck on a black screen, the first option is to wait and verify whether the cleanup utility is still running. For some, Disk Cleanup took 8-10 hours to run completely. Also, disconnect all non-critical peripherals, leaving just the mouse and keyboard, and then restart the computer.
What can I do if Disk Cleanup causes a black screen?
1. Run the SFC scan and DISM
- On the Advanced Options screen, click on Command Prompt.

- Select your user account from the list and then enter the password for it.
- Once the Command Prompt loads, paste the following DISM commands individually and hit Enter after each:
DISM /Online /Cleanup-Image /CheckHealthDISM /Online /Cleanup-Image /ScanHealthDISM /Online /Cleanup-Image /RestoreHealth - Next, execute this command to run the SFC scan:
sfc /scannow
- Reboot the PC and check for improvements.


Running the DISM commands and SFC scan will replace all missing system files, which is most likely the reason you are getting a black screen after running Disk Cleanup. However, if the problem is more deep-rooted, the two may fail!
2. Perform a system restore
- From the Advanced Options, choose System Restore.

- Wait for System Restore to initialize, and then click on Next.
- Pick a restore point from the list created before you ran Disk Cleanup (preferably the oldest), and click on Next.
- Finally, verify the restore details and click on Finish.

- Wait for the restore to complete, then boot Windows and verify whether it still shows a black screen.


3. Reset the PC
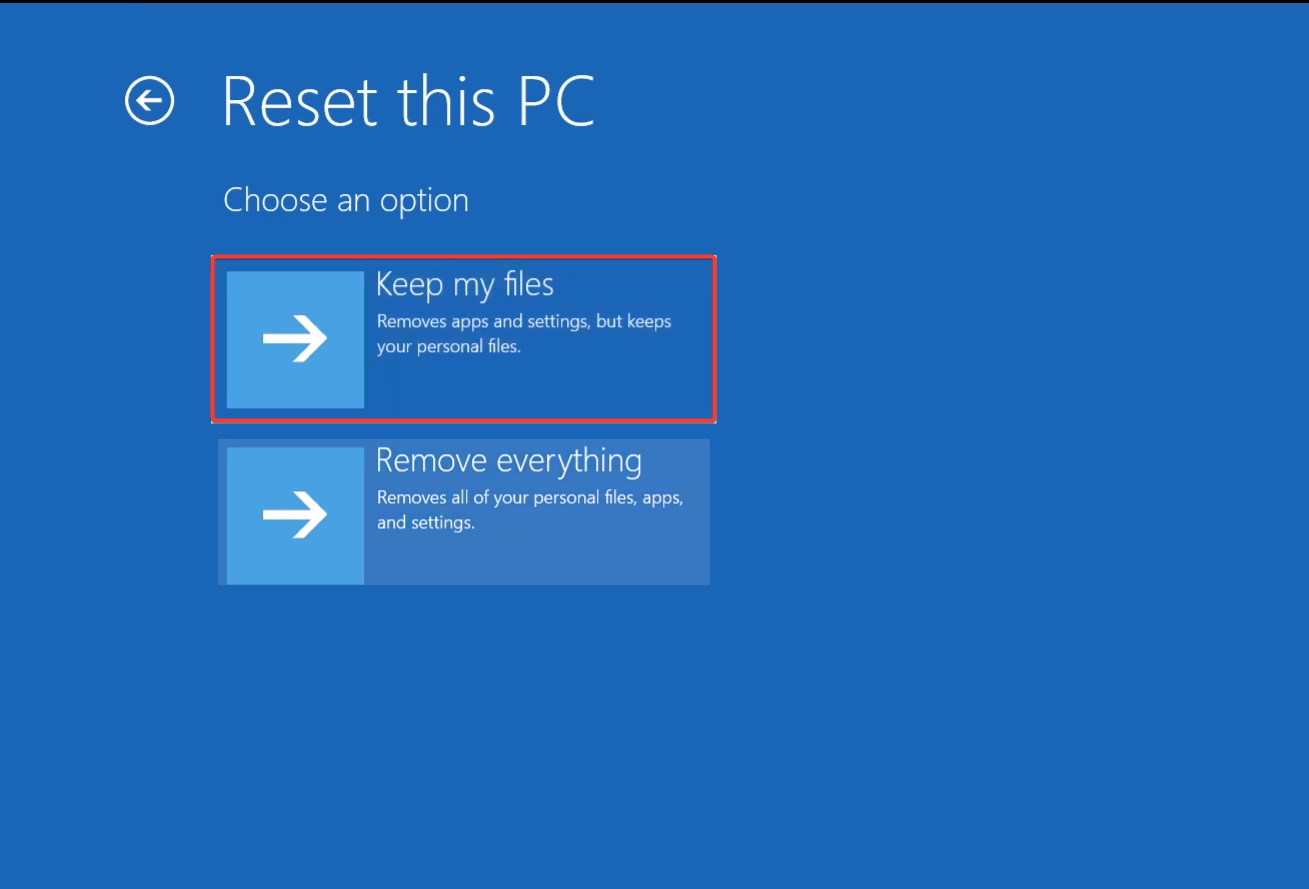
- On the Startup Repair screen, click on Advanced options, then select Troubleshoot, and finally choose Reset this PC.

- Choose the Keep my files option.

- Follow the on-screen instructions to complete the process and then check for improvements.
- If you still get a black screen after booting Windows, perform a reset again, but this time, choose Remove everything.

A system reset is an effective fix against all sorts of complex issues when you can’t boot Windows. It’s the same as reinstalling Windows, except that you won’t have to do so manually. Instead, Windows will automatically reinstall from the PC itself!
4. Manually reinstall Windows
If you can’t access the Recovery Mode and all other solutions fail to work, reinstall Windows 11. To do that, you will have to download the Media Creation Tool/Installation Media from Microsoft’s official website, and then create a bootable USB drive. All this will be done on another working PC.
Next, you simply need to connect the USB drive to the affected PC, boot through it, run the Windows Setup, and follow the on-screen instructions to complete the process.

Although it may sound tricky, installing Windows from a bootable USB is quite straightforward, given you go with the default configuration!
5. Reflash the BIOS
In a few cases I checked, a BIOS update was installed while the Disk Cleanup utility was running, leading to BIOS corruption, which subsequently triggered a black screen on boot.
If that’s the situation with you, the only option is to reflash the BIOS. Again, it would require an external USB drive loaded with the BIOS (usually available for download on the manufacturer’s official website).
Since the process is different for each PC, I recommend you check the official sources for the exact steps. Even a small mistake here can render your PC unusable!
One of these fixes should have got the PC up and running from the black screen after Disk Cleanup. I would like to reiterate that Disk Cleanup is a safe built-in utility, and even though it triggered a black screen once, future occurrences are highly unlikely.
Besides, if you want a safer tool, discover our top picks for hard drive cleaners that will help you clear a significant amount of disk space in no time!
Which fix worked for you? Share with our readers in the comments section.


User forum
0 messages