Diskpart Failed to Clear Disk Attributes: 4 Ways to Fix
Format the RAW deive to FAT32 if you encounter this issue
4 min. read
Updated on
Read our disclosure page to find out how can you help Windows Report sustain the editorial team Read more
Key notes
- The diskpart failed to clear disk attributes error indicates attributes on the disk cannot be cleared.
- This error can occur due to disk format issues and restricted access.
- You can fix it by running diskpart as an administrator and formatting the RAW drive to FAT32.
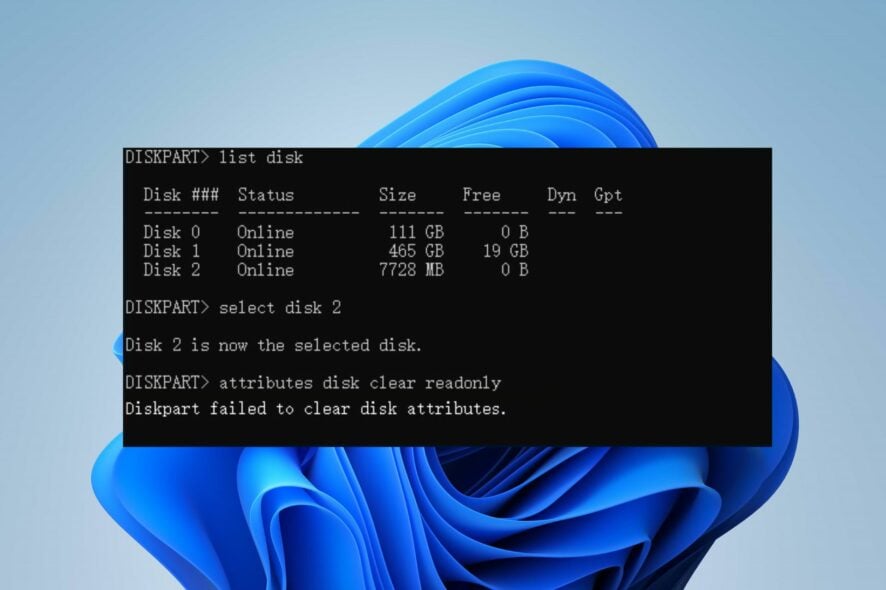
Users can run into the diskpart failed to clear disk attributes when using the Diskpart utility. The error means the disk is write-protected, and you cannot write any data on it. However, we’ll discuss the basic steps for fixing the error.
Likewise, we have a detailed guide on removing write protection from your pen drive on Windows 11.
Why did diskpart failed to clear disk attributes?
The Diskpart failed to clear disk attributes error can occur due to various reasons. Here are a few possible causes:
- Disk or hardware issues – The disk itself may have physical or hardware issues that prevent DiskPart from clearing the disk attributes, including problems like bad sectors, disk corruption, or a failing disk.
- Disk Write potection – Write protection is often enabled through physical switches or settings on the disk itself or via software settings. Removing write protection can fix the issue.
- Disk in use or locked – If another process or program currently uses the disk, it may be locked, preventing DiskPart from changing its attributes.
- Insufficient permissions – DiskPart must be run with administrative privileges to perform certain operations, including clearing disk attributes. So, insufficient permissions can cause an error.
- Incompatible disk or format – DiskPart may fail to clear attributes if the disk is formatted in an incompatible file system that DiskPart cannot handle.
- File system errors – If the disk has file system errors or inconsistencies, DiskPart may encounter difficulties in clearing disk attributes and prompt the Diskpart failed to clear disk attributes error to appear.
These causes may vary depending on the circumstances. Fortunately, we’ll take you through some effective fixes for the error in the next section of this article.
What can I do if diskpart failed to clear disk attributes?
Observe the following preliminary checks before trying any advanced troubleshooting steps:
- Ensure the disk is not locked – Some USB devices and SD card readers have a write-protected physical switch that disables the writable options on the storage device. Check the drive and turn off the toggle to make the disk writable.
- Turn off background apps – It will close any applications or background processes using the disk, allowing it to clear the disk attributes.
If the above checks can fix the issue, proceed with the solutions below:
1. Run diskpart as an administrator
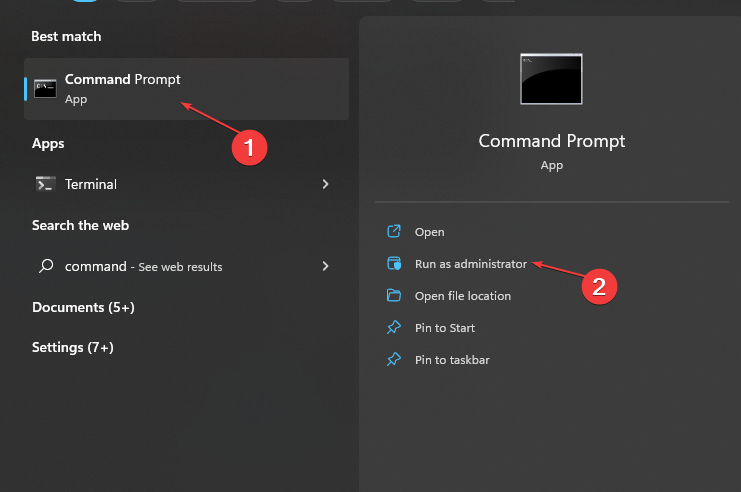
- Left-click the Start button, type Command Prompt, and select the Run as administrator option.
- Click Yes on the User Account Control (UAC) prompt.
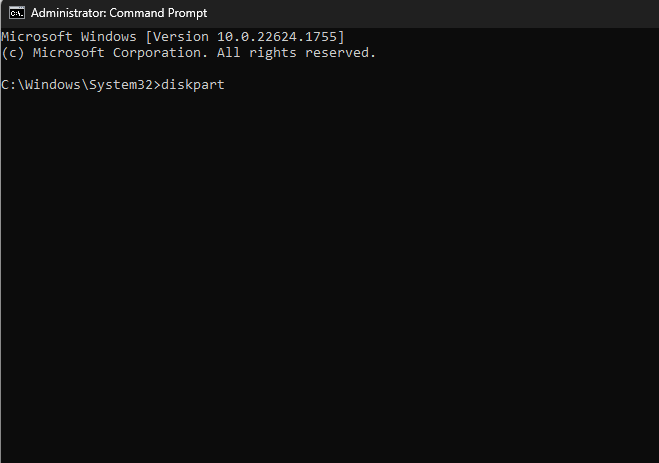
- Type the following in the command bar and press Enter:
diskpart - Try performing the task that prompted the diskpart failed to clear the disk attributes error and check if it persists.
The above steps will run Diskpart with administrative privileges and allow you to modify the disks and volumes.
2. Run the CHKDSK command
- Left-click the Start button, type Command Prompt, and click the Run as administrator option.
- Click Yes on the User Account Control prompt.
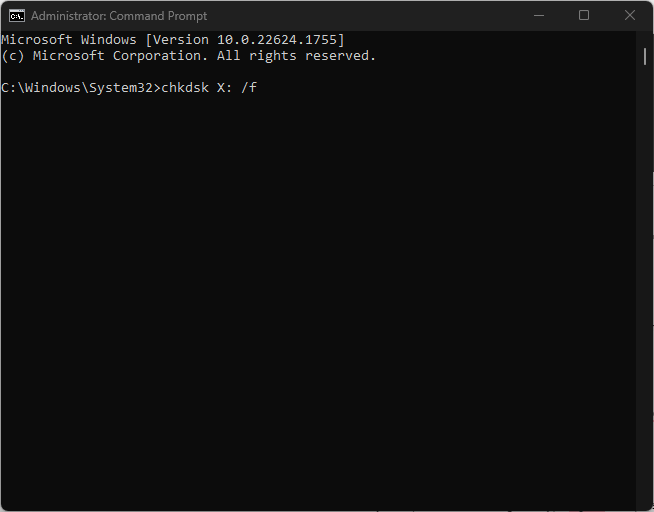
- Type the following commands and press Enter:
chkdsk X: /f - Replace X with the drive letter of the disk.
The CHKDSK (Check Disk) command will check the disk for errors causing the diskpart issues and attempt to fix them. Check our guide on what to do if Command Prompt keeps crashing on your PC.
3. Modifying WriteProtected key in Registry Editor
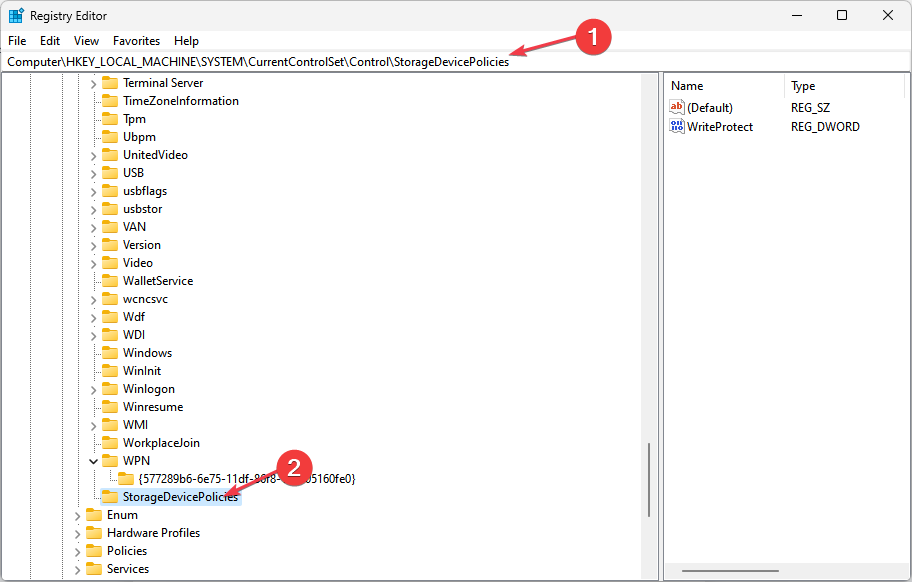
- Press the Windows + R keys to open the Run dialog box, type regedit, and press Enter to open the Registry Editor.
- Navigate to the following file path:
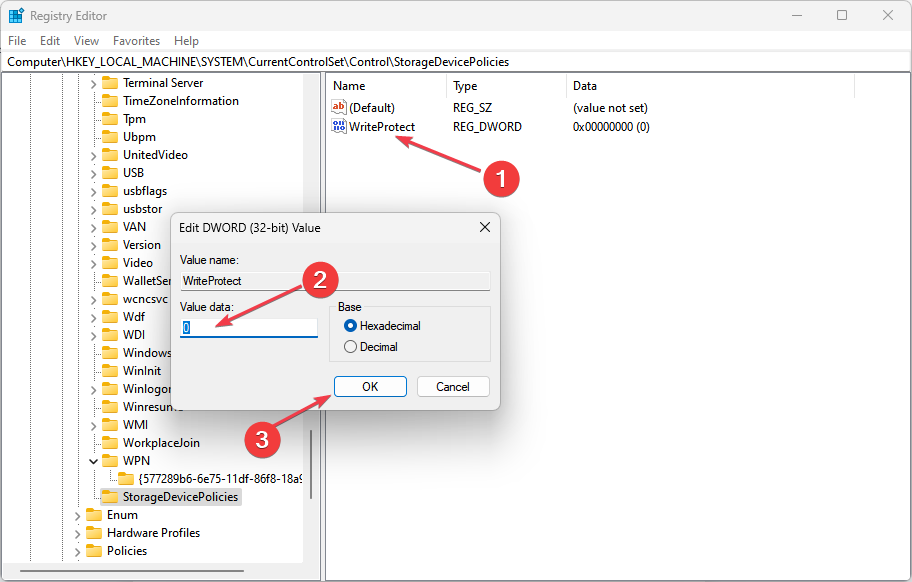
HKEY_LOCAL_MACHINE\SYSTEM\CurrentControlSet\Control\StorageDevicePolicies - Locate the WriteProtect entry on the left side of the screen, double-click on it and change its Value data to 0, then click OK to save changes.
- Restart your computer and check if the error appears on the disk.
Tweaking the registry entry allows you to disable the WriteProtect key to modify the disk.
4. Change the drive format to FAT32
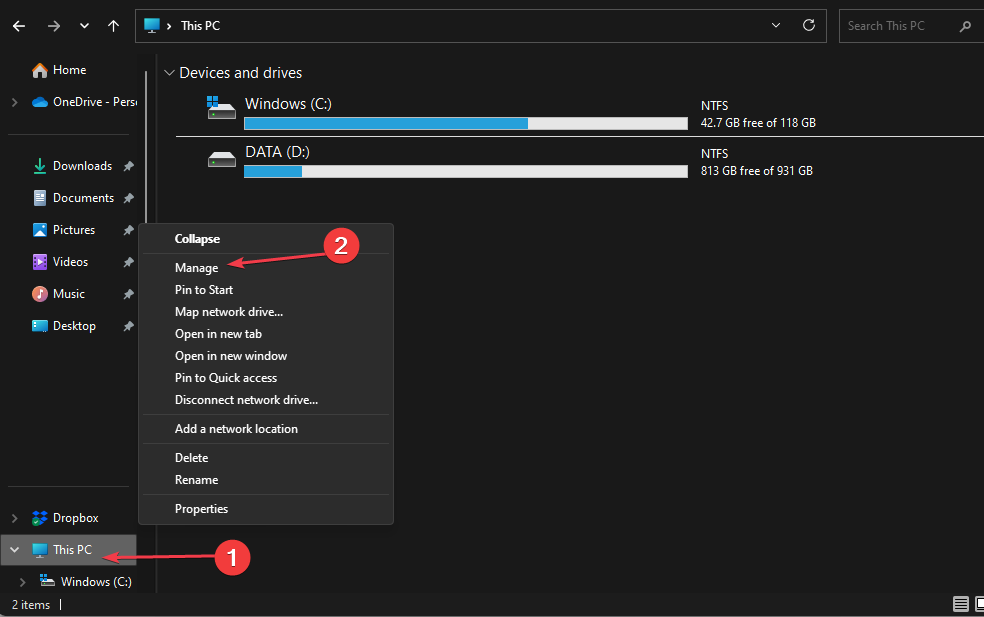
- Press the Windows + E key to open File Explorer.
- Right-click This PC or My Computer and select Manage from the drop-down.
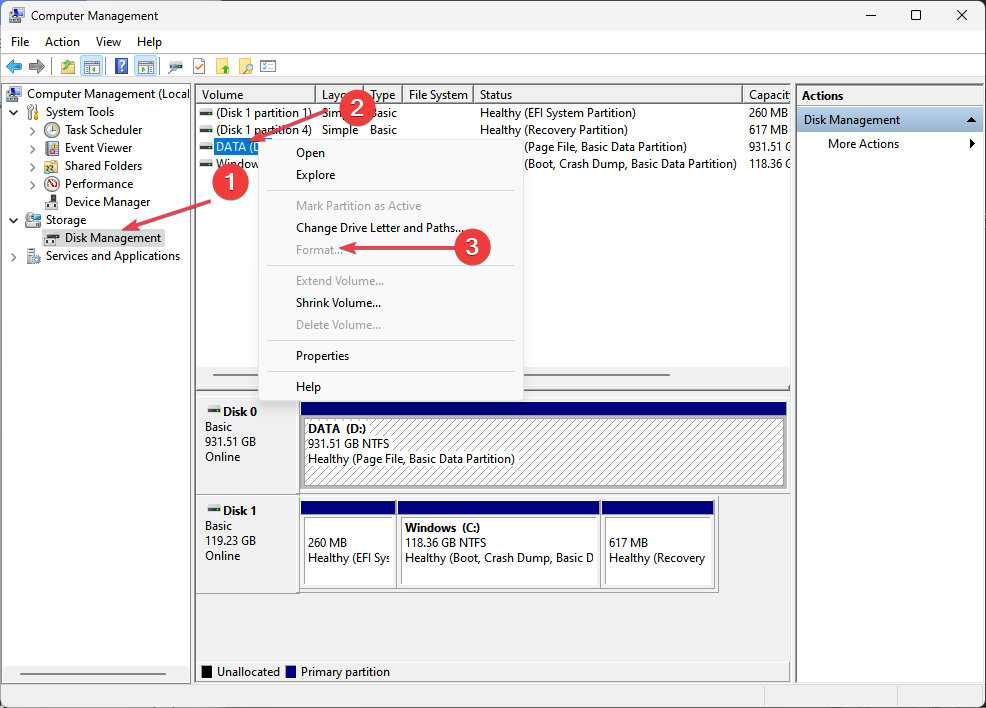
- Click on Disk Management from the left lane.
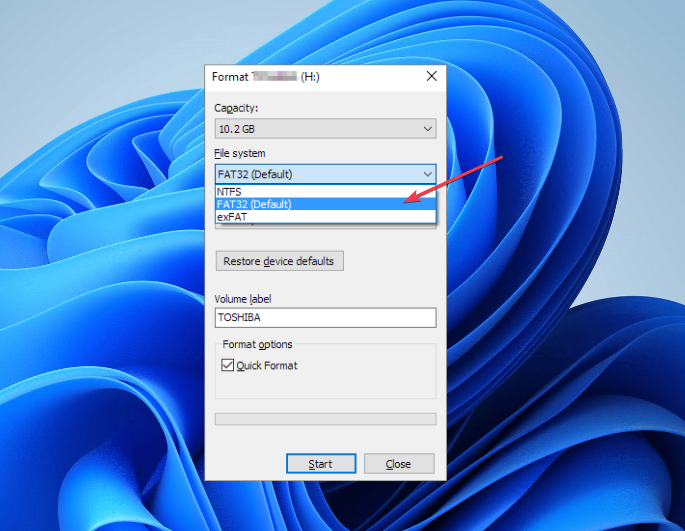
- Right-click on the RAW drive and select Format from the context menu.
- Click the File System tab, set it to FAT32, then click OK.
Formatting the drive to FAT32 can fix the issue.
Check our comprehensive article about how to format USB drives to FAT32 on Windows PCs for more steps.
In conclusion, you may be interested in our detailed guide about fixing USB drive detected but not accessible on Windows PCs.
If you have further questions or suggestions regarding this guide, kindly drop them in the comments section.
User forum
0 messages