How to Remove Write Protection from Pen Drive
This is how you remove the write protection from your pen drive
Key notes
- You will want to remove write protection from your pen drive when you have to copy new files or delete the existing ones.
- A pen drive can become write-protected if the physical security lock is turned on or BitLocker is enabled on your computer.
- Modifying the read-write property of your pen drive and disabling the BitLocker is a proven method to remove write protection from a pen drive or USB.
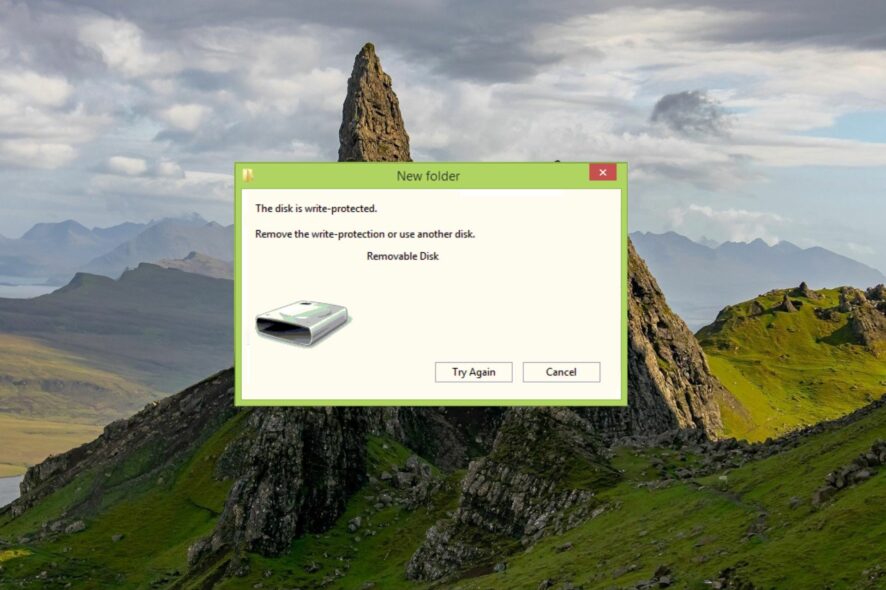
You may encounter a prompt that says this disk is write-protected when you attempt to modify the contents of a pen drive. This can be frustrating as you are prohibited from writing, deleting, or changing any data on the pen drive.
You may initially think that the pen drive is no longer usable, but surprisingly, it is possible to remove the write protection from your pen drive. Let’s find out how.
Why is my pen drive write-protected?
Generally, Pen drives or USBs are write-protected to prevent someone from copying or modifying the files. However, there can be other reasons as well that you should take into account:
- Individual files have read-only attributes – A pen drive may become write-protected if a file is marked as read-only and cannot be deleted.
- BitLocker is enabled – If BitLocker is turned on, you won’t be able to make changes to files and locked pen drives.
- No storage space – Insufficient disk space on the USB or pen drive can also cause a write-protected error.
- Write protection switch is enabled – The physical write protection switch on the pen drive has been enabled accidentally.
- Virus or malware infection – A virus infection or malware attack on the pen drive can also make it write-protected.
So, if you’re struggling to access a write-protected pen drive, you should know that there are several methods to remove write protection from your pen drive or USB. This guide lists the most effective ones and explains the step-by-step procedure.
How do I remove write protection from the pen drive?
Before employing the software-related workaround listed below, make sure to perform the following:
- Look for the physical write protection lock and move it to the off position in case your pen drive has one.
- Scan your pen drive for viruses and malware infections using Windows Defender or any third-party antivirus.
If these simple actions could not remove the write protection from your pen drive, move on to the workarounds listed below.
1. Change pen drive properties
- Insert the pen drive into a USB port on your computer and use the Windows + E shortcut to launch File Explorer.
- Choose This PC from the left navigation pane and locate your pen drive in the list of available drives.
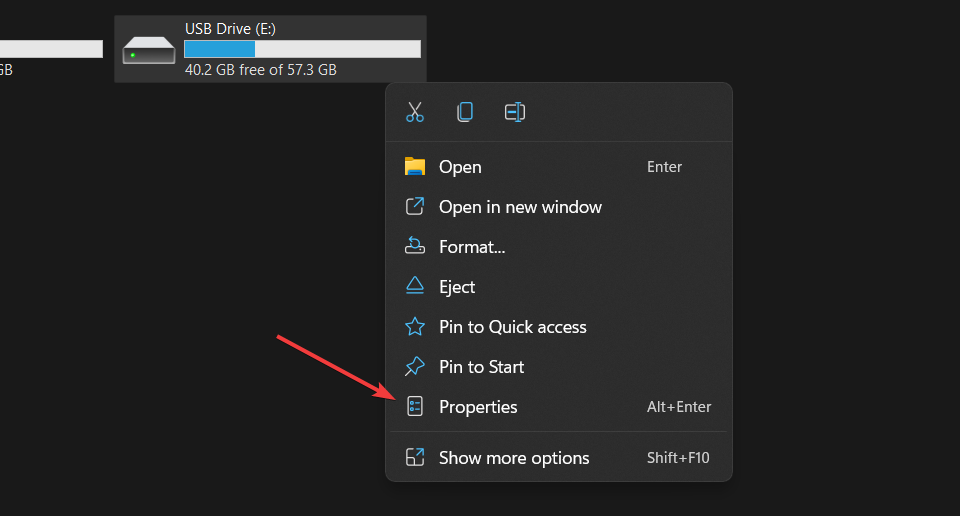
- Right-click your pen drive and select Properties from the context menu.
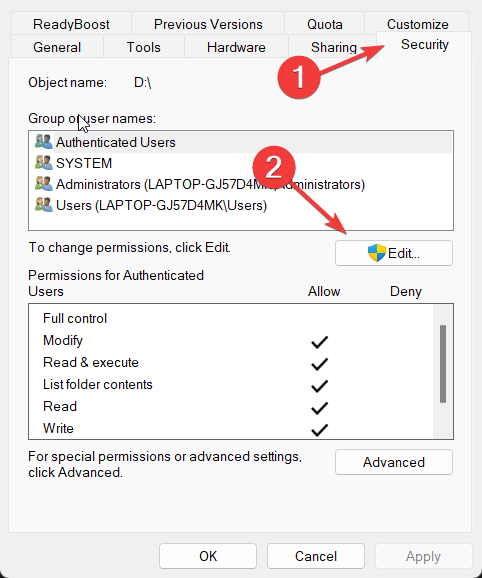
- Switch to the Security tab of the Properties dialog box and press the Edit button to modify the permissions for the pen drive.
- In the permission window, Allow or Deny the permission to perform a write operation for each group and user name.
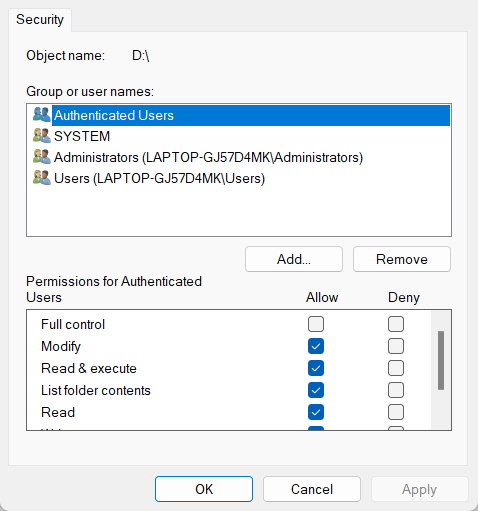
- Click Apply to save the changes and OK to close the Properties window.
Once you’ve changed the read-write properties of the pen drive, it will no longer be write-protected, and you should be able to save, delete, and modify files on the pen drive as needed.
2. Remove read-only attributes using Command Prompt
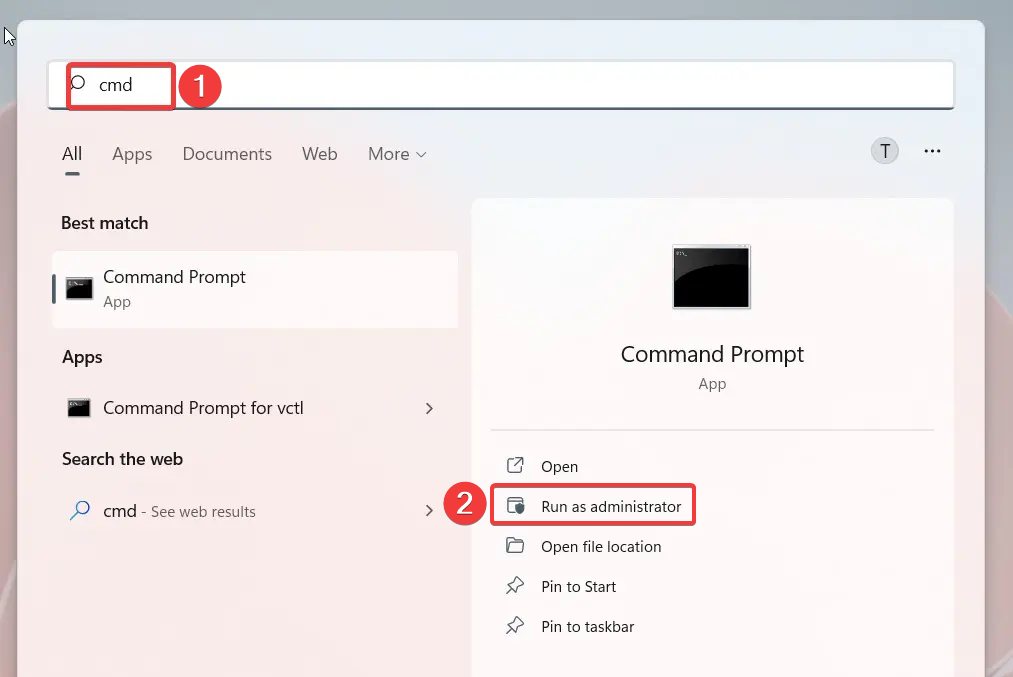
- Press the Windows key to launch the Start menu, type cmd in the search bar on top, and select Run as Adminstrator from the result section.
- Type or paste the following command and press the Enter key to execute it.
Diskpart - Next type the following command to view all the disks connected to the computer and note down the number representing your pen drive.
list disk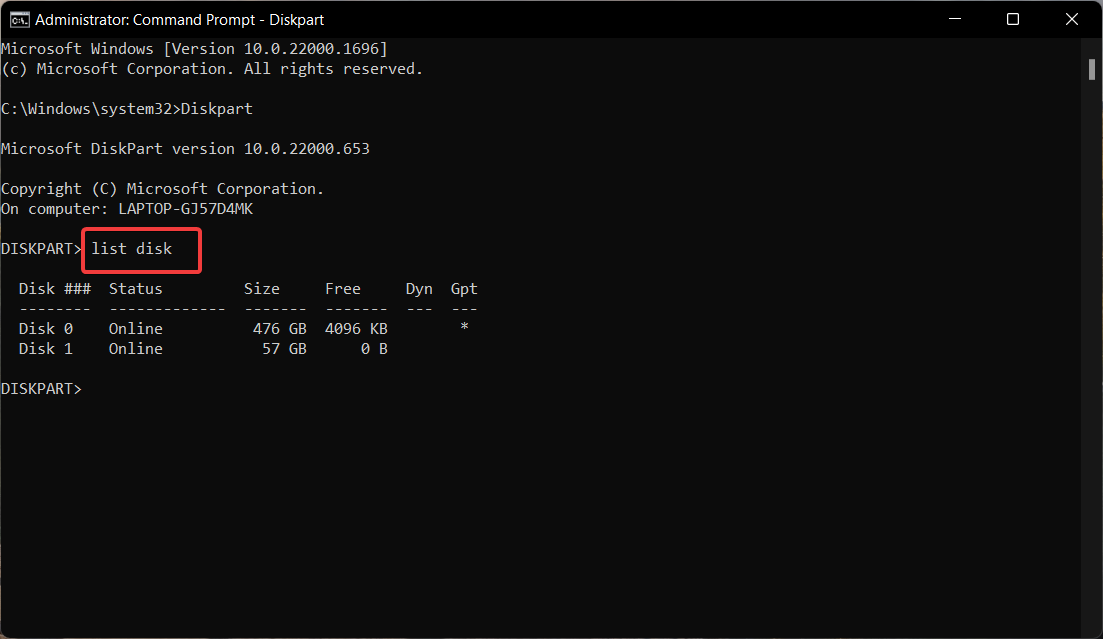
- Execute the following command and replace # with the number you copied previously.
select disk # - Now type the following command to disable the write protection on your pen drive.
attributes disk clear readonly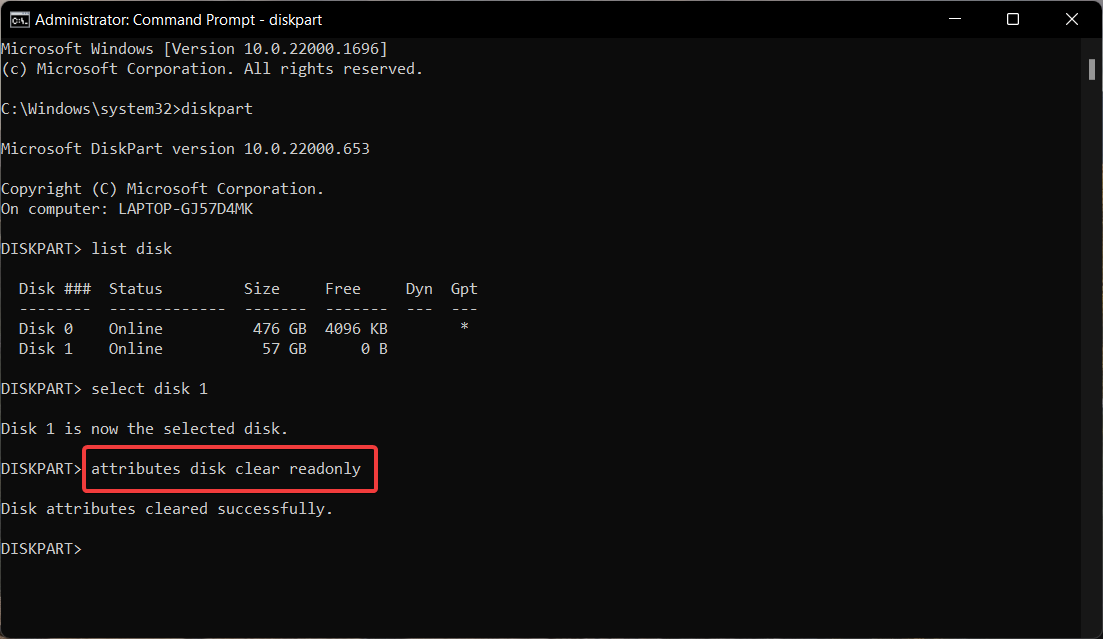
When the disk attributes are cleared successfully, exit the command prompt window. The attribute command in Windows Command Prompt can remove read-only attributes from files or directories.
3. Modify the registry to disable write protection
 NOTE
NOTE
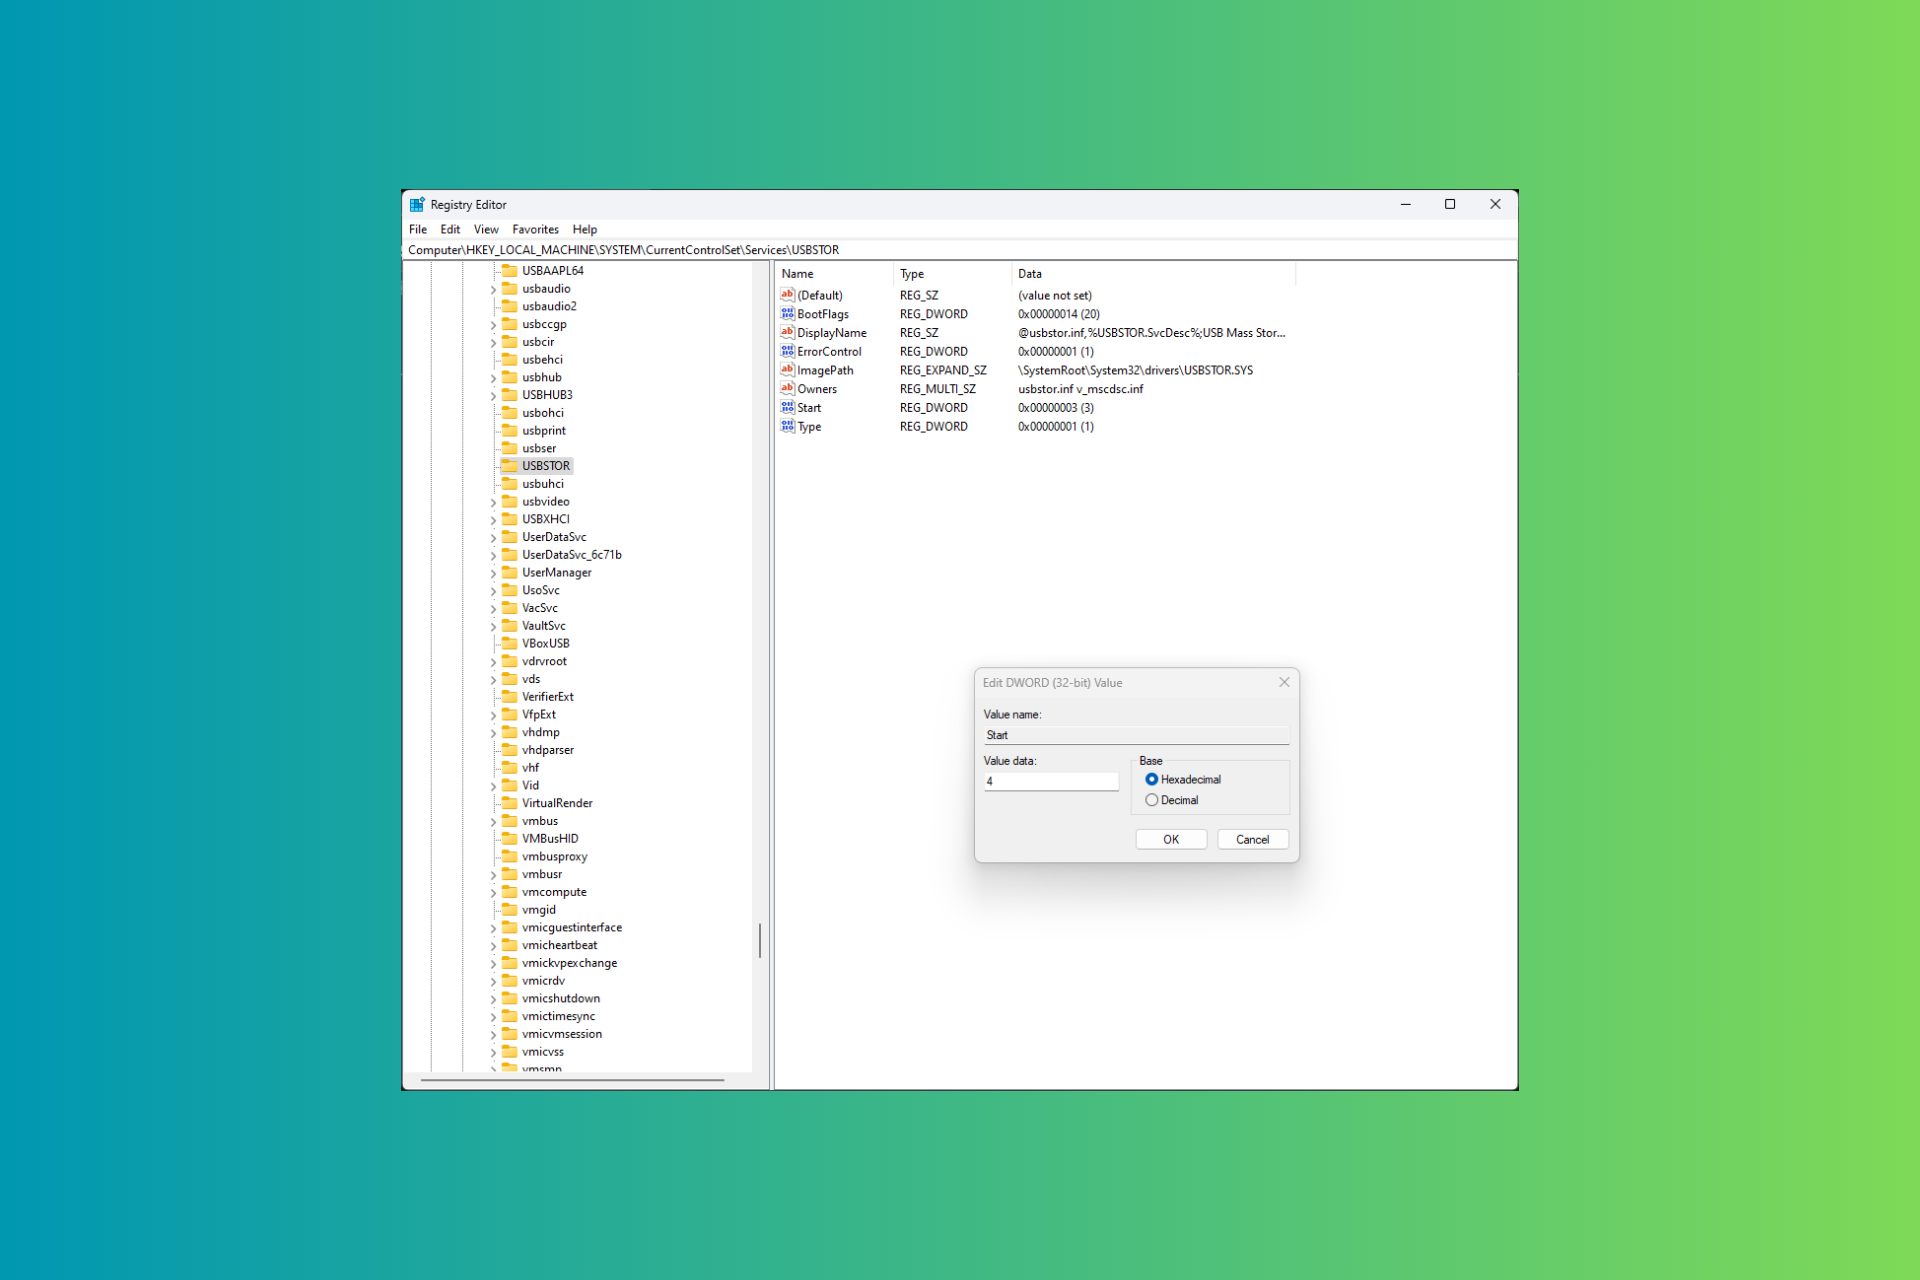
- Launch the Run command window using the Windows + R shortcut key, type the following command in the text box, and press the Enter key.
regedit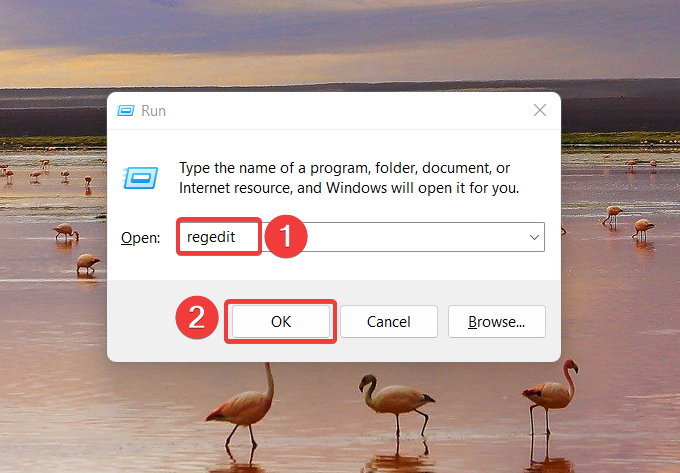
- Type the following path in the address path of the registry path:
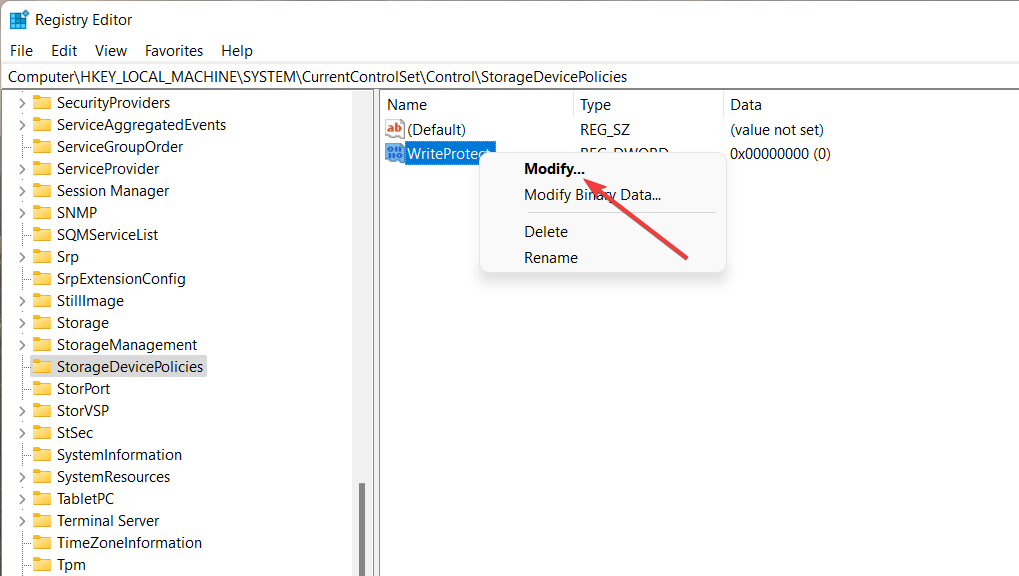
HKEY_LOCAL_MACHINE\SYSTEM\CurrentControlSet\Control\StorageDevicePolicies - Look for the WriteProtect value, right-click it, and choose Modify from the context menu.
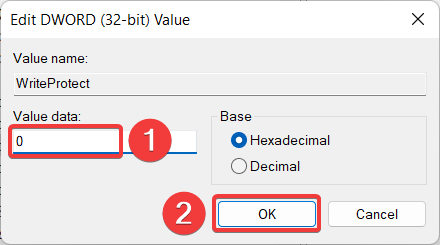
- Assign 0 as the data value instead of 1 and press OK.
Now reconnect your pen drive, and you will see that the write protection is eliminated.
If you don’t see the StorageDevicePolicies folder in Registry, you can create one and then follow the steps above.
4. Disable BitLocker using Windows PowerShell
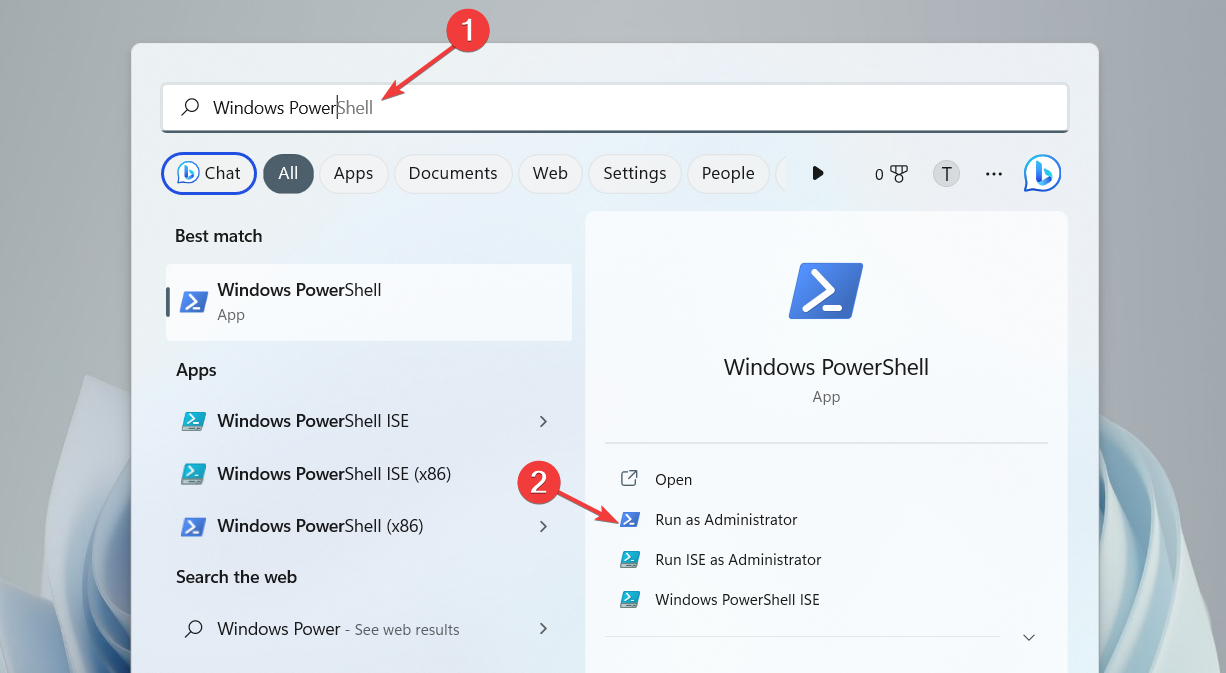
- Press the Windows key to launch the Start menu, type powershell in the search bar on top, and choose Run as Administrator.
- Type or copy-paste the following command and press Enter key to execute it. Make sure to replace E with the letter representing your write-protected pen drive.
Disable-BitLocker -MountPoint "E:”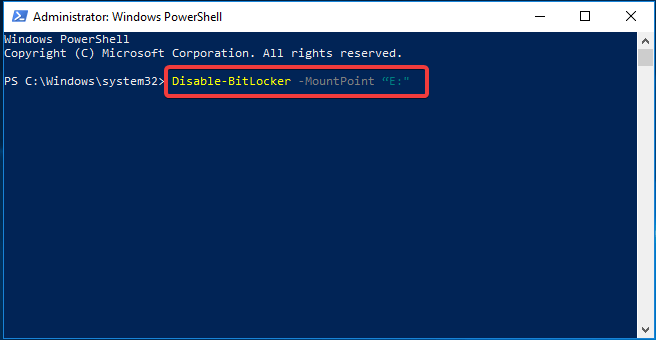
- Exit the command prompt after the BitLocker is successfully disabled on your system.
The decryption process can take several moments, depending on the contents of the pen drive. Once the process is complete, your pen drive will no longer be write-protected.
So that’s how easy it is to remove write protection from a pen drive and perform the write operation as required.
We also recommend reading another guide to repair a Kingston Flash Drive if it has become corrupt.
Let us know in the comments if any of these methods were successful in removing the write-protected limitation from your pen drive.
Read our disclosure page to find out how can you help Windows Report sustain the editorial team. Read more


Improve this guide

User forum
0 messages