DsmSvc: What Is It & How to Fix Its High CPU Usage
Often, corrupt system files could cause this problem
![]() 4 min. read
4 min. read
![]() Updated on
Updated on
Share this article

Improve this guide
Read our disclosure page to find out how can you help Windows Report sustain the editorial team Read more
Key notes
- DsmSvc is a service on Windows PC responsible for managing device installation and setup.
- Corrupt system files and Windows update issues may cause DsmSvc high CPU usage.
- Running an SFC & DISM scan and Windows Update troubleshooter can fix the issue.
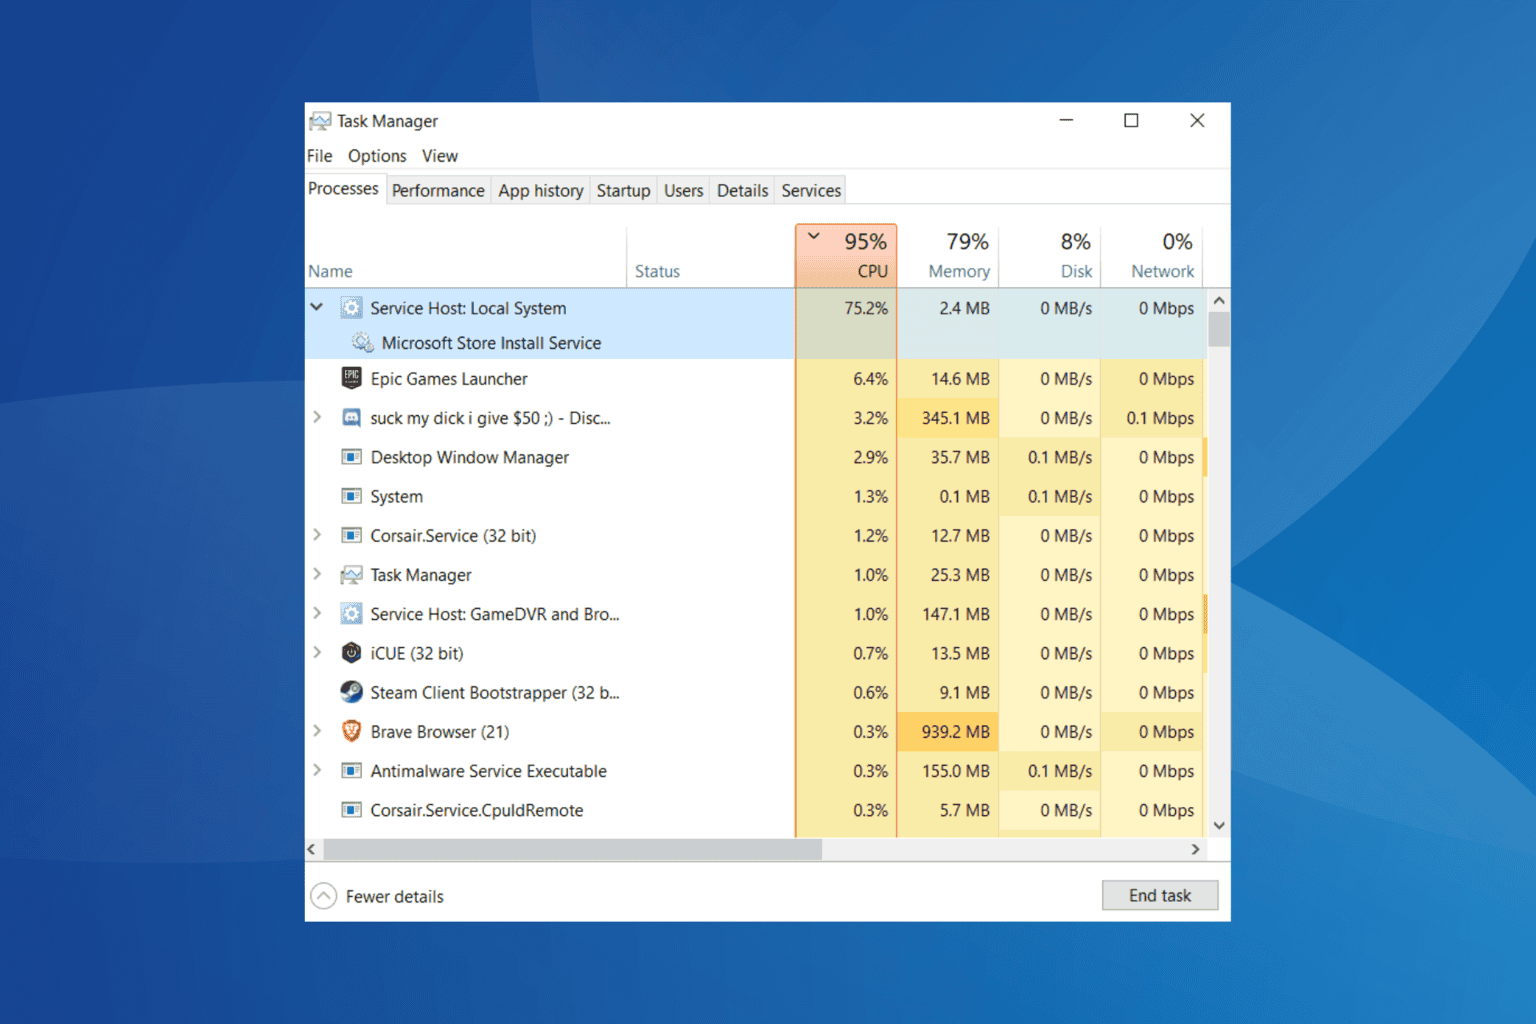
Several services are running on your computer, ensuring every component works as expected. These services are allocated system resources to help them function. However, users report DsmSvc high CPU usage is causing issues with the system performance.
What is DsmSvc?
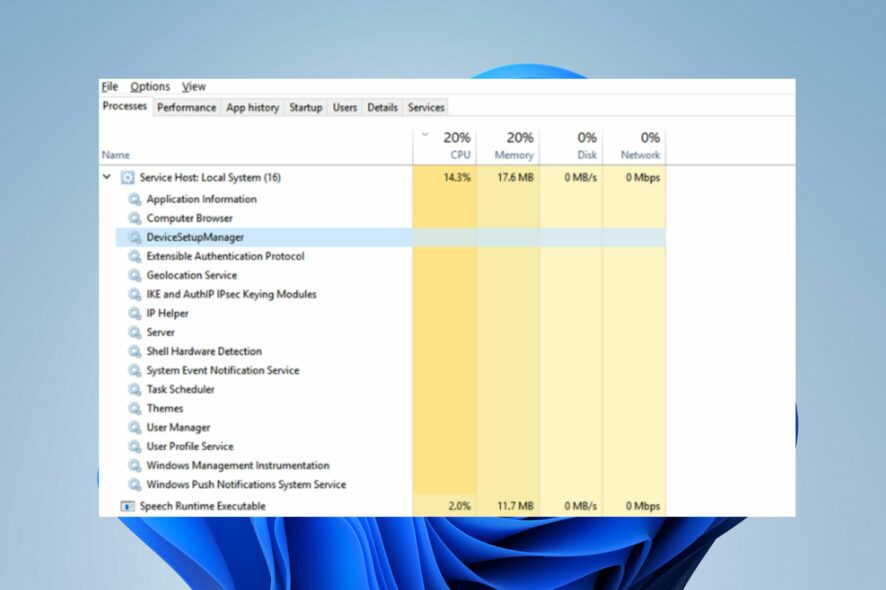
DsmSvc is also known as the Device Setup Manager service. It is a Windows PC service responsible for managing device installation and setup. It ensures devices are installed and configured correctly on the Windows PC.
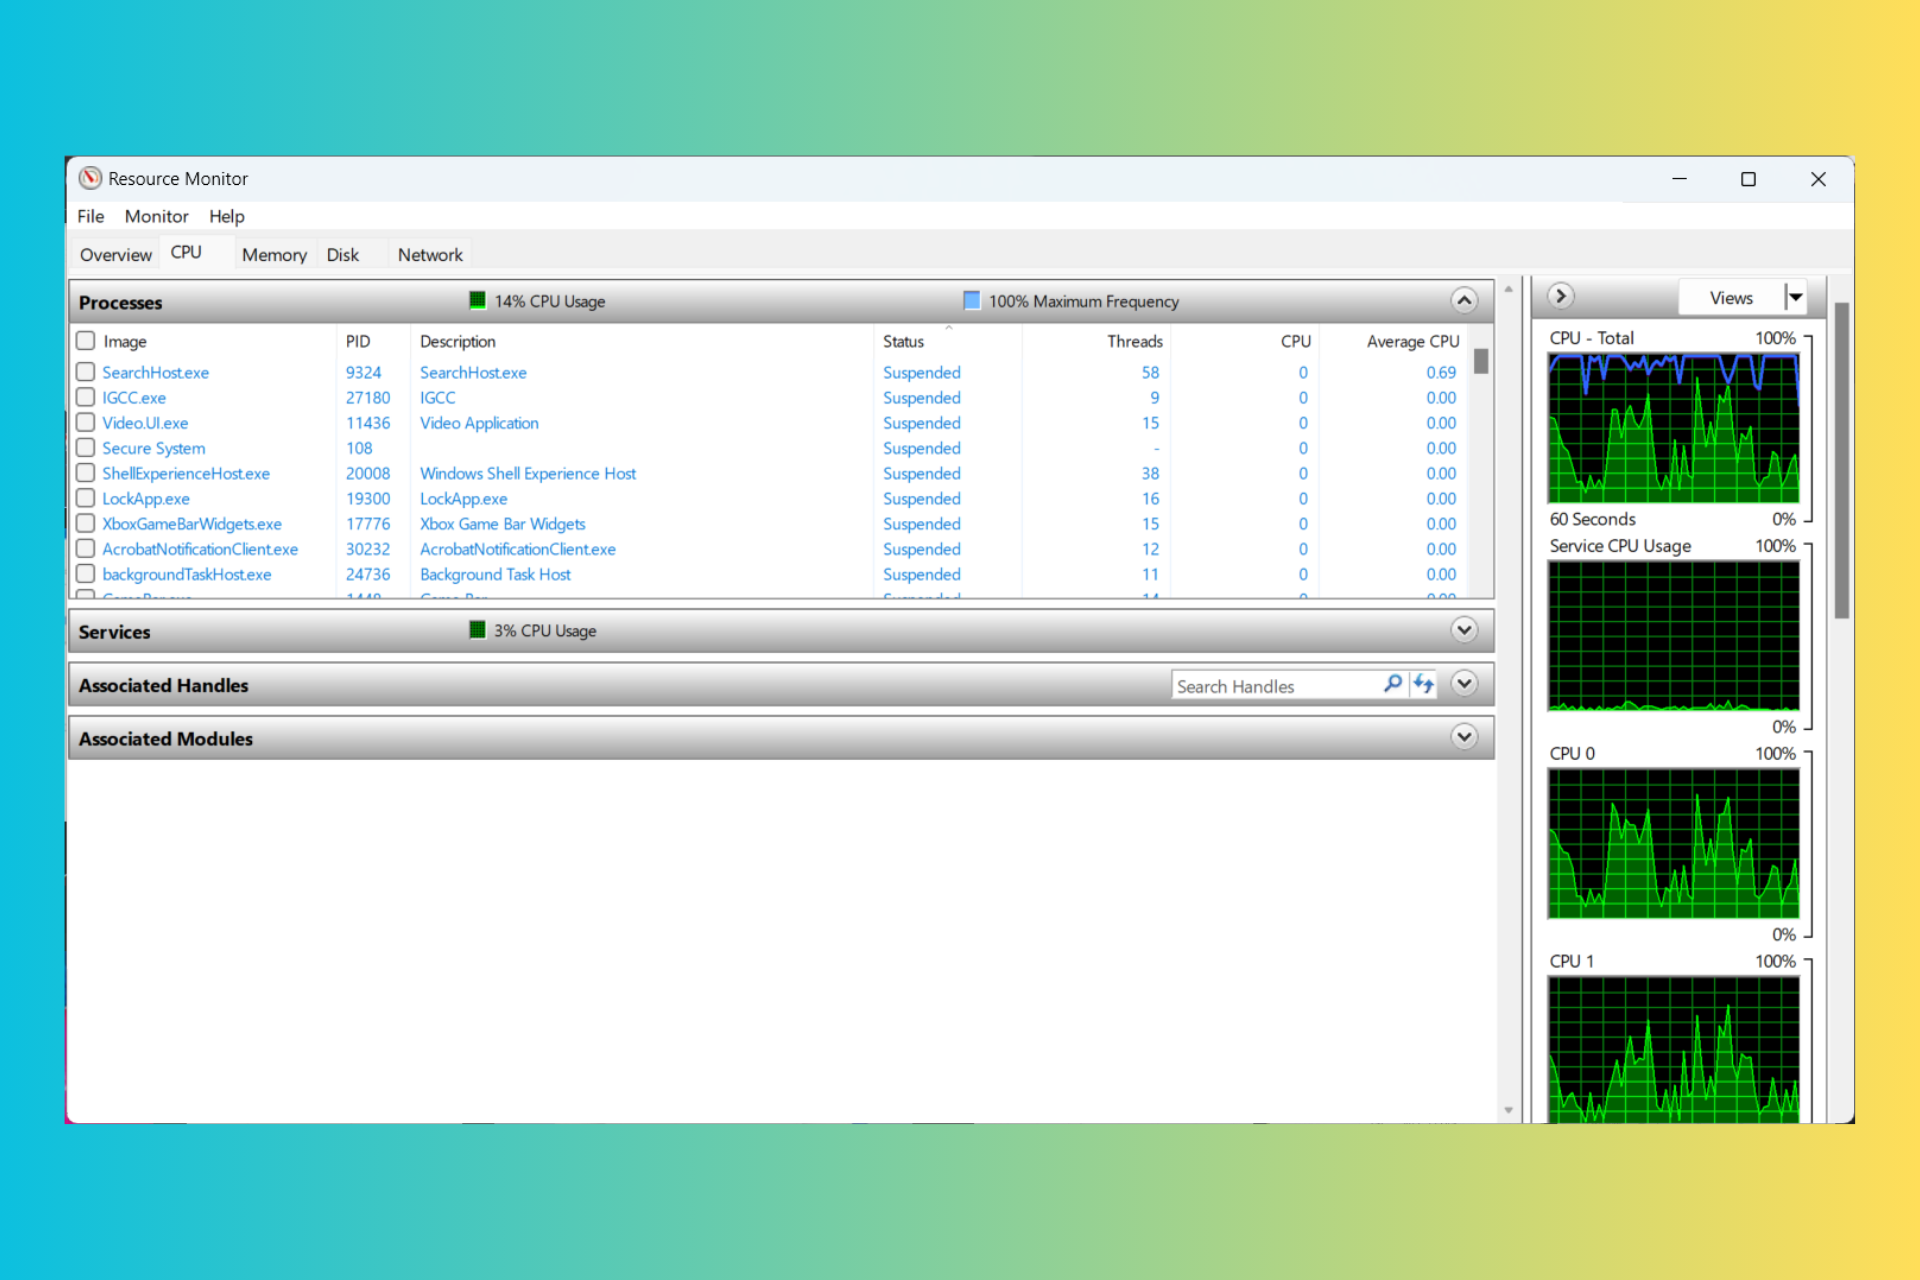
Why does DsmSvc cause high CPU usage?
DsmSvc high CPU usage causes the system to be slow or laggy and can affect the programs running on the PC. The high CPU usage can occur for reasons such as:
- Corrupt system files – When you have corrupt system files on your PC they can cause the services on your PC to malfunction and use more system resources than expected.
- Malware and virus infection – If your system gets infected, Device Setup Manager service may use more system resources than allocated.
- Issues with DsmSvc – It is possible that the Device Setup Manager service isn’t working correctly on your PC, causing high CPU usage.
- Issues with Windows Update Service – You may experience DsmSvc high CPU usage if there’s an issue with the Windows Update Service.
Fortunately, there are some fixes for the high CPU usage, and we’ll discuss them as we go further into this article.
How can I fix the DsmSvc high CPU usage?
Before proceeding with any advanced troubleshooting steps, try the following:
- Turn off background apps running on your PC.
- Restart Windows in Safe Mode and check if DsmSvc high CPU usage persists.
If you can fix the issue, go ahead with the steps below.
1. Run the SFC and DISM to repair damaged system files
- Left-click the Start button, type Command Prompt, and select Run as administrator.
- Tap Yes on the User Account Control (UAC) prompt.
- Type the following and press Enter:
sfc /scannow
- Type the following commands and press Enter:
DISM /Online /Cleanup-Image /RestoreHealth - Restart your PC and check if the DsmSvc high CPU usage persists.
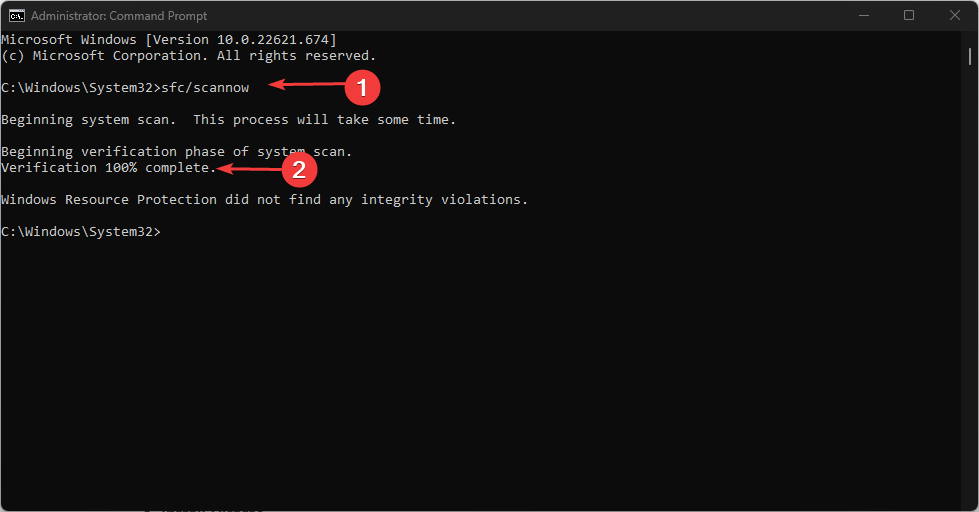
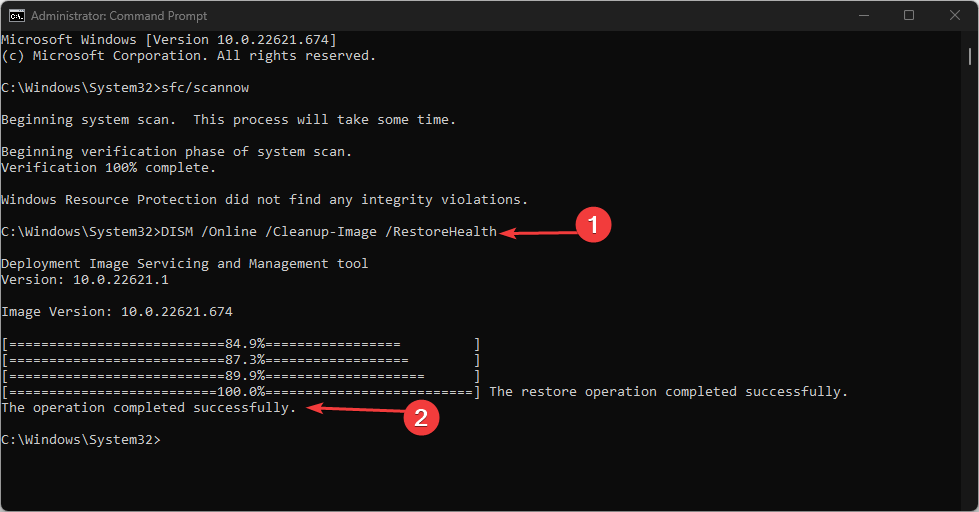
Running SFC and DISM scans will detect and repair corrupt system files causing DsmSvc high CPU usage on your PC. Check our guide on what to do if Command Prompt keeps crashing on your PC.
2. Run Windows Defender scan
- Left-click the Start button, type Windows Security, then click Enter.
- Click on Virus & Threat Protection from the menu and tap on Scan Options.

- Then Full scan to begin an extensive scan. Click the Scan now button and wait while the scan completes.


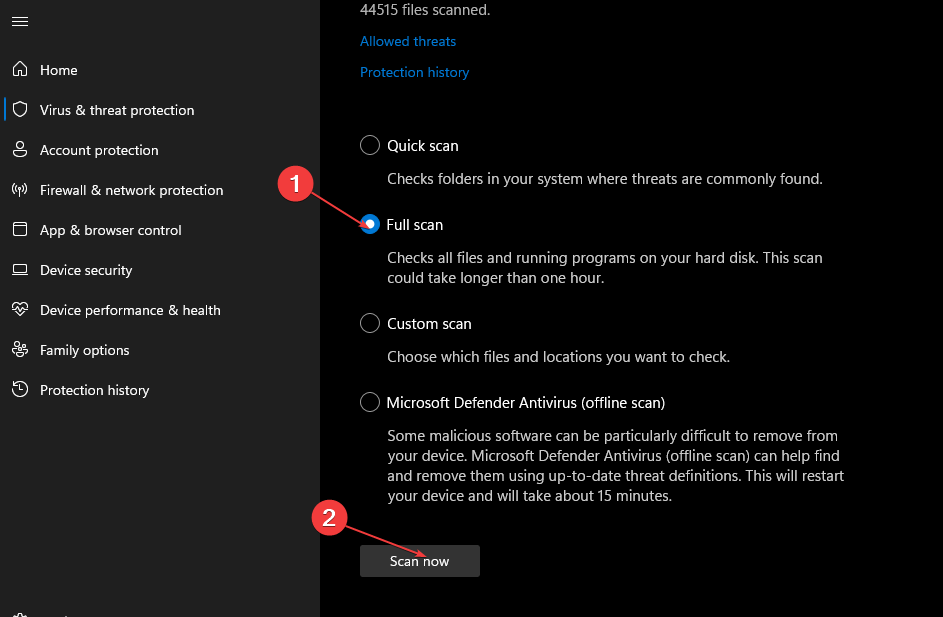
Windows Defender scan will find and remove any malware and viruses on your PC that may cause the issue.
Sometimes, not even a full scan with Windows Defender can clean your PC, so we recommend running a full scan with a better third-party antivirus.
3. Run the Windows Update troubleshooter
- Press Windows + I key to open the Settings app.
- Click System and select Troubleshoot.

- Then click Other troubleshooters.
- Click Run to initiate the Windows Update troubleshooter.

- Follow the on-screen prompts and restart your PC afterward.
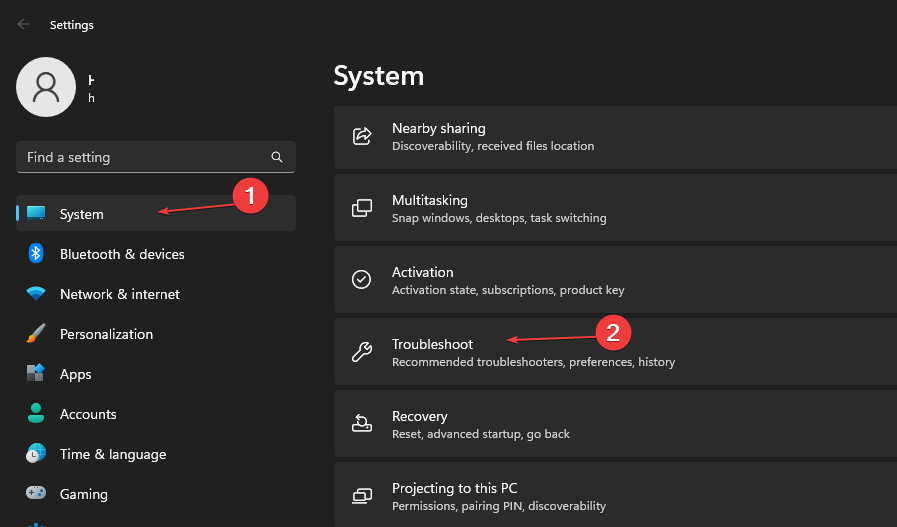

The troubleshooter will repair update issues causing the DsmSvc service high CPU usage on your PC. If you can’t get through the steps above, check other ways to run the Windows Update troubleshooter in Windows 10/11.
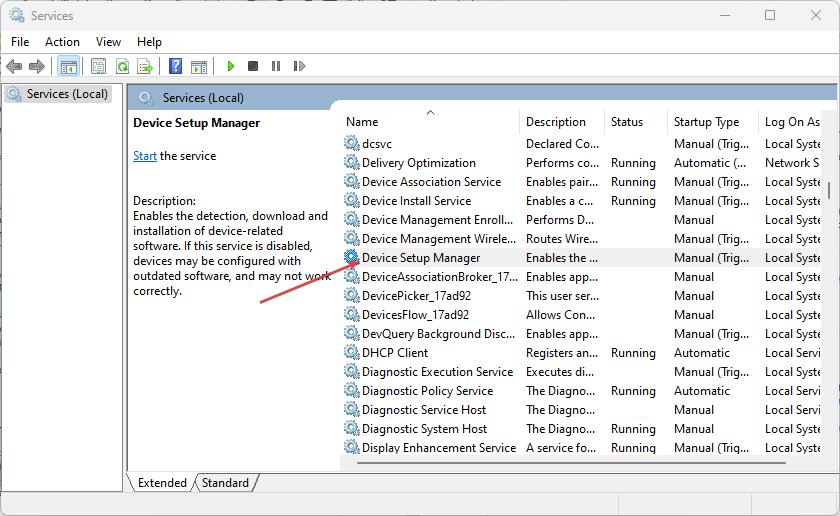
4. Disable the DsmSvc service
- Left-click the Start button, type services in the text bar, and launch the Services utility.
- Double-click on Device Setup Manager in the list of services.

- Go to Startup type, set it to Disabled, and then click Apply to save the changes.

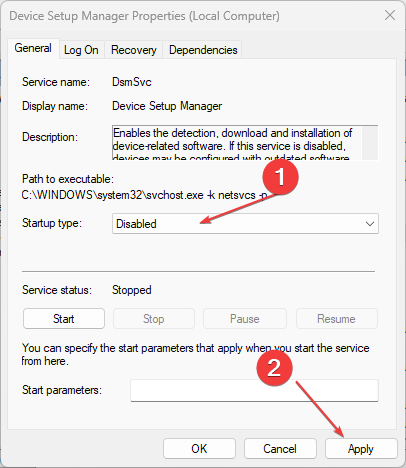
Disabling the DsmSvc service on your PC prevents it from using high system resources. Still, we recommend you only do this temporarily because the service is very important in properly functioning your PC.
In addition, our readers may be interested in what to do if the Task Manager shows wrong CPU usage on Windows 11.
Further, you can read our article about how to fix 100% disk usage on Windows 11 if you encounter an issue. As for solving high CPU usage issue by uninstalling rsEngineSvc, it is also confirmed by our team of experts.
In conclusion, fixing DsmSvc high CPU usage is tricky, but with our guide, you should troubleshoot it just fine. If you have further questions or suggestions, kindly leave them below.