How to Download & Install Epson L120 Driver on Your PC
The simplest way is to use the Device Manager
![]() 3 min. read
3 min. read
![]() Updated on
Updated on
Share this article
Improve this guide
Read our disclosure page to find out how can you help Windows Report sustain the editorial team. Read more

It is essential to download and install the correct drivers for Epson L120 for smooth operation and optimal performance. Several methods exist for installing the drivers for your Windows 10 and 11 devices; let’s examine some of them.
How can I install the Epson L120 printer driver?
1. Download & install the driver from the manufacturer’s website
- Open your preferred browser and visit Epson’s official driver download page.
- On the site, locate Operating System; choose your operating system from the drop-down and click Go.

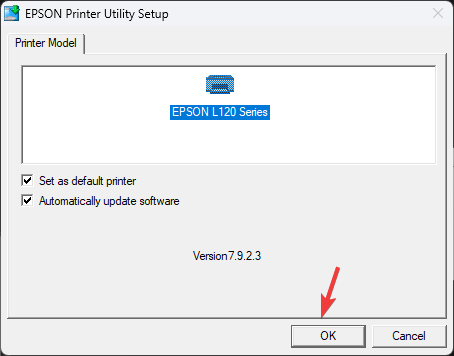
- Next, you will get a list of packages that you can install. Locate the Printer Driver and click Download.
- Double-click the installer file and click Yes on the UAC prompt.

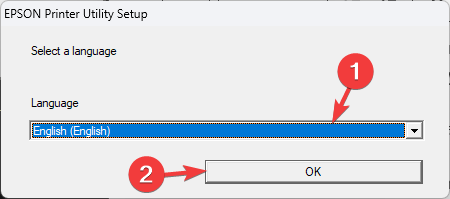
- Choose the language and click OK.

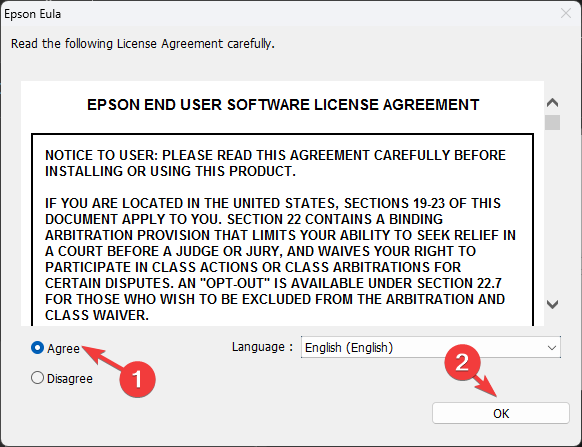
- Agree to the License Agreement, click OK, then follow the on-screen instructions to complete the process.

- Restart the computer once the process is complete.

If you don’t have an internet connection, you can download the Epson L120 drivers to a disc or flash drive and install them offline.
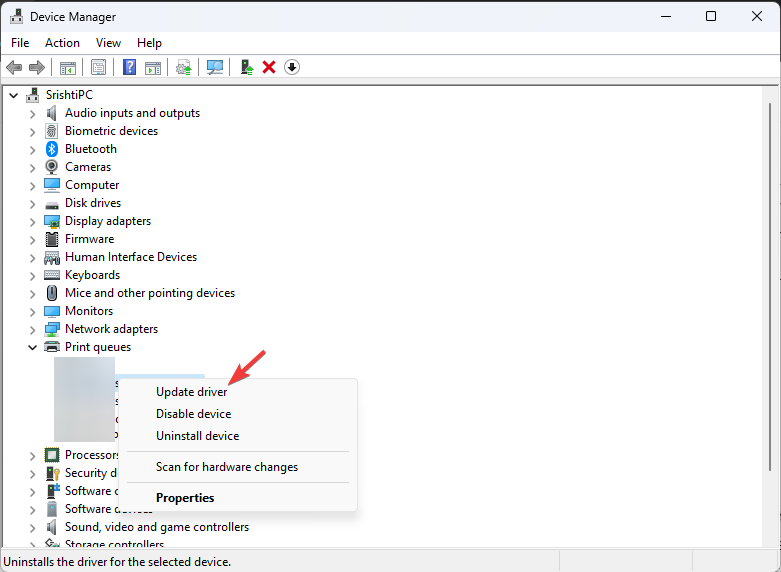
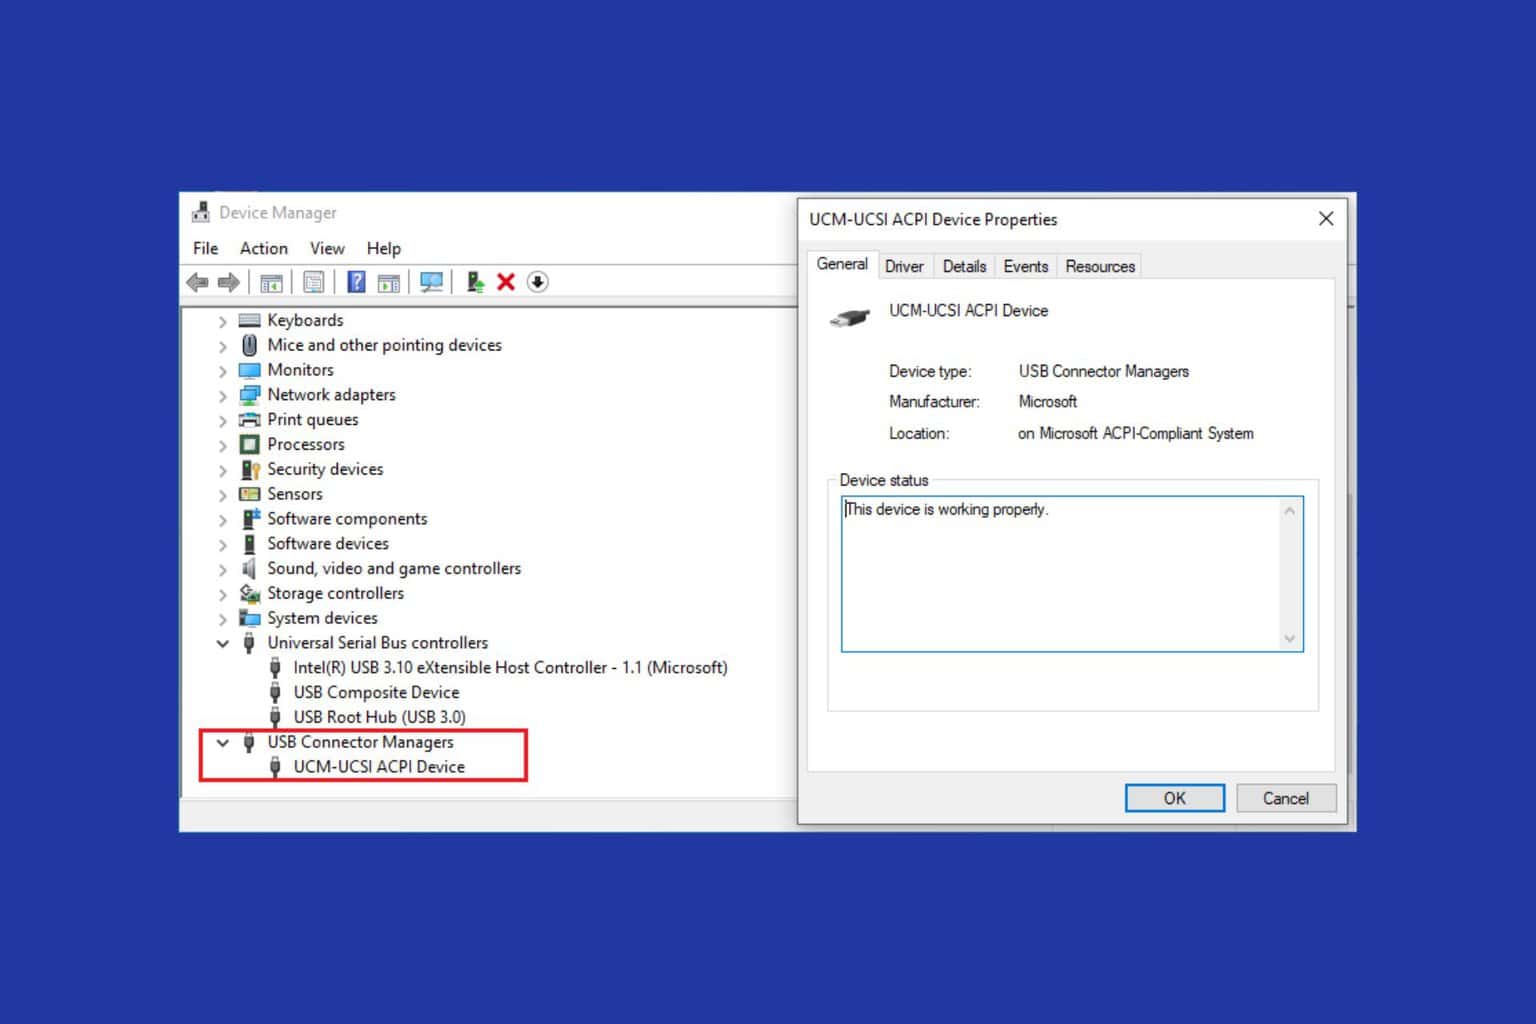
2. Use the Device Manager
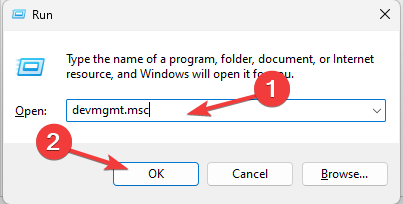
- Press Windows + R to open the Run window.

- Type devmgmt.msc and click OK to open the Device Manager.
- Locate Print queues, and click the arrow next to it to expand it.
- Right-click the printer and select Update driver from the context menu.

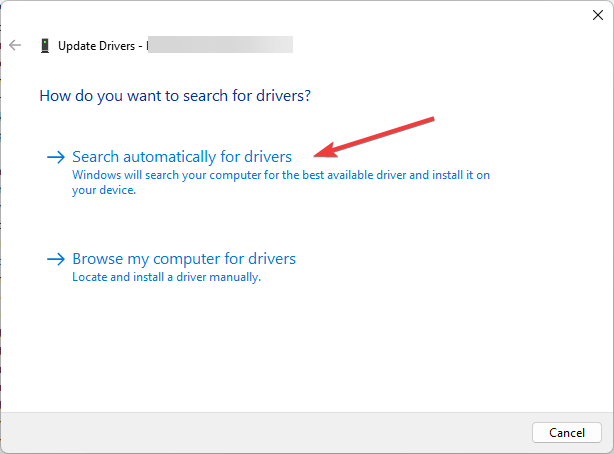
- Click Search automatically for drivers, then follow the on-screen instructions to complete.

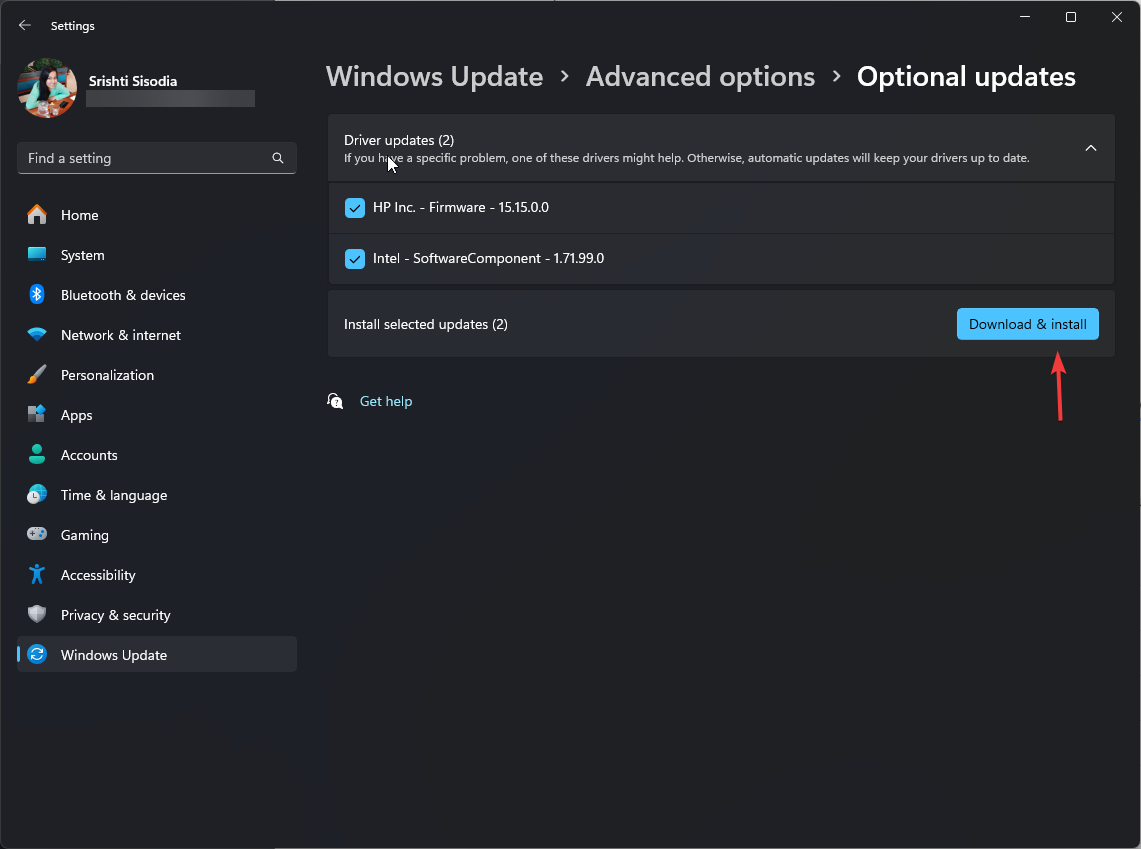
3. Install printer driver using Windows Update
- Connect your Epson printer to your Windows 11 computer via a USB cable.
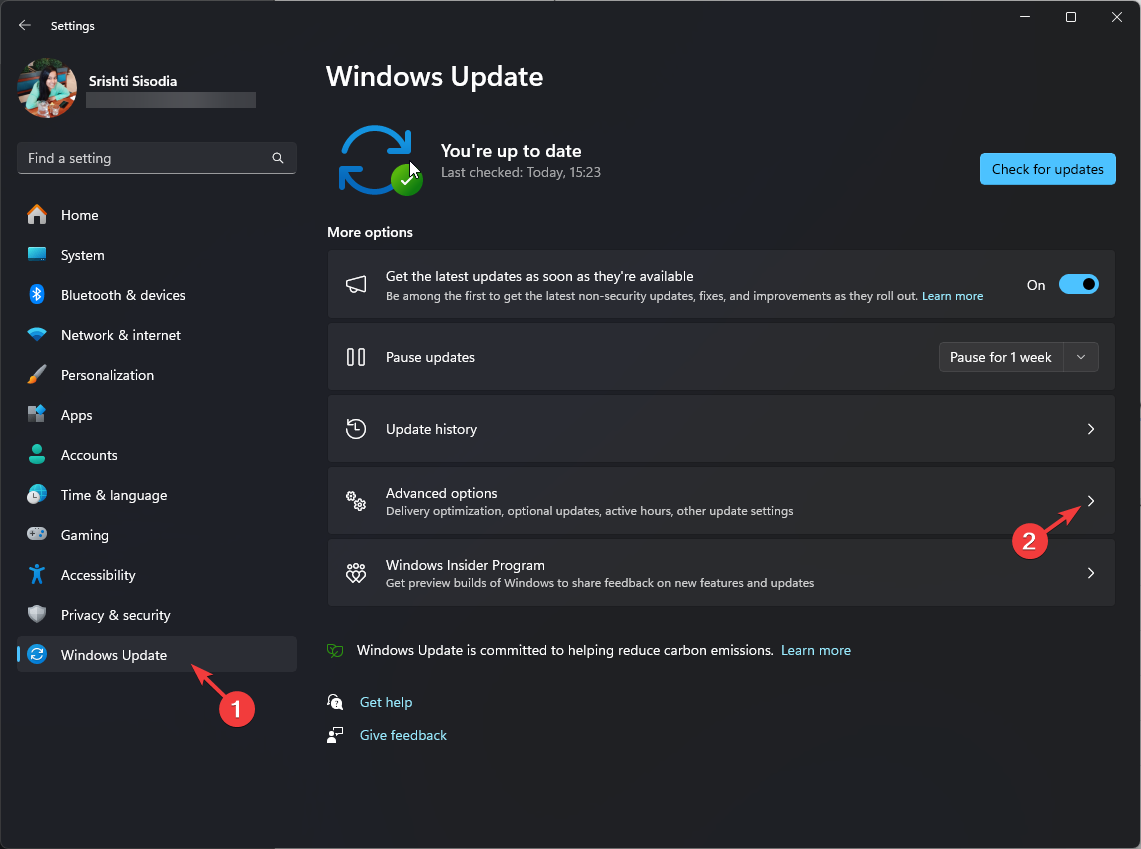
- Press Windows + I to open the Settings app.
- From the left pane, select Windows Update, then Advanced options.

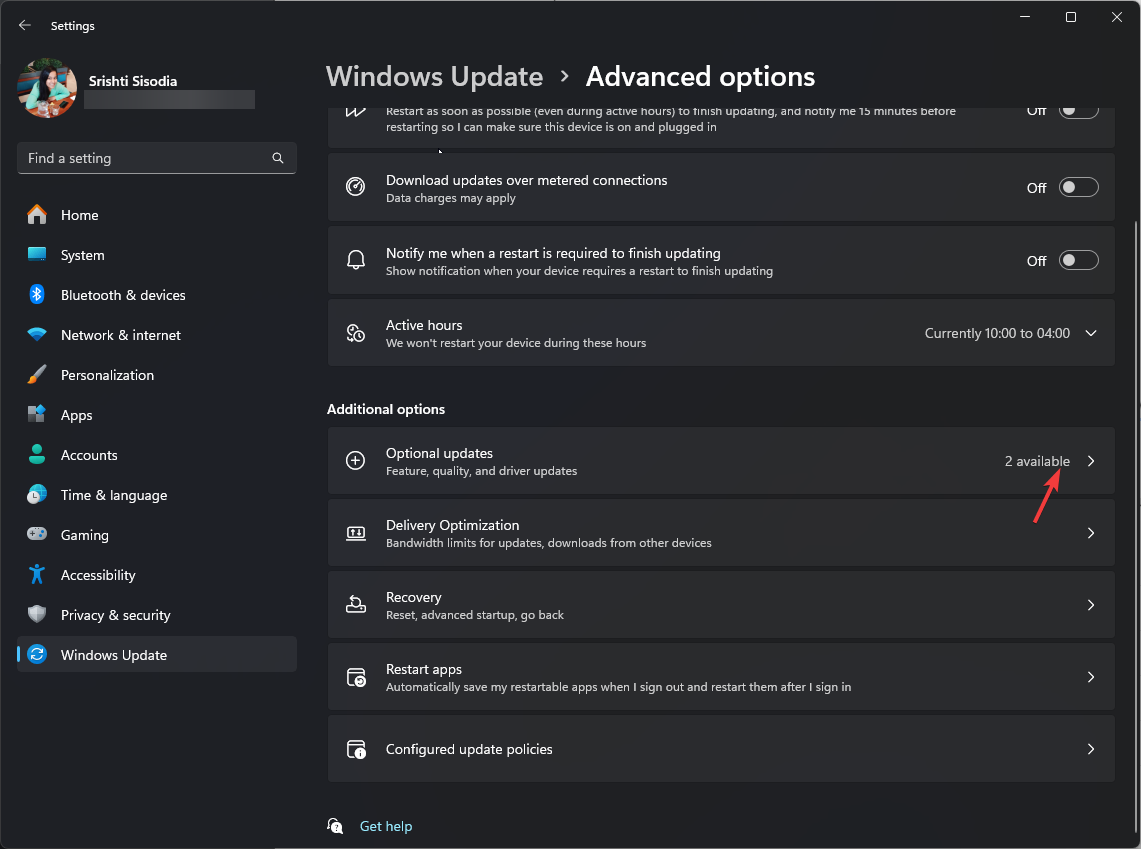
- Under Additional options, click Optional updates for available updates.
- Select the Driver updates and click the Download & install button.
- Once done, restart your computer.
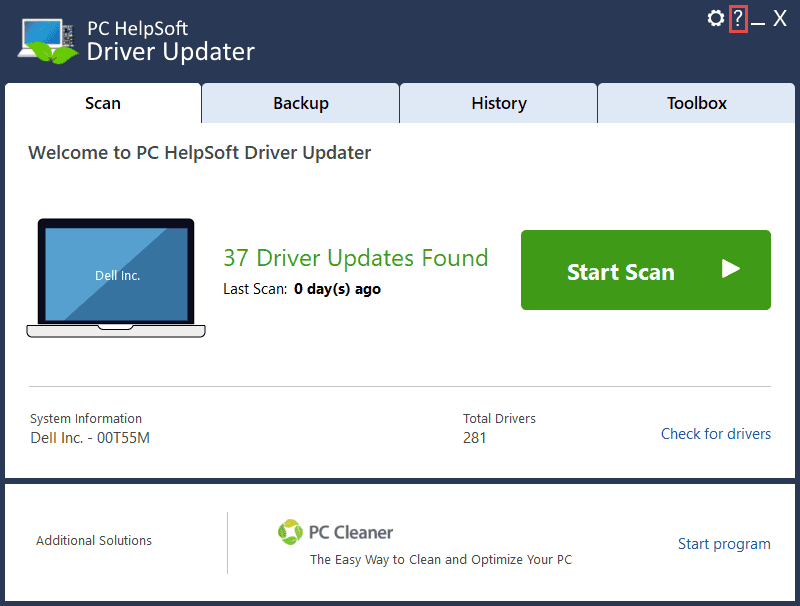
4. Use a dedicated driver updater
If you don’t want to download and install the driver updates manually and don’t have the disc, you can rely on driver updater software for Windows 11, Windows 10, or Windows 7.
For this, we recommend PC Helpsoft Driver Updater because it’s easy to use and reliable:
- Make sure your Epson is turned on and connected to your computer.
- Download and install PC Helpsoft Driver Updater on your PC.
- Launch the software and click on the Start Scan button.

- Wait for the process to complete. The tool will display a list of available drivers that are ready to install. Pick the one for your Epson and confirm you want to install it.
Wrapping up
In case you have other models, like the Epson L130, Epson L3110, Epson L380, and Epson L360, and want to download their drivers, you can check out the articles with step-by-step instructions.
Which method do you prefer to install the driver? Share your thoughts with our readers in the comments section below.
User forum
0 messages