Fix Error Code 0xd0000225: Login PIN Not Available
This is usually caused by a Windows update issue

The error code 0xd0000225 is a login screen issue on Windows 11 that can repeat itself up to three times a week. Although Windows recommends restarting your computer, that’s a temporary fix that doesn’t even work for many users.
The error 0xd0000225 on Windows 11 is caused by update bugs, malware attacks, or corrupt system files.
When troubleshooting the 0xd0000225 error, you should start with the basics. Upgrade Windows to the latest version, and if there’s any app you’ve recently installed, try uninstalling the app and check if the problem no longer appears. Lastly, run a full antivirus scan.
How can I fix error 0xd0000225 on Windows 11?
1. Rename the NGC folder using Command Prompt
- Hold the Shift key on your keyboard and restart your computer to boot the system into Safe Mode.
- Once the Advanced Startup menu appears, select Troubleshoot.

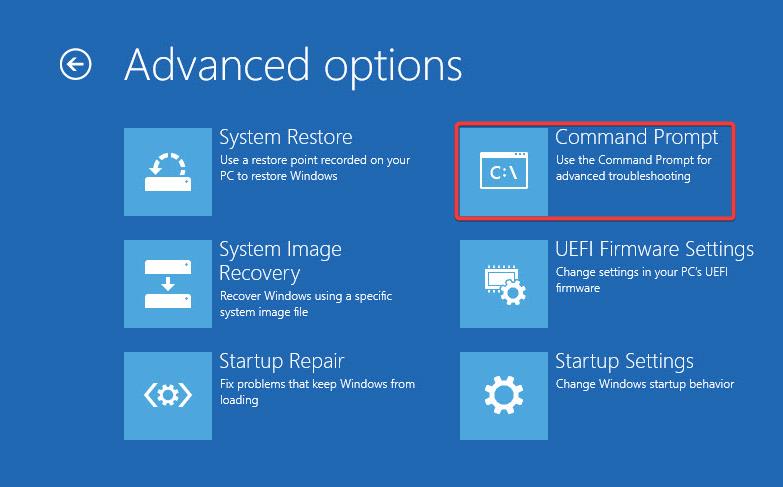
- Next, click on the Advanced options.

- Go to Command Prompt under Advanced options.
- Paste in the following command and hit Enter on your keyboard to take ownership of the NGC folder:
icacls C:\Windows\ServiceProfiles\LocalService\AppData\Local\Microsoft\Ngc /T /Q /C /RESET
- Wait for the process to complete.
- Next, run the following command and hit Enter on your keyboard to rename the folder:
Ren C:\Windows\ServiceProfiles\LocalService\AppData\Local\Microsoft\Ngc Ngc.old
- Once the process is complete, return to the first screen and click on Continue to proceed with the normal boot.

- Now sign in with your password and proceed to configure your PIN again.
Renaming the Ngc folder also helps when you encounter the Your PIN is no longer available error.
2. Remove and re-add your login PIN
- Press Windows + I on your keyboard to open Settings. Go to Accounts on the left pane and scroll down to select Sign-in options.

- Click to expand the PIN (Windows Hello) tile and select Remove from the resulting options. Click on Remove again on the next dialogue to proceed.

- Enter your device password and click on the OK button to confirm the removal.

- Next, go back to expand the PIN (Windows Hello) tile and click on the Set up button.

- Input your device password and click the OK button to proceed.
- Input your new PIN and click the OK button to save it.

- Restart or lock your PC and sign in with your PIN to check if there’s no more issue.
This guide can help if you can’t remove PIN on Windows 11.
3. Reset your PC to default settings in Safe Mode
- On the Windows sign-in screen, press and hold the Shift key while you restart your computer to boot the system into Safe Mode.
- After your PC restarts to the Choose an option screen, select Troubleshoot.

- Next, click on Reset this PC.

- Select Keep my files to proceed.

- On the next screen, choose Cloud download and click on Next.
- Wait for the process to complete. Now you can set up another sign-in PIN without any issue.
For more information on other ways to restore your Windows 11 PC to default settings, check out our guide.
You might also come across error code 0x80070035 in Windows 11. We’ve got the solutions to fix it right away too.
We also have a detailed guide on solving other login issues. You can learn what to do if you can’t log in on Windows 11.
Do you know any other methods that solve the problem? Share them with us in the comments section below.
Read our disclosure page to find out how can you help Windows Report sustain the editorial team. Read more


Improve this guide


User forum
0 messages