ERROR_CANTFETCHBACKWARDS: Fix The BSoD in 5 Ways
Restart your computer and run a malware scan
7 min. read
Published on
Read our disclosure page to find out how can you help Windows Report sustain the editorial team. Read more
Key notes

Many of our readers have complained about getting the ERROR_CANTFETCHBACKWARDS mesasage with 770 (0x302) and description The data provider cannot fetch backwards through a result set as Windows Update was unable to install updates.
The error could appear if there are corrupted system files, damaged file system, faulty drivers, or hardware issues. To fix it, first open the Event Viewer and go to Windows> Applications to understand the reason of the crash. Alternatively, you can also check the Blue Screen Log via Control Panel.
How can I get rid of ERROR_CANTFETCHBACKWARDS?
1. Reset the Windows Components manually
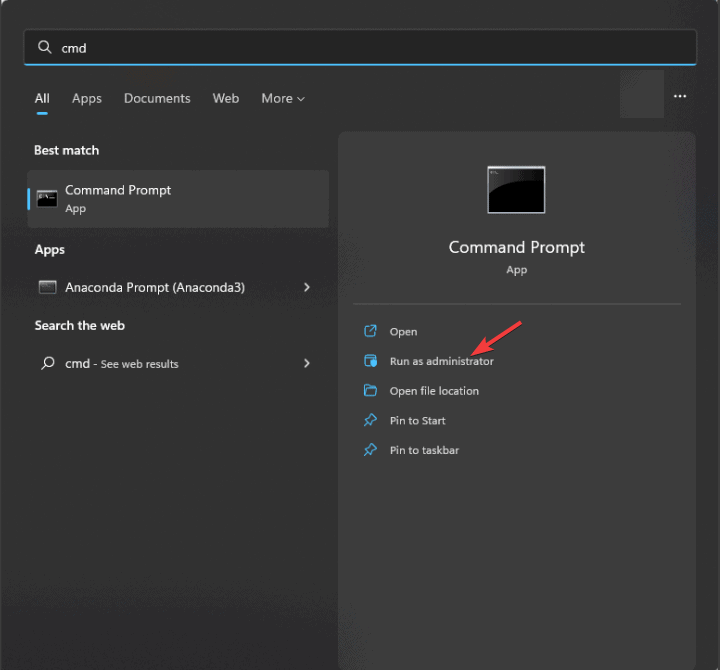
- Press the Windows key, type cmd in the search box and click Run as administrator from the list of options to launch Command Prompt with elevated rights.
- Type the following commands one by one to stop the BITS, Windows Update and Cryptographic services, hit Enter after every command:
net stop bits
net stop wuauserv
net stop cryptsvc
- Copy & paste the following command to delete the qmgr*.dat files, then press Enter:
Del "%ALLUSERSPROFILE%\Application Data\Microsoft\Network\Downloader\qmgr*.dat" - To rename the DataStore, Download and catroot2, type the following command one by one and hit Enter after every command:
Ren %Systemroot%\SoftwareDistribution\DataStore DataStore.bak
Ren %Systemroot%\SoftwareDistribution\Download Download.bak
Ren %Systemroot%\System32\catroot2 catroot2.bak
- To reset the BITS and Windows Update to the default security descriptor, copy & paste the following command one by one and press Enter after every command:
sc.exe sdset bits D:(A;CI;CCDCLCSWRPWPDTLOCRSDRCWDWO;;;SY)(A;;CCDCLCSWRPWPDTLOCRSDRCWDWO;;;BA)(A;;CCLCSWLOCRRC;;;IU)(A;;CCLCSWLOCRRC;;;SU)
sc.exe sdset wuauserv D:(A;;CCLCSWRPLORC;;;AU)(A;;CCDCLCSWRPWPDTLOCRSDRCWDWO;;;BA)(A;;CCDCLCSWRPWPDTLOCRSDRCWDWO;;;SY)
- Type the following command and hit Enter:
cd /d %windir%\system32 - To reregister the BITS files and the Windows Update, copy & paste the following commands one by one and press Enter after every command:
regsvr32.exe atl.dll
regsvr32.exe urlmon.dll
regsvr32.exe mshtml.dll
regsvr32.exe shdocvw.dll
regsvr32.exe browseui.dll
regsvr32.exe jscript.dll
regsvr32.exe vbscript.dll
regsvr32.exe scrrun.dll
regsvr32.exe msxml.dll
regsvr32.exe msxml3.dll
regsvr32.exe msxml6.dll
regsvr32.exe actxprxy.dll
regsvr32.exe softpub.dll
regsvr32.exe wintrust.dll
regsvr32.exe dssenh.dll
regsvr32.exe rsaenh.dll
regsvr32.exe gpkcsp.dll
regsvr32.exe sccbase.dll
regsvr32.exe slbcsp.dll
regsvr32.exe cryptdlg.dll
regsvr32.exe oleaut32.dll
regsvr32.exe ole32.dll
regsvr32.exe shell32.dll
regsvr32.exe initpki.dll
regsvr32.exe wuapi.dll
regsvr32.exe wuaueng.dll
regsvr32.exe wuaueng1.dll
regsvr32.exe wucltui.dll
regsvr32.exe wups.dll
regsvr32.exe wups2.dll
regsvr32.exe wuweb.dll
regsvr32.exe qmgr.dll
regsvr32.exe qmgrprxy.dll
regsvr32.exe wucltux.dll
regsvr32.exe muweb.dll
regsvr32.exe wuwebv.dll
- Type the following command to reset Winsock and hit Enter:
netsh winsock reset - To restart the BITS, Windows Update and Cryptographic services copy & paste the following command one by one, hit Enter after every command:
net start bits
net start wuauserv
net start cryptsvc
- Restart your computer and try to install Windows updates now and check if you see ERROR_CANTFETCHBACKWARDS again.
2. Restart your PC in a clean boot environment
- Press Windows + R to open the Run window.
- Type msconfig and click OK to open System Configuration.
- On the System Configuration window, go to the Services tab, place a checkmark next to Hide all Microsoft services, then click Disable all.
- Switch to the Startup tab, click the Open Task Manager link.
- Select the Enabled start items one by one and click Disable, then close the window.
- Back on the System Configuration window, click Apply, then OK.
- Click Restart on the following window.
Your Windows will restart and boot up without any third-party services and startup items. You can try enabling them one by one to identify which one is causing the issue, If none of these are causing the problem, reverse engineer the steps mentioned above to restart your PC in normal mode.
3. Update/reinstall problematic drivers
- Press Windows + R to open the Run window.
- Type devmgmt.msc and click OK to open the Device Manager app.
- You will get a list of system components, go to each category, click it to expand and look for device with yellow triangle with exclamation point in it.
- Once located, right-click it and select Update driver.
- Click Search automatically for drivers to allow Windows to find and install the suitable driver version.
If there are multiple problematic drivers, you can follow the same steps to update them. If Windows fails to find the driver version for your device, you can head to manufacturer’s website, and download the latest one manually. Alternatively, you can download and install a third-party driver updater tool to ensure all the device drivers on your computer are up to date.
If updating the drivers didn’t help and you still see the ERROR_CANTFETCHBACKWARDS, follow these steps to reinstall them:
- Open the Device Manager again, locate the problematic driver, and right-click it and select Uninstall device from the context menu.
- Click Uninstall again if prompted.
- Next, go to Action, then select Scan for hardware changes from the list of options to reinstall the device driver.
4. Run SFC & DISM scans
- Press the Windows key, type cmd in the search box, and click Run as administrator to launch Command Prompt with admin rights.
- To repair or restore corrupted system files, type the following command and hit Enter:
sfc /scannow - Let the command execute successfully, then copy & paste the following command to repair the Windows image files via Windows Update and press Enter:
Dism /Online /Cleanup-Image /RestoreHealth - Wait for the scan to complete, then restart your computer to let the changes take effect.
5. Check for computer for hardware issues
Run the disk check
- Press the Windows key, type cmd in the search box, and click Run as administrator to launch Command Prompt with admin rights.
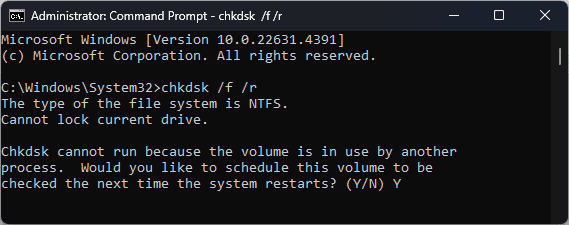
- To check and to fix any disk errors, copy & paste the following command and press Enter:
chkdsk /f /r - If the disk in use, it will prompt you to schedule the scan after a restart. Type Y and hit Enter.
- Now save all your work and restart your computer to initiate the scan.
Run the Windows Memory Diagnostic tool
- Press the Windows key, type memory diagnostic in the search box, and click Open to launch Windows Memory Diagnostic tool.
- Select Restart now and check for problems (recommended).
Your computer will restart and you can choose either Standard (basic tests) and Extended (more thorough testing). Once selected, a series of diagnostic tests on your RAM will run and check for errors causing system instability or crashes. If memory issues are detected, you will see it in scan results.
You remove the RAM, clear dust and debris and reseat it, then run the test again. If the issues are still there, you might have to replace the faulty RAM
In conclusion to fix the ERROR_CANTFETCHBACKWARDS, you can reset the Windows Update components, restart your computer in clean oot, run SFC & DISM scans, or check for hardware issues.
If you see the BSoD errors on your computer more often , you must learn the causes for the same; read this guide for insights.
If you have any questions or suggestions about the BSoD error, feel free to mention them in the comments section below. We will be happy to help!


User forum
0 messages