Evbda.sys BSOD Errors: 4 Solutions to Easily Apply
Get rid of the BSOD error in simple steps
Key notes
- The evbda.sys error usually happens due to corrupted system files or hardware failure.
- Using third-party software will quickly fix the evbda.sys error message in Windows 10.
- Quickly checking your peripherals with the solution listed below will solve the issue.

Let us explore evbda.sys errors The Blue screen of death (BSOD) error has existed since Windows 95 days, and till today, Windows users are haunted by this error with no real explanation of what might have gone wrong.
BSOD errors can be temporary, and a quick restart may be able to fix them. Other times, these errors can be severe and leave your PC unusable for days.
The evbda.sys error is a critical blue screen of death error that usually leaves your PC unusable, preventing successful Windows boot. Your PC can also go into an endless loop, leaving no option to perform recovery.
What is Evbda sys?
Evbda.sys is a system file related to the Intel Rapid Storage Technology (RST) driver. It manages hard disk drives and Solid State drives on a computer system.
The following are some common causes of errors related to Evbda.sys file:
- Outdated or corrupted driver – If the Intel RST driver is corrupt or outdated, it can cause the Evbda.sys file to malfunction, leading to error messages and system crashes.
- Conflicts with other drivers – The Evbda.sys file may conflict with other drivers installed on your system, causing errors and instability.
- Malware infection – If the Evbda.sys file has been infected by malware, which can cause errors and crashes on your system.
- Physical damage to the hard drive – If the hard drive is physically damaged, it can cause errors in the Evbda.sys file and other system files, leading to crashes and error messages.
- Incorrect configuration – If the configuration of the Intel RST driver is incorrect, it can cause errors in the Evbda.sys file and result in system crashes.
- Operating system issues – If there are issues with the operating system itself, it can cause errors in the Evbda.sys file and lead to system crashes and error messages.
The evbda.sys error behaves differently on different PCs. While some users may be able to boot into Windows before the error crashes the computer, some users find it hard even to boot Windows into Safe Mode.
While it is nearly impossible to pinpoint the exact reason for the BSOD error, you can follow a set of solutions we have collected with our testing and from other users to fix the evbda.sys error in Windows 10.
How can I fix evbda.sys errors?
Before going into the fixes we suggest, we recommend the following:
- Detach any peripheral devices connected to your PC. At times the evbda.sys error can occur due to a malfunctioning peripheral device like your external keyboard, mouse, external hard drive, USB Hub, etc.
- Consider replacing some hardware. One of the most common causes of evbda.sys error is a hardware failure or Windows incompatibility with the hardware. The usual culprits are the RAM video/graphics card and the hard drive/SSD.
- Usually, the SSDs have 3-5 years of limited warranty, but they don’t break as often as HDDs do. If you want to buy a brand-new SSD, check out our guide on the best SSDs on the market.
1. Use a third-party BSoD fixer
Using third-party software specialized in restoring Windows files is a great idea. You can quickly download a third-party repair tool and allow it to scan your computer.
After scanning, it will attempt to correct any problems and remove any troublesome files. In addition, it will also restore the crucial Windows data required for your OS to run correctly.
2. Use System Restore Point
2.1 If you can log in to Windows
- In the Cortana/Search bar type, Restore and open Create a Restore Point option.

- Click on the System Restore button, then click Next.

- To view more restore points, check the option Show more restore points, select one restore point, and click Next.

- At this point, you want to note that during the process, Windows will uninstall any program installed after the restore point was created.

- Read the confirmation message and click on the Finish button.
- Windows will restart your computer and restore the system to the selected point in time before the evbda.sys error.
2.2 If you are unable to login to Windows
- If Windows presents you with a Recovery option, click on the Advanced Options button; if not, insert the bootable USB or installation disc and restart your computer.
- Select Repair this computer to access the Recovery screen.
- From the Choose an option window, click on Troubleshoot, then Advanced options.

- From Advanced Options, click on System Restore.

Now the PC will restart and ask you to enter your username and password. Once done, proceed with the on-screen instructions.
If you cannot log in to Windows, you can use the Recovery Mode and Command Prompt to restore the system.
You can use a bootable USB flash drive or installation disc to boot into Recovery Menu or simply wait for Windows to present the recovery screen after multiple boot process failures.
This solution is only applicable if evbda.sys error occurred while using your PC or when you tried to restart the system or upgrade it with the new version of Windows.
If the error occurred while trying to clean install Windows on a new PC build or non-Windows system, you wouldn’t be able to use System Restore Point to fix the issue.
Microsoft Windows has a built-in System Restore feature that allows you to create system restore points on your local hard drive. System Restore Point stores a working copy of your system.
Windows will automatically create Restore Points when allowed before installing a software or system update. If your PC has previously created Restore Points, you can use them to fix any problem with system files.
3. Use Startup Repair
3.1 Access Startup Repair from the Start screen
- Restart your computer. Click on the Power button from the login screen or after logging in.
- Now press and hold the Shift key and click on Restart.

- This will take you to the Choose an option screen. Click on Troubleshoot, then Advanced Option.
- Click on Startup Repair and follow the on-screen instructions.

3.2 If you are unable to log in
- If you can’t boot into Windows, accessing Advanced Option requires a Windows 10 bootable USB drive or Disc.
- From the screen, click on Troubleshoot, then select Advanced options.
- Then click on Startup Repair.

- Windows will scan for any problems causing startup problems, including evbda.sys errors.
Windows OS has a built-in Startup Repair option to repair corrupted or missing system files. This option can be accessed from the Advanced Options screen.
4. Run System File Checker
- Click the Cortana/Search bar and type cmd.
- Right-click on the Command Prompt option and select Run as administrator.

- In the command prompt, type the following command and hit Enter:
sfc /scannow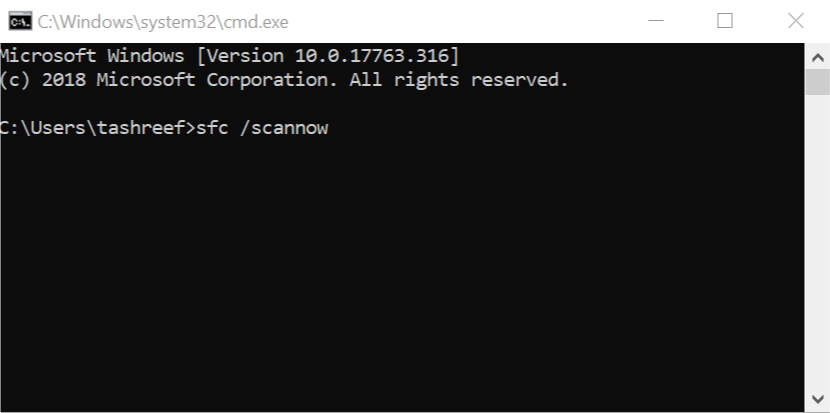
- Wait for the System File Checker to find and fix the problem. The process may take some time, so be patient.
 NOTE
NOTE
Windows OS has a built-in command line-based System File Checker that scans the installation drive for missing or corrupt system files.
If found, Sfc fixes the issue by replacing the faulty system files with a cached version of the system files from the local drive.
We hope you can fix the evbda.sys error BSOD using one of the solutions listed here. We have not made these solutions in any particular order, so we recommend you try the most appropriate ones.
If you have a new solution that worked for you, leave it in the comments below.
Read our disclosure page to find out how can you help Windows Report sustain the editorial team. Read more


Improve this guide


User forum
0 messages