Install Error - 0xc1900101 [Solved For Good]
Try these easy and tested fixes to resolve your driver issues
Key notes
- Missing or problematic drivers usually cause the 0xC1900101 driver error.
- The first and most important solution is to update or uninstall corrupted drivers.
- Another effective troubleshooting method is to disconnect your peripherals and other components.

Many users who tried to upgrade to Windows 11 reported that they couldn’t complete the upgrade due to a series of 0xC1900101 errors.
Various driver-related factors trigger these errors: users haven’t installed the latest driver updates on their computers, some drivers are incompatible with Windows 11, and more.
Driver errors occur quite often when users try to upgrade their OS. So let us help you resolve this one.
What does 0xC1900101 mean?
The universal rollback code 0xC1900101 typically denotes the presence of an incompatible driver or some underlying driver issue. An incompatible driver can lead to system hangs, blue screens, and unforeseen reboots.
The entire error message reads There were some problems installing updates, but we’ll try again later. If you keep seeing this and want to search the web or contact support for information, this may help: (0xc1900101).
What errors can I encounter when upgrading to Windows 11?
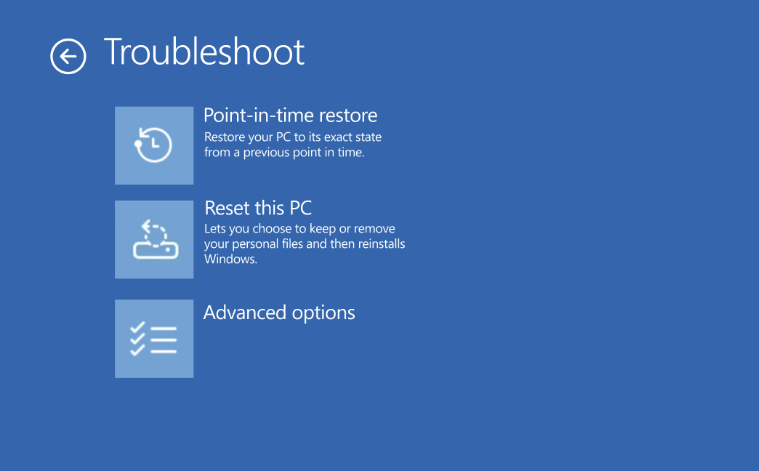
0xc1900101 installation error on Windows 11 occurs when there’s an issue with Windows Update. Thus running the troubleshooter might be helpful. Please refer to the article linked for more solutions to this issue.
Luckily, this guide will help you fix the driver error and many similar issues on multiple Windows platforms, so be sure to keep on reading.
Here are the driver-related errors that you might encounter when upgrading to Windows 11:
- The 0xC1900101 – 0x2000c error
- 0xC1900101 – 0x20004 error
- 0xC1900101 – 0x40017 error
- 0xC1900101 – 0x30017 error
- A 0xC1900101 – 0x30018 error
- 0xC1900101 – 0x30004 error
- 0xC1900101 – 0x4000D error
What causes Windows Update Failure?
- Inadequate space on the drive – During this process, downloads of vital update files are initiated, and the computer must have enough space for these downloads.
- Missing or corrupt system files – Your system files may have recently been destroyed or corrupted, which is why Windows Update failed.
- Outdated device drivers – If drivers that handle some third-party components are obsolete, they could interfere with your OS update.
Let’s jump into the solutions you can implement to fix the driver error in Windows 11 and 10.
How do I fix error code 0xC1900101?
Before you explore any complex fixes, we recommend you do the following:
- Remove any external components connected to your computer peripherals.
- Check your available upgrade space and make sure it is sufficient. Run Disk Cleanup if necessary.
1. Manually update or uninstall any corrupted drivers
1. Right-click on the Start icon and choose Device Manager.

2. Locate the problematic device in the list. The device causing the 0xC1900101 error will likely appear with a yellow exclamation mark.
3. Right-click the driver and select Update Driver to install the latest updates.

4. Lastly, click on Search automatically for drivers.

5. Alternatively, click Uninstall device to remove it and reboot your PC to reinstall it automatically.
After this, the 0xc1900101 SYSPREP_SPECIALIZE error should be solved.

If you’re encountering the error code 0xc1900101, you should, first of all, manually update or reinstall the corrupted device drivers.
You can find the problematic device in Device Manager, from which you can proceed to remove the old drivers and replace them with newer and safer ones.
2. Update your device drivers
- Open Device Manager on your desktop.

- In the open window, expand the device driver category.
- Right-click on the problematic drivers and select Update driver.

- Now, pick the Search automatically for drivers option to continue.

- Follow the next instructions to complete the process.
If the steps above didn’t solve this Windows update issue, don’t run out of hope. There is an alternative you can simply use.
Namely, you should know that using reliable driver update software will improve your PC functionality by fixing or updating old drivers 100% automatically.
3. Run the SFC scan
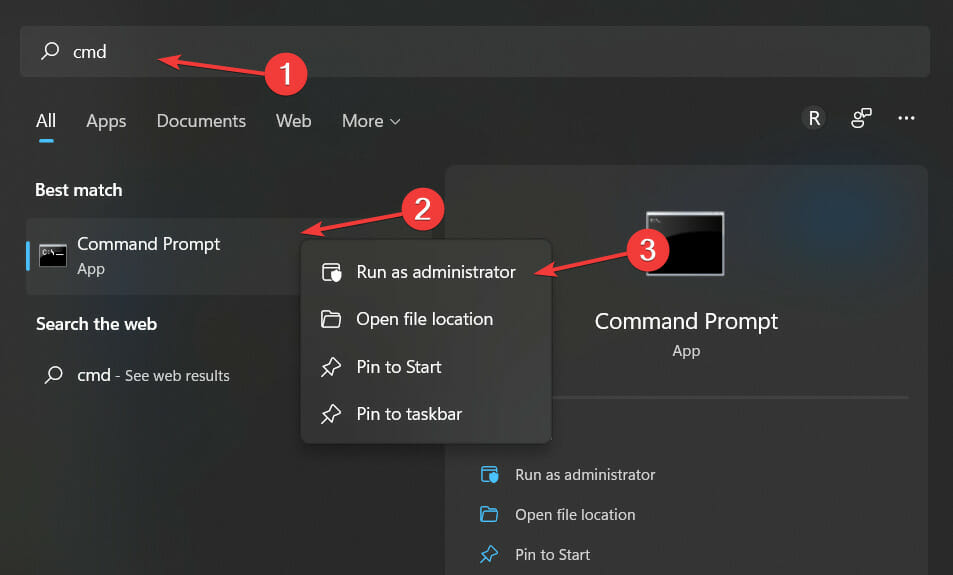
- Click on the magnifying glass icon and enter cmd. Next, right-click on the top result and choose Run as administrator.
- Type the following command and hit Enter, then wait for the scan process to complete:
sfc /scannow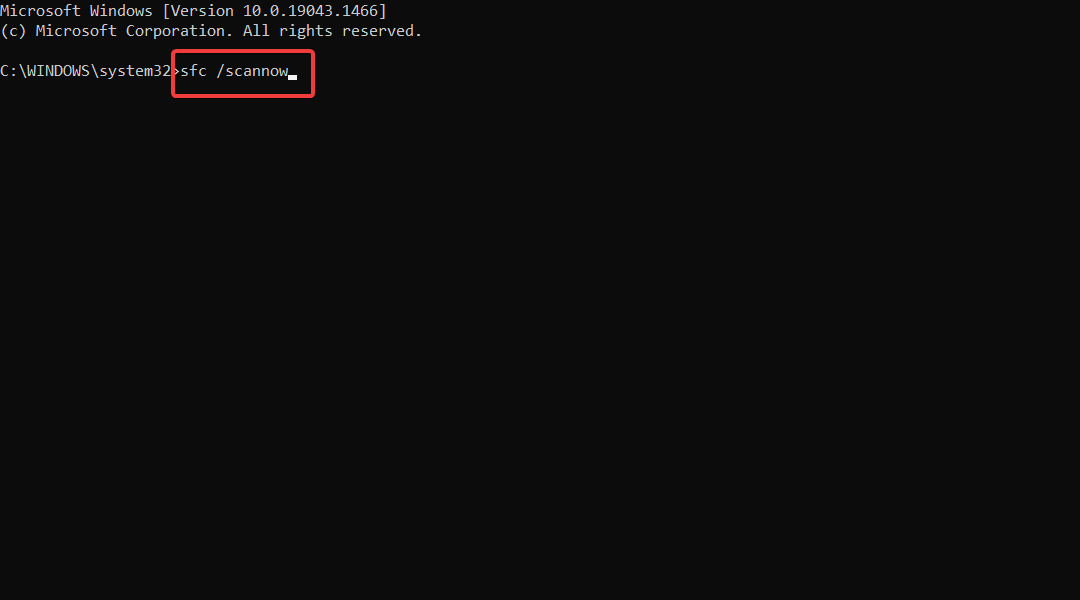
Sometimes the 0xC1900101 driver error can appear due to corrupted system files, but you can quickly fix them by running the SFC scan.
Once the process is finished, the problem should be resolved, and you should be able to perform the upgrade. If you’re having trouble accessing Command Prompt as an admin, change the administrator account on your Windows 11.
Regardless of that, you could truly solve the issue automatically with a secure PC repair solution that will scan your Windows OS and replace corrupted files in minutes.
4. Remove your antivirus
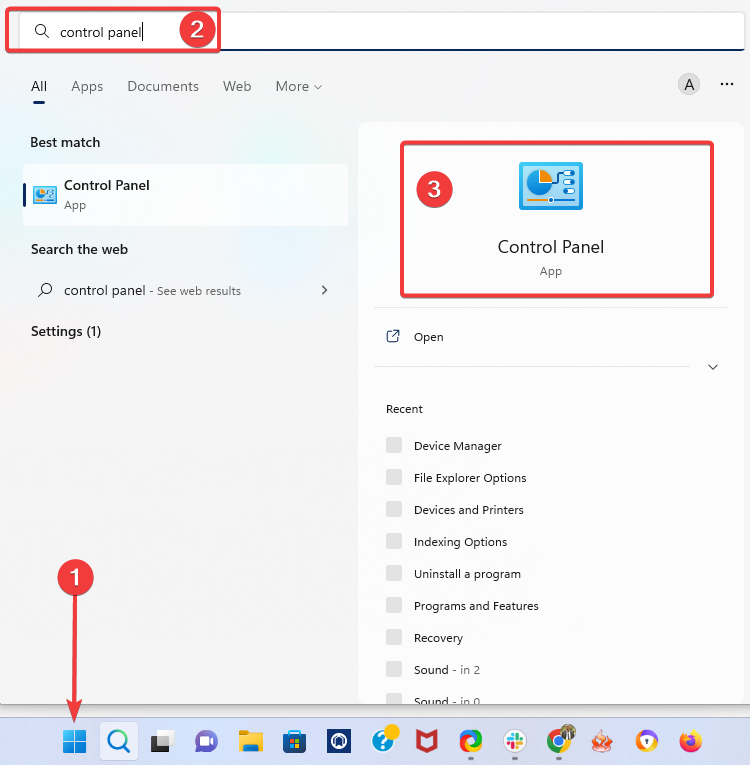
- Go to Start and type Control Panel and open up the app.
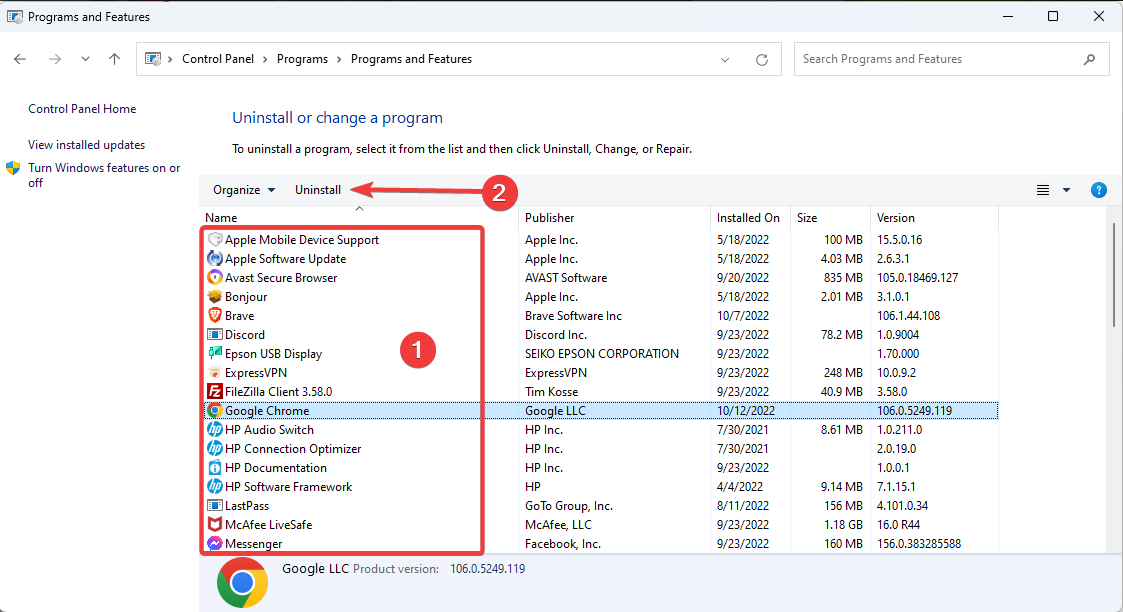
- Click on Uninstall a program.

- Select the antivirus from the program list and click the Uninstall button.
- Finally, follow the on-screen instructions, which will vary by the type of antivirus.
On the flip side, you can also go for an antivirus that doesn’t interfere with your PC’s functions and therefore doesn’t need to be deactivated or removed.
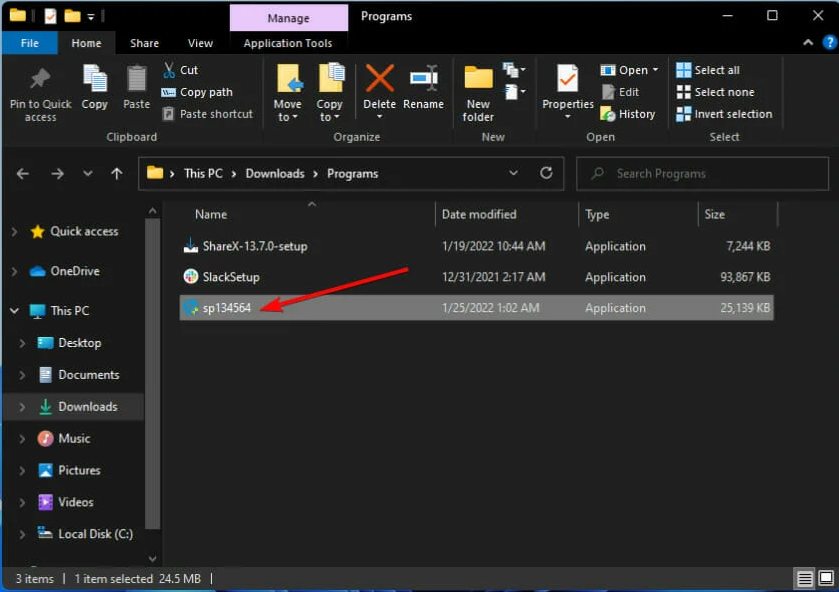
5. Remove problematic or recently installed applications
- Go to Start and type Control Panel and open up the app.
- Click on Uninstall a program.
- Lastly, select a recently installed app from the list of applications and click the Uninstall button (repeat the process for all recently installed apps).
Sometimes third-party applications can interfere with the upgrade process and cause the 0xC1900101 driver error to appear. Users reported that applications such as Acronis True Image and Trusteer Rapport are the leading causes for this.
If you need expert tools that will thoroughly remove stubborn applications from your PC, the great idea is to try the most relevant uninstaller software for Windows 11.
6. Update your BIOS
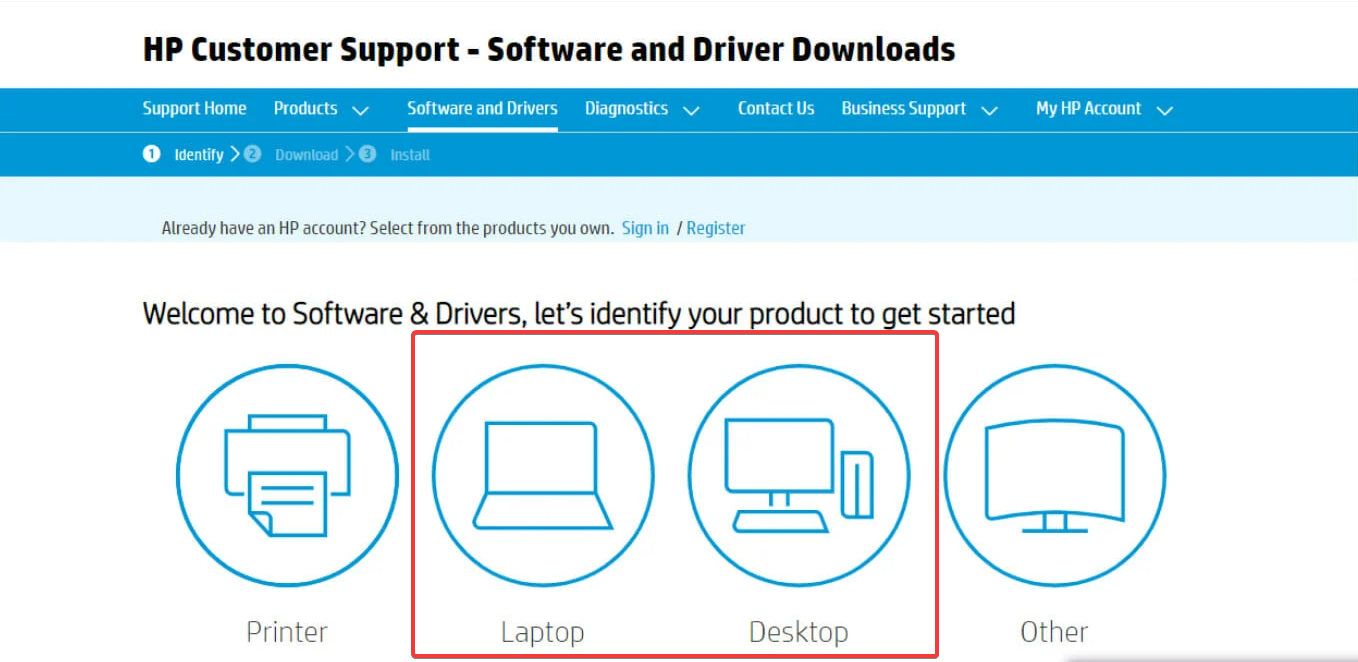
- Navigate to the HP driver and software download website (this will vary depending on the manufacturer of your device).
- Choose a laptop or desktop, depending on the type of computer you’re using.
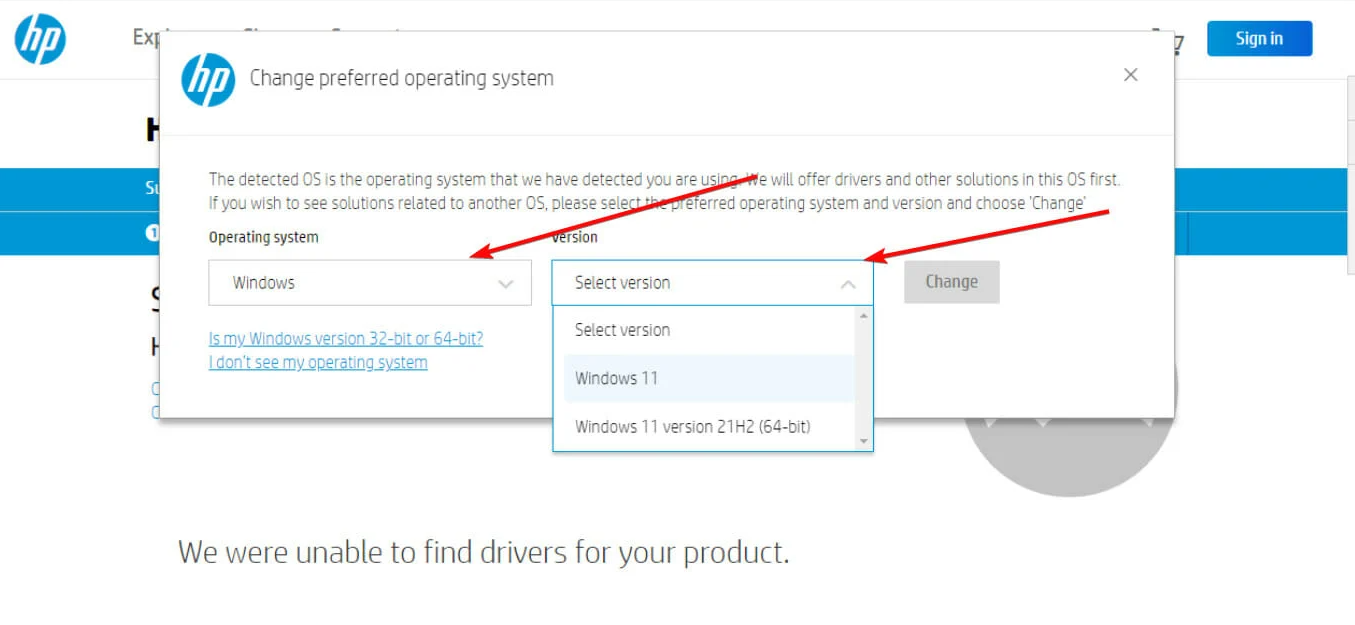
- Enter your exact serial number or your exact computer model.
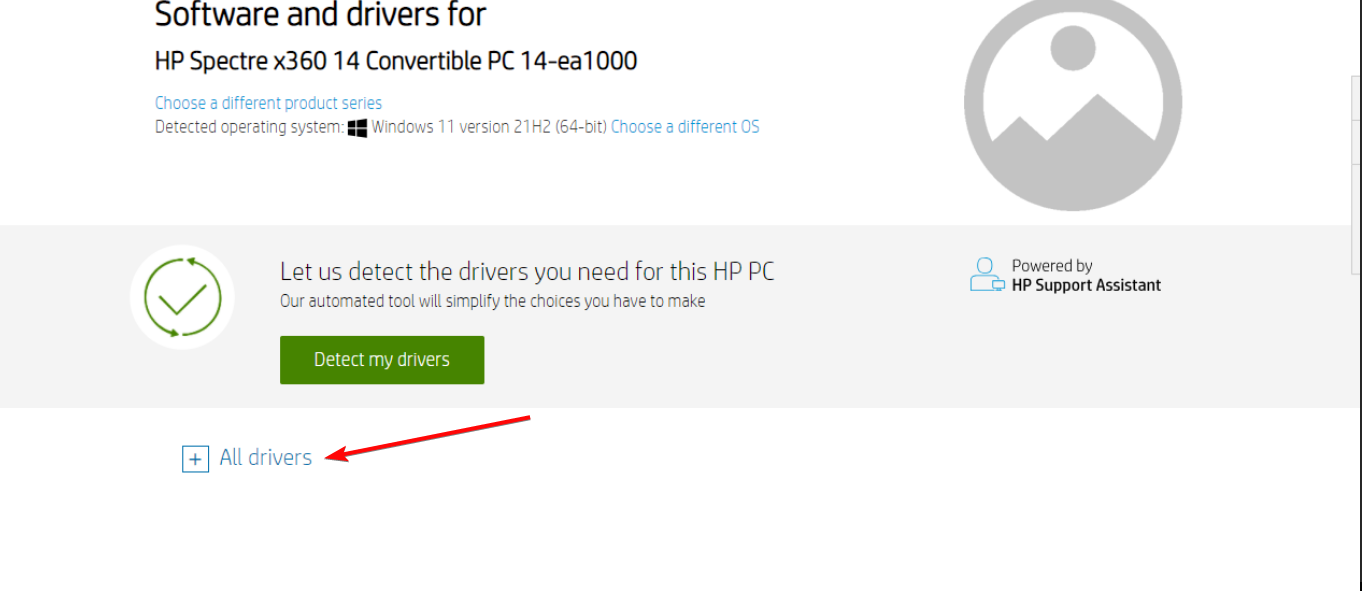
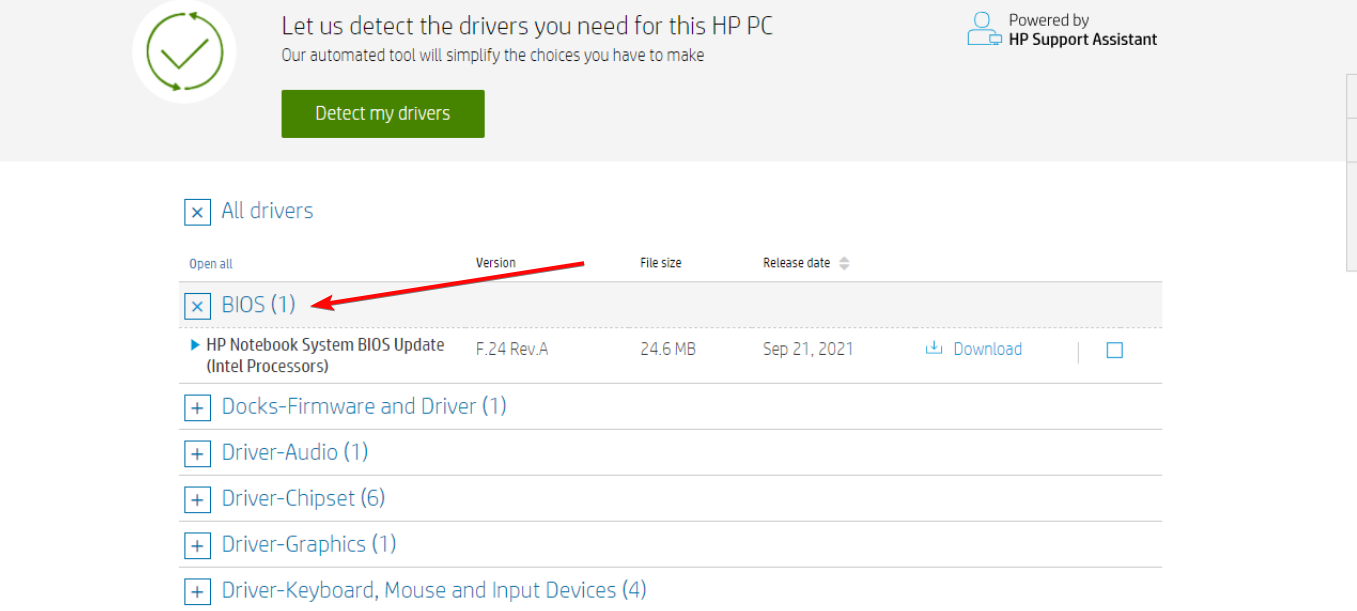
- Click on All drivers and then expand BIOS to see available updates.
- Click the download icon.
- Install the .exe file, following the on-screen instructions.
- Finally, restart your PC, and you can select Apply Update Now during the startup.
The 0xC1900101 driver error can be severe and prevent you from installing specific updates, but you should be able to fix it using one of our solutions.
Lastly, if you have any other suggestions or encounter difficulties, leave us a comment in the dedicated section below.
FAQ
The error code 0xC1900101 indicates an incompatible driver or underlying driver issue. This can lead to system hangs, blue screens, and unexpected reboots.
Users often encounter the 0xC1900101 error due to outdated driver updates or incompatible drivers with Windows 11. These driver-related factors frequently cause installation problems during the upgrade.
To resolve the 0xC1900101 error, ensure you install the latest driver updates and check for any incompatible drivers. Running the Windows Update troubleshooter may also help identify and fix issues.
Read our disclosure page to find out how can you help Windows Report sustain the editorial team. Read more


Improve this guide


User forum
0 messages