Game Install Taking Forever: How to Speed it up
Fixing your hard drive should do the job here
5 min. read
Updated on
Read our disclosure page to find out how can you help Windows Report sustain the editorial team. Read more
Key notes
- If your game takes forever to install, it might be due to a lack of privilege.
- You can fix this issue by defragmenting your hard drive.
The sheer size of modern games can certainly prolong the installation process. But nonetheless, we can conclude that even Gears of War 4, which is enormous in size and has an abundance of DLCs, will eventually install after a few hours or so.
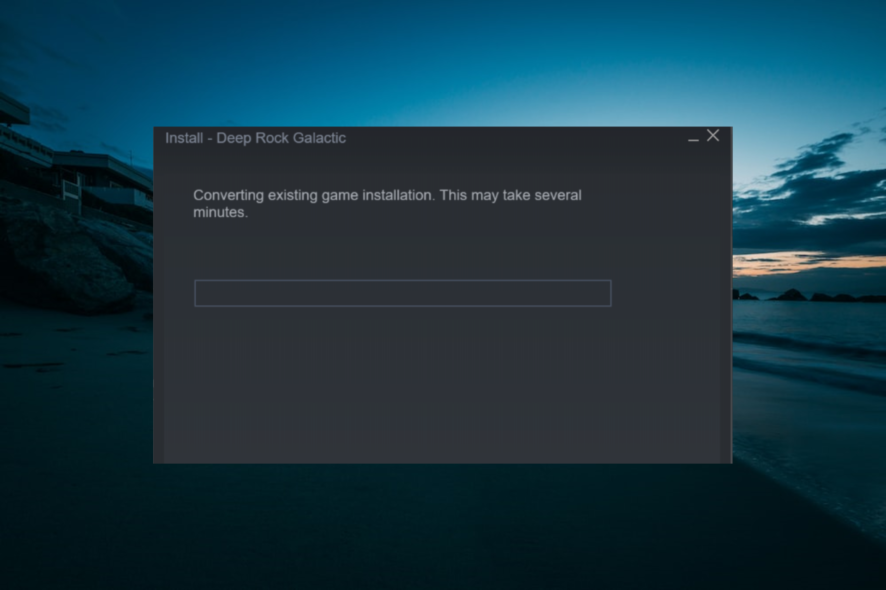
But what to do when the game install is so long that you’re not even sure if the progress bar is advancing forward? This is especially common when Steam is converting existing game installations.
There are many possible reasons for this, and we made sure to cover them in this article. Irrespective of the cause, you can fix it with the solutions in this guide.
How can I fix my game if it taking forever to install?
1. Quit and try again
A simple but nonetheless viable step when something like this or a running install script occurs, especially if you’re installing digital copies with the Steam client or its peers, is to ensure you have enough storage space. Free up some space, if necessary.
Contemporary games come with many additional patches and updates that can sometimes take up to 10, 20, or more gigabytes.
Basically, for the installation process to finish completely, occasionally, you’ll need to install available updates, too. And that will additionally prolong the installation process.
Therefore, make sure to stop the installation process, clean everything, check all included variables (storage space, permissions, etc.), and start from scratch. Furthermore, if there’s a way, you can start the setup directly and avoid the Steam/Battle.net/Origin client.
2. Run the installer in compatibility mode with administrative permission
- Navigate to the folder where the game setup (Setup.exe, most of the time) is located. It’s either on the installation disk or in the PC storage.
- Right-click on the Setup.exe file and open Properties.
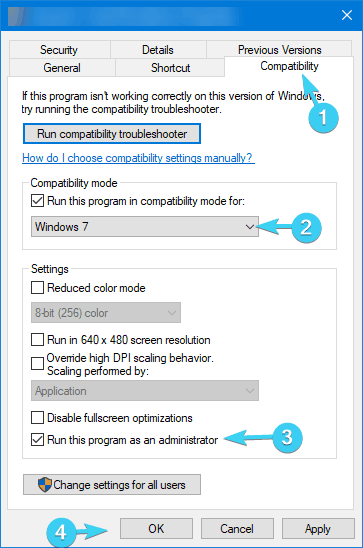
- Choose the Compatibility tab.
- Check the Run this program in compatibility mode for box.
- From the drop-down menu, select Windows 7 or Windows 8.
- Now, check the Run this program as an administrator box.
- Click OK to confirm changes.
While we’re at it, it’s worth mentioning that sometimes the incompatibility with the current system version can stall or even prevent the installer from completing the installation. These errors can manifest in different ways like the libvorbisfile.dll not found.
To avoid this, we advise you to run the game in the compatibility mode to an initially predicted system version.
If your game is older, make sure to run it in compatibility mode for Windows 7. Furthermore, the installer needs administrative permission to make changes to your system.
3. Restart Steam and try again
- Close the Steam desktop client.
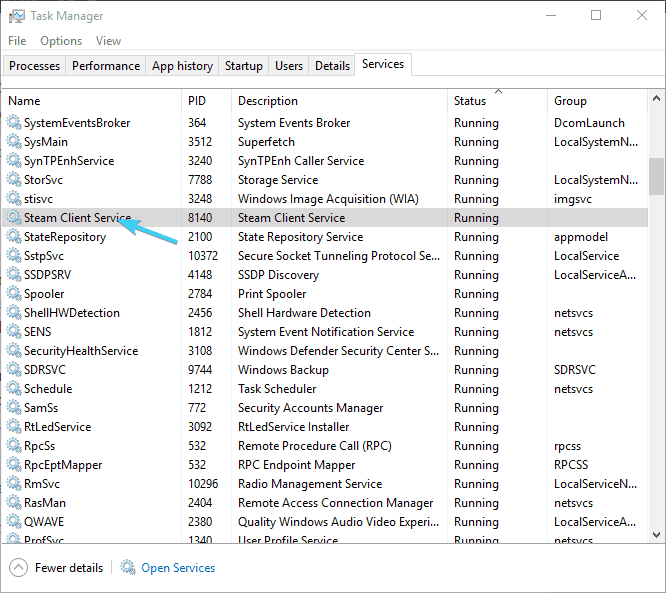
- Right-click on the taskbar and open Task Manager.
- Open Details and kill all active Steam-related processes.
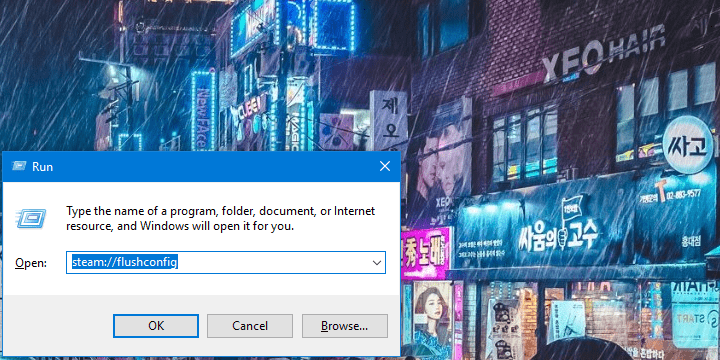
- Press Windows key + R to summon the Run utility.
- Copy and paste the following command on the command line and press Enter:
steam://flushconfig - Wait for some time and restart your PC.
While digital distribution spurs access to a certain game, it also has issues. More than a few users found the Steam client culpable for more than slow installation.
In order to address this, it’s best to restart Steam and move from there. Additionally, you can run the dedicated command in the Run elevated command line. This command will restore Steam to default values, and it’s a good way to avoid reinstallation.
We explained how to run the steam flushconfig command, in our detailed article.
4. Defragment the HDD and check its health
- Open This PC or File Explorer.
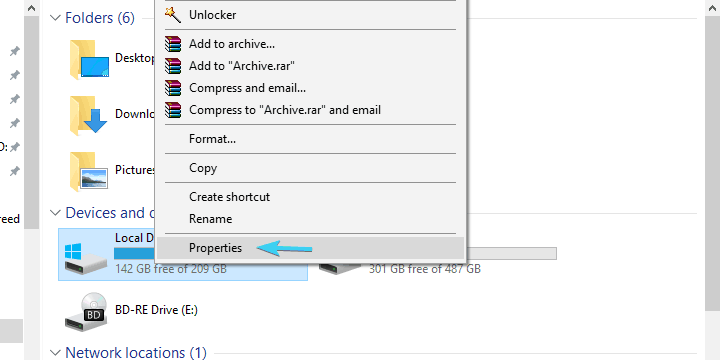
- Right-click on the system partition (most of the time C:) and open Properties.
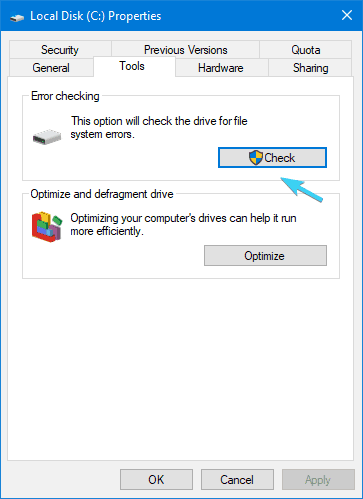
- Select the Tools tab.
- Under the Error Checking section, click on the Check button.
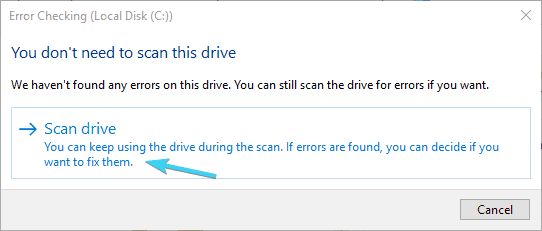
- Click Scan drive. This should find and fix all drive errors.
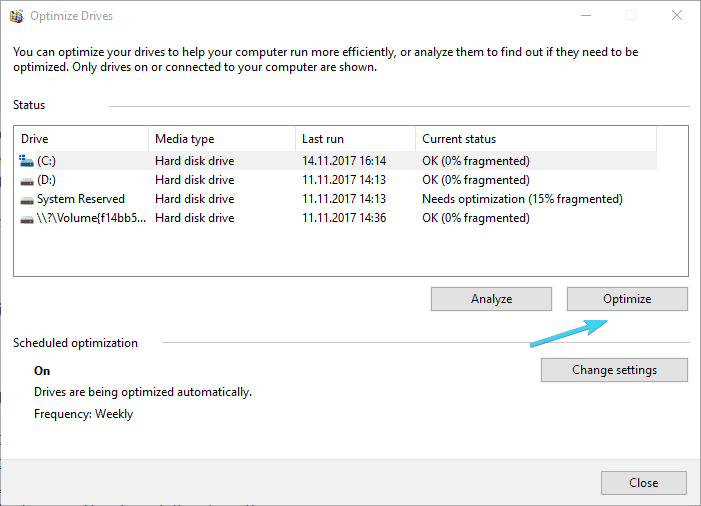
- Now, get back to Tools tab and, under the ”Optimize and defragment drive” click Optimize.
- Highlight the system partition drive and click Optimize.
- The defragmentation process will take some time, depending on the HDD size and the fragmentation levels.
The previous steps should have dealt with the lesser evils, but we have finally reached the worst-case scenario: the HDD failure.
The first symptom of HDD health issues or corruption is substantially decreased reading speeds. Thus, file installation or copying can take more time than usual.
Once your HDD reaches this stadium, it’s too late to fix it most of the time. However, maybe the fragmentation levels are too high, or there are some repairable errors. To address these, you can either turn to a third-party tool or use the built-in system tools.
If, after this, you’re still stuck with the same old overlong installation, we advise you to take a more thorough approach. You can do so by running the Check Disk command in order to confirm the integrity of the disk.
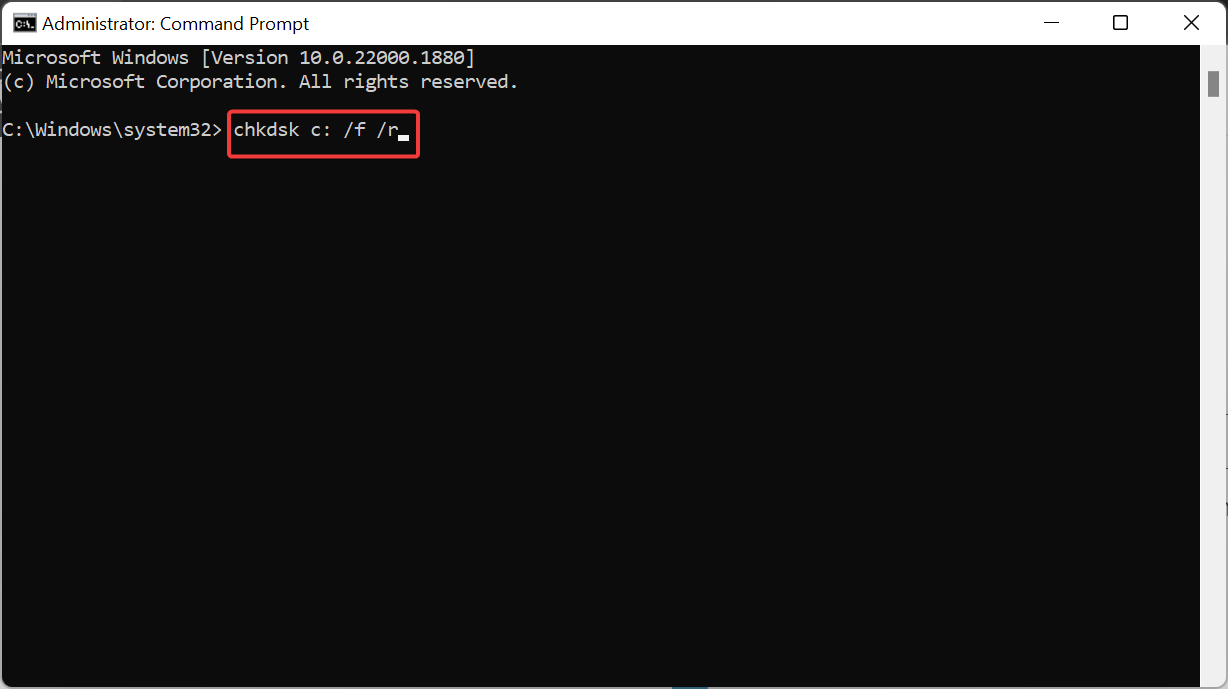
- In the Windows Search bar, type cmd, and select Run as administrator under Command Prompt.
- In the command line, type the following command and press Enter:
chkdsk c: /f /r - Wait for the tool to analyze the disk and resolve possible errors.
If, even after that, you’re stuck with the same issue, you can go further by using the HDD troubleshooting tools or repair the HDD altogether.
That should do it. If you have additional solutions or questions about the ones we presented above, feel free to tell us in the comments section below.


User forum
0 messages