Steam Flush Config: What is it and how to use it Properly
Best ways to use the utility
Key notes
- It is no longer a surprise that Steam can get you into trouble, so you need to know how to run the steam://flushconfig command.
- You can easily use this command through the Windows run dialog box.
- Remember that the steam flush config command works for an individual game or library-related errors.

Many users want to discover how to use the Steam flush config command. If you’re in the same boat, read this guide thoroughly.
Steam has somewhat become the synonym for PC gaming. Furthermore, its desktop client is a top-notch application with remarkably few errors.
However, it’s not flawless, so you must learn the steam://flushconfig command to address the errors.
We prepared a how-to on the subject if you’re unsure how. We’ll try to explain concisely below, so check it out.
What is the Steam flush config command?
The Steam flush config command is used in the Steam client application to clear the local configuration settings stored on the user’s computer.
Steam will delete the user’s saved login credentials, custom settings, preferences, and any cached data or temporary files when executing this command.
The primary purpose of this command is to troubleshoot issues related to corrupted or outdated configuration settings that may be causing problems with the Steam client’s functionality.
By clearing the configuration settings, users can reset the Steam client to its default state, often resolving issues related to login problems, download errors, or other matters that outdated or corrupted settings may cause.
However, it’s important to note that executing this command will erase all of the user’s custom settings and preferences, so it must be used with care and only as a last resort when other troubleshooting steps have failed.
How do I use the Steam flush config command?
1. Through the Windows run dialog box
- Close the Steam desktop client.
- Right-click on the taskbar and open Task Manager.
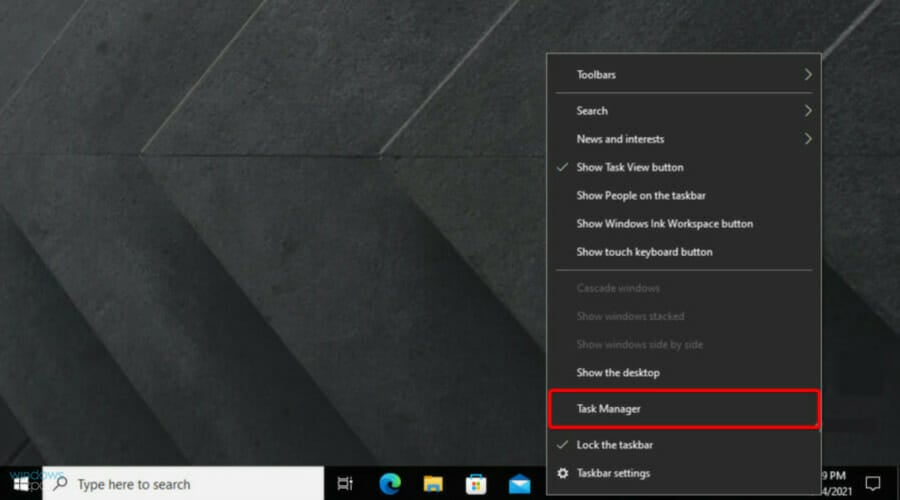
- Open Details and kill all active Steam-related processes.
- Now, use the following keyboard shortcut to open the Windows run dialog box: Windows + R.
- Copy and paste the following command in the command line and hit Enter:
steam://flushconfig - Wait for some time and restart your PC.
- Now, navigate to Steam’s installation folder by right-clicking on the app’s shortcut, then choose Open file location.
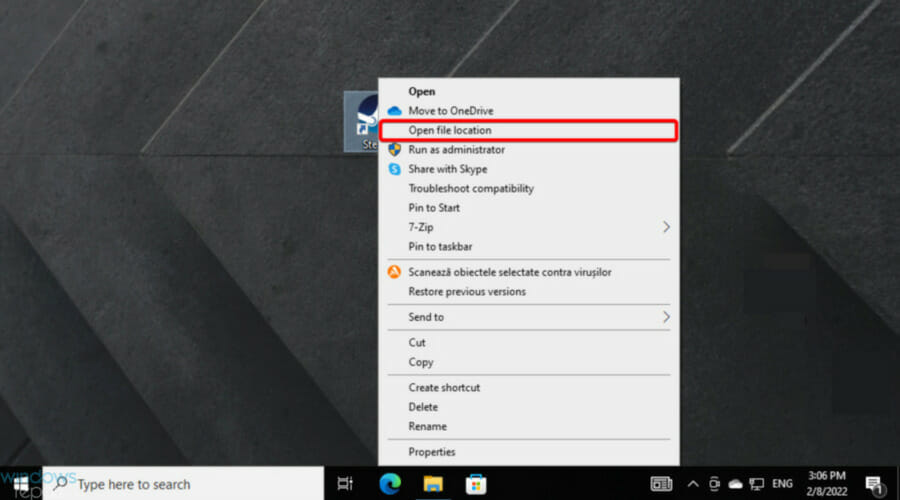
- Run Steam.exe from the installation folder.
2. With Command Prompt
- Hit the Windows key, type cmd, then right-click on Command Prompt, and choose to Run as administrator.

- In the opened window, input our presented command, then press Enter:
steam://flushconfig
- Wait a few seconds, and after the process is done, restart your PC.
So, this is how you can run the steam flush DNS config command in Windows 10. As you can see, it’s a straightforward process that can generate unexpected results.
If you have any questions or suggestions regarding this Steam troubleshooting step, please tell us in the comments section below.
Read our disclosure page to find out how can you help Windows Report sustain the editorial team. Read more


Improve this guide


User forum
1 messages