Fix: Marvel Rivals Failed to Connect to Steam (Error Code: 5)
Running Steam with administrative privileges is the quickest fix

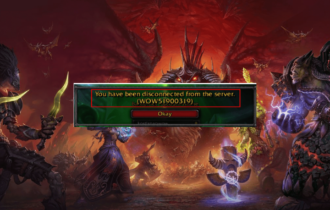
Marvel Rivals, a free-to-play hero shooter game, has gained massive popularity within days of launch, but network issues continue to plague it. A common error that appears when launching the game is Failed to connect to Steam. Error Code: 5.
The network error arises due to missing permissions, corrupted game files, issues with the current DNS, a misconfigured time zone, conflicts triggered by the firewall, and improper game installation.
Before you proceed to the slightly complex solutions, restart the PC, install pending Marvel Rivals updates, and connect to a mobile hotspot, if available. Also, check the Marvel Rivals server status using a monitoring service like Downdetector.
How can I fix Failed to connect to Steam error in Marvel Rivals?
1. Run Steam with administrative privileges
- Right-click on the Steam launcher (.exe file), and select Properties.
- Go to the Compatibility tab, and tick the checkbox for Run this program as an administrator.

- Click Apply and OK to save the changes and then check for improvements.
For 3 out of 5 users, simply running Steam with administrative privileges fixed the Failed to connect to Steam error in Marvel Rivals on a Windows PC.
2. Verify the integrity of game files in Steam
- Launch Steam, navigate to the Library tab, right-click on Marvel Rivals, and select Properties.

- Go to the Installed Files tab, and click on Verify integrity of game files.

- Wait for Steam to repair/replace any problematic game files and then check for improvements.
Still cannot start the game after verifying files? Follow our full guide to fix Marvel Rivals not launching issues for additional launch troubleshooting.
3. Switch to Google’s DNS
- Press Windows + R to open Run, type ncpa.cpl in the text field, and hit Enter.
- Right-click on the active network adapter, and select Properties.

- Choose Internet Protocol Version 4 (TCP/IPv4), and click on Properties.

- Select the Use the following DNS server addresses, and enter the following in the fields underneath:
- Preferred DNS server: 8.8.8.8
- Alternate DNS server: 8.8.4.4
- Tick the checkbox for Validate settings upon exit, and click OK to save the changes.

In a few cases of Marvel Rivals Failed to connect to Steam error on Windows, Xbox, and PlayStation, switching to Google’s Public DNS cleared out network-based inconsistencies. Also, for improved speed, you can set the fastest DNS server near you!
4. Set time and zone selection to automatic
- Press Windows + I to open Settings, go to Time & language from the left pane, and click on Date & time.
- Enable the toggles for Set time zone automatically and Set time automatically.

- Now, click on the Sync now button.

- Finally, reboot the PC, relaunch Steam, then run Marvel Rivals, and check for improvements.
5. Whitelist Marvel Rivals in Windows Firewall
- Press Windows + S to open Search, type Windows Defender Firewall, and click on the relevant result.
- Click on Allow an app or feature through Windows Defender Firewall from the left pane.

- Click on Change settings.
- Now, click on Allow another app.

- Click on Browse, then go to this path, select the Marvel Rivals launcher (.exe file), and click on Open:
C:\Program Files (x86)\Steam\steamapps\common\MarvelRivals - Click on Add.
- Finally, tick the checkboxes for Private and Public next to Marvel Rivals and click OK to save the changes.

Windows Defender Firewall has also been found to block Marvel Rivals, triggering Failed to connect to Steam Error Code: 5 on the PC. So, verify whether the firewall is blocking it and then whitelist the game. Also, check for blocks imposed by any third-party firewall or security software!
6. Use a VPN
When Marvel Rivals won’t launch on a specific network or account but works for others, it may be a temporary issue in servers or the setup. In this case, you can go with a free VPN solution to play the game.
Since it’s known to affect the Internet speed, I recommend using an effective gaming VPN, which delivers superior performance and enhances the gaming experience.
A professional VPN software, well suited for this task is ExpressVPN. With this tool, you are able to choose from numerous servers and you also benefit from amazing connection speed, so you don’t have to worry about any issues when playing your game.
7. Reinstall Marvel Rivals
- Press Windows + R to open Run, type appwiz.cpl in the text field, and hit Enter.
- Select Marvel Rivals from the list of apps, and click on Uninstall.

- Follow the on-screen instructions to complete the process and then restart the PC.
- Now, launch Steam and download a fresh copy of Marvel Rivals. If possible, save it in the same drive where Steam is installed.
If Marvel Rivals finally launches but is not visible in your streaming setup, you can solve it by following this guide: Marvel Rivals not showing on OBS.
When nothing else works, the last option is to reinstall Marvel Rivals. This will clear out any inconsistencies that may have been present in the previous installation!
If a quick removal doesn’t work, the game may have left behind files or Registry entries that are still conflicting with Windows. In this case, you should use a top-rated software uninstaller to wipe all traces of the previous game installation.
Based on available reports, the Failed to connect to Steam error in Marvel Rivals is fixable for most. But if the solutions here don’t help you, wait for 12-24 hours for the servers to be up and running or until the developers deploy a patch (in case of a bug).
Before you leave, discover expert tips to optimize your PC for gaming and enjoy a seamless, error-free experience!
If the game still won’t launch because the update won’t download or install, follow our guide on Marvel Rivals not updating to fix update issues first.
For any queries or to share which fix worked for you, drop a comment below.
Read our disclosure page to find out how can you help Windows Report sustain the editorial team. Read more


Improve this guide


User forum
0 messages