Mouse Keeps Jumping Around: Why It Happens & Fix
Fix your erratic mouse pointer with our step-by-step solutions
Key notes
- The mouse jumping around on a Windows 10 device might be a result of misconfigured settings or problems with the port.
- To fix things, adjust the touchpad delay or update the drivers, amongst other solutions.
- Some users also reported that the mouse itself was faulty and replacing it did the job.

If your mouse keeps jumping around or ignoring your movements on Windows 10, you’re not alone. It’s a frustrating issue that can seriously mess with your workflow.
While it might be a simple driver glitch or system setting, sometimes the mouse itself is the problem. Before replacing it, try a few quick fixes first.
This guide covers the main reasons your cursor jumps and how to fix them, including tips on updating your drivers and running a virus scan to rule out malware.
How can I fix the mouse if it’s jumping around on Windows 10?
Before we head to making changes to Windows, here are a few quick tricks that might work:
- Unplug the mouse and connect it to a different USB port in case the present USB port is not working or is faulty. Also, disconnect all non-critical peripherals from the PC and check if the problem is resolved.
- A user pointed out that in touchscreen laptops, the problem may appear due to the improper functioning of the screen. In this case, disable the touchscreen functionality in the BIOS. Then, check the manufacturer’s website for the exact steps.
- Try using another mouse and verify whether it, as well, jumps on Windows 10. Because in that case, the problem indeed lies with the computer.
If nothing listed previously worked, try the fixes listed next.
1. Adjust the touchpad delay time and disable the touchpad
1.1 Adjust touchpad delay time
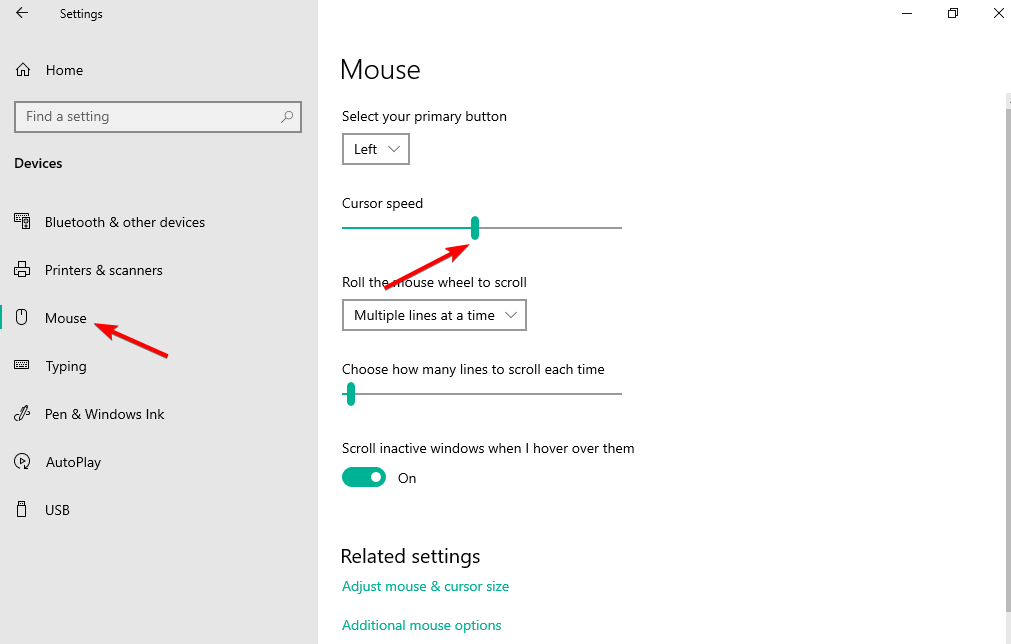
- Press the Windows + I hotkeys on your computer, then select Devices.
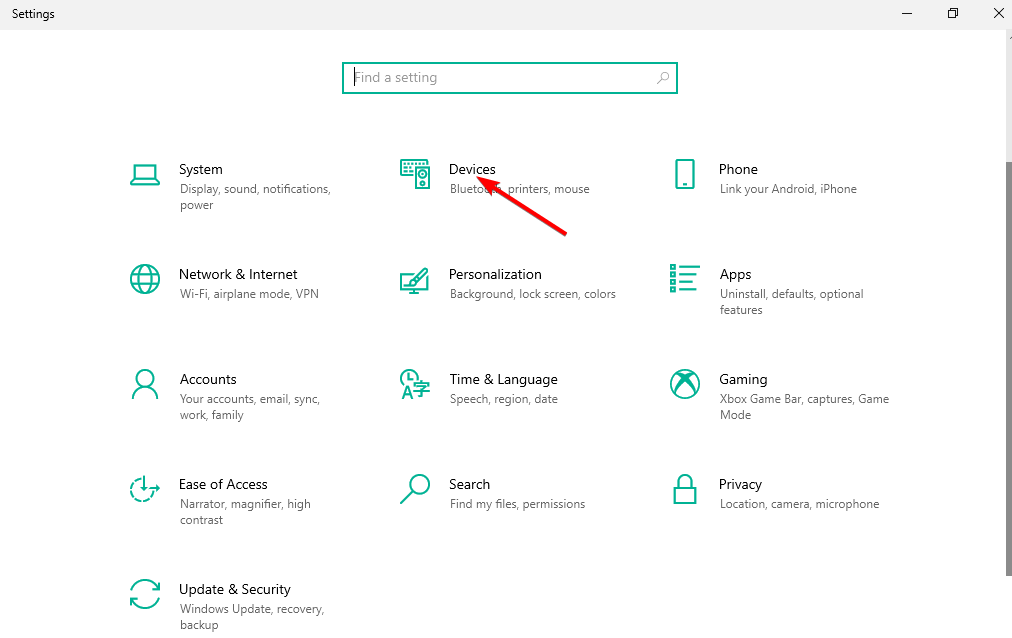
- Next, select the Mouse tab and change the mouse speed. Touchpad cursor jumping around in Windows 10 will no longer be an issue.
1.2 Disable touchpad
- On your home screen, click on the arrow located near the clock and then right-click on the touchpad icon.
- Select Property of Touch-Pad, and switch to the tab associated with your Touchpad from the next window.
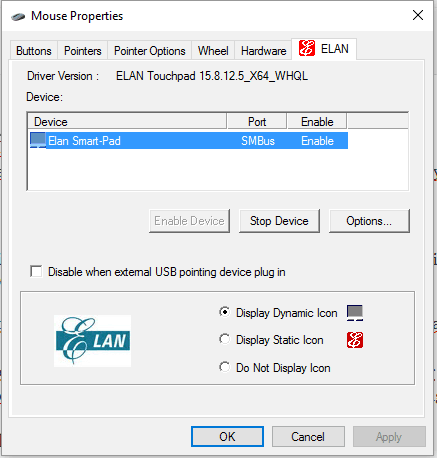
- Click the Stop Device button or check the Disable when external USB pointing device plugin checkbox. This way, you can fix the mouse jumps on your PC.
Due to the same reasons explained during the previous troubleshooting solution, you must also try to disable the touchpad.
If this didn’t help you fix the problem, we also have an excellent guide on avoiding your touchpad interfering with your mouse.
2. Check the associated drivers
- Right-click the Start icon, then select Device Manager.
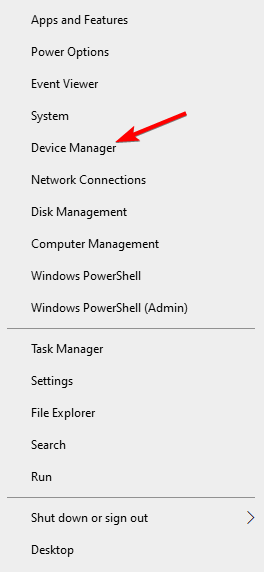
- Navigate towards Mice and other pointer devices—Right-click on each driver and select Update driver.
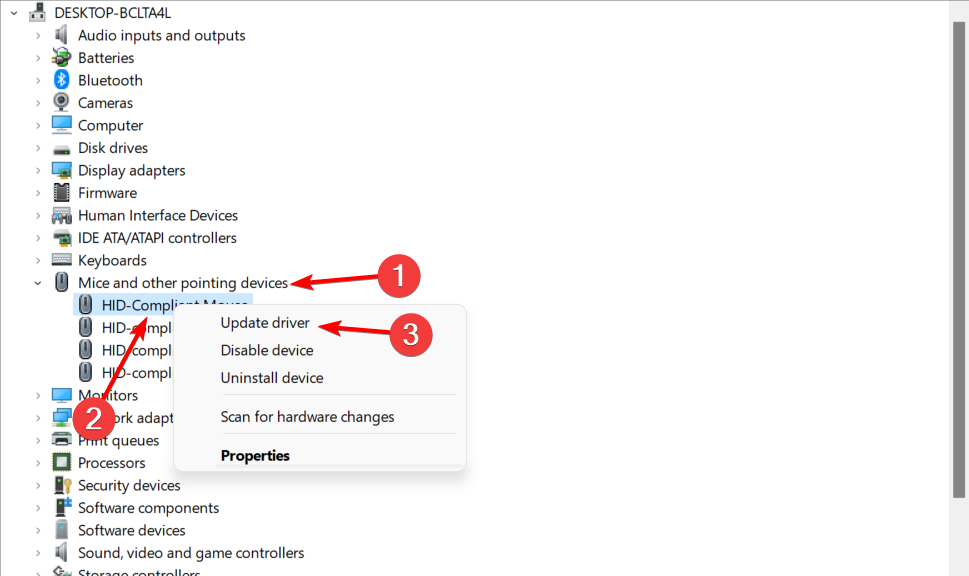
- Then, restart your Windows 10 computer and see if that resolves the mouse jumps in Windows 10.
If, after updating the driver, the issue is still there, try to manually install the latest driver version available.
To avoid damaging system settings, we strongly recommend using dedicated software such as the one recommended below to search the web and suggest appropriate drivers update the old ones.
Not only that the software will ease the job for you, but you can also use it for further monitoring the essential system drivers and processes to optimize and update them accordingly.

Outbyte Driver Updater
Take advantage of in-depth scans and let the tool find the latest updates for your device drivers.3. Adjust the settings from Control Panel
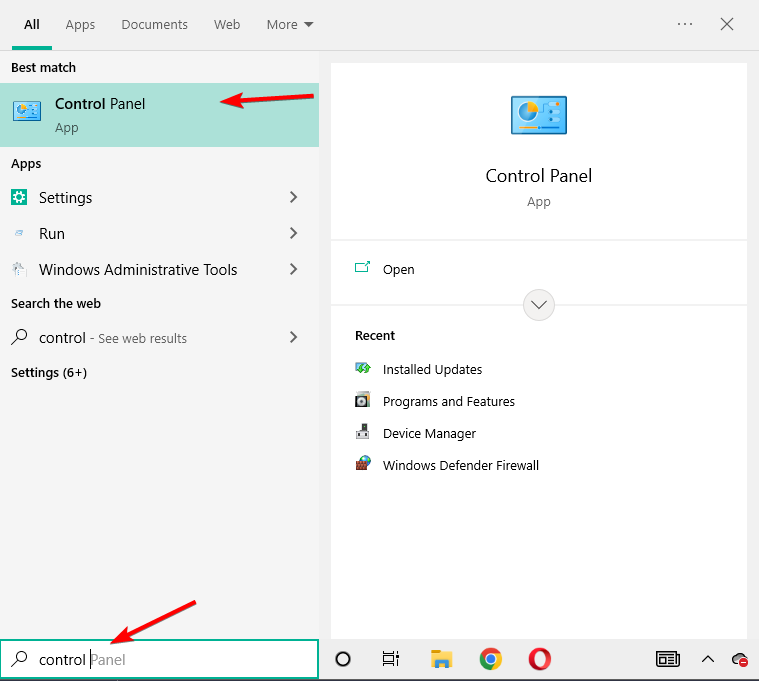
- Press Windows, then input control and select Control Panel from the list.
- Type mouse inside the search bar and select the Mouse result.
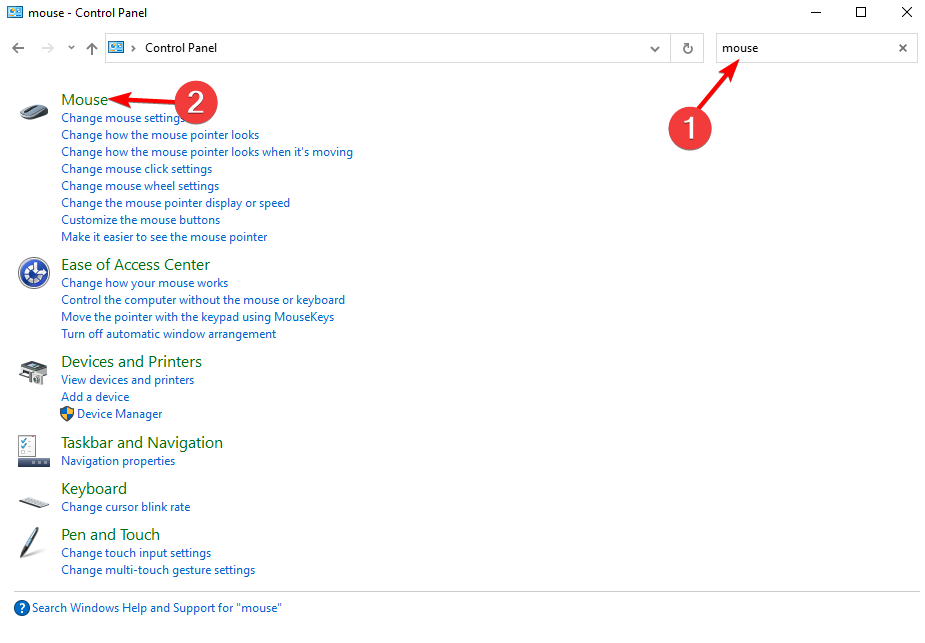
- Make sure you uncheck the box next to Enhance pointer precision, then click OK.

Mouse Acceleration is another name for the Enhance Pointer Precision feature. When you use it, it will make on-the-fly adjustments to your DPI to provide you the ability to move your cursor over a greater distance.
When you are attempting to aim, the value of your DPI will fluctuate all the time as a result of this.
4. Scan your computer
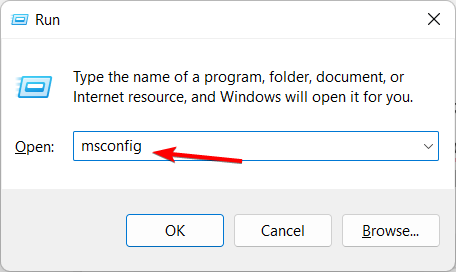
- Press the Windows key + R, and in the Run box, type msconfig, then press Enter.
- In the window that opens, switch to the Boot tab. From there, check Safe Boot located under Boot options.
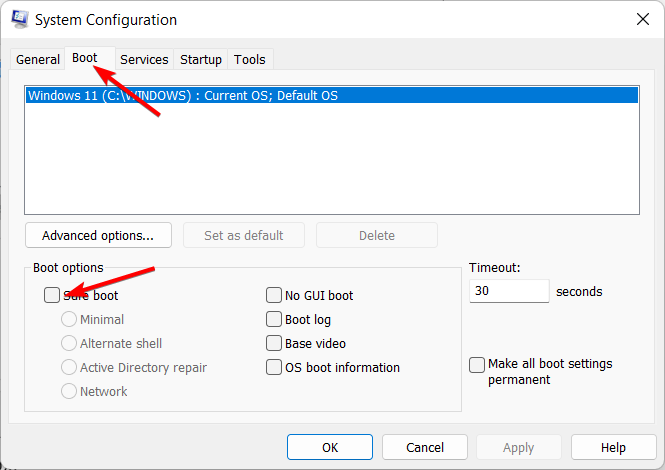
- Also, check the Network box. Click OK and then Apply.
- Restart your Windows 10 device.
- Now resume the scanning process for removing possible malware.
Malware or viruses can be why the mouse jumps in Windows 10, so you need to remove the malicious program accordingly.
We recommend you use some of the best virus removal tools for Windows 10. There you go; that’s how you can fix the mouse jumps in Windows 10 problem.
How can I fix the mouse jumping around on Windows 11?
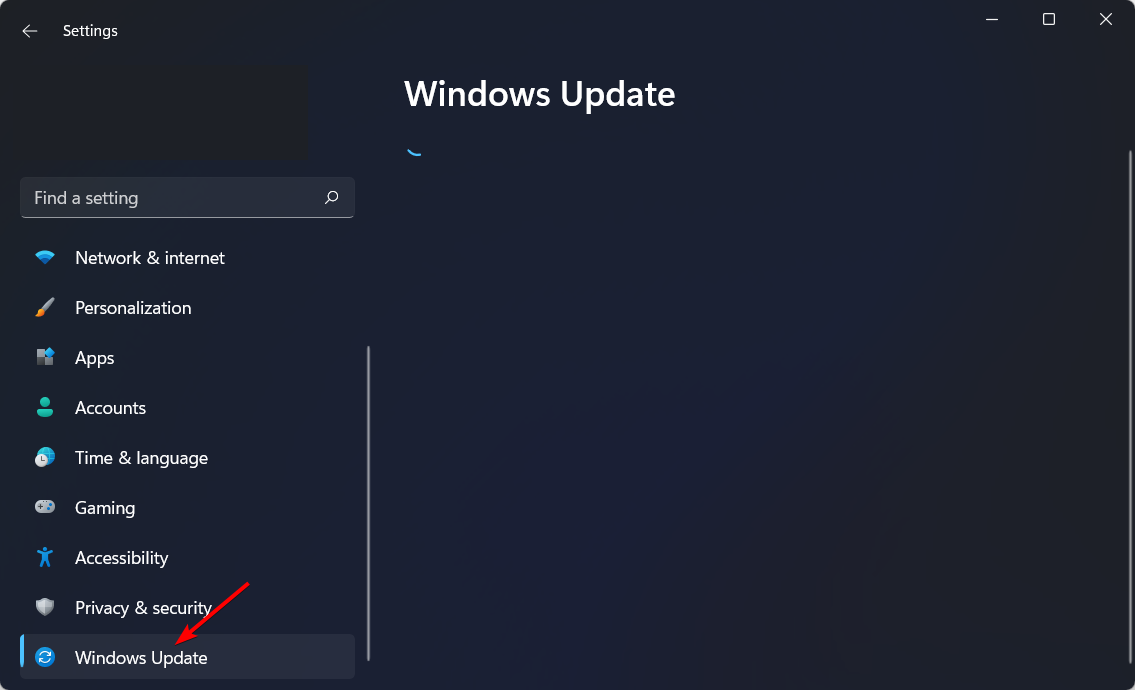
- Press Windows + I to open Settings, then go to Windows Update.
- Click the Check for updates button in order to bring your OS up-to-date and fix mouse jumps on PC.
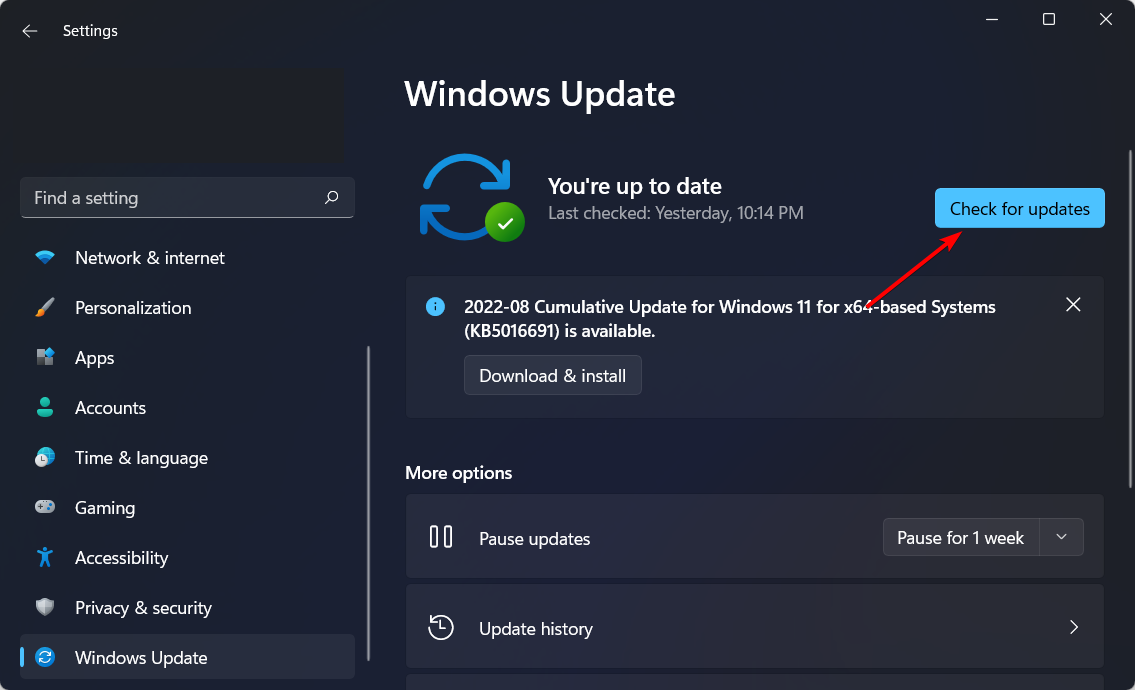
By updating your OS, you will use the latest bug fixes and features that can address the PC mouse jumps that have been causing you issues so far.
Why is my mouse jumping around on my laptop?
Malfunctioning hardware, such as the mouse, the USB port, and the cable, is frequently the cause of the mouse moving about randomly. Also, issues with the screen on touchscreen laptops have been reported to be the underlying cause here.
The erratic behavior of the cursor can also be caused by a mouse pointer that is corrupted, an out-of-date device driver, faulty touchpad settings, or even malware. By following the above solutions, you can address all these issues and successfully regain access to your mouse.
For more solutions, we recommend you check what to do if the cursor freezes, jumps, or disappears in Windows.
Other common mouse issues include the cursor not going to the second screen, disappearing entirely, lagging during use, or clicking on its own.
Do tell us which troubleshooting solution worked for you by using the comments field below. Of course, stay close and check out our tutorials for learning further Windows-related tips and tricks.
Read our disclosure page to find out how can you help Windows Report sustain the editorial team. Read more


Improve this guide


User forum
3 messages