Here's how to fix Windows Defender error 0x8000404
Updating Windows Defender can sometimes be quite a tricky task. There are various errors that can block the update process, but fortunately, most of them can be fixed using quick workarounds.
Error code 0x8000404 is one of the most frequent errors encountered by Windows Defender users, and appears when the definition updates can’t be installed.
I have tried three times to install the Virus & Spyware updates, the defination updates couldn’t be installed, the error code 0x8000404 – what do I have to do?
There are several possible causes for this error: another security program creates conflicts and blocks Windows Defender updates, some system files are corrupt or missing, the Internet connection in unstable, and more.
Fix Windows Defender error 0x8000404
- Disable third-party antivirus
- Make sure the Windows Defender service is running
- Make sure Windows Defender is running
- Check for updates
- Remove latest updates
- Run the SFC scan
- Check the environment variables
Fix – Error 0x8000404 in Windows Defender
Solution 1 – Disable third-party antivirus
As we already know that Windows Defender is a part of the system, so installing a third-party antivirus can lead to certain interferences. In that manner, it’s advisable to disable a third-party antivirus in order to make Windows Defender work again.
However, you might consider changing your antivirus for a more efficient solution, so we recommend picking the best antivirus tools with high detection rates.
Solution 2 – Make sure the Windows Defender service is running
For Windows Defender to run properly, you need its service to run properly. Obviously, if the service doesn’t work, neither will Windows Defender. In that manner, let’s go and check if the Windows Defender service runs properly, and re-enable it if not. Here’s how to do that:
- Press Windows Key + R and enter services.msc. Press Enter or click OK.
- Locate the Security Center service, right-click it and choose Restart.

- After that, go back to the Services window, and make sure the Security Center service is enabled.
Solution 3 – Make sure Windows Defender is running
Even if the service is running properly, the firewall itself could be disabled. Now, it should be enabled by default, but let’s check just in case. Here’s how to do that:
- Go to search, type windows defender, and open Windows Defender Firewall with Advanced Security.
- Click Windows Defender Firewall Properties.
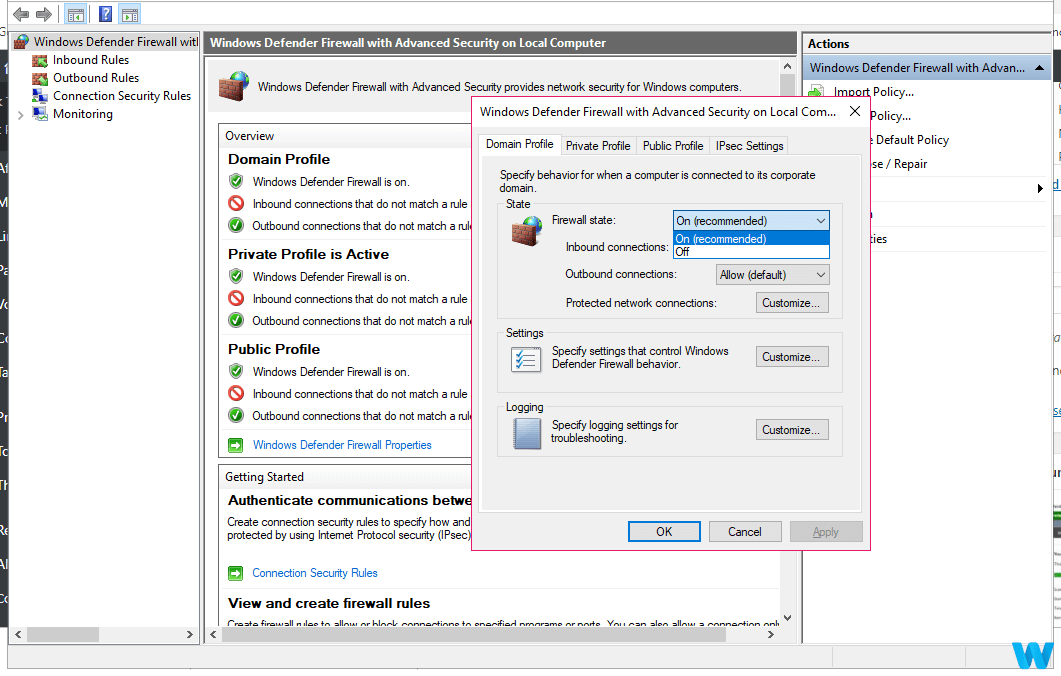
- Under Domain Profile Window, make sure Firewall state is set to On.
Solution 4 – Check for updates
As Windows Defender is part of the system, Microsoft releases updates for it through Windows Update. So, if there’s something broken inside Windows Defender, go on and check for updates. Maybe Microsoft has an ‘automatic’ solution.
To check for updates, simply go to Settings > Updates & Security, and check for updates.
Solution 5 – Remove latest updates
Just like installing a simple update can resolve the whole problem, it can also cause it in the first place. It’s actually a common sight that some cumulative update actually breaks something inside the system, and it could easily be Windows Defender. So, if you suspect the latest update you installed could have caused the problem, go on and delete that update.
If you’re not sure how to delete updates in Windows 10, just follow these instructions:
- Press Windows Key + I to open the Settings app.
- Once the Settings app opens, navigate to Update & security section.
- Go to Windows Update tab and click on Update history.
- Click on Uninstall updates.
- List of installed updates will now appear. Select the problematic update that you want to remove and click the Uninstall button.
- After removing the update, restart your PC.
Solution 6 – Run the SFC scan
The SFC scan is a universal troubleshooting tool that can be used for fixing all sorts of issues in Windows 10. So, it might be helpful in this case, as well.
Follow these steps to run the SFC scan in Windows 10:
- Right-click the Start Menu button, and open Command Prompt (Admin).
- Enter the following line and press Enter: sfc/scannow
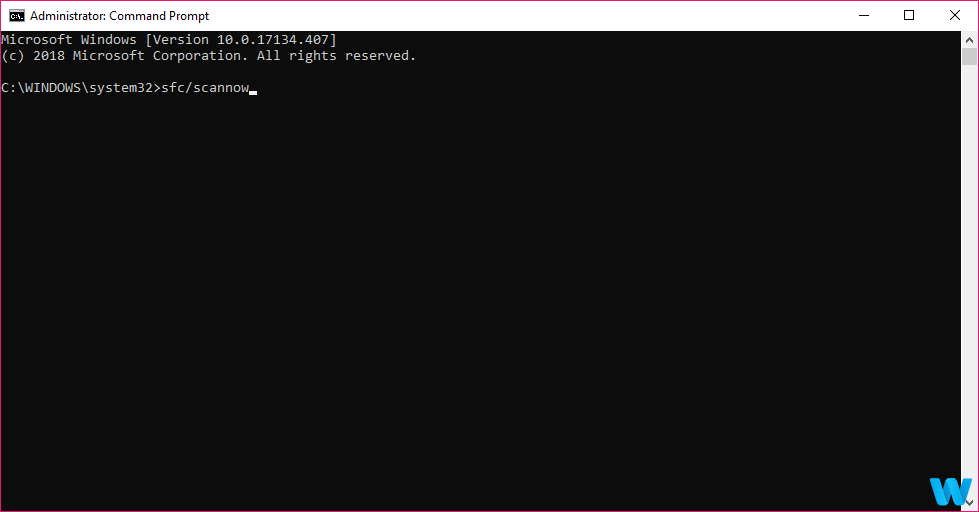
- Wait until the process is done (it may take a while).
- If the solution is found, it will automatically be applied.
- Now, close the Command Prompt and restart your computer.
Solution 7 – Check the environment variables
Environment variables are a useful feature used by your system to access certain directories. However, sometimes users or perhaps a third-party application can change the environment variables and cause issues with Windows Defender.
To fix your environment variables manually do the following:
- Press Windows Key + S and enter advanced system settings. Select View advanced system settings from the menu.
- Now click Environment Variables button.
- Locate %ProgramData% variable and check if it’s set to C:ProgramData. If not, change the variable accordingly.
That’s about it. If you’ve come across other workarounds to fix Windows Defender error 0x8000404, list the troubleshooting steps in the comment section below.
Read our disclosure page to find out how can you help Windows Report sustain the editorial team. Read more


Improve this guide


User forum
0 messages