Fix: Geforce Experience Driver Downloads But Doesn't Install
Reinstalling the drivers manually can fix this
![]() 3 min. read
3 min. read
![]() Published on
Published on
Share this article
Improve this guide
Read our disclosure page to find out how can you help Windows Report sustain the editorial team. Read more
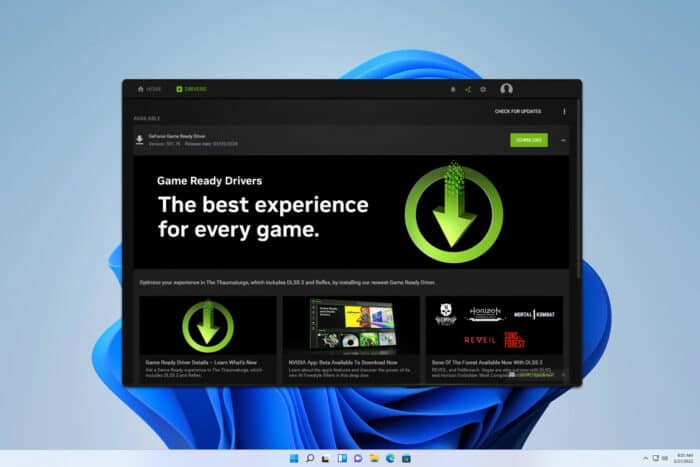
Encountering issues where GeForce Experience downloads the driver but fails to install it can be incredibly frustrating. This will prevent you from achieving maximum performance, so let’s see how we can fix this.
What can I do if the GeForce Experience driver downloads but doesn’t install?
Before we try more complex solutions, ensure that your Windows installation is up to date. Also, try disabling your antivirus software before starting the installation.
1. Perform a clean install of the NVIDIA driver
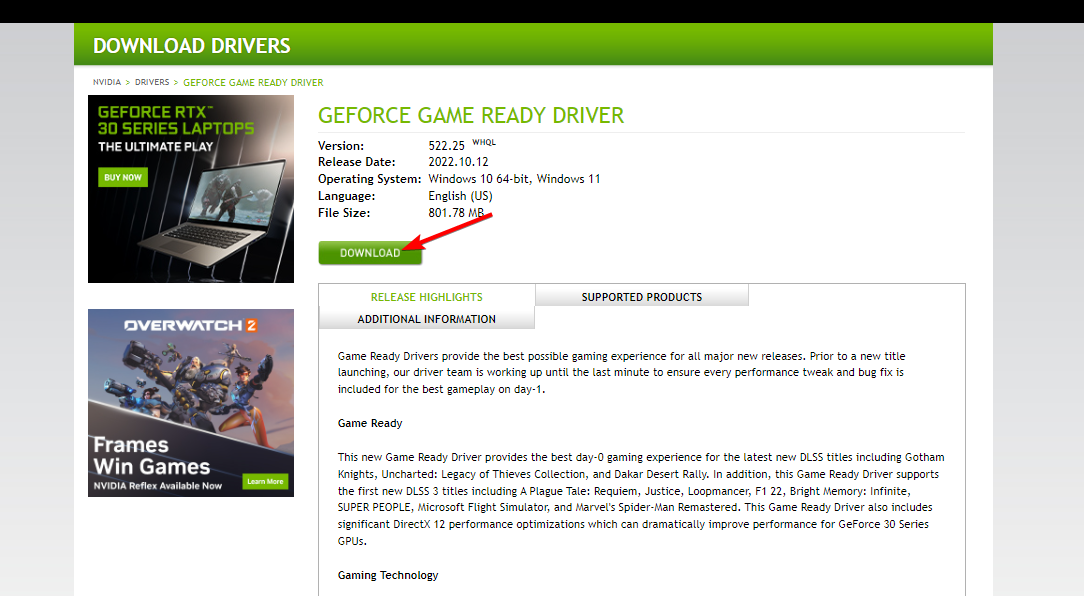
- Go to the NVIDIA Driver Downloads Page and select your product type, series, and operating system. Choose either the Game Ready Driver or Studio Driver based on your needs, then click Search and Download the driver installer.

- Close all open programs, especially GPU monitoring utilities (like EVGA Precision X or MSI Afterburner), and any aggressive antivirus programs that might interfere with the installation.
- Right-click the downloaded driver installer and select Run as administrator.
- Click Yes if prompted by Windows User Account Control.
- Choose the default path for temporary driver files by clicking OK.
- Click Agree And Continue.
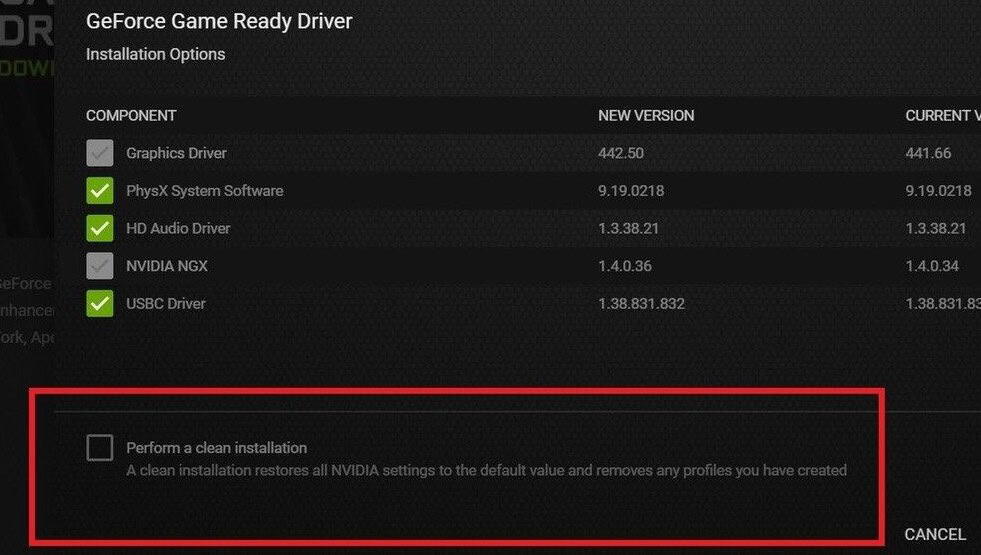
- Choose Custom (Advanced) and click Next.
- Tick the Perform clean install option and click Next.

- Once the installation completes, reboot your PC to finalize the process.
This method ensures all old driver files are completely removed, reducing the chances of conflicts. For more detailed instructions, visit our guide on how to update graphics drivers on Windows 11.
2. Remove the Nvidia driver completely and reinstall it
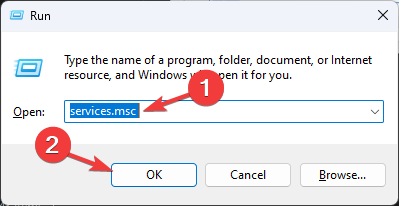
- Press Win + R to open the Run dialog, type services.msc, and press Enter.

- Find and stop all services starting with NVIDIA.
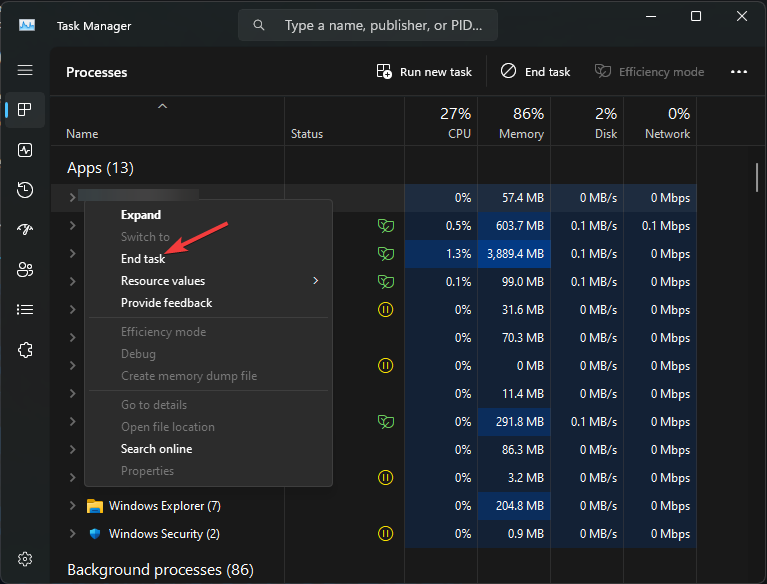
- Open Task Manager by pressing Ctrl + Shift + Esc.
- Find processes starting with nv or NVIDIA and end them.

- Press Win + R, type regedit, and press Enter.
- Navigate to
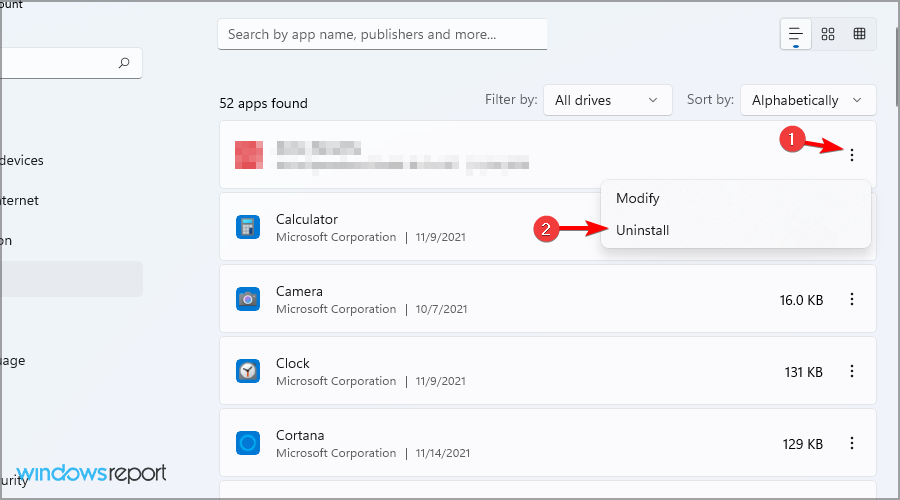
HKEY_LOCAL_MACHINE\SOFTWARE\NVIDIA Corporation\Logging and HKEY_LOCAL_MACHINE\SOFTWARE\Wow6432Node\NVIDIA Corporation\Logging. If these keys exist, delete them. - Open Settings > Apps > Installed apps.
- Find all NVIDIA applications, click the three-dot menu next to each, and select Uninstall.

- Follow the steps from the previous solution to install the NVIDIA driver again.

If this method seems too complicated, you can always use Display Driver Uninstaller to completely remove your drivers.
Why will my GeForce driver not install?
There are numerous causes, such as your antivirus, permissions, or file corruption. To learn more, check our dedicated guide to learn what to do if Nvidia drivers aren’t installing on Windows 11.
By following these steps, you should be able to resolve issues with NVIDIA driver installations. Let us know if you’ve found a different solution that worked for you.
This isn’t the only problem, and for many GeForce Experience driver download is stuck at 100%, but we have a guide that addresses that.


User forum
0 messages