How to Hide Completed Tasks in Outlook
Keep completed tasks safely tucked away with these methods
3 min. read
Updated on
Read our disclosure page to find out how can you help Windows Report sustain the editorial team. Read more
Key notes
- Some of our readers don't want to see completed tasks on to-do lists because they're a thing of the past.
- Here's how to hide your completed Outlook tasks or archive them for later deletion.
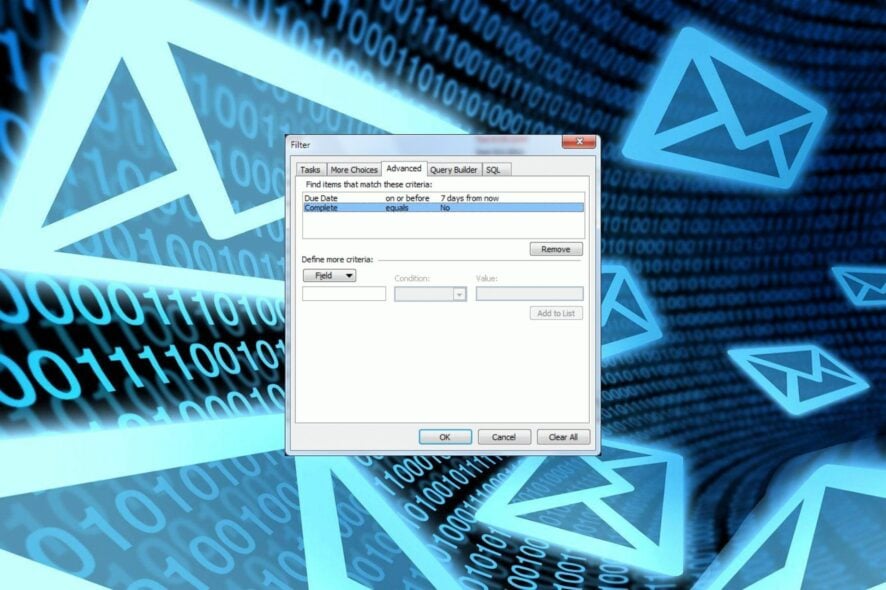
Done with your to-do list? No need to have them lingering around. In this article, you will learn how to hide completed tasks in Outlook.
This will allow you to be more productive and move on to other active tasks that need your attention. So, here’s how you go about it.
What happens to completed tasks in Outlook?
When you complete a task in Outlook, it is moved from your Tasks folder to the Completed Items folder. The only problem is that it only moves from one folder to another. The completed folder does not remain hidden.
Having these tasks displayed every time Outlook opens on startup can become annoying to many.
This is why you may need to hide these tasks from the main task view. The main benefits of decluttering your task view include:
- You’ll organize your tasks in Outlook and make your task list more manageable. In turn, your workload will also shrink because you can clearly see tasks in your Outlook calendar that are pending.
- You won’t have to second-guess yourself by trying to redo completed tasks every time you see them.
- You’ll be able to prioritize your tasks and meet deadlines when you only have pending tasks in your tasks screen.
Now that you know the pros of hiding tasks in Outlook, here are some Outlook task management tips.
How do I automatically hide completed tasks in Outlook?
- Launch your Outlook application.
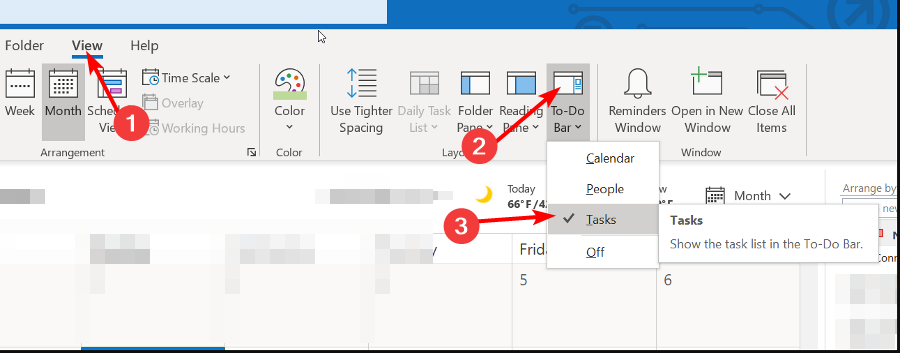
- Navigate to the View tab, click the To-Do Bar option, then select Tasks in the pop-out menu.
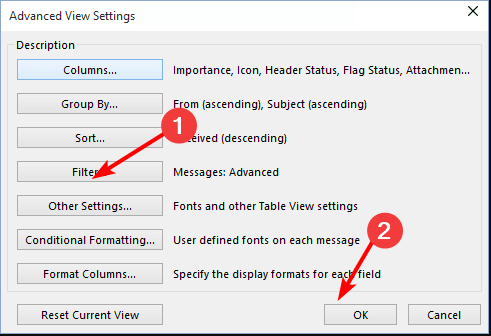
- In the Advanced View Settings dialog box, click on the Filter button, then hit OK.
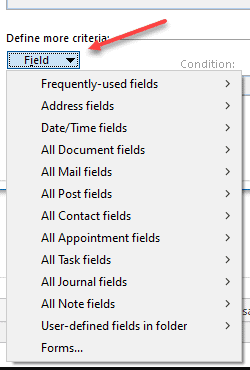
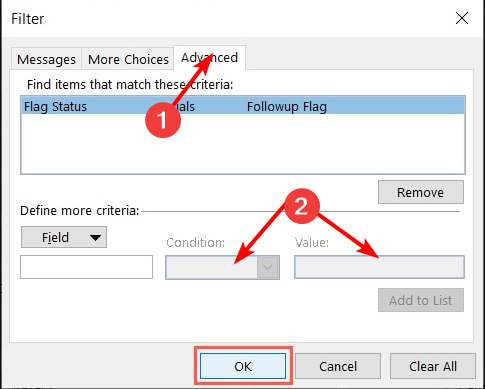
- Navigate to the Advanced tab, and under Define more criteria, select Completed in the Field drop-down menu.
- Set the Conditions entry to equals, and the Value entry to no, then click OK.
- Go back to your Task list, and you’ll find all the completed tasks hidden.
How do I archive completed tasks in Outlook?
- Launch your Outlook app.
- Navigate to the View tab, click the To-Do Bar option, then select Tasks in the pop-out menu.
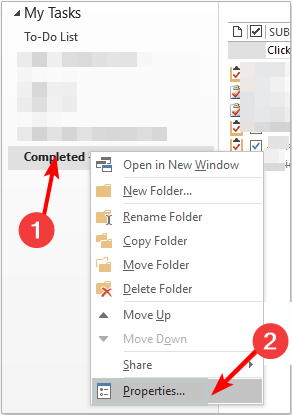
- Find your Completed tasks folder, right-click on it, and select Properties.
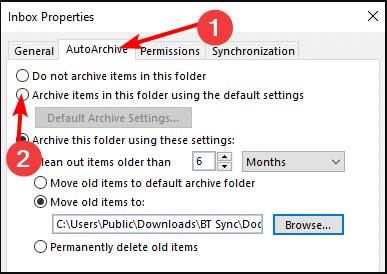
- Navigate to the AutoArchive tab, then check the Archive items in this folder using the default settings box.
- To get rid of these tasks after a certain period, check the Archive this folder using these settings: and edit the time field to clean out this task folder automatically.
Hopefully, as you auto-hide completed tasks, this will help you eliminate clutter from your tasks list and make the daily tasks easier to track.
All of the changes will be taking place behind the scenes, and it will be seamless for you without worrying about completed tasks.
With that out of the way, we’d like to direct your attention to another related issue. You may find that your Outlook app is not opening in Windows 11 at times. If this is the case, check out our detailed article on how to address this problem.
Having shown you two different methods for hiding completed tasks in Outlook, you should have a pretty good idea of which will work best for you. Which method do you prefer? Let us know in the comments section below.

User forum
0 messages