Fix: Laptop Not Detecting My Wi-Fi But Detecting Others
Find out why you can't find the WiFi on your laptop
3 min. read
Updated on
Read our disclosure page to find out how can you help Windows Report sustain the editorial team. Read more
Is your laptop not detecting your Wi-Fi but detecting others? This is a common issue, but don’t worry. While it can seem like a real hassle, it’s often easy to fix.
Whether the problem stems from faulty router settings, software glitches, or Windows configurations, we’ll walk you through all steps necessary to quickly fix it.
How to fix laptop not detecting WiFi
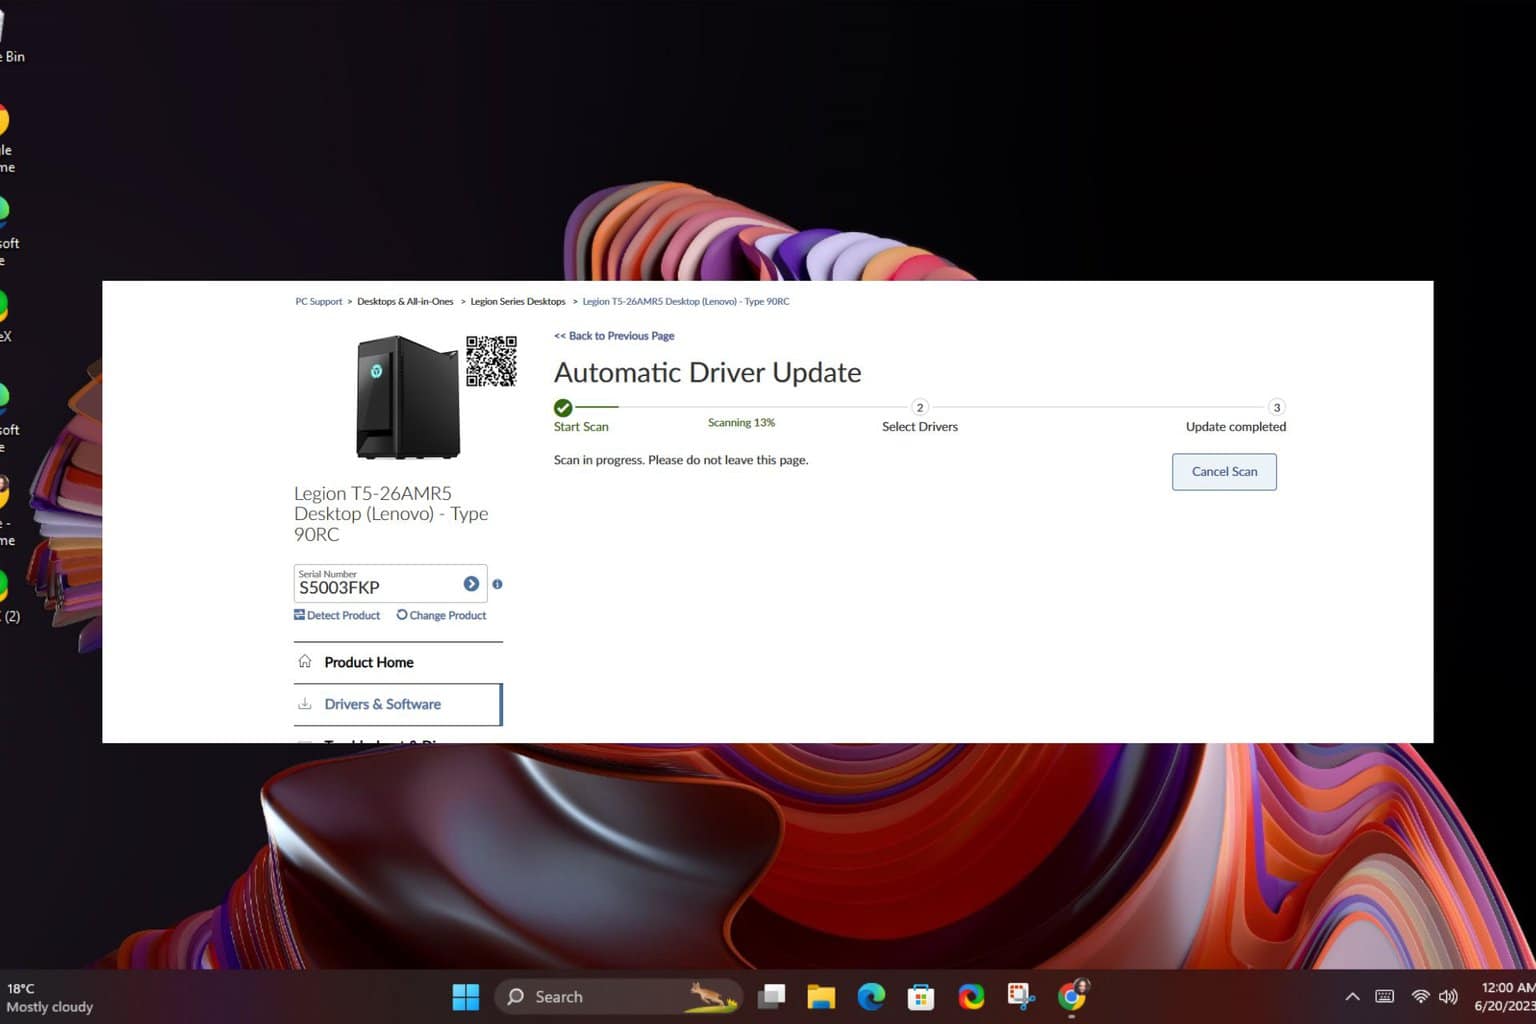
1. Update your WiFi drivers and install the WiFi software
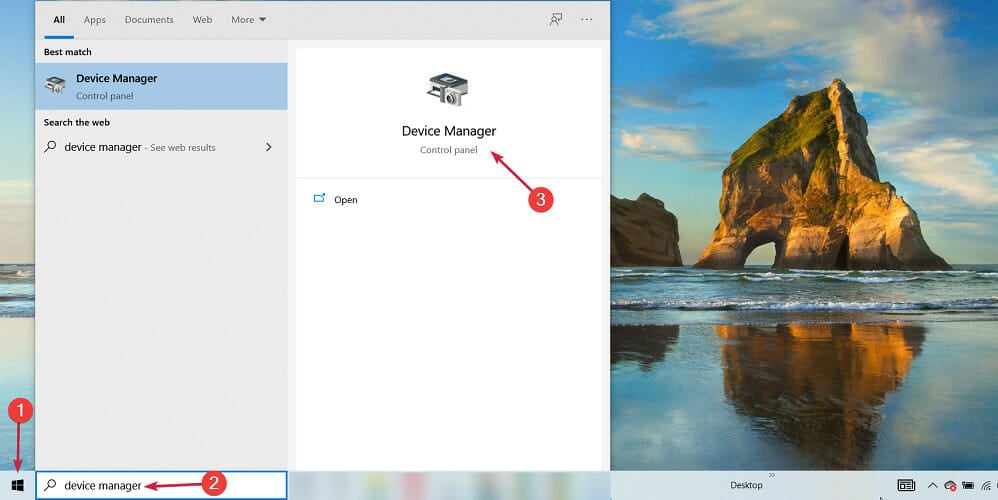
- Open Device Manager by typing its name in the Search bar.
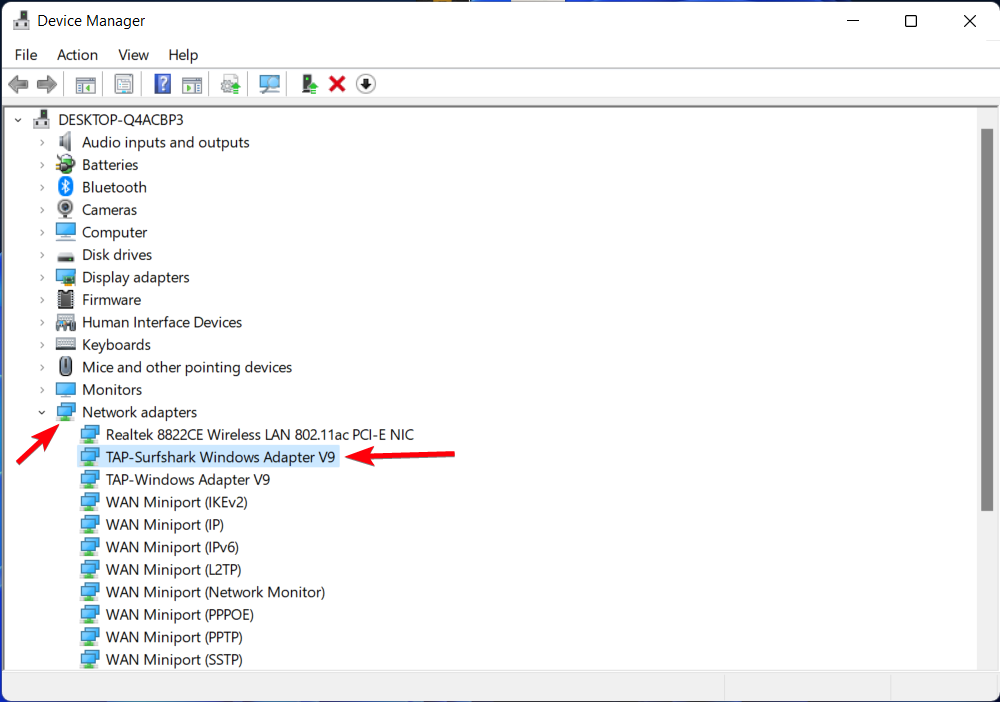
- Open the Network Adapters list by double-clicking it or clicking the little arrow in front of it.
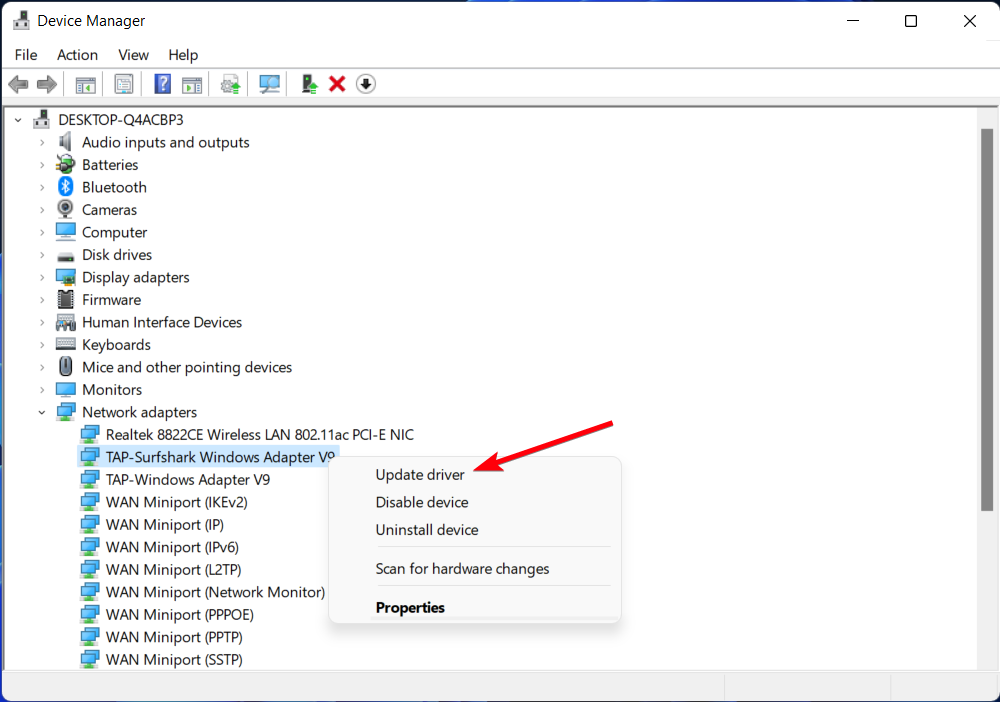
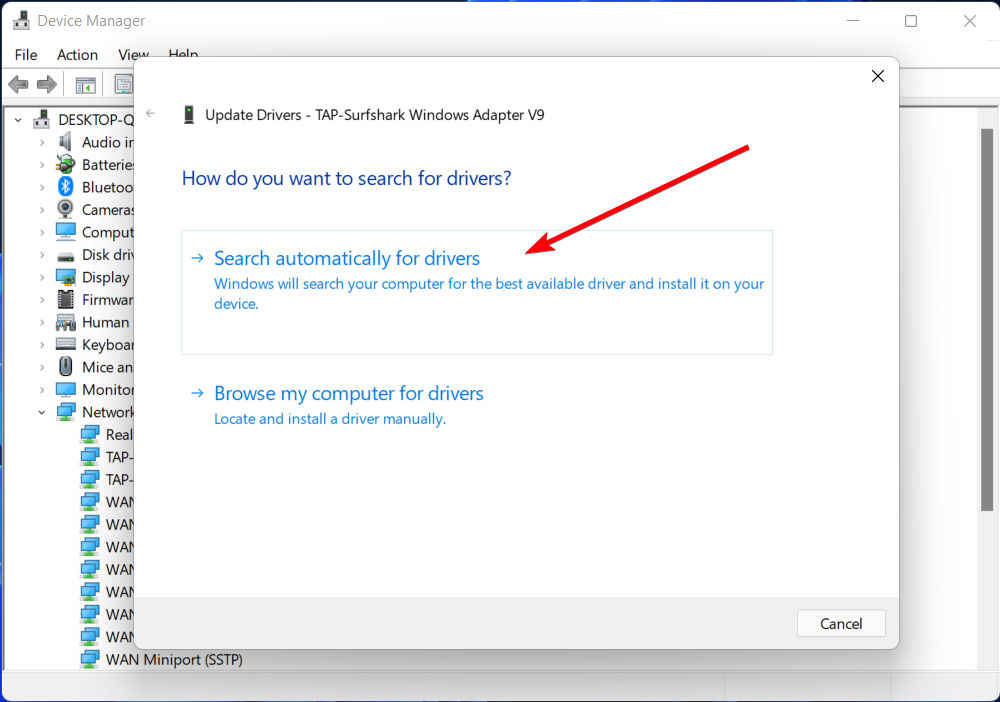
- Locate your Wi-Fi adapter and right-click on it, then select Update Driver.
- Select Automatically search for drivers if you want the wizard to find your required drivers online automatically.
- If you prefer to download them yourself, make sure you get them from the official website of your device manufacturer, then proceed with the above-listed steps, but select Browse my computer for drivers for Step 5.
- Proceed with the update. If your drivers are already up to date, a message prompt will let you know just that.
2. Use Command Prompt
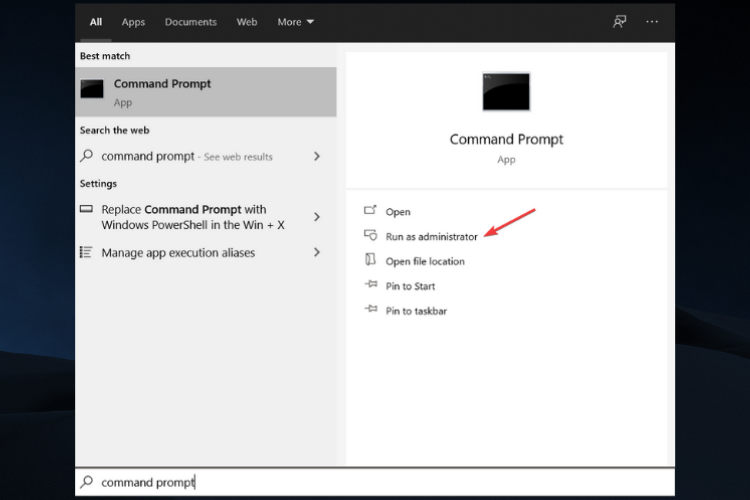
- Type command prompt in Windows search and click on Run as administrator to start Command Prompt with full administrative rights.
- Now run the following commands:
reg delete HKCRCLSID{988248f3-a1ad-49bf-9170-676cbbc36ba3} /va /fnetcfg -v -u dni_dne
3. Check if the required services are running
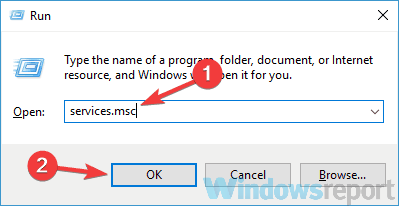
- Press Windows Key + R to open the Run dialog.
- Now enter services.msc and press Enter or click OK.
- Now you need to pay close attention to the following services:
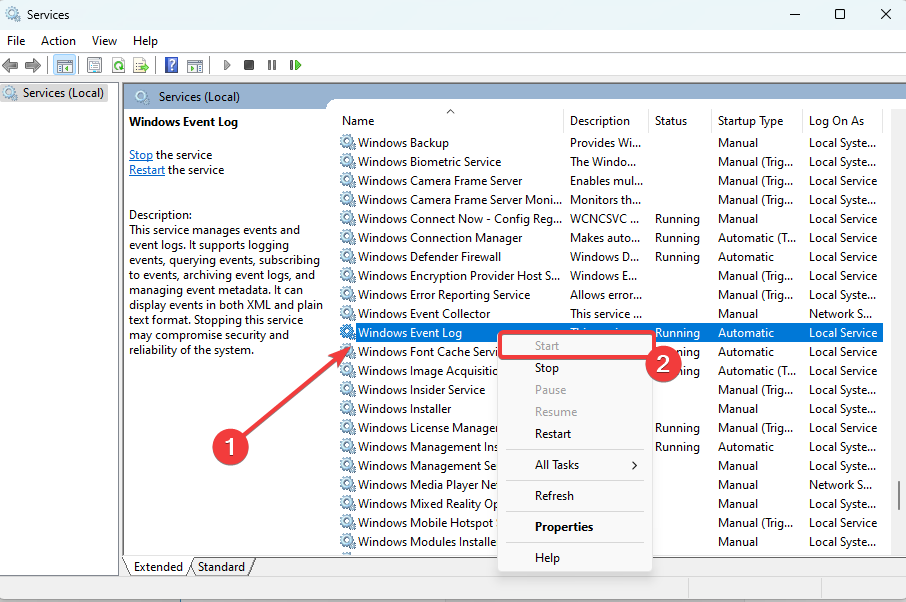
- Windows EventLog
- Remote Procedure Call (RPC)
- Windows Update
- Make sure that all of these services are properly running. If any of these services aren’t running, right-click that service and choose Start from the menu.
4. Enable Wi-Fi network
- Open the Settings app by pressing Windows + I.
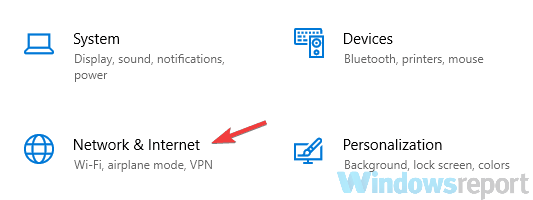
- Click the Network & Internet section.
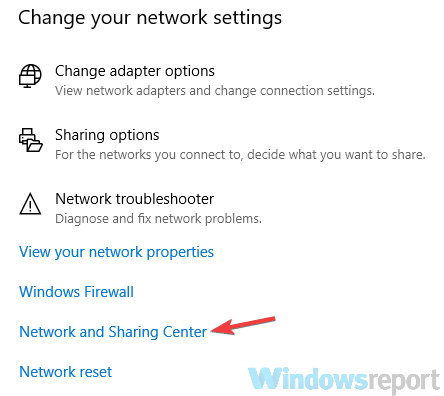
- In the right pane, scroll down and click on Network and Sharing Center.
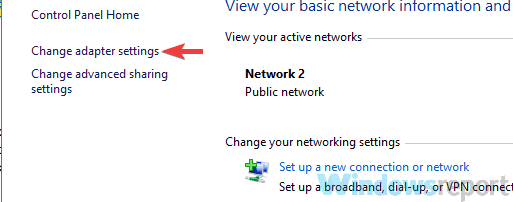
- When Network and Sharing Center window opens, click the Change adapter settings.
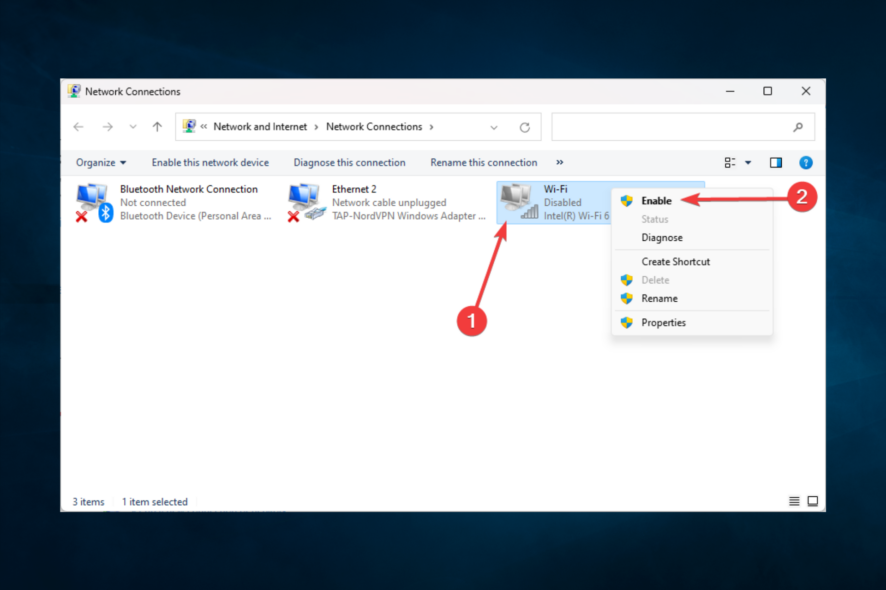
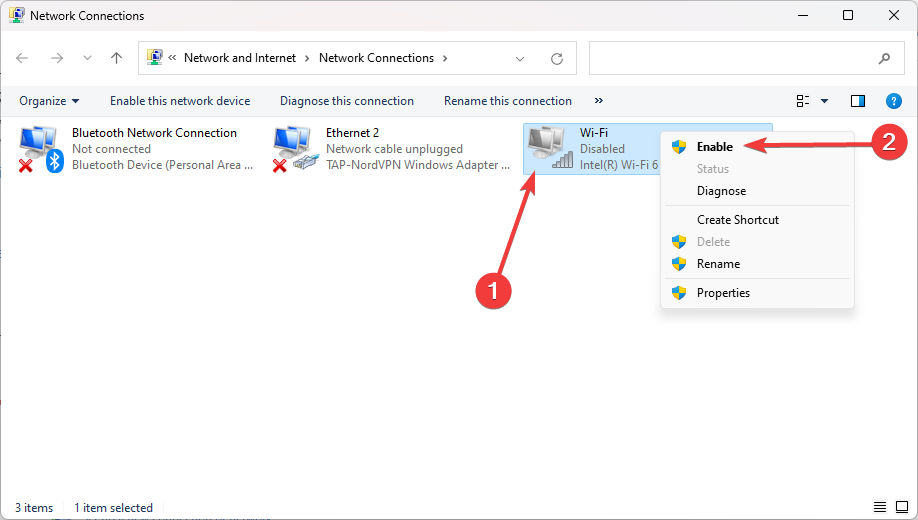
- Locate your Wi-Fi connection, right-click it, and choose Enable.
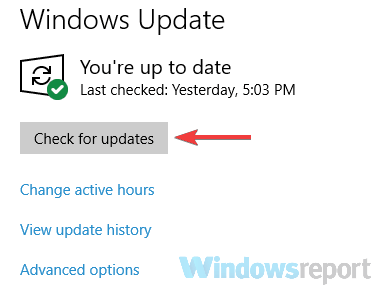
5. Make sure that you have the latest updates installed
- Open the Settings app by pressing Windows + I.
- Now head over to the Update & Security section.
- In the right pane, click the Check for updates button.
6. Select a Property
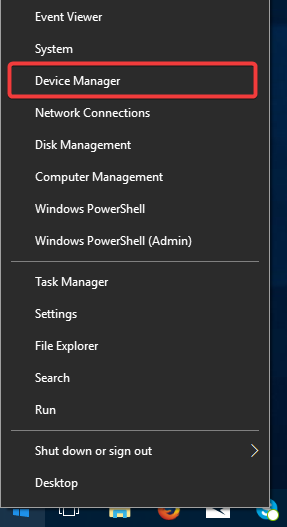
- On your keyboard, press Windows key + X and select Device Manager.
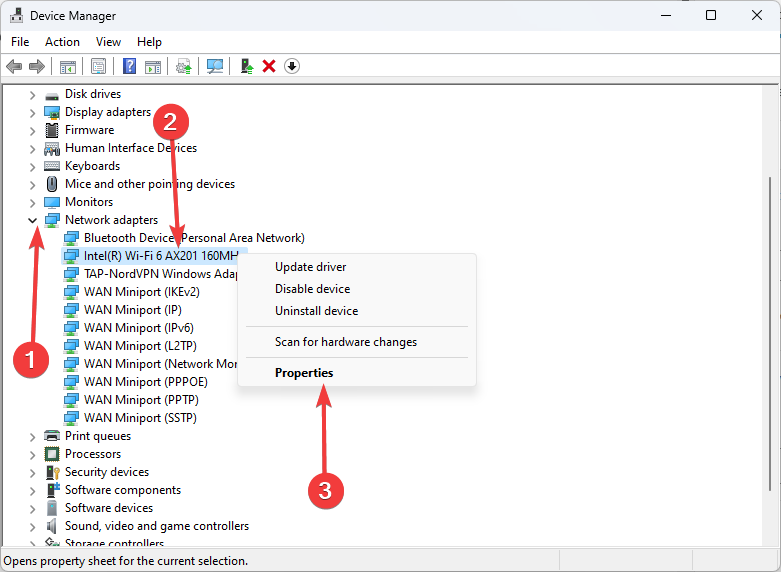
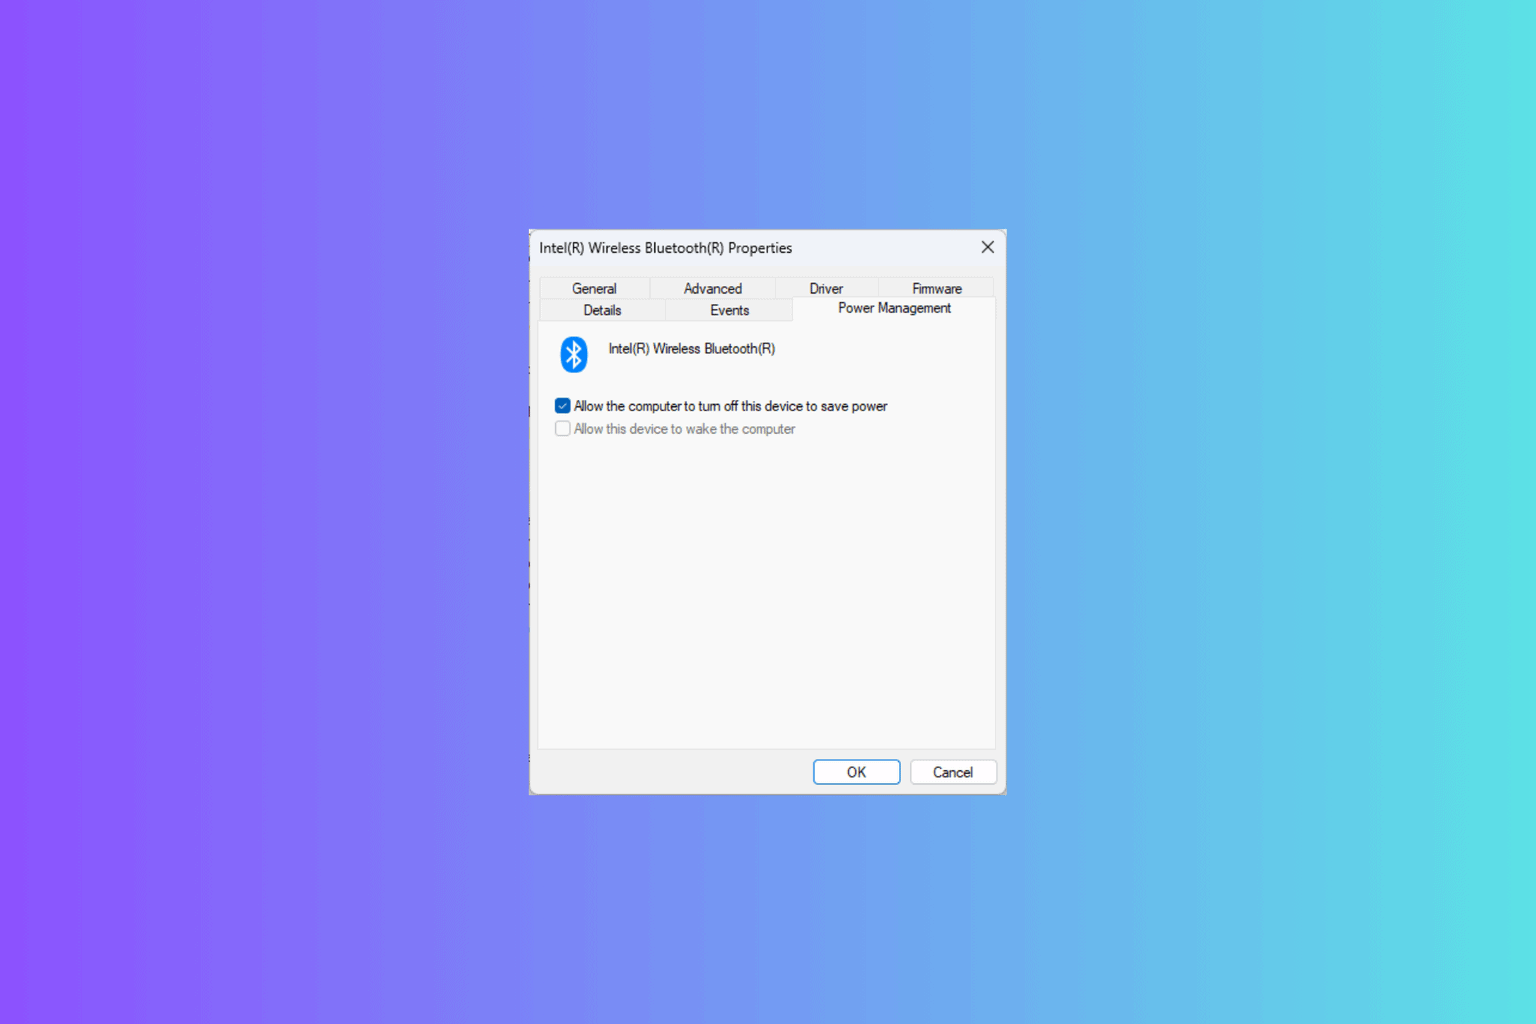
- Expand Network adapters, right-click on your Wi-Fi driver, and select Properties.
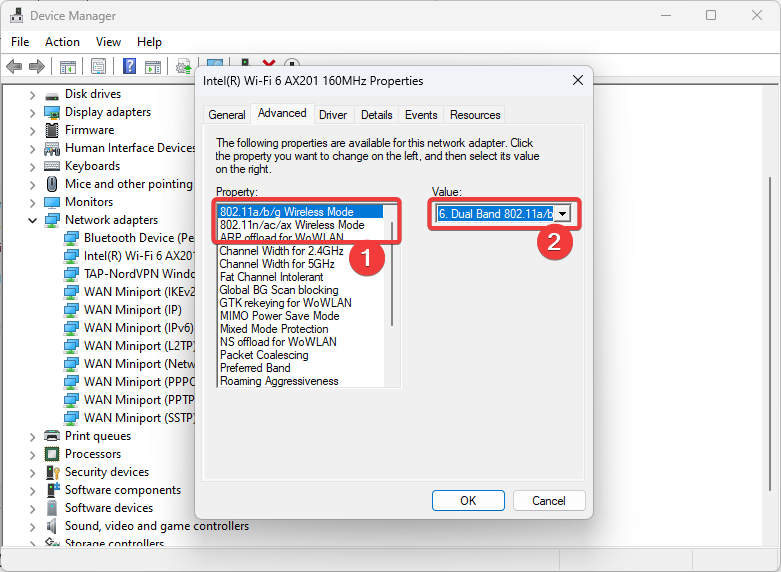
- Click on the Advanced tab.
- Depending on your router, select a Property; in most cases, it will be one of the 802 properties on the list of Properties; make sure that the value is not disabled.
As you can see, network and Internet issues may be inconvenient, but you should be able to fix them using one of our solutions.
If the laptop won’t connect to Wi-Fi but other devices will, we also have a guide that can help you fix that, so don’t miss it.
Tell us in the comments below what has worked best for you.






User forum
6 messages