Clipchamp Tips and Tricks: How to Easily Edit Videos
Key notes
- Learning how to edit videos in Clipchamp will prove to be way easier than you thought.
- Microsoft’s recently acquisitioned editing software is free and extremely simple to use.
- The necessary tools are easy to access and creating a masterpiece won’t take that long.
- We’re about to show you what effects you can work with and how exactly to use them.

Most of us are happy with simply having a photo or video memory of our favorite people, pets, events, cars, or places.
Some, however, feel the need to take things to the next level and transform said memories into more intricate projects.
Whether you are thinking of creating a slideshow or adding some special effects to your favorite video, having the right tools for the job is a must.
Learning how to use this video editing software is easier than you might think, as everything is neatly structured and quickly accessible.
It has quite a few effects to work with, considering that Clipchamp is still a free app for Windows 11. So, without any further ado, let’s get into how video editing works in Clipchamp.
How can I edit videos with Clipchamp?
When it comes to editing videos with Clipchamp, you are basically looking at seven major edit categories.
We’re about to show you what they do does and how best to use each and every one of them in order to transform your clip into a masterpiece.
The first step, as always, is to actually go to the Windows 11 Store and download and install the Clipchamp video editor.
- Open Clipchamp and press the Create a video button.

- Click the plus button to add your video to Clipchamp.

- Click the Add button or drag the clip to the timeline.

Now that we’ve added our video to Clipchamp’s timeline, we can actually begin the editing process and start creating our vision.
Once your video is added to the timeline, it’s useful to also check our guide on how to save a project in Clipchamp so you understand how autosave and exporting work during editing.
What effects can I use for editing in Clipchamp?
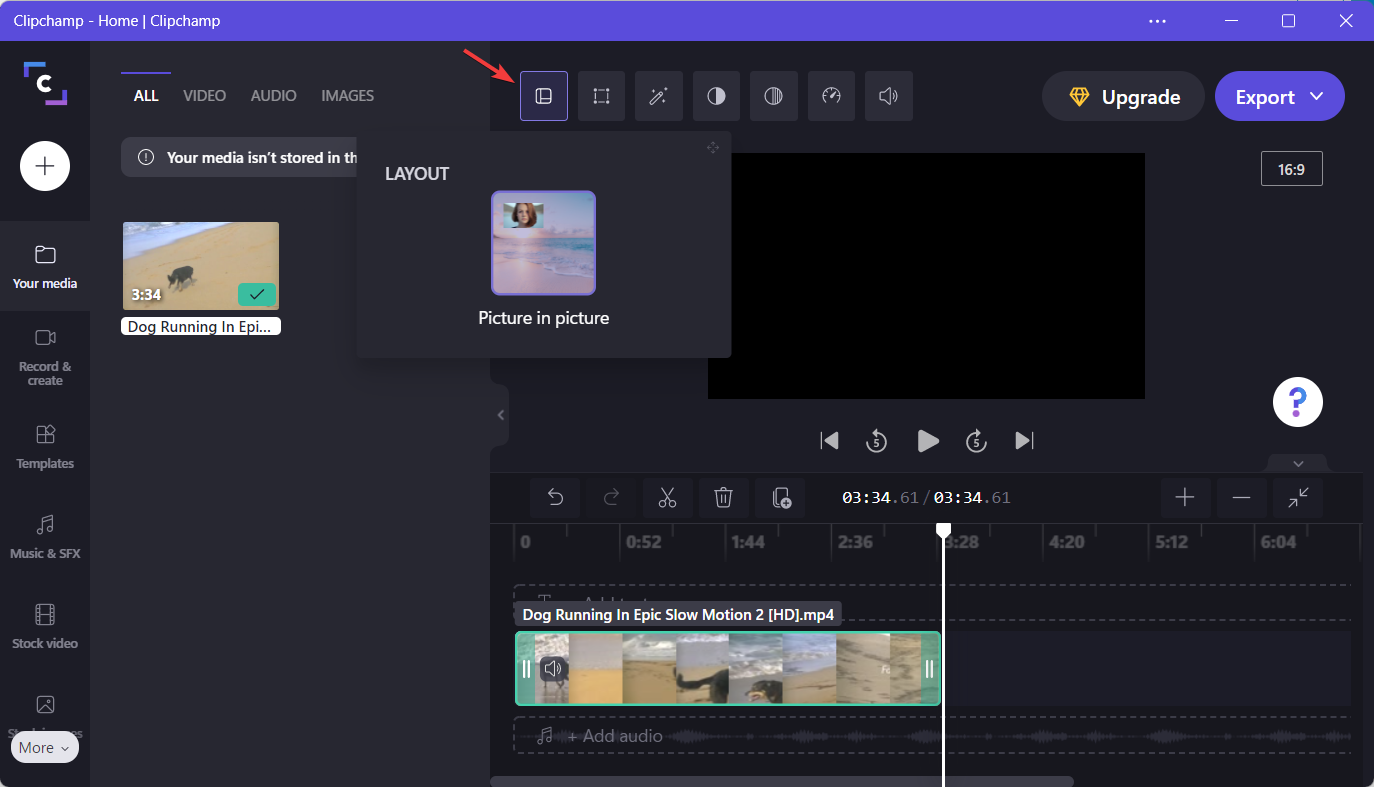
To change different layouts for your video, use the first of the editing tools you have, which is Layout. Here, you fill find functions such as Picture and picture, and more.
If you want to crop, rotate, flip, or even change the opacity of the video you added, simply use the Transform tab, which is the second one.
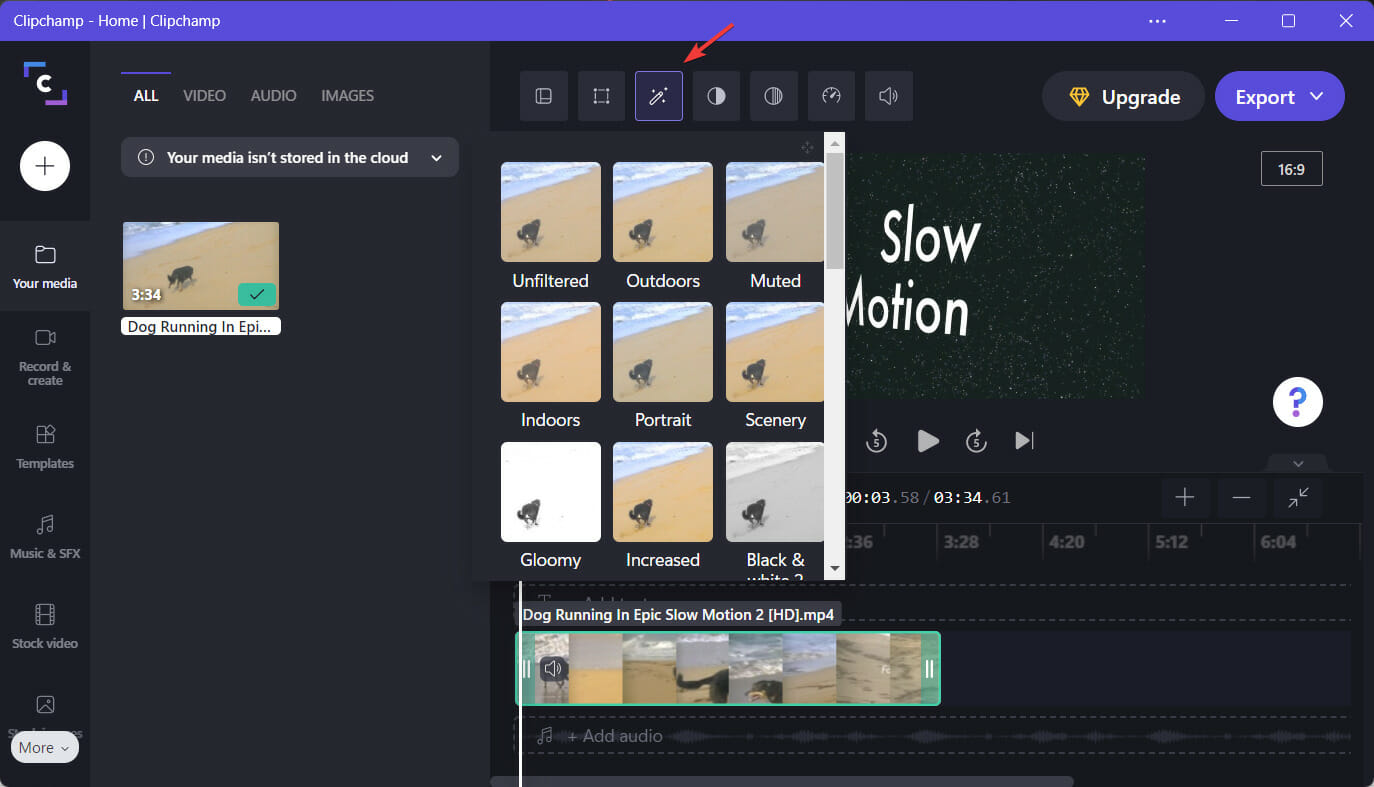
Adding the perfect filter to your clip is also important and you can do so from the Filters tab, which will give you a lot of options to choose from.
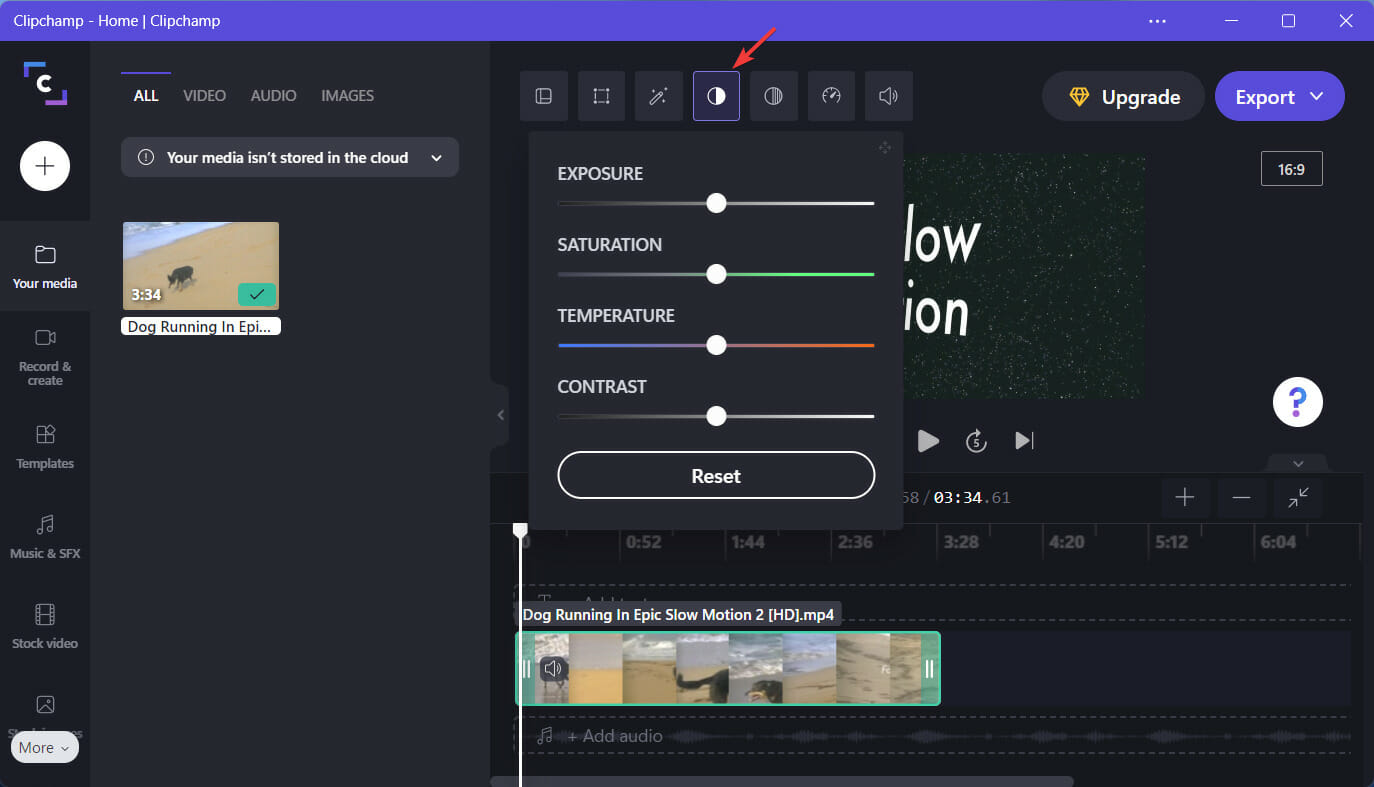
Not happy with the current colors in the video? Do a little tweaking by using the Adjust color tab and give it that extra zing.
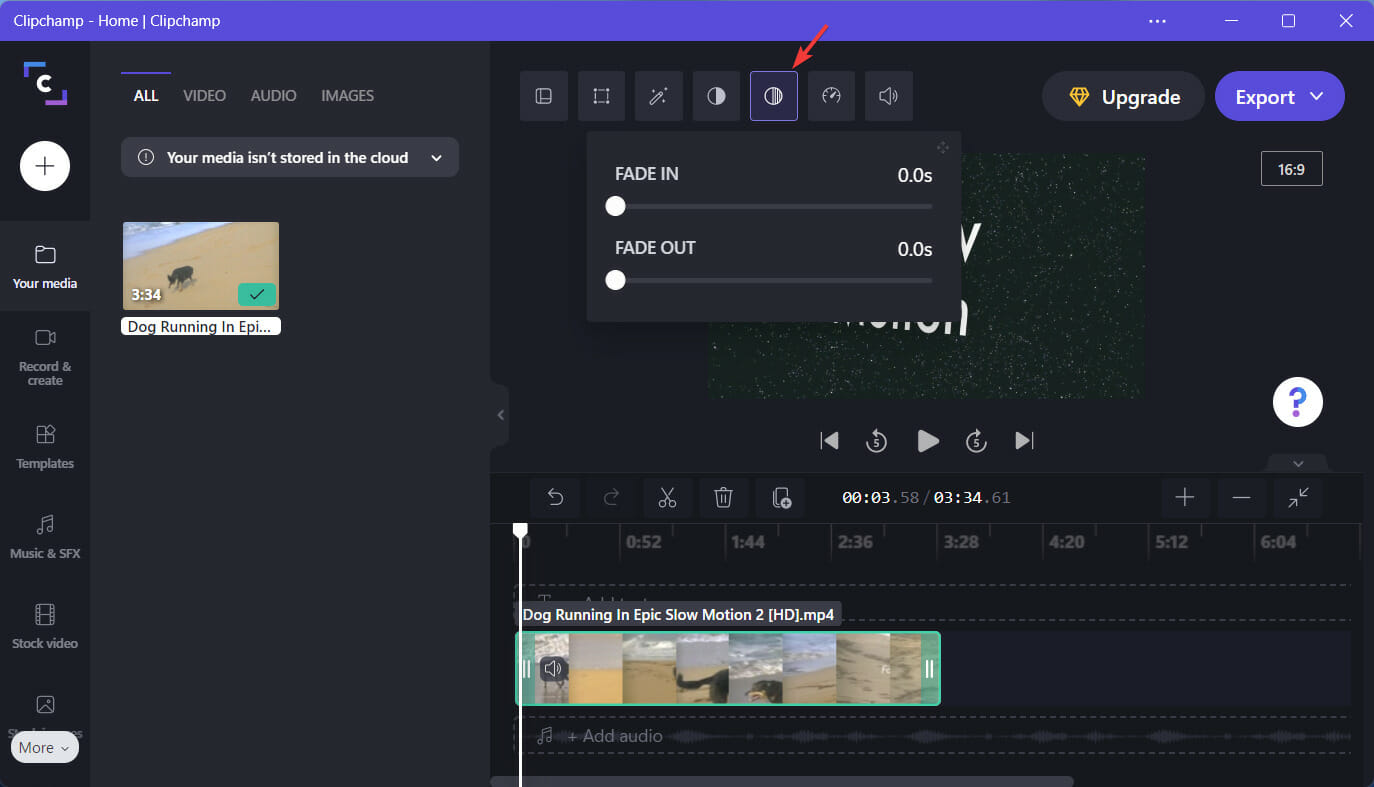
If what the clip lacks is some fade in or out transitions, be sure to add those as well, by using the next tab in the editing menu, which is simply called Fade.
Speed up or slow down the contents of your video by using the Speed tab in Clipchamp. This is really easy to do, as you’re about to see.
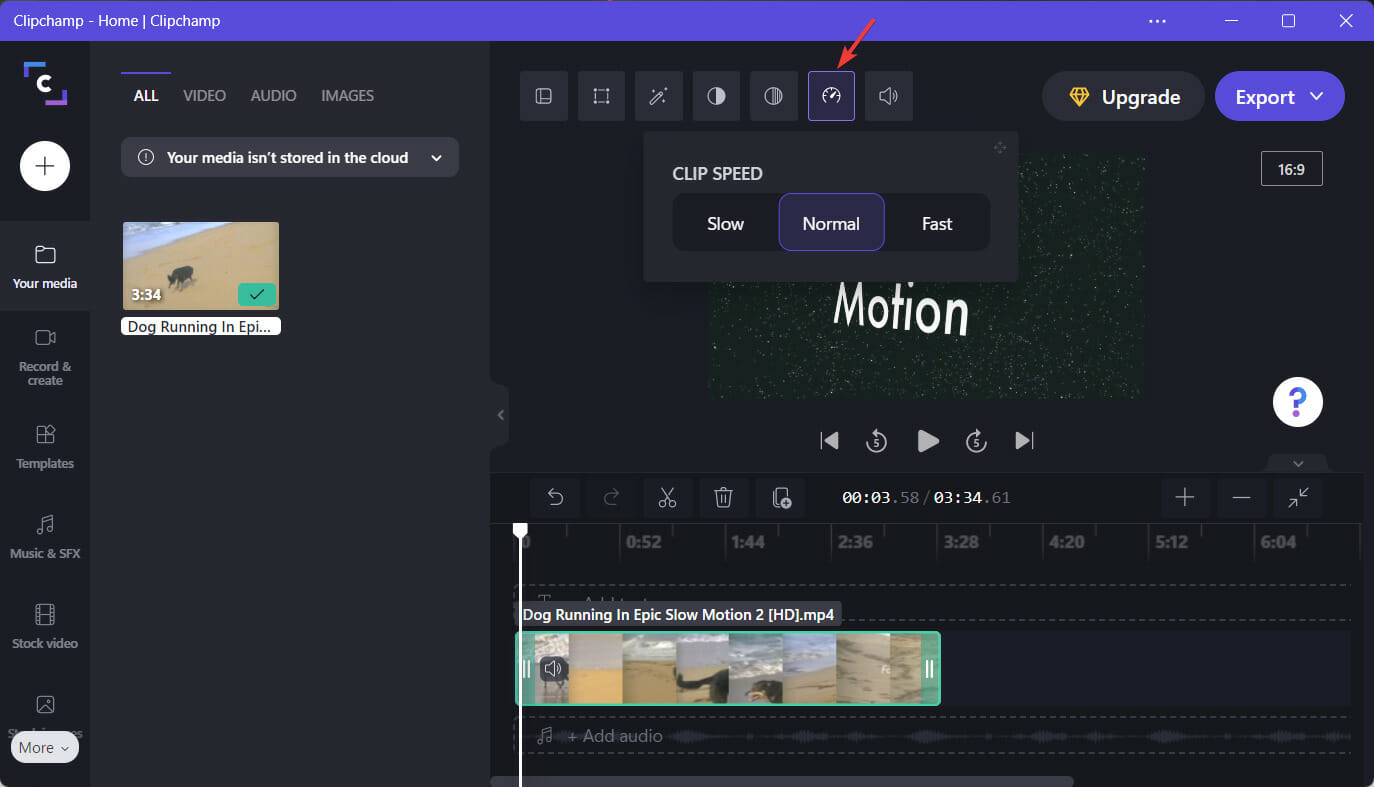
For a clear walkthrough on changing playback speed settings, read our guide on how to speed up video in Clipchamp.
Controlling the video’s volume is really easy thanks to the last editing tab, which is called Audio. Use this to quickly adjust sound preferences.

There is also a section for actions such as splitting, trimming, copying, pasting, and deleting certain parts of your video.

All of the templates can be found on the bar on the left. That bar can also be used for adding text, audio, transitions, images, GIFs, stickers, or other video effects.
You will find all these options on the left-hand side, so feel free to play around with them and discover all that Clipchamp has to offer when it comes to editing.

Adding all of these effects to your clip is only a matter of selecting the one you like and clicking on it. You can later tweak timings and intensity, but the process is a simple one.
However, there are tons of other video editing software alternatives out there as well, if you feel that Clipchamp just won’t do enough for you.
To learn more about removing or splitting clips, you can follow this step-by-step guide on how to cut video in Clipchamp.
Has this guide been helpful to you? Let us know in the comments section below.
Read our disclosure page to find out how can you help Windows Report sustain the editorial team. Read more


Improve this guide


User forum
0 messages