Virtualization Support is Disabled in the Firmware [Fix]
Update your BIOS to enable virtualization support
Key notes
- Microsoft has made it possible to run a virtual machine without any additional software with the Hyper-V feature.
- However, if your device doesn't meet the system requirements, you may run into some hurdles.

Hyper-V is a feature of Windows that allows you to create virtual machines on your computer. However, you may find that Hyper-V cannot be installed because virtualization support is disabled in the firmware.
When installing Hyper-V, it will automatically detect whether your system has the required hardware and software prerequisites. If your device doesn’t meet the said requirements, you will be prompted to install them before continuing with the installation process.
Why is virtualization support disabled in the firmware?
If you are wondering why you’re getting the hyper-v cannot be installed virtualization support is disabled in the firmware error, it could be due to one of the following reasons:
- Outdated OS – You probably use an old version of Windows with Hyper-V disabled. You’ll have to upgrade to Windows 11 or an OS that supports the feature.
- Hardware conflict – Hyper-V uses hardware-assisted virtualization. Therefore, if you try to install Hyper-V on a computer that might cause incompatibility issues with the software and hardware, you may get such an error message.
- Disabled in BIOS – Hyper-V Virtualization Support may be disabled because of an issue with the computer’s BIOS.
What can I do if Hyper-V cannot be installed and virtualization support is disabled?
It’s always essential to perform basic checks before any advanced troubleshooting, such as:
- Check that your system meets the Hyper-V minimum requirements.
- Ensure you have enabled the Hyper-V feature.
1. Turn on Hardware Virtualization in BIOS
- Turn on your PC and hold down the F10 key to boot into BIOS (The specific key will depend on your device’s manufacturer, which is HP).
- Use the arrow keys, navigate to the Security tab, select System Security, and press Enter.

- Select Virtualization Technology (VTx/VTd), then Enable it.

- Press F10 to save your changes and exit the BIOS.
The steps above are specific to HP devices. You may find that Virtualization support is disabled in the firmware for Asus or Lenovo. The steps may differ a bit, but you can also borrow some similarities from this step.
2. Update your BIOS
- Hit the Windows + R keys to open the Run command.
- Type msinfo32 and hit Enter.

- Locate the entry marked BIOS version/date and note it down.

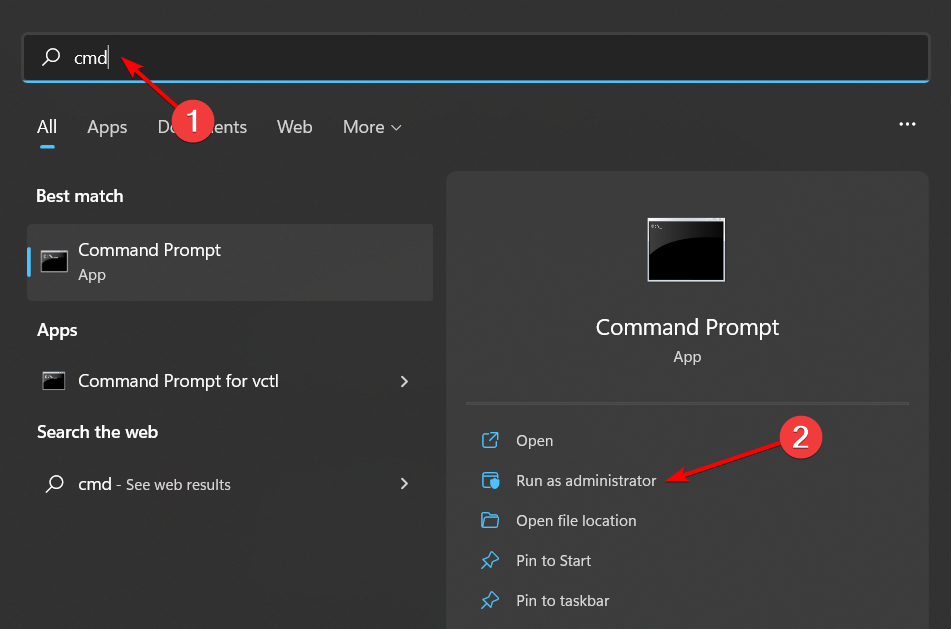
- Hit the Windows key, type cmd, and select Run as administrator.
- Type wmic baseboard, get product, manufacturer, version, and serial number, and press Enter on the keyboard.

- Note this information too.
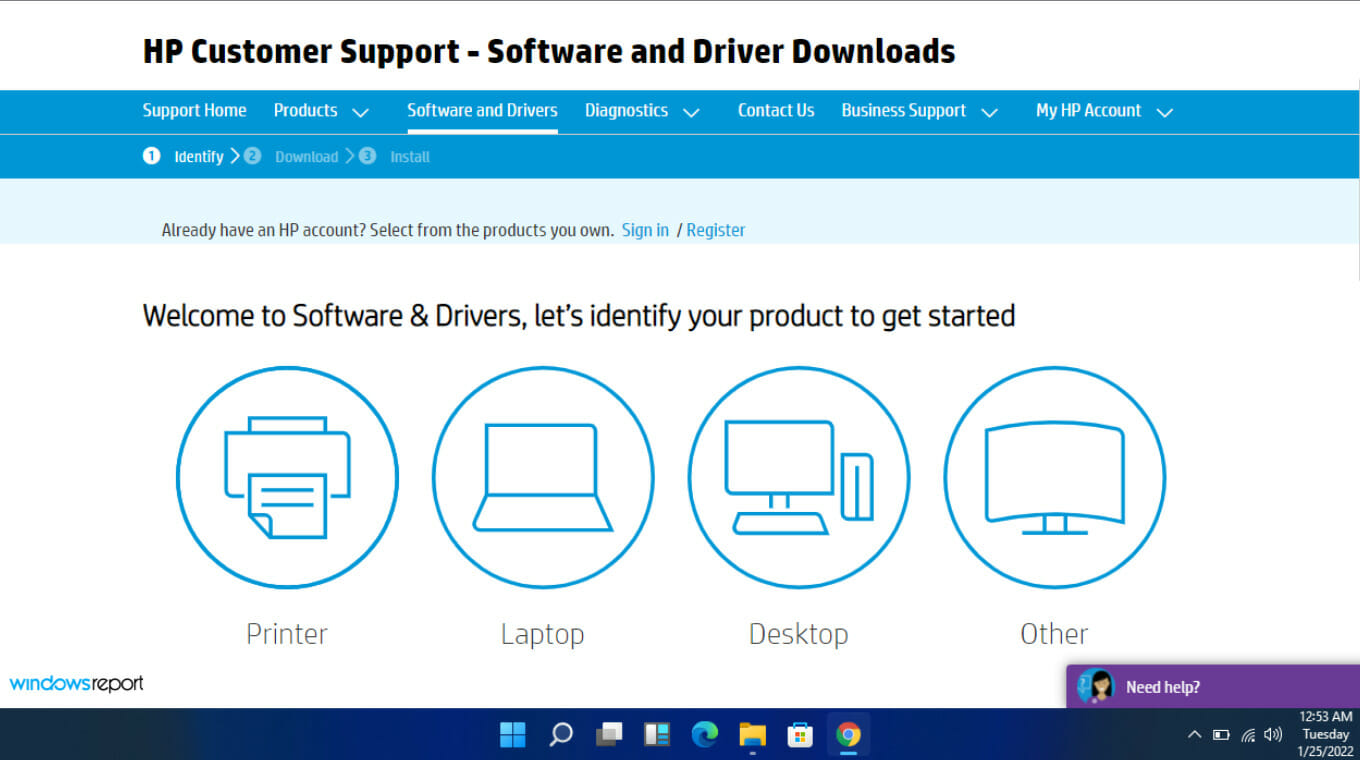
- Now, navigate to the download website (In this case, HP).
- Choose a laptop or desktop, depending on the type of computer you’re using.
- Enter your exact serial number or your exact computer model.
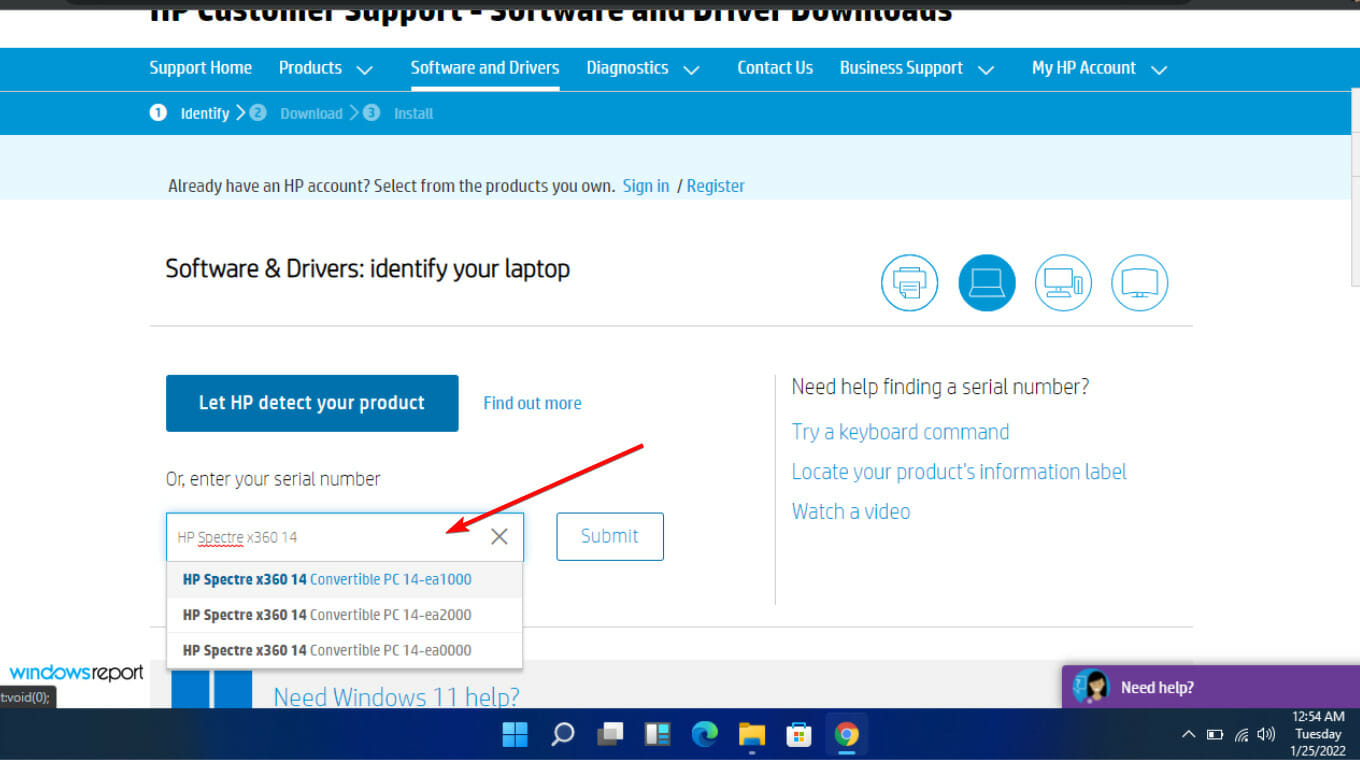
- Select your OS and OS version, then click Submit.

- Click on All drivers and then expand BIOS to see available updates.
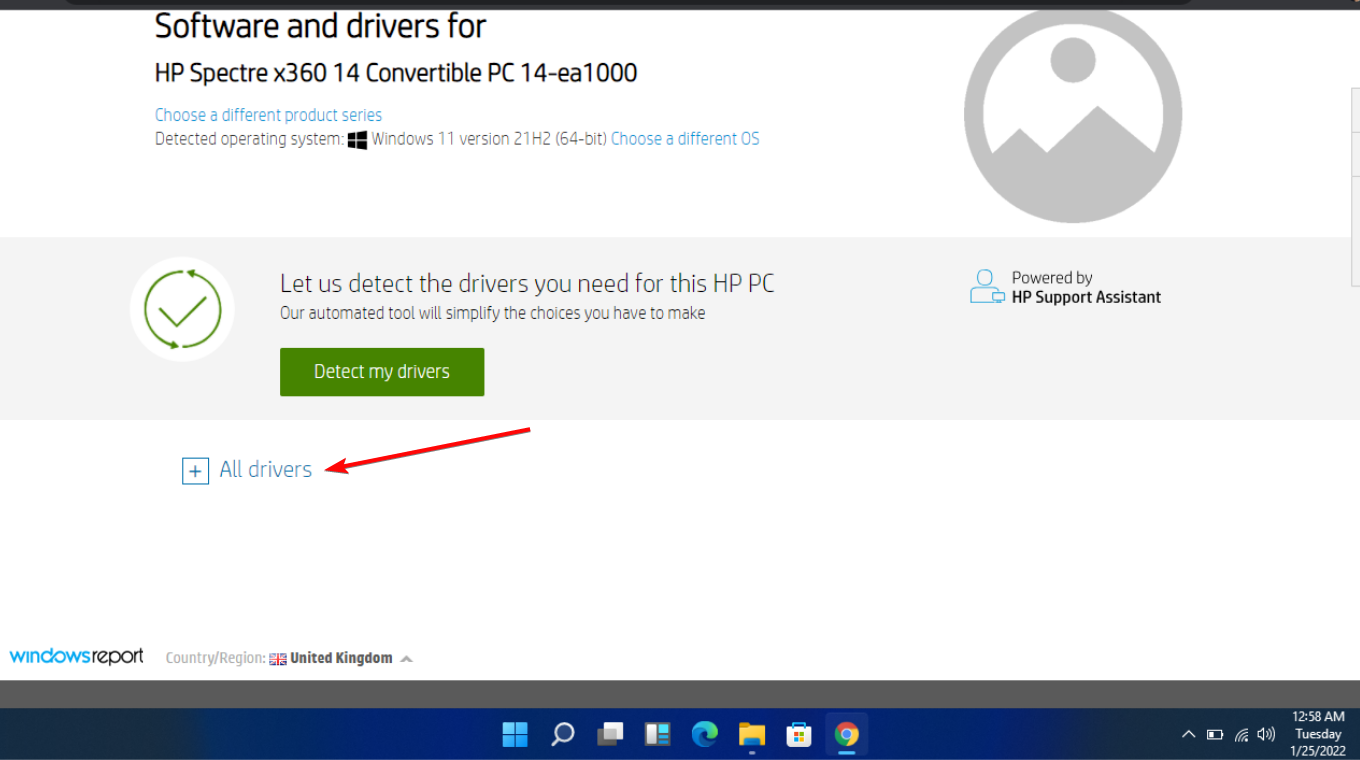
- Hit the Download icon.
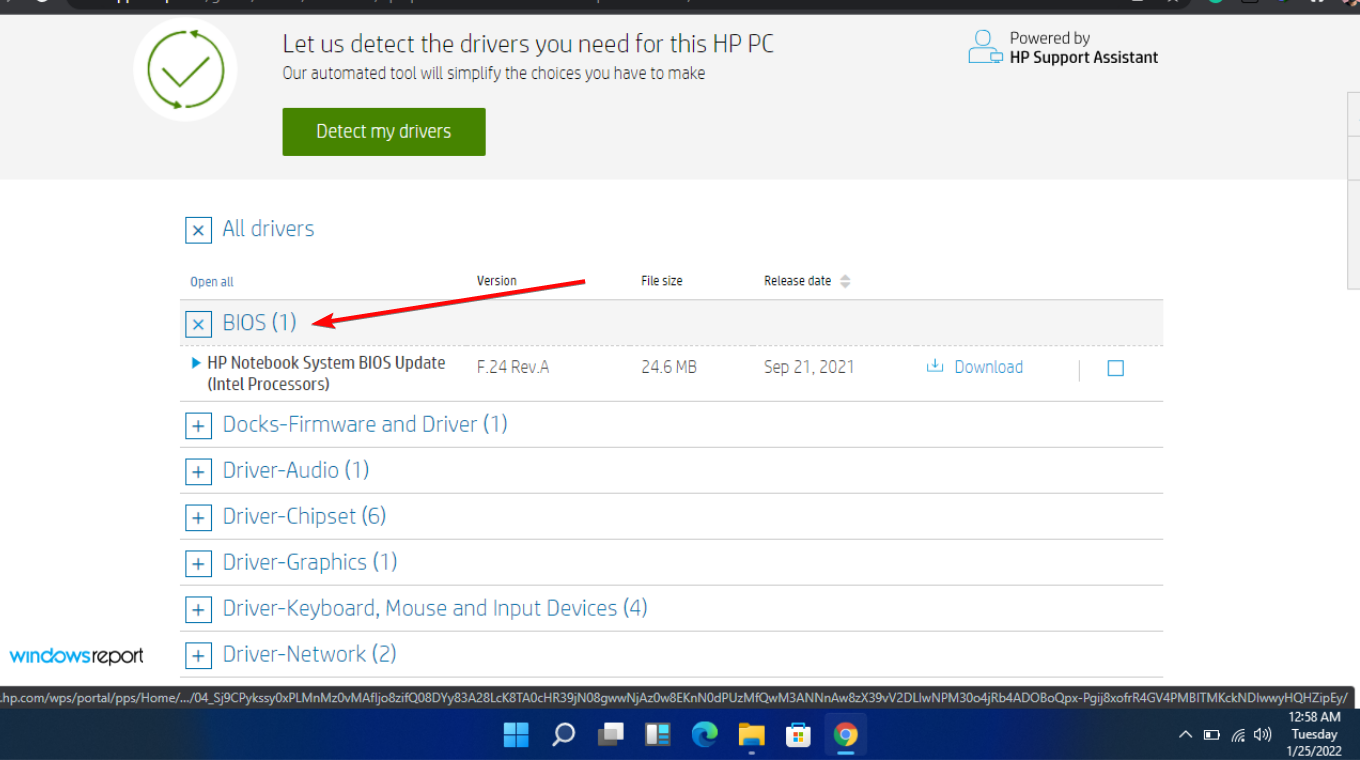
- Install the .exe file and follow the on-screen instructions.

- Restart your PC.
- During the startup, you can select Apply Update Now.
The BIOS (Basic Input/Output System) is a chip on your computer that loads when it boots up. It controls the booting process and is responsible for making sure all the hardware works together correctly.
Whereas many users reported that updating their BIOS fixed the hyper-v cannot be installed virtualization support is disabled in the firmware error, you need to exercise extra caution.
Don’t update if you’re not sure what you’re doing. BIOS updates can cause permanent damage to your computer if done incorrectly. Always read instructions carefully before updating your BIOS or asking for technical support.
How do I enable Hyper-V virtualization in Windows 10?
To enable Hyper-V virtualization in Windows 10, follow the steps below:
- Hit the Windows key, type Control Panel and click Open.

- Click on Programs.

- Select Turn Windows features on or off.

- Expand the Hyper-V Platform, then make sure both options are checkmarked and click OK. (If the second one is greyed-out, you’ll need to enable hardware virtualization in your BIOS).

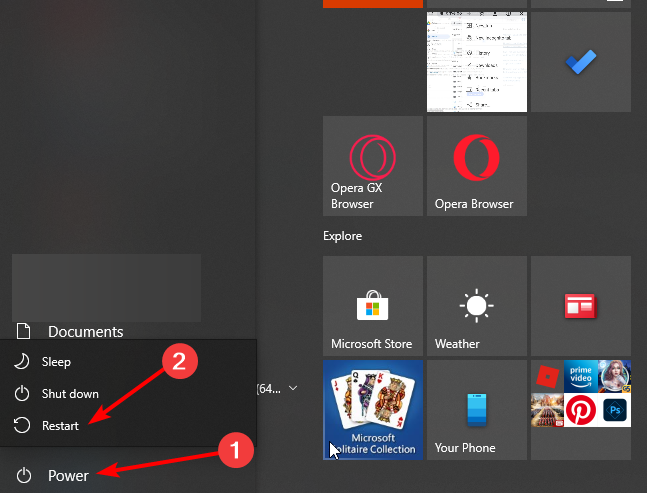
- Next, you’ll have to reboot your PC, so click on the Restart button.
If you have problems installing Hyper-V, we have an expert guide to help bypass this issue. Some users have also complained that they ran into an error where the Hyper-V is not compatible with VMware, be sure to also check out our comprehensive guide on the same.
We love your feedback, so continue the conversation in the comment below.
Read our disclosure page to find out how can you help Windows Report sustain the editorial team. Read more


Improve this guide


User forum
0 messages