Hyper V is Not Authorized to Connect: 5 Ways to Fix It
Don't hesitate to apply these easy fixes right away
Key notes
- Hyper V lets you create virtual machines on your Windows PC, but often it can run into a bunch of errors.
- Several users have reported facing Hyper V not authorized to connect errors not allowing them to use the tool.
- You can try updating all drivers on your PC or restarting the Hyper V service, as described below.

Hyper V or hypervisor is Microsoft’s product that lets users create and manage virtual machines. You can check out our guide to understand how to enable Hyper V in Windows 11.
In this guide, we will give you a bunch of solutions that will help you resolve a common Hyper V not authorized to connect error. Let us check it out.
What causes Hyper V not authorized to connect error?
- Your PC has outdated drivers: Update drivers on your PC either manually or using a dedicated tool.
- The Hyper V services aren’t enabled: Some third-party programs might have disabled the Hyper V service, because of which you are experiencing the problem.
- Incorrect system settings: You might not be running the Hyper V without sufficient privileges. In such a case, run Hyper V as an administrator.
- The presence of bad sectors can also cause this issue: Due to missing or corrupt system files, it could create multiple issues.
- Failed Windows updates: If you tried updating your PC, and it failed because of any reason, then it could cause multiple problems, one of which is the Hyper V not authorized to connect error.
How can I fix the Hyper V that is not authorized to connect error?
Here are a few preliminary checks that we would advise you to apply before proceeding with the advanced troubleshooting solutions mentioned in this guide:
- Check if the Hyper-V Virtual Machine service is running.
- Make sure that you run the Hyper-V Manager using an account in the Administrators group otherwise, you will be denied access.
- Restart your PC and Hyper-V server.
- Install the latest available Windows update.
- Reinstall Hyper V from Windows feature updates.
If you checked all the boxes above, let’s see how we can fix this problem with the solutions below.
1. Tweak the system settings
- Click the Search icon, type security, and click on Window Security.

- Click on App & Browser control.

- Select Exploit protection settings.

- Switch to the Program settings tab.
- Locate C:\WINDOWS\System32\vmcompute.exe in the list and expand it.
- Click Edit.

- Scroll down to Control flow guard (CFG) and uncheck Override system settings.

- Click the Windows Search button, type powershell, and open the app from the results.
- Execute the below command on PowerShell:
net start vmcompute
- Restart your PC.
2. Update drivers on your PC
- Click the Search icon on the taskbar, type device manager, and click the app from the results.

- Expand each section and right-click on it.

- Select the Update driver option.
- Pick Search automatically for drivers and if the system finds any new ones, it will install them.

One of the easiest ways to avoid coming across issues on your Windows 11 PC, is to keep all of the drivers on it updated.
Often, we forget to update drivers and because of that not only your PC’s performance will be hampered but it will also trigger issues such as Hyper V not authorized to connect errors.
The above solutions require you to manually check for updates, which is quite time-consuming. A better alternative is to use a trusted third-party tool to update all drivers for you automatically.
We would recommend you check out Outbyte Driver Updater. It scans your PC for all faulty drivers; all you need to do is select all the ones you would like to fix, and everything else will be done automatically.

Outbyte Driver Updater
Enhance your device’s health by keeping all your drivers up-to-date with this great tool.3. Restart the Hyper V services
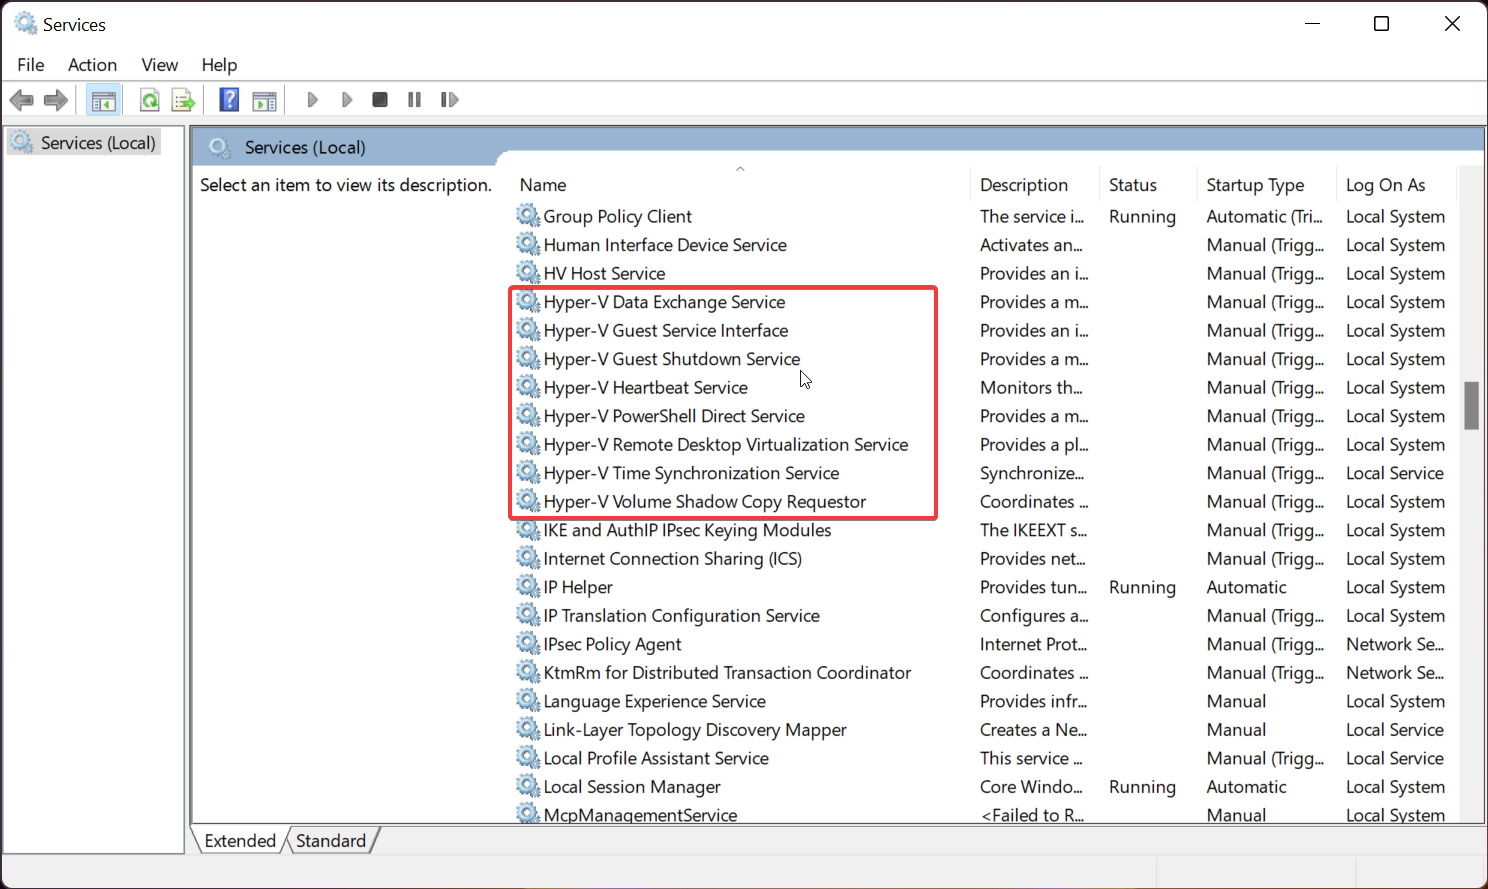
- Hold the Win + R to open the Run dialog box.
- Type in services.msc and hit Enter.

- Locate the Hyper-V related services, right-click on each, select Stop, then Start again.
Often a service runs into an error due to continuous usage and settings tweaks. In such a case, it is required that you restart the service, which allows it to reload all of its files from scratch.
Launching the relevant services also helps get rid of the An error occurred while attempting to connect to server. Check that the Virtual Machine Management service is running and you are authorized to connect to the server error.
And while you are at this, it would also be helpful to disable all non-essential services in Windows 11.
4. Use Command Prompt
- Click the Search icon, type cmd, and click on Run as administrator.

- Type the below command and press Enter:
MOFCOMP %SYSTEMROOT%\System32\WindowsVirtualization.V2.mof - Restart your PC and check if this fixes the issue or not.
5. Run Hyper V as an administrator
- Right-click on the Start menu and select Computer Management.

- From the left side, expand Local Users and Groups and double-click on Groups.

- On the right side, select and open Hyper-V Administrators.

- Click on Add, and in the Enter the object names to select field, enter your user account name.

- Press OK, then click Apply and OK to acknowledge the change.
- Restart your PC.
Running as an administrator will help in the case of the Hyper-V You might not have permission to access it error. You can try reinstalling the Hyper-V feature from Windows Features. Check if a new Windows update is available. If yes, then install it.
Also, you can uninstall problematic updates if the Hypervisor error appeared after performing a Windows update. You can check out our guide that will help you easily uninstall updates in Windows 11.
Update your BIOS by following how to enter and update your BIOS in Windows 11 step-by-step guide.
Run SFC Scan and DISM commands to fix or repair missing/corrupt system files. Use System Restore to turn Windows to a previous state in which the Hypervisor worked.
That is it from us in this guide. We hope the above solutions helped you fix the issue, and do not forget to let us know which one resolved the issue.
Read our disclosure page to find out how can you help Windows Report sustain the editorial team. Read more


Improve this guide


User forum
0 messages