How to Install Hyper-V on Windows Home Step by Step
Hyper-V isn’t included by default in Windows Home editions, but you can still enable it manually. This guide explains how to install Hyper-V on Windows 10 or Windows 11 Home safely and use it to create virtual machines.
Table of contents
How to Install Hyper-V on Windows Home?
1. Check Your System Requirements
Before proceeding, make sure your system supports virtualization.
- Press Ctrl + Shift + Esc to open Task Manager.
- Go to the Performance tab.
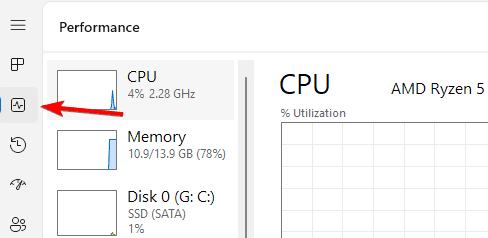
- Under CPU, verify that Virtualization is set to Enabled.

- You’ll also need Windows 10/11 Home (64-bit) and at least 4 GB RAM.
If virtualization is disabled, enable it in your BIOS or UEFI settings before continuing.
2. Download the Hyper-V Enabler Script
Hyper-V can be unlocked in Windows Home through a PowerShell script.
- Open Notepad.
- Copy and paste the following command:
pushd "%~dp0"
dir /b %SystemRoot%\servicing\Packages\*Hyper-V*.mum >hyper-v.txt
for /f %%i in ('findstr /i . hyper-v.txt 2^>nul') do dism /online /norestart /add-package:"%SystemRoot%\servicing\Packages\%%i"
del hyper-v.txt
Dism /online /enable-feature /featurename:Microsoft-Hyper-V-All /LimitAccess /ALL
pause
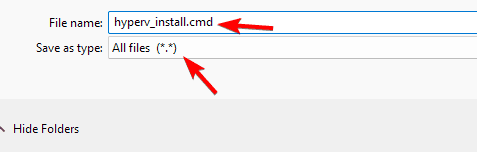
- Save the file as hyperv_install.cmd on your desktop.
3. Run the Script as Administrator
Now you’ll execute the script to install the Hyper-V components.
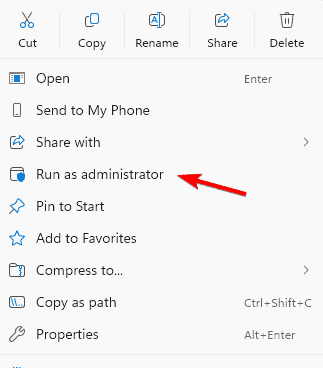
- Right-click hyperv_install.cmd and choose Run as administrator.
- Wait for the installation to complete.
- When prompted, press Y to restart your computer.
After rebooting, Windows will finalize the Hyper-V installation process.
4. Enable Hyper-V Features via Windows Settings
Next, ensure all Hyper-V features are active through the Windows interface.
- Press Windows + R and type optionalfeatures.
- In the Windows Features window, check Hyper-V, Hyper-V Management Tools, and Hyper-V Platform.

- Click OK, then restart your PC if required.
Follow these simple steps to activate Hyper-V manually on Windows Home. Learn more about different installation methods in this complete guide on how to install Hyper-V on Windows 11.
5. Open Hyper-V Manager
Once installed, you can start using Hyper-V immediately.
- Press Windows + S, type Hyper-V Manager, and open it.
- From here, create and manage virtual machines using your existing ISO files.
If you plan to connect your virtual machines to the internet or local network, check this detailed guide on how to create Hyper-V virtual switches.
Why Use Hyper-V on Windows Home?
Hyper-V offers several advantages for developers and advanced users:
- Test software in isolated environments
- Run Linux or older Windows versions
- Manage multiple virtual servers on one machine
- Improve security through sandboxed testing
It’s a lightweight and reliable way to virtualize without installing third party tools. You can also expand your setup by following this tutorial on how to use Hyper-V USB passthrough on Windows 11.
Troubleshooting Hyper-V Installation
If Hyper-V isn’t appearing after setup, try these fixes.
- Run Windows Update to ensure all dependencies are installed.
- Re-enable virtualization in BIOS > Advanced > CPU Configuration.
- Check that your Windows edition is 64-bit Home.
- Run this PowerShell command as Administrator:
dism /online /enable-feature /featurename:Microsoft-Hyper-V-All
- Restart and verify in Windows Features again.
FAQs
Yes. The steps above unlock the built in Hyper-V components at no cost.
Hyper-V integrates deeply with Windows and offers faster performance, though VirtualBox supports more host platforms.
No, but it reserves system resources for virtual machines. Disable it temporarily if you notice performance issues.
Yes. Go to Windows Features, uncheck Hyper-V, and restart your PC to remove it completely.
Conclusion
You can install Hyper-V on Windows Home using a simple script and the Windows Features tool. Once activated, you’ll have access to a full virtualization environment for running multiple systems safely and efficiently. If you want to dive deeper into managing your network and external devices, refer to the linked guides above for a complete setup.
Read our disclosure page to find out how can you help Windows Report sustain the editorial team. Read more


Improve this guide


User forum
0 messages