Local Security Authority Process High CPU & Memory [SOLVED]
Solutions for Windows & Windows Server devices
Key notes
- High CPU usage from a buggy LSASS program can lead to several issues including a slow computer.
- Some of the solutions we recommend include checking for fixes through the Windows Update, restoring your system and using an antivirus program to fix it.
- It is important that you keep your computer well protected from viruses and updated at all times to avoid such issues.

Also known as the LSASS.exe, the local security authority process is an executable file that handles the security operations for your Windows computer.
This includes functions such as password authentication, password changes, and creating access tokens across multiple applications.
If you are having issues with your Local security authority process using too much CPU power, it is possible that your system could be compromised. This leads to the program taking up too much CPU power and hogging the memory.
How can I fix Local Security Authority Process high CPU?
1. Check for Windows Update
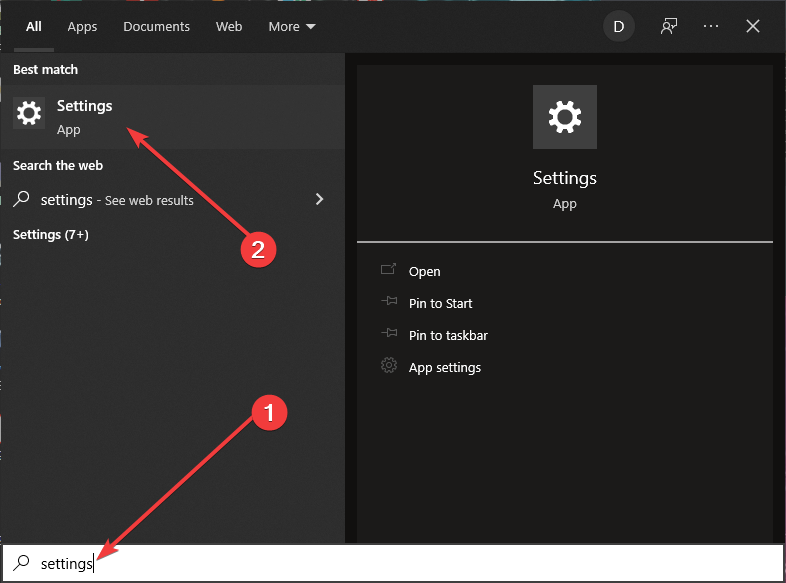
- Go to your search button on the bottom left part of your screen.
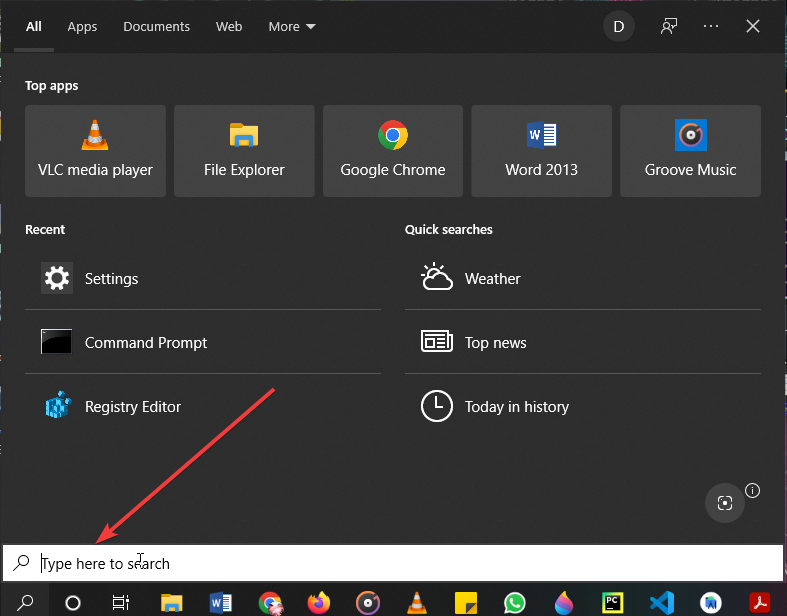
- Type Settings and click on the App.
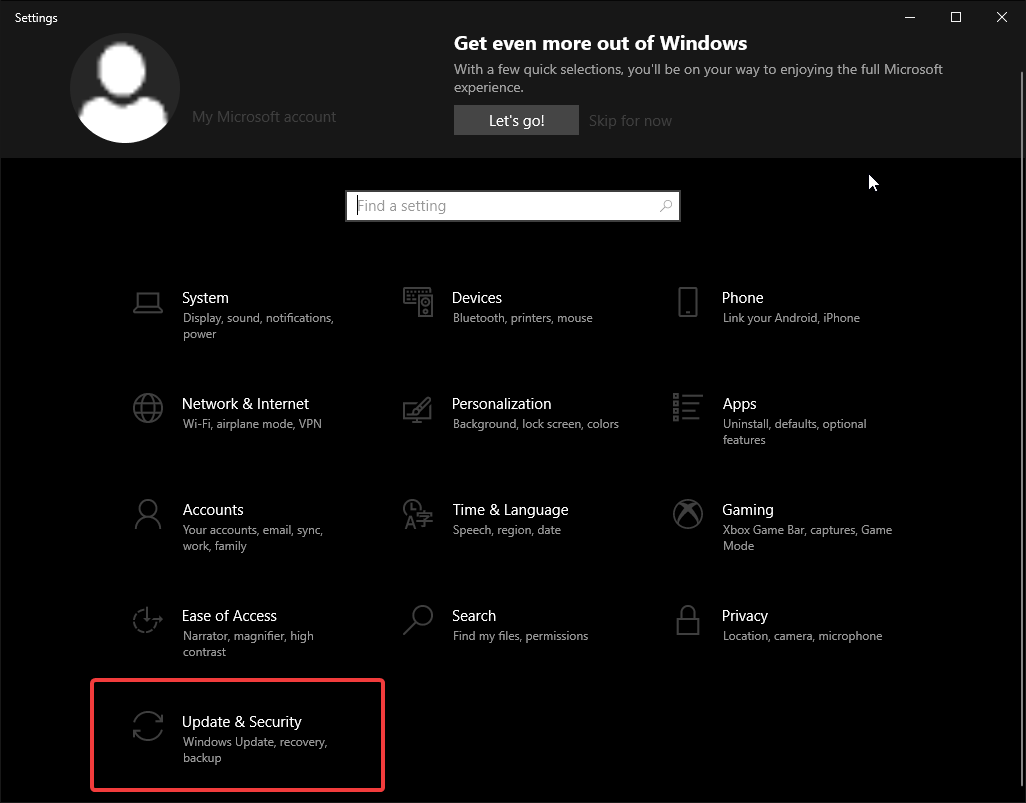
- The settings up will open with different options.
- Scroll down and select Update and Security.
- Click the Check for Updates button and let your computer check for available Windows updates. This might take some time.
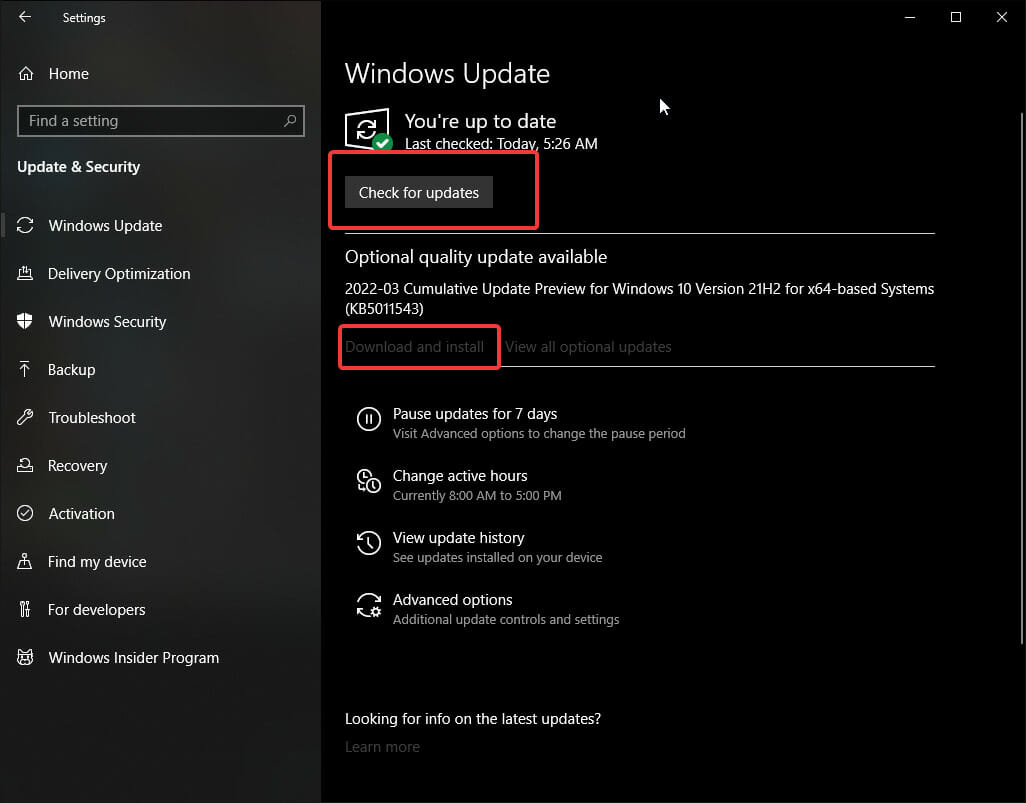
- If you are up to date, move on to the next solution. If not, consider downloading and installing the updates.
Sometimes, Windows updates come with bugs and glitches that affect the local security authority. Microsoft routinely sends out fixes with subsequent updates which are sometimes not immediately downloaded to your system.
2. Scan for viruses
2.1. Check for fake LSASS.exe programs on your computer.
- Open your file explorer. On the This PC window, click on your local disk (C:).
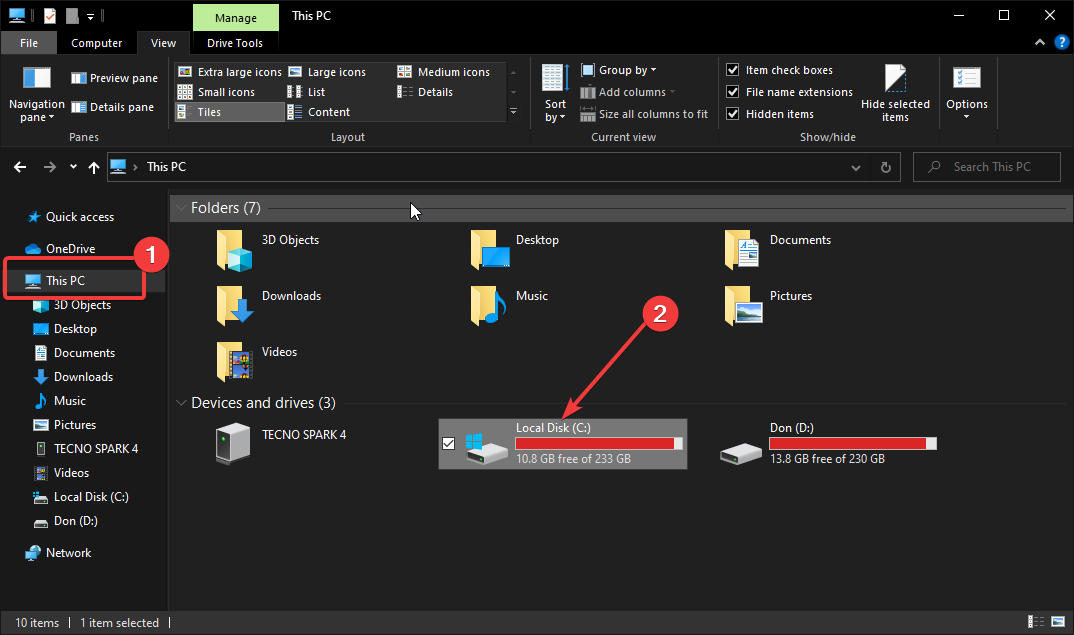
- Scroll down to Windows and hit Enter.

- Scroll down to system32 and hit Enter
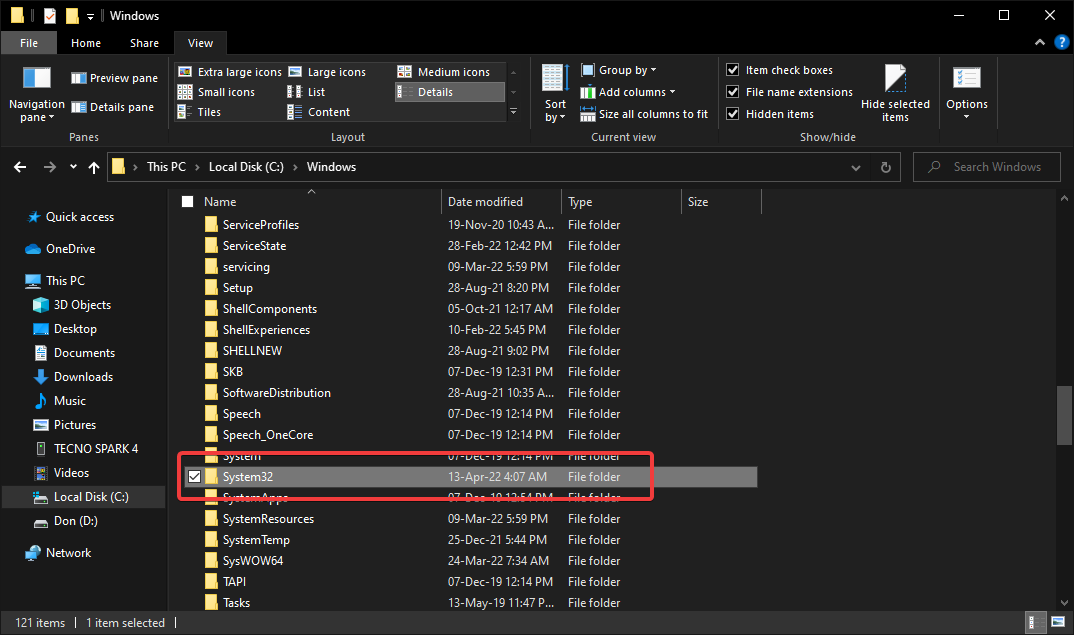
- Check whether the lsass.exe file is correctly spelt and is to an unusually large file.
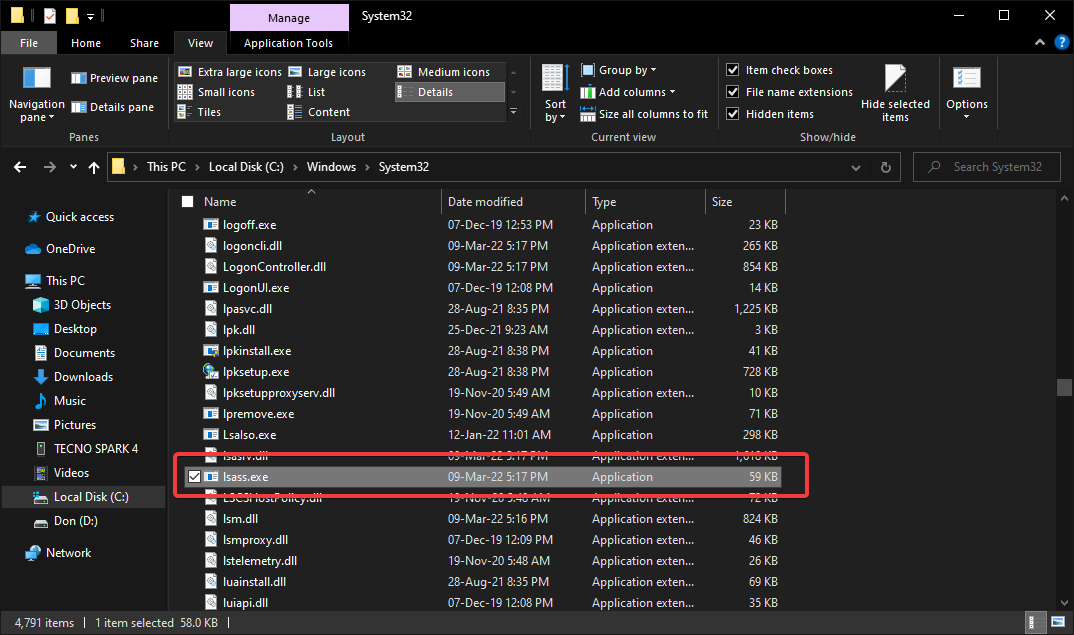
- Delete any program that is wrongly misspelt.
2.2. Use an Antivirus
The best and safest way of getting rid of any malicious files and programs from your computer is through an antivirus program.
If you are looking for reliable antivirus protection, consider using ESET HOME Security Essential. It is designed to protect your system against corruption from such malicious programs.
⇒ Get Eset HOME Security Essential
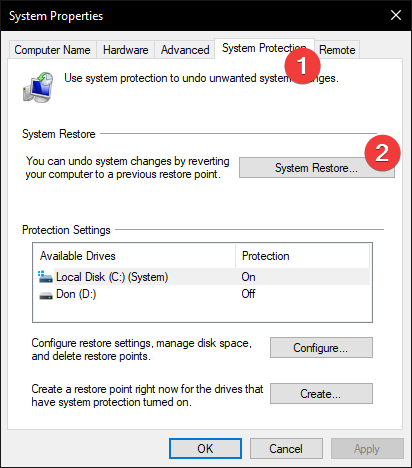
3. Do a system restore
- Go to your search button at the bottom left of your screen and search for Create a Restore Point

- Select the System Protection tab to open it
- Find and select System Restore. Then hit Next.
- Pick a restore point and select scan for affected programs. This option will let you know what changes to expect.
- Close the scan for the affected programs Window.
- Select Next and follow the prompts to create a restore point for your computer.
Note that you might encounter an error on step 2 if you have never created a system protection system before. 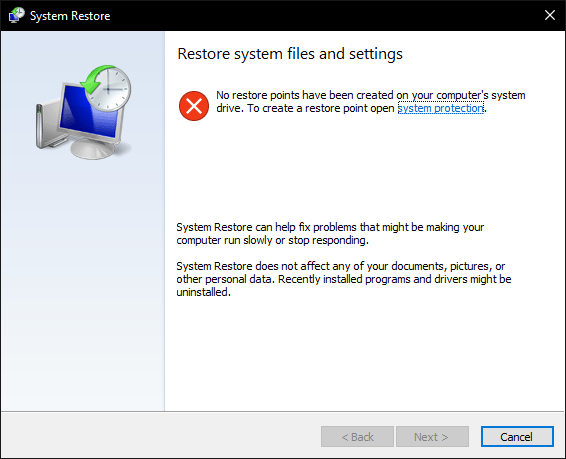
This means you won’t be able to apply this solution to your computer and should move on to the next solution.
4. Run the Active Directory Data Collector
- Launch your Server Manager Windows Server 2008 or later.
- Open the Server Manager, click Tool, and select Performance Monitor.

- Now, expand the Diagnosis option, and Navigate Reliability and Performance, Data Collector Sets, and System.
- Right-click on the Active Directory Diagnostics option, and from the menu that appears, select Start.
- After the compilation, navigate Diagnostics, Reliability and Performance, Reports, System, and Active Directory Diagnostics to view the report.
Note that this will only work on Windows servers.
Consider setting up the protection and if you encounter issues, this detailed guide will help you out.
We also have a guide on what to do if Local Security Authority is off, so don’t miss it. Learn more about how the Local Security Authority process works in Windows and what the lsass.exe file does in our lsass.exe explained guide.
Remember to always keep your system well updated at all times to keep your computer system healthy and robust.
If you have additional fixes, feel free to leave them in the comment section below.
Read our disclosure page to find out how can you help Windows Report sustain the editorial team. Read more


Improve this guide


User forum
0 messages