VLC is not working on Mac? Here's how to fix it
4 min. read
Updated on
Read our disclosure page to find out how can you help Windows Report sustain the editorial team. Read more
Key notes
- The popular media player VLC can stop working on a newer macOS version for several reasons.
- This article explores quick steps to help you fix the VLC player not working problem.
- Havnig additional issues? You can find more solutions in our Mac Troubleshooting section.
- Looking for more guides and fixes? Our Mac Hub has all the information you need.

The popular media player VLC is available on almost all computers and mobile platforms, including Mac. However, for several users, the VLC is not working on Mac due to frequent crashes.
VLC crashing on Mac problem can occur due to several reasons, including corrupted VLC program files. In some instances, even reinstalling the VLC app will not fix the problem.
In this article, we have listed a few troubleshooting steps to help you resolve the VLC crashing issues on Mac.
What can I do if VLC is not working on Mac?
1. Reset VLC preferences
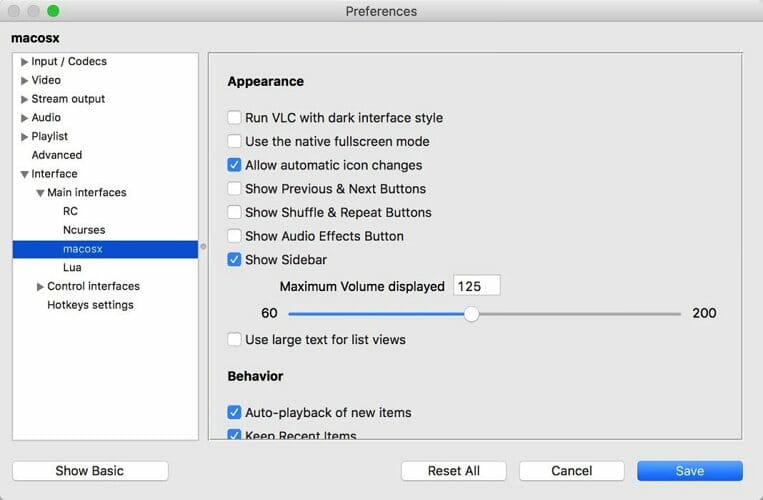
- Launch VLC on your Mac.
- Select the VLC menu and click on Preferences.
- Click the Reset All button in the bottom left corner.
- VLC will ask for a confirmation to complete the action, Click Reset.
- The VLC media player will restart automatically.
If you are unable to access the VLC preference due to an immediate crash, you can delete the preference data manually. Here’s how to do it.
Delete preferences manually
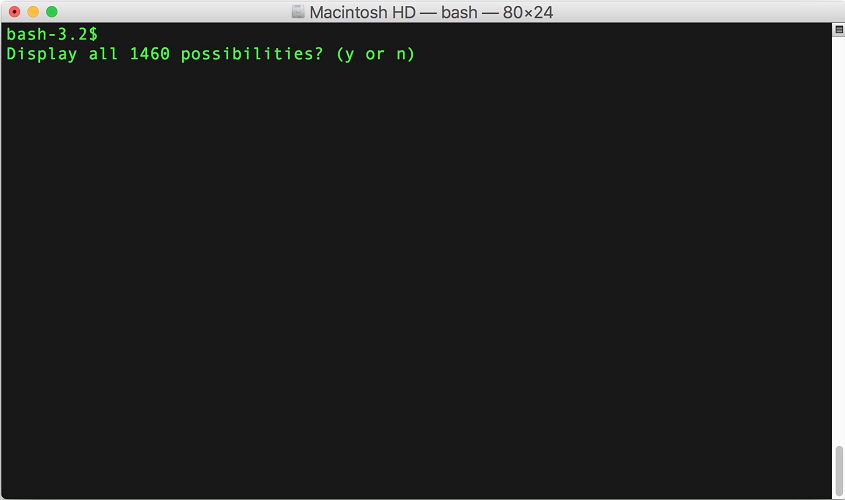
- Make sure VLC is closed.
- Open the terminal and enter the following command:
defaults delete org.videolan.vlc - Next, remove org.videolan.vlc from the following location:
~/Library/Preferences - You may need to use the Go to Folder within the Finder’s Go menu to access this folder.
- Once deleted, reboot Mac and check if the VLC crashing issue is resolved.
2. Update VLC to the latest version
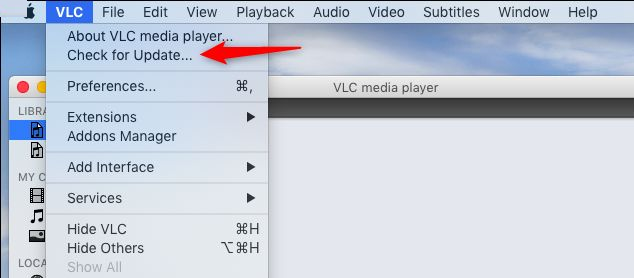
- Launch the VLC app on your Mac.
- Click on VLC in the Menu.
- Choose Check for Updates.
- Download and install any pending update for VLC by clicking on Install Update.
- Once installed, relaunch the app and check for any improvements.
3. Reinstall VLC player
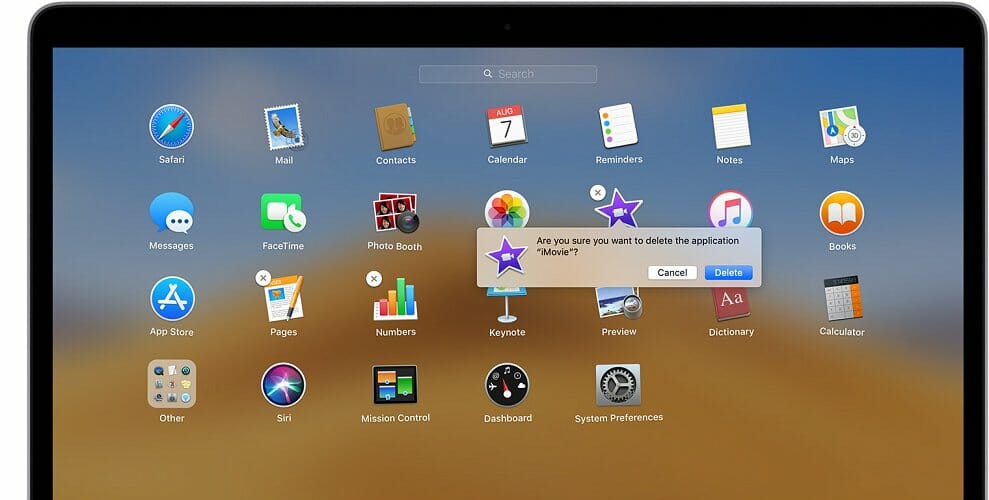
- Open the Launchpad. You can open it from the Applications folder or Dock.
- Press and hold the Option key on your keyboard and then click the VLC app.
- Click the small X icon next to the app you want to delete.
- Click on Delete to confirm. The app will be deleted.
- Reboot Mac and then reinstall the VLC media player from the official website and check for any improvements.
Reinstalling the VLC media player can fix any issues triggered by app incompatibility and glitches.
However, if reinstalling the app does not fix the crashing problem, use AppCleaner. AppCleaner removes leftover files from uninstalled apps allowing you to clean install the apps.
Use the AppCleaner
- Download and install the AppCleaner app from the developer website.
- Run the installer to complete the installation.
- Launch AppCleaner.
- Next, drag and drop the app you want to uninstall; it will be the VLC media player in this instance.
- AppCleaner will find all the files related to the VLC media player. Click the Delete button to clean all the files.
- Reinstall the VLC media player and check if the error is resolved.
If you have uninstalled the VLC app already, simply search for the files with VLC in it and then remove the files using AppCleaner.
AppCleaner is a small application and works like CCleaner for Windows. It allows you to uninstall unwanted apps thoroughly. Installed apps usually distribute many files throughout your system, and only uninstalling the app from the apps menu won’t remove all the files.
AppCleaner makes the task easier by finding all the files associated with a program that can be deleted with one click.
In most cases, the VLC not working on Mac issue has occurred after the users upgraded to the latest macOS version.
You can fix the VLC crashing problem by resetting preferences. As a last resort, clean Install VLC player using AppCleaner.
[wl_navigator]





User forum
0 messages