How To Map Network Drives Over VPN on Windows 10 & 11
It's proven that using efficient VPN helps you map network drives fast
Key notes
- If you're worried about the security and integrity of your data, you can map the network drive using a VPN in Windows 10 & 11.
- It's not a complicated procedure, you just need to install a VPN and connect to a server before starting the process on LAN.
- You will be happy to know that the steps are not much different in Windows 11, so you will be able to handle it seamlessly.


World-class 24/7 support with 82% for a 2 years plan and 2 months free
70% of our readers choose Private Internet Access
70% of our readers choose ExpressVPN
Amazing connection speed with 61% off and 4 months free for the 2-years plan.
Best security protocols with 83% off and 2 months free for a 2-year plan.
Mapping network drives over VPN on Windows 10 is a great way to increase the security of your computer and network.
By protecting your data traffic with a VPN that supports strong VPN protocols with the highest possible levels of encryption, you can fend off hackers and ensure the integrity of your data.
There’s nothing elaborate about mapping network drives through VPN. In fact, you just have to connect to a VPN server before managing access settings to shared drives and folders in your local network.
Connected to VPN but cannot access network drives
This type of VPN error usually appears when there are connection issues on the VPN’s end, so the users can’t access the network drives.
Plus, your local network and the remote network need to use the same subnet so your VPN can access network drives.
You can take care of connection issues easily by using proficient VPN software that has thousands of servers globally and the latest encryption features.
How do I map network drives over VPN on Windows 10 & 11?
1. Connect to a VPN server
- Sign up for a PIA subscription.

- Download and install PIA on your PC.
- Launch PIA and press the big power button.

- You are now connected to a VPN server.
As a practical workaround, we utilized Private Internet Access to solve network drive connection issues and for the fastest network speed and privacy online.
We’re using PIA in our example because it’s the best VPN for Windows 10. The steps above are for downloading and installing the PIA desktop client.
Keep in mind that the VPN connection must protect the entire computer, so you can’t use anything lesser than that, not even a browser extension.
An alternative is to create a VPN connection in Windows 10 without installing anything after obtaining the PIA login credentials and a preferred server address from its website.
Check out how to set up an IPsec VPN client on Windows 10 using PIA connection details.
On the other hand, if you want to use the OpenVPN protocol, you need a third-party OpenVPN client since Windows 10 doesn’t have native support for OpenVPN.
It’s easier to set up the PIA desktop client since it uses OpenVPN by default (WireGuard is also an option).
In addition to an impressive network of VPN servers, PIA can connect you to the nearest server automatically to ensure the best speed.
Furthermore, you can use PIA to reduce your ping during gameplay. It comes bundled with split-tunneling mode, a kill switch, and exclusive DNS servers.
That being said, you can install PIA’s OpenVPN manual configuration mode on your router to share VPN access with all connected devices.
Private Internet Access
Choose PIA before mapping network drives to reduce risks and increase connection speed.2. Map a network drive
- Make sure you’re connected to a VPN server.
- Turn on Network Discovery on your computer.

- Open the Windows 10 File Explorer (Win key + E).

- Go to This PC, select the Computer tab, and press Map Network Drive.

- Set Drive to a preferred drive letter that you will use to access the shared location.
- Press Browse next to Folder and select a shared drive or folder.

- Enable Reconnect at sign-in to ensure the location auto-reconnects at every Windows startup.
- Enable Connect using different credentials if you can’t access the shared location using your current Windows login info.
- Click Finish.
Although you would be tempted to disconnect from the VPN after mapping the network drive, it’s a good idea to leave it turned on at all times while staying connected to the Internet.
This ensures that you’ll always be protected from hackers and other possible attacks.
How do I map network drives over VPN on Windows 11?
Although the new OS is clearly more advanced and it has a lot of new interesting features, its core is still very similar to the one of Windows 10.
Therefore, you will see that all the solutions presented here, including using the PIA VPN, will work like a charm on Windows 11 as well.
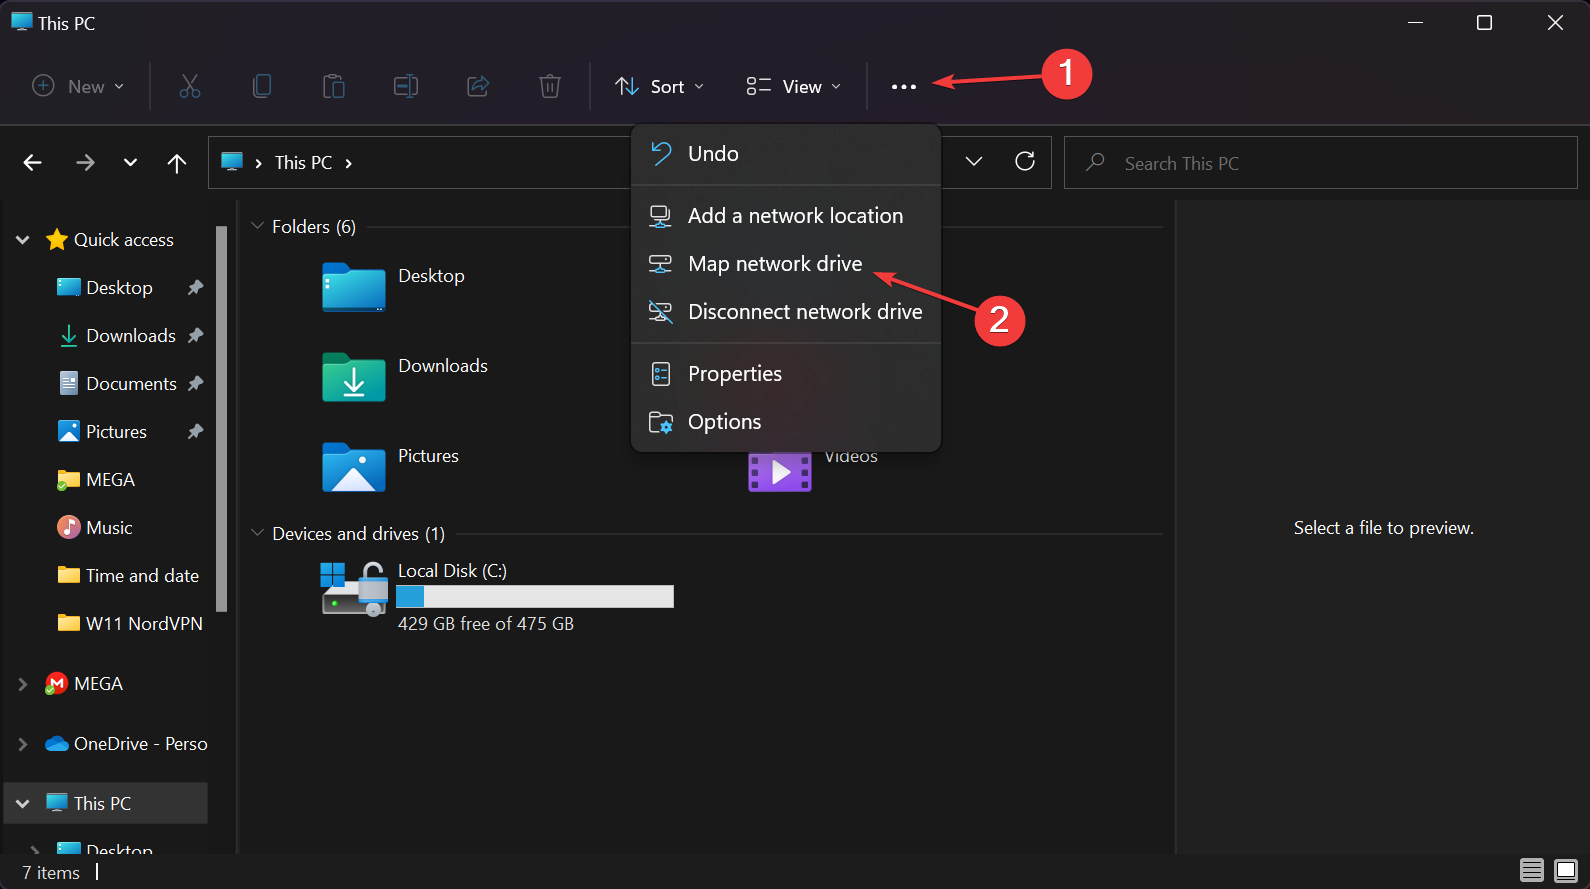
File Explorer has a slightly different design in Windows 11 so, as you can see from our screenshot above, to access the Map network drive option, you will find it by clicking on the three-dot button from the top.
But that’s where the differences end because all the other steps presented in our solutions are still the same.
In conclusion, it’s an excellent idea and a wise move to connect to a VPN server before mapping network drives in Windows 10 and 11.
This way, you can reduce the risks of getting hacked and compromising your sensitive data.
We hope that our guide helped you map a network drive while using a VPN and now, your shared location is safe and secure.
You might also be interested in our list including the best file-sharing tools & software for Windows 10/11 because it’s another way of sending your files safely.
For any questions or suggestions, feel free to use the comments section below and we will get back to you as soon as possible.
Read our disclosure page to find out how can you help Windows Report sustain the editorial team. Read more


Improve this guide


User forum
0 messages