How to Set Up an IPsec VPN Client on Windows 10
Use a reliable L2TP/IPsec VPN client and quickly set it up to your PC
Key notes
- You create an IPsec VPN connection on a PC without having to install anything.
- But you still need the IPsec connection details of a VPN client.
- Follow our step-by-step guide to quickly install an IPsec VPN client in Windows.
- Learn how to find your L2TP/IPSec credentials and configure it from Settings.


World-class 24/7 support with 82% for a 2 years plan and 2 months free
70% of our readers choose Private Internet Access
70% of our readers choose ExpressVPN
Amazing connection speed with 61% off and 4 months free for the 2-years plan.
Best security protocols with 83% off and 2 months free for a 2-year plan.
If you need to set up an IPsec VPN client on Windows 10 PC, we’re here to help. Using a virtual private network, you can hide your IP address, encrypt your data traffic, and ultimately protect your online privacy.
There are numerous benefits to using a VPN, such as finding cheaper flights online, fixing network congestion, or reducing ping in multiplayer games.
You can also watch unlimited streaming by using a VPN to circumvent geoblocks and unblock Netflix libraries that aren’t normally available in your country.
What’s an IPsec VPN client?
An IPsec VPN client is a virtual private network service that supports the IPsec protocol. IPsec is used by the VPN to encrypt and protect your data across the Internet.
IPsec (Internet Protocol security) is a VPN protocol that authenticates and encrypts data transferred over the web. It supports multiple encryption methods, including 256-bit AES.
An IPsec VPN client is a virtual private network client that uses the IPsec protocol. However, IPsec can’t be used standalone because it’s only an encryption protocol that provides data security and privacy.
A VPN connection also requires a tunneling protocol to deliver data. As such, IPsec is typically accompanied by L2TP or IKEv2, resulting in the L2TP/IPsec and IKEv2/VPN protocols.
Does Windows 10 support IPsec VPN?
Windows 10 has native support for L2TP/IPsec. You can also set up a VPN on Windows Vista or older editions if you can find one that’s still compatible.
You can use this protocol to set up the built-in Windows VPN (for Windows 10 and 11). It is also compatible with third-party VPN clients that support it.
It’s possible to create a VPN connection in Windows 10 using the built-in OS settings and then add the VPN client’s login information, but it’s recommended to use a dedicated client for best performance.
How do I set up an IPsec VPN client on Windows 10?
To set up a VPN with IPsec on Windows, you need a client that offers you the possibility to connect using this protocol, and our top choice in this regard is ExpressVPN.
The VPN has thousands of fast servers all around the world and industry-leading VPN security to make sure your data stays completely private: military-grade encryption,
1.Get IPsec VPN client credentials
- Sign up for an ExpressVPN subscription.
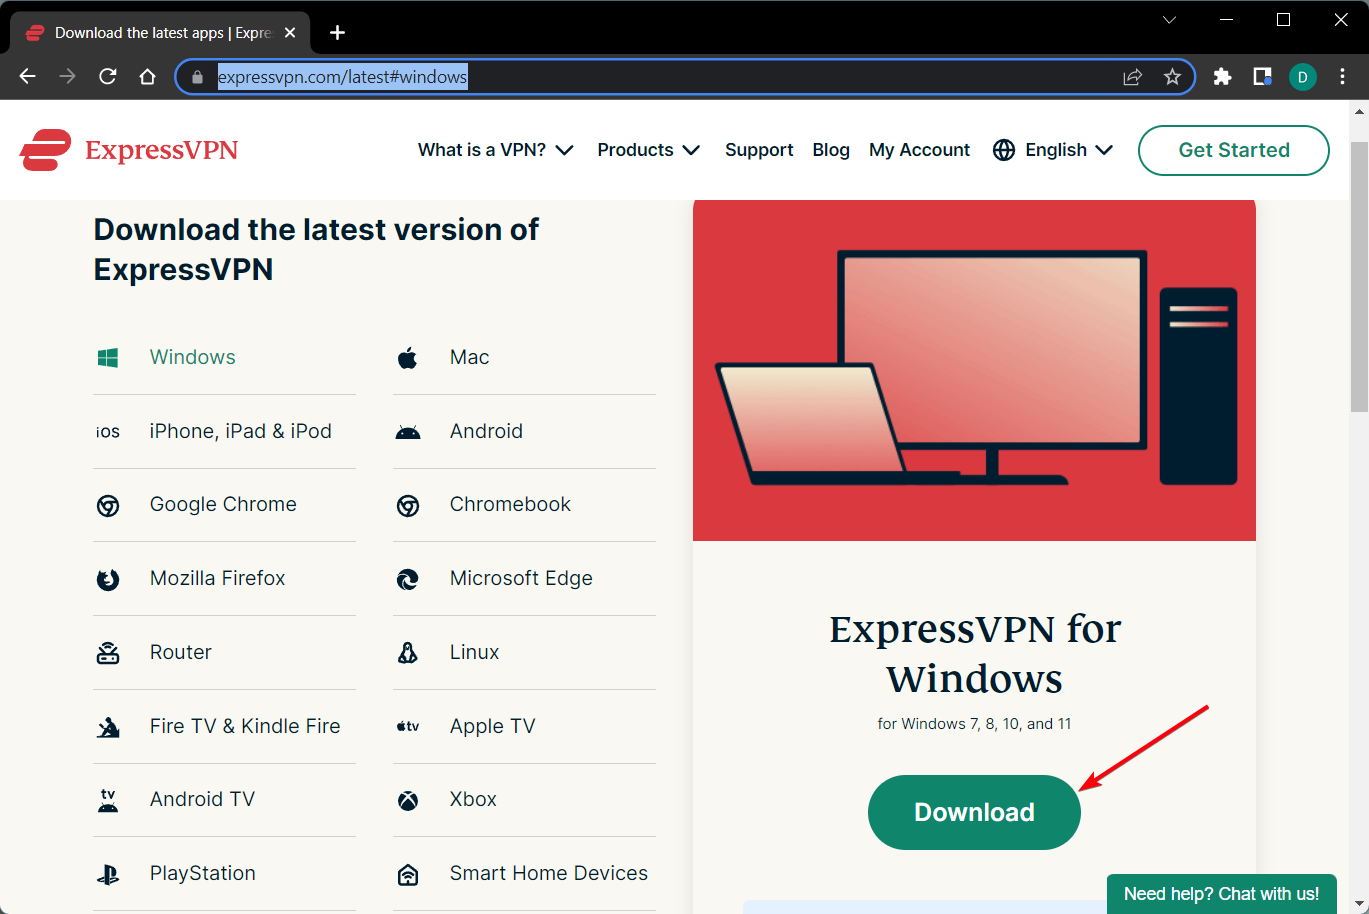
- In your browser, open the ExpressVPN manual configuration page.
- Enter your credentials and select L2TP/IPsec.
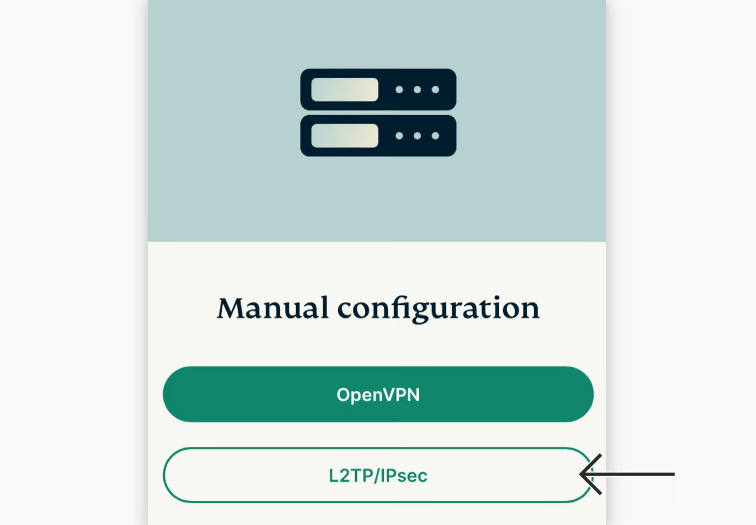
- You’ll get information about your username and password + IPsec server addresses.
- Save this information so you can add it to your VPN connection.
The user name and password for the IPsec connection will be necessary once you configure your VPN connection using Windows settings.
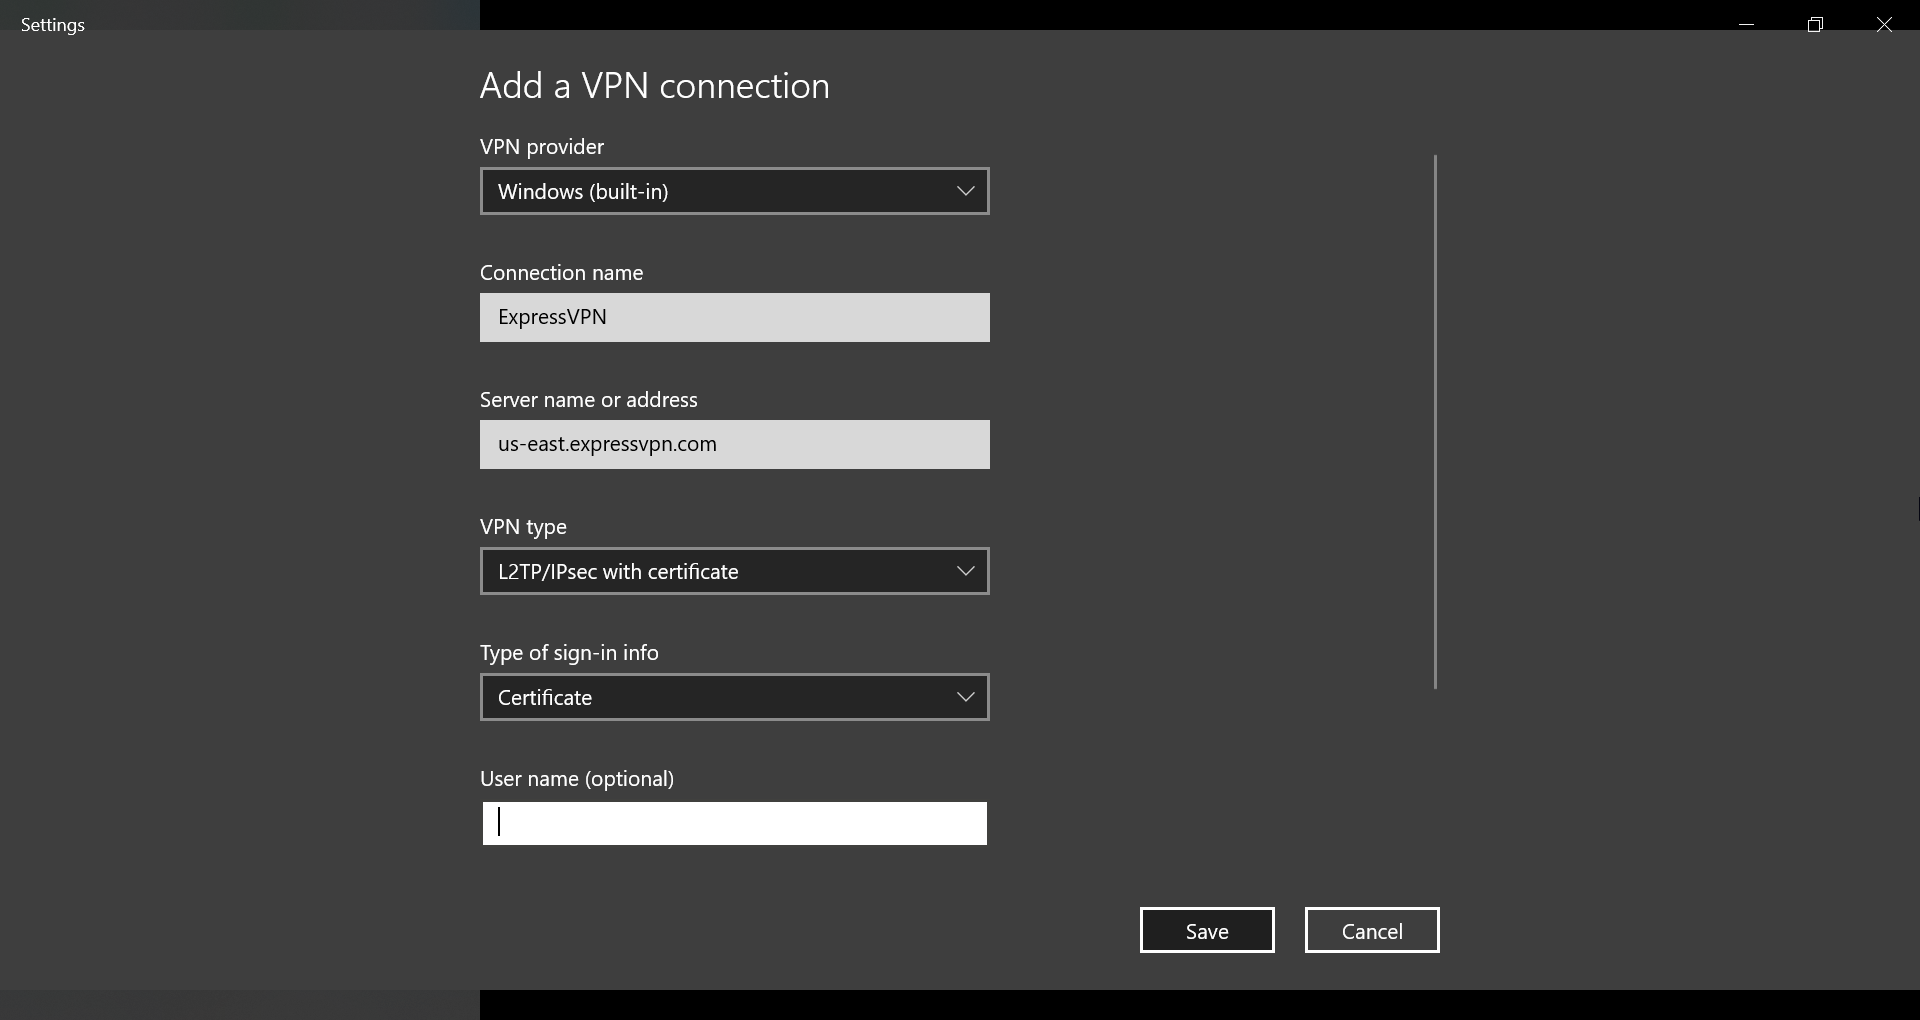
2. Create a VPN connection
- Right-click the Start button and go to Network Connections.
- Select VPN on the left side and click Add a VPN connection.
- Set VPN provider to Windows (built-in) and write a Connection name.
- At Server name or address, type one of the server addresses provided by the ExpressVPN configuration page.
- Set VPN type to L2TP/IPsec with certificate.
- At Type of sign-in info, select User name and password.
- At User name (optional) and Password (optional), paste the ExpressVPN credentials you previously obtained.
- Enable Remember my sign-in info and click Save.
3. Connect and disconnect from the IPsec VPN

- Click the Network icon in the systray.
- Select the IPsec VPN connection.
- Click Connect or Disconnect.
4. Change IPsec VPN settings
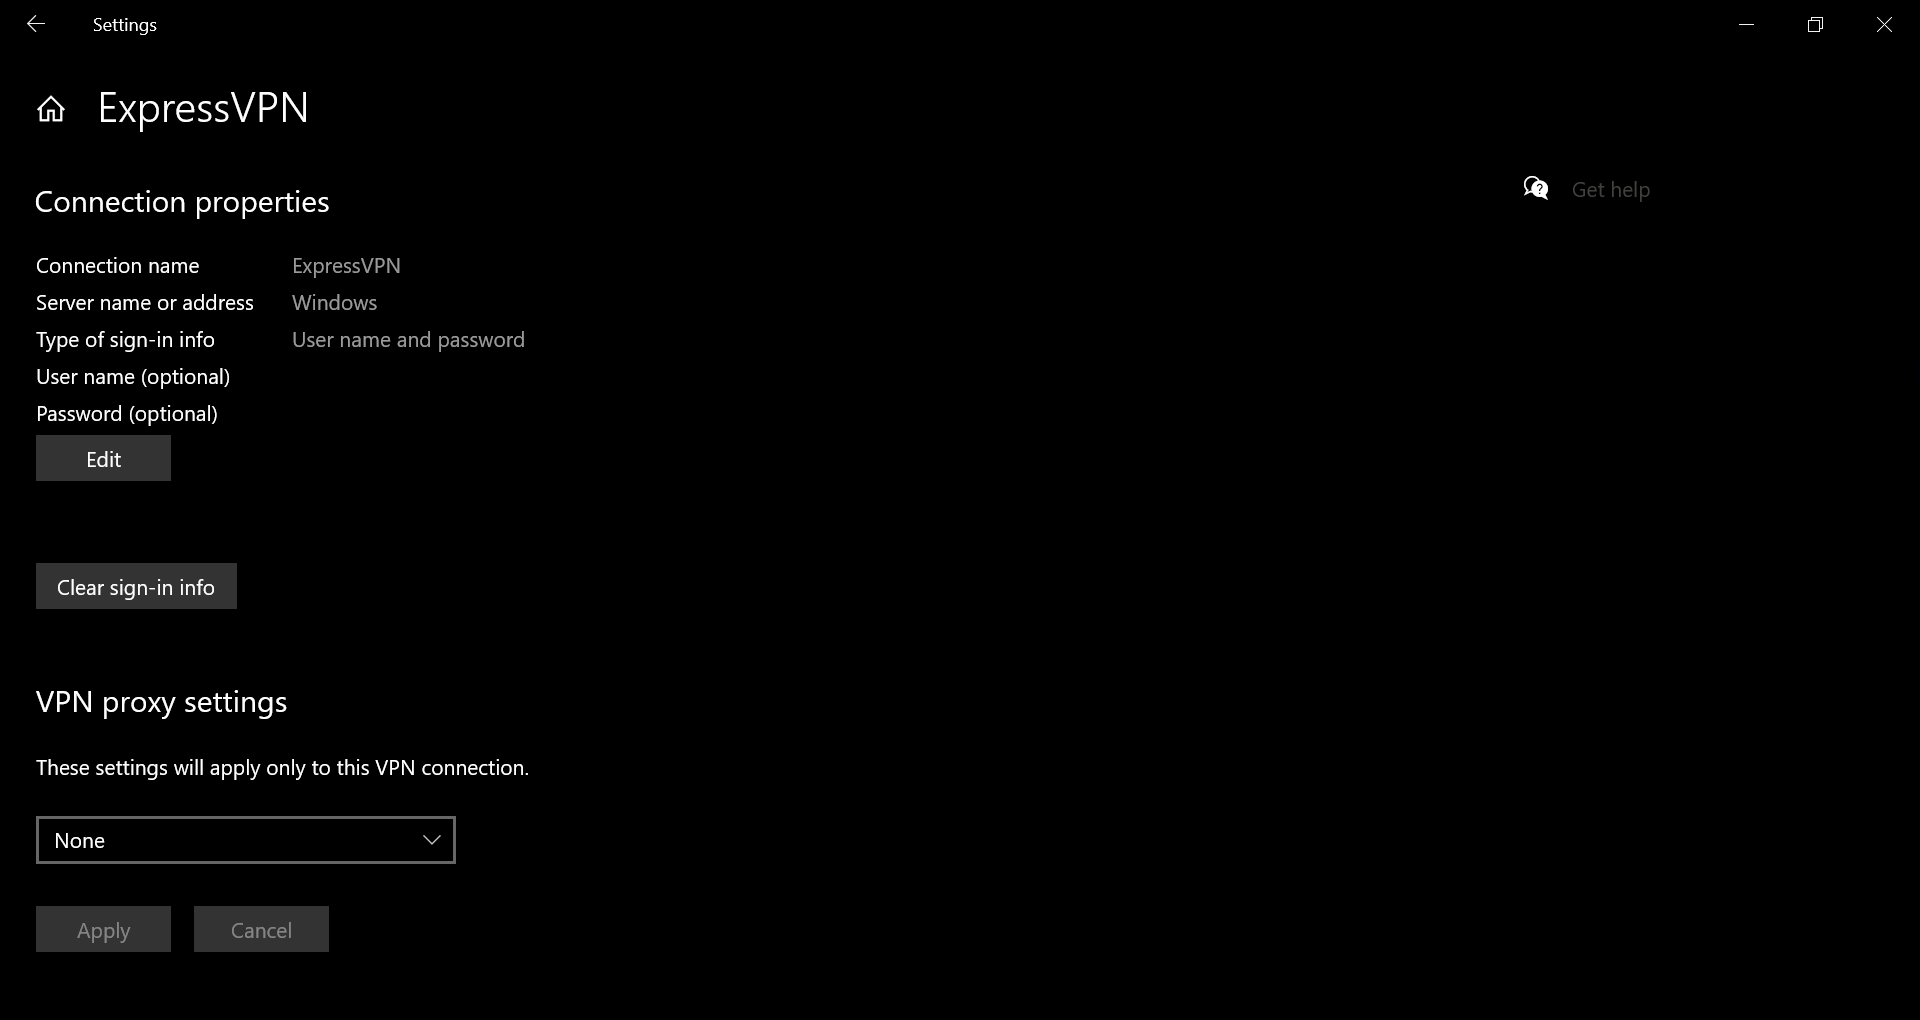
- Right-click the Start button and go to Network Connections > VPN.
- Select the IPsec VPN connection and click Advanced options.
- At Connection properties, click Edit.
- Change VPN connection details and click Save.
If you want to connect to a different VPN server, you can either edit VPN connection details to set the new address or create a new VPN connection for each address.
5. Remove the IPsec VPN connection
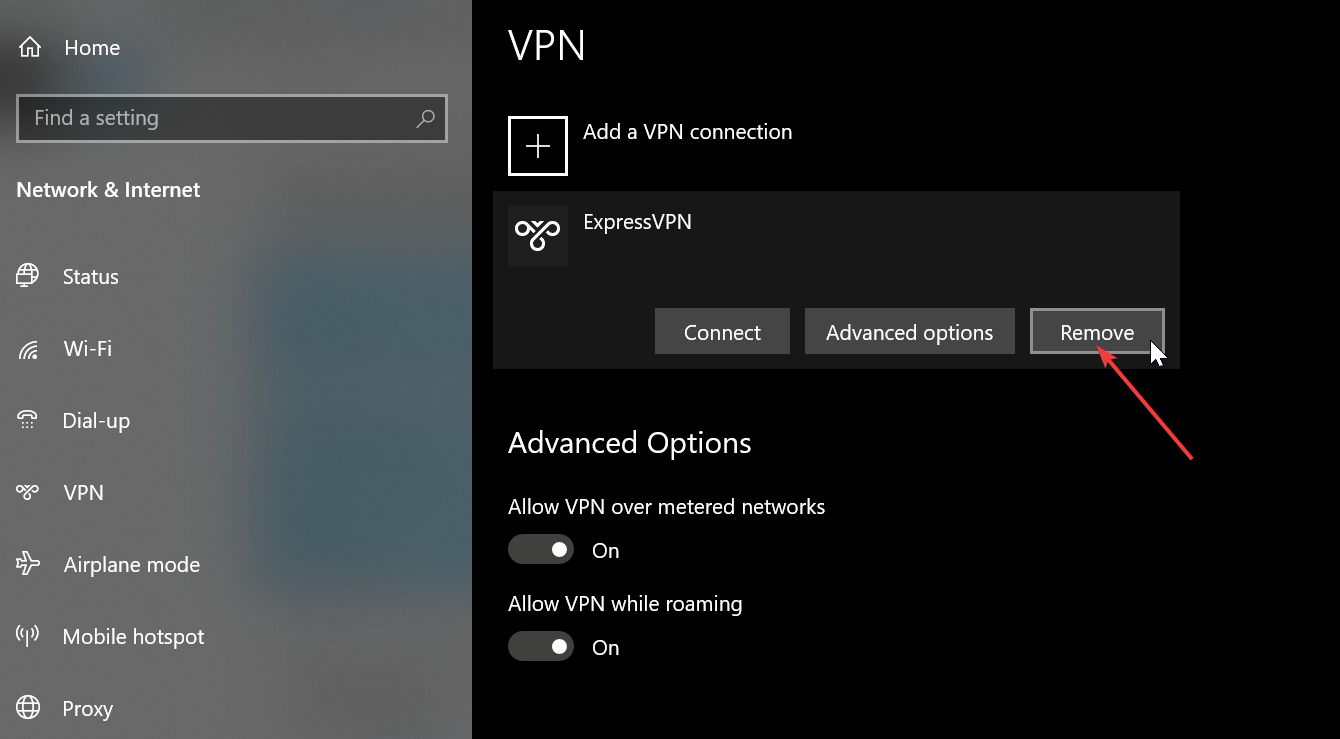
- Right-click the Start button and go to Network Connections > VPN.
- Select the IPsec VPN connection.
- Click Remove.
Why use ExpressVPN
ExpressVPN is compatible with all popular platforms, including Mac, Linux, Android, and iOS.
You can even set it up on a router to share VPN access with all connected devices. Otherwise, up to 5 devices can share the VPN account for ExpressVPN.
Furthermore, ExpressVPN supports OpenVPN and Lightway, in addition to PPTP and L2TP with IPsec.
It comes with private DNS, gaming optimized servers, SOCKS5 and Shadowsocks proxy servers, port forwarding, split tunneling, and a kill switch.
What else you should know about ExpressVPN:
- +4000+ servers in 94 countries
- No traffic logs
- 24/7 live chat support
- 30-days money-back guarantee
- 7-day free trial (mobile)
ExpressVPN
Quickly set up an IPsec VPN client connection on Windows 10 using this fast and secure VPN app.In conclusion, you can easily set up an IPsec VPN client on Windows 10 in order to protect your online privacy and computer security, as well as to unblock streaming services and minimize jitter. You can even set up an IPsec connection on XP by using the best VPN for Windows XP.
You just need to get equipped with a premium VPN that not only supports the IPsec protocol but also comes with high-speed VPN servers and superior security features, like ExpressVPN.
Read our disclosure page to find out how can you help Windows Report sustain the editorial team. Read more


Improve this guide


User forum
0 messages