Mfc140u.dll Not Found: How to Fix or Download It Again
Often, missing DLL files indicates virus attacks
5 min. read
Updated on
Read our disclosure page to find out how can you help Windows Report sustain the editorial team Read more
Key notes
- The mfc140u.dll not found error occurs when a program that needs the file can’t access it.
- It may be due to corrupt system files, the file deleted by the user, or viruses.
- Download and register the mfc140u.dll file to run a new and credible copy on your PC.
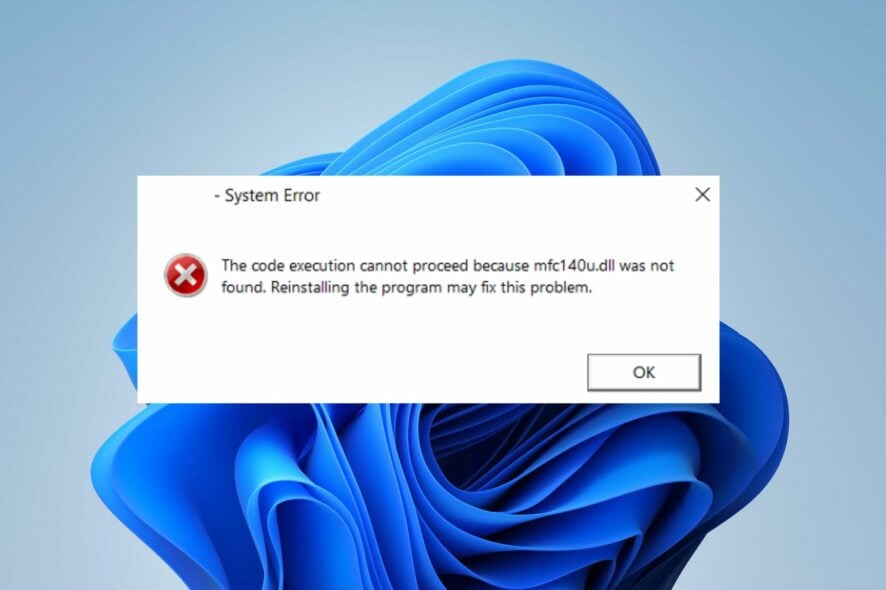
Many of our readers report an error saying The program can’t start because MFC140U.DLL is missing from their computers when opening an app. It occurs when the needed DLL file can’t be accessed for some reason. However, we’ll show you how to fix the error as we go further into the article.
Aside from the mfc140u.dll not found error, there are other DLL file missing errors you can run into on Windows 11.
Why is mfc140u.all not found?
If a mfc140u.dll file required for running a program is missing from your PC, you won’t be able to run it which results in an error message. Some factors that can cause this are:
- Corrupt system files – If the mfc140u.dll file the program wants to access is corrupt, it can become inaccessible or unavailable when invoked. It can be due to the impact of corrupt system files that have infected it, causing its functionality to be suppressed.
- Interference from other apps – Most DLL file missing error appears due to a program on your PC overwriting the file and rendering it unusable. It makes it impossible for other programs to fetch the file, causing them to stop working.
- Viruses and malware – Users may run into the mfc140u.dll not found on Windows 11 due to malware or virus deleting the DLL files.
Fortunately, there are some troubleshooting steps to resolve the error and get your apps running again.
What can I do if mfc140u.dll is not found?
Before trying any advanced troubleshooting steps, go through the following:
- Turn off background apps running on the PC.
- Disconnect any remote connection from the computer.
- Restart your device in Safe Mode and see if the DLL file missing error appears.
Proceed with the solutions below if you can’t fix the mfc140u.dll missing error:
1. Download and replace the Mfc140u.dll file
 NOTE
NOTE
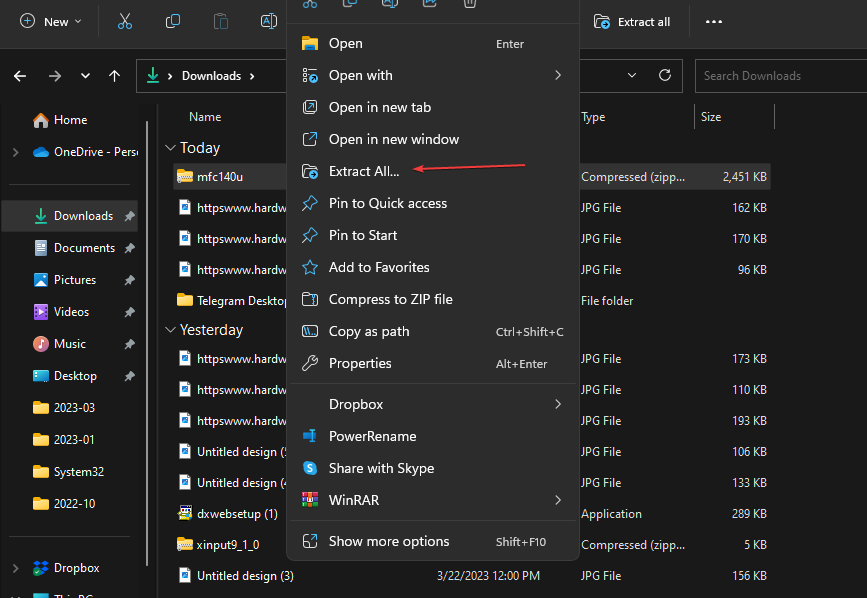
- Launch your browser and download the appropriate version of the mfc140u.dll file for your Windows.
- Double-click the downloaded zip file to open it, click the Extract icon at the top bar, and select Desktop for a location to extract the DLL file.
- Alternatively, you can copy the DLL file inside the app folder that prompted the error.
- Restart your PC and try to open the app prompting the error to check if the error persists.
Downloading a new copy of the mfc140u.dll file will replace the missing copy, and it should fix the mfc140u.dll not found error.
If you’re concerned about getting different issues and errors by performing this action manually, we recommend you try a specialized program capable of an in-depth repair process.
2. Register the mfc140u.dll file
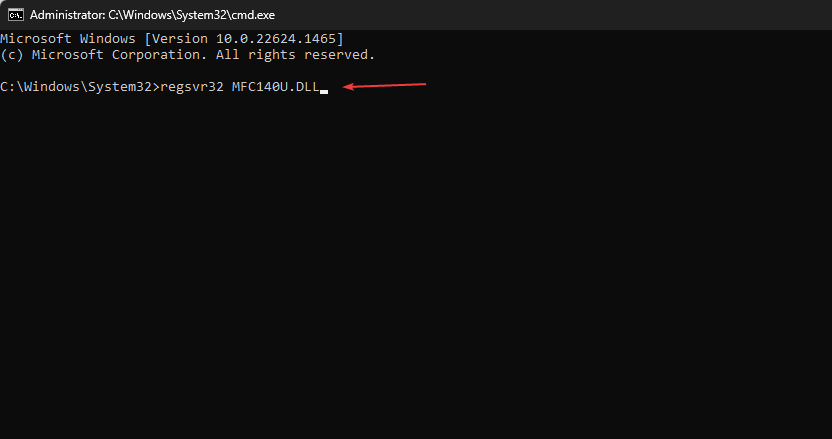
- Left-click the Start button, type command prompt, and click Run as administrator.
- Click Yes on the User Account Control window.
- Type the following and press Enter, then Wait for Windows to register the DLL:
regsvr32 MFC140U.DLL - Restart your PC.
Registering the mfc140u.dll file will revalidate the file and fix the error on your computer. It helps the system rewrite the file, making it visible to the needed services.
3. Run a System File Checker (SFC) scan
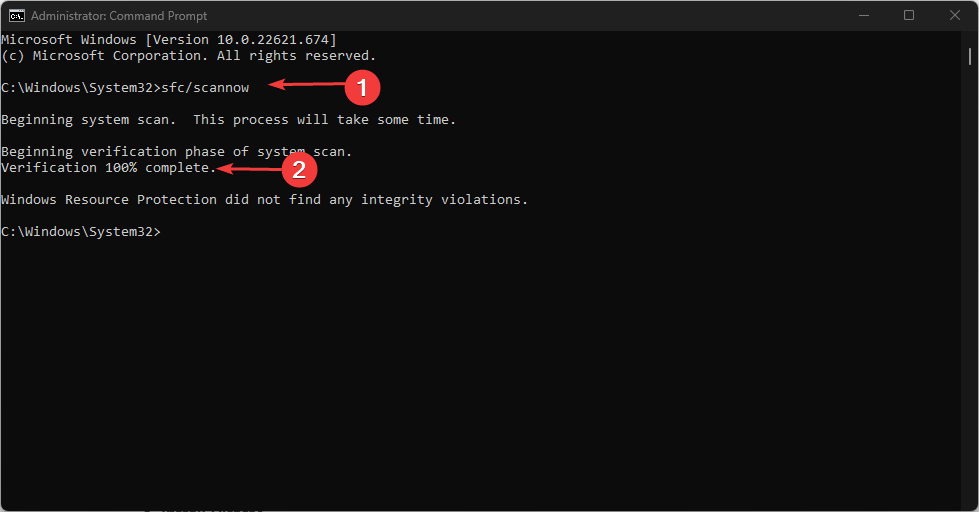
- Left-click the Start button, type the command prompt and select Run as administrator.
- Click Yes on the User Account Control prompt.
- Type the following and press Enter:
sfc /scannow - Restart your PC and check if the mfc140u.dll missing file error appears again.
Running a System File Checker scan will find and repair corrupt files causing the LibusbO.dll file to be inaccessible to the application.
Check our article about what to do if nothing happens when you select run as administrator on Windows 11.
4. Run Windows Defender’s real-time protection
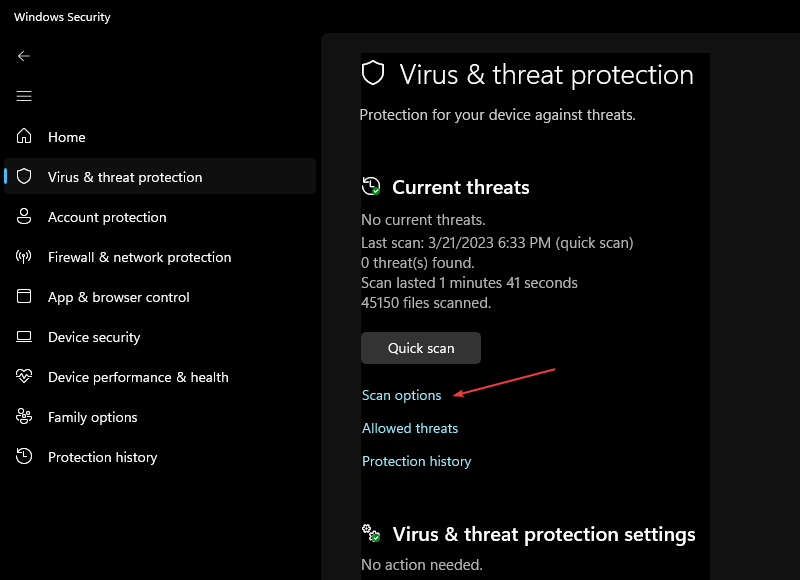
- Press the Windows button, type Windows security, and launch it.
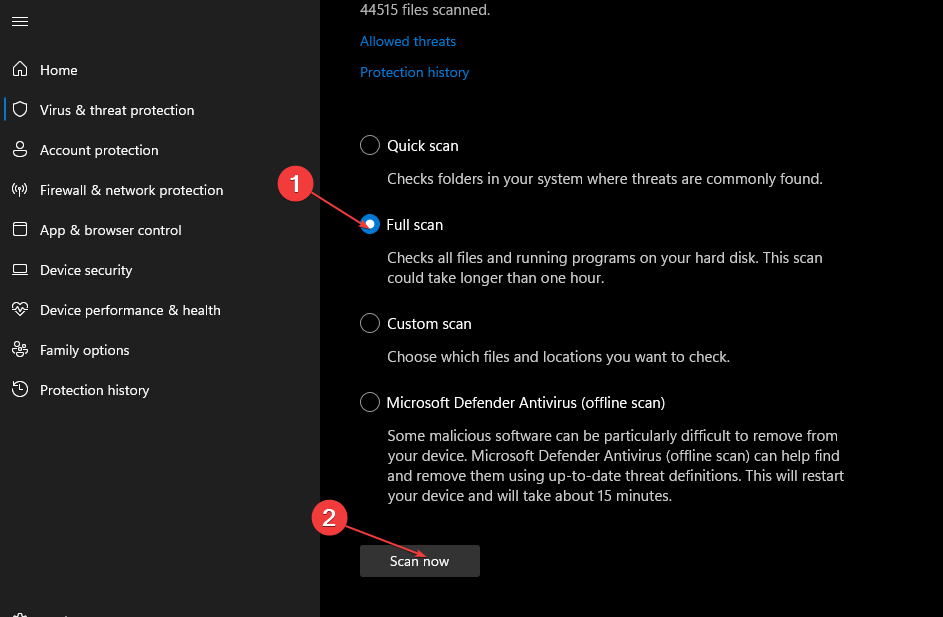
- Select Virus and threat protection and click the Scan options.
- Select Full scan and click Scan now.
- Wait for the scan result to see if your system there’s a virus or malware in your computer.
Real-time protection will find viruses and threats liable to impede the DLL file and annihilate them.
5. Run a System Restore
- Press Windows + R key to open the Run dialog box, type control, then press Enter to open the Control Panel.
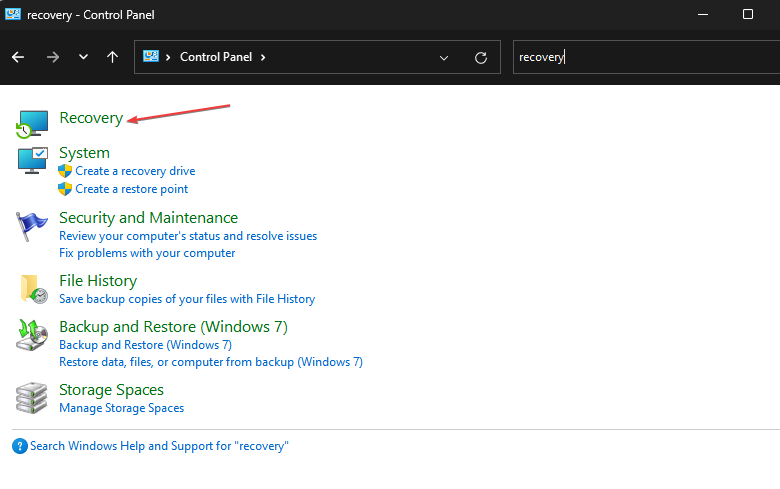
- Type recovery in the Control Panel search bar and click on Recovery.
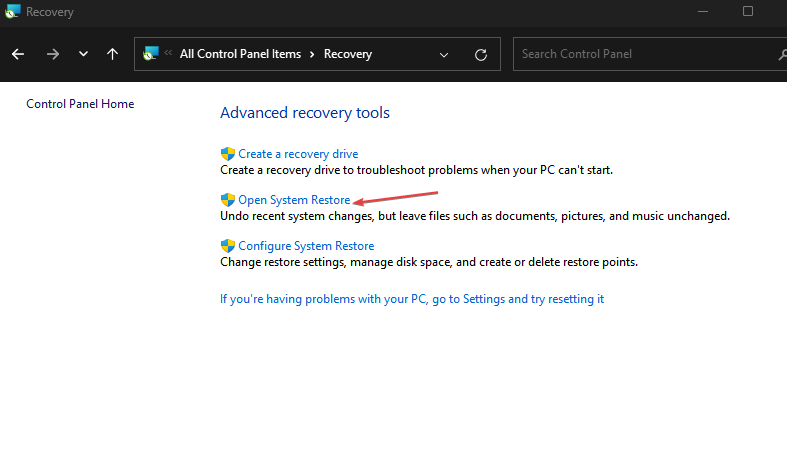
- Then select Open System Restore.
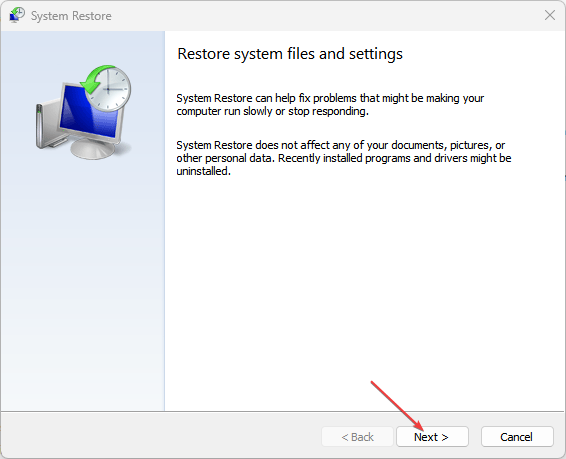
- Click Next in the Restore system files and settings page.
- Choose the restore point you want to restore from, then click Scan for affected programs.
The System Restore may uninstall some recently installed programs, and it only affects the most recent errors. Read how to fix Restore Point if it’s not working on your PC.
Furthermore, you may be interested in our guide on the best DLL repair tool to download on your PC. Also, we have a detailed guide on the Autorun.dll error on Windows 10/11 and some ways to fix it.
Should you have further questions or suggestions, kindly drop them in the comments section.

